")

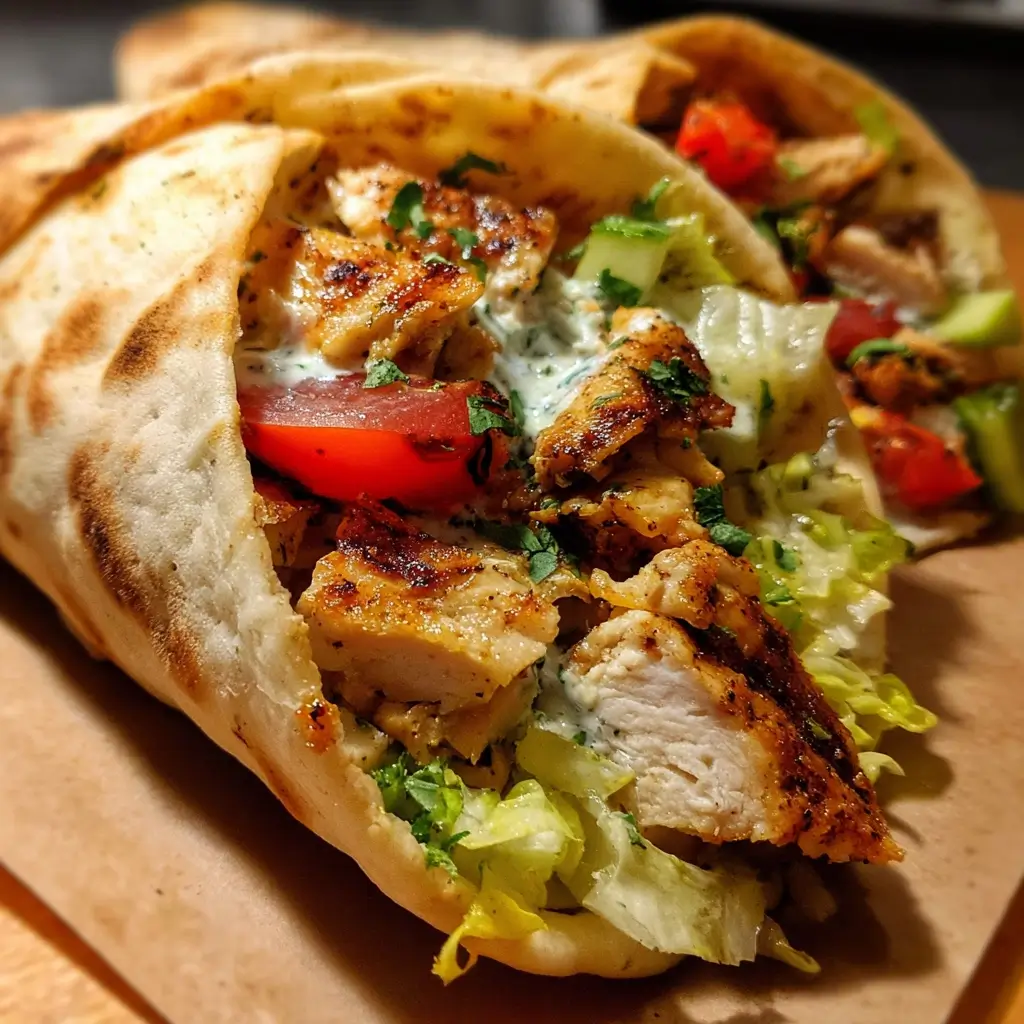

Of all the recipes that have saved me on a chaotic weeknight, this one for 15-Minute Chicken Pita Wraps holds a special place in my heart and my recipe binder. I remember one particularly frantic Tuesday evening. Work had run late, the kids were practically vibrating with hunger, and the thought of spending an hour in the kitchen felt like climbing a mountain. I needed something fast, something everyone would eat without complaint, and frankly, something that wouldn’t leave a mountain of dishes. I stumbled upon the basic idea for these wraps and decided to give it a shot. The sizzle of the chicken hitting the hot pan, mixed with the fragrant aroma of garlic and oregano, instantly changed the mood in the house. Within minutes, we were assembling our own wraps at the dinner table—a whirlwind of warm, tender chicken, cool and creamy tzatziki-style sauce, and the fresh crunch of lettuce and tomato, all bundled in a soft, warm pita. It was a resounding success. The kids loved the hands-on aspect of building their own meal, and my husband and I were just thrilled to be eating a delicious, home-cooked dinner that felt gourmet but took less time to make than ordering a pizza. Since that day, these chicken pita wraps have become our emergency dinner, our “too-tired-to-cook” meal, and even a fun, casual option when friends come over. It’s a recipe that proves you don’t need a lot of time to create something truly satisfying and wholesome.
Ingredients
Here is the simple, yet powerful, list of ingredients you’ll need to create this incredibly fast and flavorful meal. Each component is chosen for its ability to deliver maximum taste in minimum time.
- For the Chicken:
- 1 lb (about 450g) Boneless, Skinless Chicken Breasts: The lean, versatile base of our wrap. Cut into small, bite-sized pieces to ensure they cook in minutes.
- 1 tablespoon Olive Oil: Used for cooking the chicken, it adds a touch of fruity richness and prevents sticking.
- 1 teaspoon Dried Oregano: This essential Mediterranean herb provides a peppery, aromatic, and slightly sweet flavor.
- 1/2 teaspoon Garlic Powder: Offers a savory, garlicky punch without the time-consuming task of mincing fresh cloves.
- 1/2 teaspoon Paprika: Adds a beautiful reddish hue to the chicken and a subtle, sweet-smoky flavor.
- Salt and Black Pepper to taste: The fundamental seasonings that enhance all the other flavors.
- For the Creamy Yogurt Sauce:
- 1 cup Plain Greek Yogurt: The star of the sauce. Its thick, creamy texture and tangy flavor are the perfect cool counterpoint to the warm chicken.
- 1/4 cup Cucumber, finely diced or grated: Adds a crucial element of freshness, moisture, and a light crunch.
- 1 tablespoon Lemon Juice: Freshly squeezed is best! It brings a bright acidity that cuts through the richness of the yogurt.
- 1 tablespoon Fresh Dill, chopped (or 1 tsp dried): Provides a unique, slightly anise-like freshness that is classic in Mediterranean sauces.
- A pinch of Salt: To bring all the sauce flavors together.
- For Assembly:
- 4-6 Large Pita Breads: The vessel for our delicious filling. Choose soft, pliable pitas for the best wrapping experience.
- 1 cup Romaine Lettuce, shredded: For that essential fresh, crisp texture.
- 1 cup Cherry Tomatoes, halved: These add a burst of juicy sweetness and vibrant color.
- 1/4 Red Onion, thinly sliced (optional): For those who enjoy a sharp, pungent bite that complements the other ingredients.
Instructions
Follow these simple, step-by-step instructions to bring your 15-Minute Chicken Pita Wraps to life. The key to speed is to work efficiently, preparing the sauce while the pan heats up.
Step 1: Prepare the Creamy Yogurt Sauce
The first step is to create the cool, refreshing sauce that will elevate your wraps from good to great. In a small or medium-sized bowl, combine the 1 cup of plain Greek yogurt, 1/4 cup of finely diced cucumber, 1 tablespoon of lemon juice, and 1 tablespoon of chopped fresh dill. Mix everything together until it’s well-incorporated. Add a small pinch of salt, stir again, and give it a taste. Adjust the seasoning if necessary—you might prefer a little more lemon for brightness or a bit more salt to make the flavors pop. Once you’re happy with it, set the sauce aside. Making the sauce first allows the flavors to meld together while you cook the chicken.
Step 2: Season the Chicken
Take your bite-sized chicken pieces and place them in a separate bowl. Drizzle with 1 tablespoon of olive oil. Sprinkle the 1 teaspoon of dried oregano, 1/2 teaspoon of garlic powder, 1/2 teaspoon of paprika, and a generous pinch of salt and pepper over the chicken. Use a spoon or your hands to toss the chicken pieces until they are evenly coated in the oil and spices. This quick “marinade” ensures that every single bite of chicken is packed with flavor.
Step 3: Cook the Chicken to Perfection
Place a large skillet or frying pan over medium-high heat. Allow the pan to get properly hot before adding the chicken; this is crucial for getting a nice sear rather than just steaming the meat. Once hot, add the seasoned chicken pieces to the pan in a single layer. Be careful not to overcrowd the pan, as this will lower the temperature and prevent browning. Cook for about 5-7 minutes, stirring or flipping the pieces occasionally, until the chicken is golden brown on the outside and cooked all the way through. The internal temperature should reach 165°F (74°C). To check for doneness without a thermometer, you can cut into one of the larger pieces to ensure there is no pink remaining.
Step 4: Warm the Pitas
While the chicken is finishing its last minute of cooking, it’s the perfect time to warm your pita breads. Warming them makes them softer, more pliable, and much easier to fold without cracking. You can do this in a few ways:
- Microwave: Wrap the stack of pitas in a slightly damp paper towel and microwave for 20-30 seconds.
- Oven/Toaster Oven: Wrap the pitas in foil and place them in a preheated oven at 350°F (175°C) for a few minutes.
- Dry Skillet: Place them one at a time in a dry, non-stick skillet over medium heat for about 30 seconds per side.
Step 5: Assemble Your Masterpiece
Now for the fun part! Lay a warm pita bread on a plate or cutting board. Spread a generous layer of the creamy yogurt sauce down the center. Next, add a hearty portion of the cooked chicken. Top the chicken with a handful of shredded romaine lettuce, some halved cherry tomatoes, and a few slices of red onion if you’re using it.
Step 6: Fold and Serve
To fold, simply bring one side of the pita over the filling, then fold the other side over it, creating a secure wrap. Alternatively, you can fold the bottom of the pita up first and then fold the sides over, creating a pocket to prevent any filling from escaping. Serve immediately and enjoy the incredible flavors you created in just 15 minutes!
Nutrition Facts
This recipe is designed to be as nourishing as it is delicious. Here’s a look at the key nutritional benefits you can expect from a single serving.
- Servings: This recipe makes approximately 4 servings.
- Calories: Approximately 450-550 calories per wrap.
- High in Lean Protein: Each wrap is packed with protein, primarily from the chicken breast and Greek yogurt. Protein is essential for building and repairing tissues, supporting muscle mass, and keeping you feeling full and satisfied for longer, which can help prevent overeating.
- Excellent Source of Fiber: With whole wheat pitas (if chosen), lettuce, tomatoes, and cucumber, these wraps provide a good dose of dietary fiber. Fiber is crucial for digestive health, helping to maintain regularity and feed the beneficial bacteria in your gut.
- Rich in Probiotics: The Greek yogurt in the sauce is a fantastic source of probiotics. These live beneficial bacteria support a healthy gut microbiome, which is linked to improved digestion, a stronger immune system, and even better mental health.
- Contains Essential Vitamins and Minerals: This meal delivers a variety of micronutrients. You’ll get B vitamins from the chicken for energy metabolism, Vitamin C from the tomatoes and lemon juice for immune support, and calcium from the Greek yogurt for bone health.
- Balanced Macronutrients: This meal provides a well-rounded mix of protein, healthy fats (from olive oil and yogurt), and complex carbohydrates (from the pita). This balance is key for sustained energy, preventing the blood sugar spikes and crashes associated with less balanced meals.
Preparation Time
The beauty of this recipe lies in its incredible speed and efficiency, making it the ultimate solution for time-crunched days.
Total preparation and cooking time is just 15 minutes. This is achieved through smart multitasking. The preparation phase, which includes dicing the chicken, chopping the vegetables, and mixing the sauce, takes about 5-7 minutes. The cooking phase, which involves searing the chicken until it’s perfectly cooked, takes about 7-8 minutes. By making the sauce while the pan heats up and warming the pitas while the chicken cooks, you streamline the process to fit comfortably within that 15-minute window from start to finish.
How to Serve
While these 15-Minute Chicken Pita Wraps are a complete and satisfying meal on their own, pairing them with the right sides and beverages can turn a quick dinner into a memorable feast. Here are some fantastic ways to serve them:
- Create a “Build-Your-Own” Bar:
- This is especially fun for families or when entertaining guests.
- Place each component in a separate bowl: the cooked chicken, the yogurt sauce, shredded lettuce, halved tomatoes, sliced red onions, and any extra toppings.
- Lay out the warm pitas and let everyone assemble their own wrap exactly how they like it. This interactive approach gets everyone involved and ensures they get a meal they love.
- Perfect Side Dishes:
- Classic Greek Salad: A simple salad of cucumbers, tomatoes, bell peppers, olives, and feta cheese with a light vinaigrette perfectly complements the flavors of the wrap.
- Sweet Potato Fries: The sweetness of baked or air-fried sweet potato fries provides a wonderful contrast to the savory, herby chicken.
- Quinoa Tabbouleh: For a healthier, grain-based side, a zesty quinoa tabbouleh with lots of fresh parsley and lemon juice is a fantastic choice.
- Hummus and Veggie Sticks: Serve a bowl of your favorite hummus with sticks of carrot, celery, and bell pepper for dipping. It stays on theme and adds extra nutrients.
- Lemon-Herb Rice Pilaf: A fluffy and fragrant rice pilaf, seasoned with lemon and herbs, can be served alongside the wrap to make the meal even more substantial.
- Refreshing Beverage Pairings:
- Homemade Lemonade or Iced Tea: A tall glass of freshly made lemonade or unsweetened iced tea with a sprig of mint is the perfect non-alcoholic pairing.
- Crisp White Wine: A chilled Sauvignon Blanc or Pinot Grigio, with their bright acidity, cuts through the richness of the sauce and complements the chicken beautifully.
- Light Beer: A light lager or a wheat beer works well, offering a refreshing counterpoint without overpowering the delicate flavors of the wrap.
- Garnish for a Final Flourish:
- Sprinkle some crumbled feta cheese over the filling before you wrap the pita for an extra salty, tangy kick.
- Add a few Kalamata olives for a briny, authentic Mediterranean flavor.
- A final sprinkle of fresh dill or parsley on top of the assembled wrap adds a pop of color and freshness.
Additional tips
Master this recipe and make it your own with these eight handy tips designed to enhance flavor, save time, and add variety.
- Meal Prep for Super-Speedy Assembly: Dedicate 30 minutes on a Sunday to prep the components. You can cook a double batch of the chicken and store it in the fridge. Mix the yogurt sauce (keep it separate from the cucumber to prevent it from getting watery) and chop all your veggies. When you’re ready to eat during the week, all you need to do is warm the chicken and pitas and assemble.
- Don’t Skip Warming the Pita: This is a crucial step. Cold pitas are stiff and prone to cracking and splitting open as you try to fold them. A quick warming in the microwave or a dry pan makes them soft, steamy, and pliable, ensuring your wrap stays intact.
- Grate, Don’t Dice, the Cucumber: For the creamiest, most integrated sauce, grate the cucumber on a box grater instead of dicing it. After grating, gently squeeze out the excess water using your hands or a cheesecloth. This prevents the sauce from becoming watery and thin.
- Get a Great Sear on the Chicken: For the best flavor and texture, make sure your skillet is hot before adding the chicken. Don’t move the chicken pieces around too much for the first couple of minutes. This allows them to develop a delicious, golden-brown crust, which adds a huge amount of flavor.
- Customize Your Spices: The seasoning blend is a great starting point, but feel free to customize it. Add a pinch of cumin for earthiness, a dash of coriander for a citrusy warmth, or a sprinkle of red pepper flakes if you like a little heat.
- Make it Kid-Friendly: If you have picky eaters, serve the components deconstructed. Let them have a small pile of chicken, a dollop of sauce for dipping, and some veggie sticks on the side. This “no-pressure” approach often encourages them to try new things.
- Toast the Pita for Extra Crunch: If you prefer a crunchier texture, try lightly toasting the pita bread in a toaster or a hot oven until it’s slightly crispy before filling it. This creates a wonderful textural contrast with the soft, tender filling.
- Use Chicken Thighs for More Flavor: While chicken breast is lean and quick-cooking, boneless, skinless chicken thighs can also be used. They have a slightly higher fat content, which makes them more forgiving (less likely to dry out) and gives them a richer, more succulent flavor. Just be sure to trim any excess fat and adjust the cooking time by a minute or two.
FAQ
Here are answers to some of the most frequently asked questions about making these 15-Minute Chicken Pita Wraps.
1. Can I use a different type of meat?
Absolutely! This recipe is incredibly versatile. Thinly sliced beef steak (like sirloin or flank) would be delicious; cook it quickly over high heat. Ground beef or ground lamb, seasoned with the same spices, would also work wonderfully. You could even use shrimp—they would only need 2-3 minutes to cook.
2. How can I make this recipe gluten-free?
It’s very simple to adapt this recipe for a gluten-free diet. The filling and sauce are naturally gluten-free. The only thing you need to swap is the pita bread. Look for high-quality gluten-free pita bread in the specialty aisle of your grocery store. For another fantastic option, skip the bread altogether and serve the chicken and toppings in crisp lettuce cups (butter lettuce or iceberg work well) for a low-carb, gluten-free wrap.
3. How do I store leftovers?
For the best results, store the components separately in airtight containers in the refrigerator. The cooked chicken will last for 3-4 days, the yogurt sauce for about 3 days, and the chopped vegetables for 2-3 days. When you’re ready to eat, simply reheat the chicken and assemble a fresh wrap. Assembling them ahead of time will result in soggy pitas.
4. Can I make the yogurt sauce ahead of time?
Yes, you can make the sauce up to 2-3 days in advance. In fact, the flavor often improves as it sits and the ingredients meld. For the best texture, store the grated/diced cucumber separately and mix it into the yogurt sauce just before serving to prevent it from becoming too watery.
5. My pitas always split when I fold them. What am I doing wrong?
This is a common problem, and it usually has one of two causes. First, you might be over-stuffing the pita. Try using a little less filling. Second, and more likely, the pita is not warm enough. A cold, dry pita has no flexibility. Always warm your pitas right before assembling to make them soft and pliable. Microwaving them in a damp paper towel is one of the most effective methods.
6. Can I add more vegetables to the wraps?
Please do! This recipe is a great canvas for adding more veggies. Thinly sliced bell peppers (any color), shredded carrots, chopped spinach, or even some roasted zucchini or eggplant would be delicious additions. You can either add them raw for extra crunch or sauté them with the chicken.
7. I don’t have Greek yogurt. What can I use instead?
While Greek yogurt is ideal for its thick consistency, you can substitute it. Regular plain yogurt will work, but it’s much thinner. To thicken it, you can strain it through a cheesecloth or coffee filter for an hour to remove excess whey. Sour cream is also a great substitute, offering a similar tangy flavor and thick texture. For a dairy-free option, use a plain, unsweetened coconut or almond-based yogurt.
8. Can I cook the chicken on a grill or grill pan?
Yes, and it’s a fantastic option for adding a smoky, charred flavor. If using an outdoor grill or an indoor grill pan, you might want to leave the chicken in slightly larger pieces or thread the bite-sized pieces onto skewers to prevent them from falling through the grates. Grill over medium-high heat for a few minutes per side until cooked through and you have beautiful grill marks.

15-Minute Chicken Pita Wraps
Ingredients
Here is the simple, yet powerful, list of ingredients you’ll need to create this incredibly fast and flavorful meal. Each component is chosen for its ability to deliver maximum taste in minimum time.
- For the Chicken:
- 1 lb (about 450g) Boneless, Skinless Chicken Breasts: The lean, versatile base of our wrap. Cut into small, bite-sized pieces to ensure they cook in minutes.
- 1 tablespoon Olive Oil: Used for cooking the chicken, it adds a touch of fruity richness and prevents sticking.
- 1 teaspoon Dried Oregano: This essential Mediterranean herb provides a peppery, aromatic, and slightly sweet flavor.
- 1/2 teaspoon Garlic Powder: Offers a savory, garlicky punch without the time-consuming task of mincing fresh cloves.
- 1/2 teaspoon Paprika: Adds a beautiful reddish hue to the chicken and a subtle, sweet-smoky flavor.
- Salt and Black Pepper to taste: The fundamental seasonings that enhance all the other flavors.
- For the Creamy Yogurt Sauce:
- 1 cup Plain Greek Yogurt: The star of the sauce. Its thick, creamy texture and tangy flavor are the perfect cool counterpoint to the warm chicken.
- 1/4 cup Cucumber, finely diced or grated: Adds a crucial element of freshness, moisture, and a light crunch.
- 1 tablespoon Lemon Juice: Freshly squeezed is best! It brings a bright acidity that cuts through the richness of the yogurt.
- 1 tablespoon Fresh Dill, chopped (or 1 tsp dried): Provides a unique, slightly anise-like freshness that is classic in Mediterranean sauces.
- A pinch of Salt: To bring all the sauce flavors together.
- For Assembly:
- 4–6 Large Pita Breads: The vessel for our delicious filling. Choose soft, pliable pitas for the best wrapping experience.
- 1 cup Romaine Lettuce, shredded: For that essential fresh, crisp texture.
- 1 cup Cherry Tomatoes, halved: These add a burst of juicy sweetness and vibrant color.
- 1/4 Red Onion, thinly sliced (optional): For those who enjoy a sharp, pungent bite that complements the other ingredients.
Instructions
Follow these simple, step-by-step instructions to bring your 15-Minute Chicken Pita Wraps to life. The key to speed is to work efficiently, preparing the sauce while the pan heats up.
Step 1: Prepare the Creamy Yogurt Sauce
The first step is to create the cool, refreshing sauce that will elevate your wraps from good to great. In a small or medium-sized bowl, combine the 1 cup of plain Greek yogurt, 1/4 cup of finely diced cucumber, 1 tablespoon of lemon juice, and 1 tablespoon of chopped fresh dill. Mix everything together until it’s well-incorporated. Add a small pinch of salt, stir again, and give it a taste. Adjust the seasoning if necessary—you might prefer a little more lemon for brightness or a bit more salt to make the flavors pop. Once you’re happy with it, set the sauce aside. Making the sauce first allows the flavors to meld together while you cook the chicken.
Step 2: Season the Chicken
Take your bite-sized chicken pieces and place them in a separate bowl. Drizzle with 1 tablespoon of olive oil. Sprinkle the 1 teaspoon of dried oregano, 1/2 teaspoon of garlic powder, 1/2 teaspoon of paprika, and a generous pinch of salt and pepper over the chicken. Use a spoon or your hands to toss the chicken pieces until they are evenly coated in the oil and spices. This quick “marinade” ensures that every single bite of chicken is packed with flavor.
Step 3: Cook the Chicken to Perfection
Place a large skillet or frying pan over medium-high heat. Allow the pan to get properly hot before adding the chicken; this is crucial for getting a nice sear rather than just steaming the meat. Once hot, add the seasoned chicken pieces to the pan in a single layer. Be careful not to overcrowd the pan, as this will lower the temperature and prevent browning. Cook for about 5-7 minutes, stirring or flipping the pieces occasionally, until the chicken is golden brown on the outside and cooked all the way through. The internal temperature should reach 165°F (74°C). To check for doneness without a thermometer, you can cut into one of the larger pieces to ensure there is no pink remaining.
Step 4: Warm the Pitas
While the chicken is finishing its last minute of cooking, it’s the perfect time to warm your pita breads. Warming them makes them softer, more pliable, and much easier to fold without cracking. You can do this in a few ways:
- Microwave: Wrap the stack of pitas in a slightly damp paper towel and microwave for 20-30 seconds.
- Oven/Toaster Oven: Wrap the pitas in foil and place them in a preheated oven at 350°F (175°C) for a few minutes.
- Dry Skillet: Place them one at a time in a dry, non-stick skillet over medium heat for about 30 seconds per side.
Step 5: Assemble Your Masterpiece
Now for the fun part! Lay a warm pita bread on a plate or cutting board. Spread a generous layer of the creamy yogurt sauce down the center. Next, add a hearty portion of the cooked chicken. Top the chicken with a handful of shredded romaine lettuce, some halved cherry tomatoes, and a few slices of red onion if you’re using it.
Step 6: Fold and Serve
To fold, simply bring one side of the pita over the filling, then fold the other side over it, creating a secure wrap. Alternatively, you can fold the bottom of the pita up first and then fold the sides over, creating a pocket to prevent any filling from escaping. Serve immediately and enjoy the incredible flavors you created in just 15 minutes!
Nutrition
- Serving Size: one normal portion
- Calories: 550