")

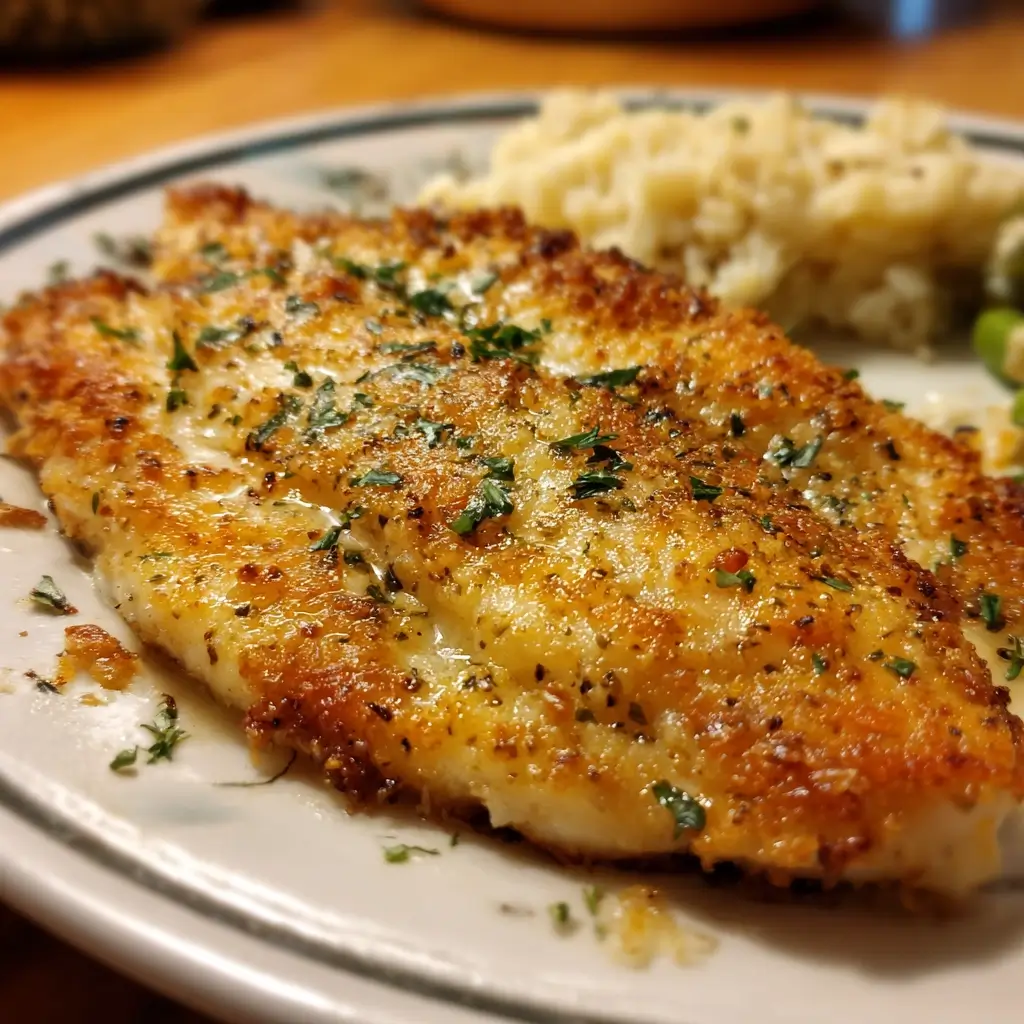

The other night was one of those nights. You know the kind—it’s 6 PM, the day has been a relentless marathon of work calls and errands, and the thought of spending an hour in the kitchen felt utterly exhausting. My family was hungry, and my creativity was running on empty. I scrolled through my saved recipes, looking for a lifeline, and my eyes landed on a simple note: “15-Minute Garlic Parmesan Tilapia.” I was skeptical. Fifteen minutes? For something that sounded so decadent? I decided to give it a shot, expecting a passable meal at best. What happened next was nothing short of a weeknight miracle. The aroma of garlic and melting Parmesan filled the kitchen almost instantly, replacing the day’s stress with a sense of cozy anticipation. The final dish was spectacular: perfectly flaky, moist tilapia with a savory, crispy, golden-brown crust that had my kids asking for seconds before they’d even finished their first helping. It tasted like a dish from a nice restaurant, yet it took less time to make than it does to decide what to watch on TV. This recipe didn’t just save dinner; it transformed a chaotic evening into a genuinely delightful family meal. It has since become our go-to emergency dinner, our “I don’t feel like cooking” champion, and a dish I’m genuinely excited to share because it proves that you don’t need a lot of time to create something truly wonderful.
Ingredients
Here is the simple, yet powerful, list of ingredients you’ll need to create this incredibly flavorful dish. Each component plays a crucial role in building the layers of taste and texture that make this tilapia recipe unforgettable.
- 4 (6-ounce) Tilapia Fillets: The star of the show. Choose fillets that are roughly the same thickness to ensure they cook evenly. Tilapia’s mild, slightly sweet flavor makes it the perfect canvas for the bold garlic and Parmesan topping.
- 4 Tablespoons Unsalted Butter, Melted: Melted butter acts as the binding agent for our delicious crust. It infuses the topping with richness and helps it achieve that beautiful golden-brown color in the oven.
- 1/2 Cup Grated Parmesan Cheese: For the best flavor and melting quality, use freshly grated Parmesan from a block. It provides a sharp, nutty, and salty bite that is the signature flavor of this dish.
- 1/2 Cup Panko Breadcrumbs: These Japanese-style breadcrumbs are lighter and flakier than traditional breadcrumbs, which is the secret to achieving a wonderfully crispy, crunchy crust that contrasts perfectly with the tender fish.
- 2 Cloves Garlic, Minced: Freshly minced garlic is essential for a vibrant, aromatic flavor. It infuses the butter and topping with its pungent, savory essence that pairs beautifully with the cheese and fish.
- 1 Tablespoon Fresh Parsley, Chopped: A touch of fresh parsley adds a bright, clean, and slightly peppery note that cuts through the richness of the butter and cheese, balancing the flavors and adding a pop of color.
- 1/2 Teaspoon Paprika: This adds a subtle warmth and a beautiful reddish hue to the crust. You can use sweet paprika for a mild flavor or smoked paprika for a deeper, smokier taste.
- Salt and Black Pepper, to taste: Essential for seasoning the fish and enhancing all the other flavors. Seasoning the fillets directly before adding the topping ensures the entire dish is well-seasoned.
- 1 Lemon, cut into wedges for serving: A fresh squeeze of lemon juice at the end is non-negotiable! The acidity brightens up the entire dish, cutting through the richness and making all the flavors sing.
Instructions
Follow these simple, step-by-step instructions to achieve perfectly cooked, crispy, and flavorful tilapia every single time. The process is straightforward and designed for a quick and effortless cooking experience.
Step 1: Preheat and Prepare
First things first, preheat your oven to 400°F (200°C). This ensures the oven is hot enough to cook the fish quickly and help the topping become crispy. Line a large baking sheet with parchment paper or aluminum foil. This is a crucial step for easy cleanup and prevents the delicate fish from sticking to the pan.
Step 2: Prepare the Tilapia Fillets
Gently pat the tilapia fillets dry on all sides with a paper towel. Removing excess moisture is key to preventing the fish from steaming in the oven; it helps the topping adhere better and allows the fish to bake to a perfect flaky texture. Arrange the dried fillets in a single layer on the prepared baking sheet, ensuring there is a little space between each one for even air circulation. Season both sides of the fillets generously with salt and black pepper.
Step 3: Mix the Garlic Parmesan Topping
In a small to medium-sized bowl, combine the grated Parmesan cheese, panko breadcrumbs, minced garlic, chopped fresh parsley, and paprika. Stir them together until they are evenly distributed. Now, pour the melted butter over the dry ingredients. Use a fork or a small spatula to toss everything together until the breadcrumbs are evenly coated and the mixture resembles wet sand. This buttery mixture is what will transform into your golden, crispy crust.
Step 4: Top the Tilapia
Spoon the garlic Parmesan mixture evenly over the top of each tilapia fillet. Use your fingers or the back of the spoon to gently press the topping onto the fish. This helps it adhere during baking. Be generous with the topping; you want a nice, thick layer on each fillet to create that satisfying crunch.
Step 5: Bake to Perfection
Place the baking sheet in the preheated oven on the middle rack. Bake for 10-12 minutes. The exact time will depend on the thickness of your fillets. The fish is done when it is opaque all the way through and flakes easily when tested with a fork at its thickest point. The topping should be a beautiful golden brown and crispy.
Step 6: Broil for Extra Crispiness (Optional but Recommended)
If you want an even crispier, more deeply golden crust, switch the oven setting to a high broil for the last 1-2 minutes of cooking. Watch it very carefully during this step, as the topping can go from golden to burnt in a matter of seconds. Stay by the oven and remove the pan as soon as it reaches your desired color.
Step 7: Rest and Serve
Remove the baking sheet from the oven. Let the fish rest for a minute or two before serving. This allows the juices to redistribute, ensuring a moist and tender fillet. Serve immediately with fresh lemon wedges on the side for squeezing over the top.
Nutrition Facts
This recipe offers a delicious meal that is also packed with nutritional benefits, making it an excellent choice for a healthy and balanced diet.
- Serving Size: 1 fillet
- Calories Per Serving: Approximately 350 kcal
- Protein (Approx. 38g): Tilapia is an excellent source of high-quality, lean protein, which is essential for building and repairing tissues, supporting muscle growth, and keeping you feeling full and satisfied.
- Omega-3 Fatty Acids (Approx. 240mg): While not as high as fatty fish like salmon, tilapia provides a good amount of omega-3 fatty acids, which are crucial for brain health, reducing inflammation, and supporting a healthy cardiovascular system.
- Calcium (Approx. 200mg): Thanks to the generous amount of Parmesan cheese, this dish is a good source of calcium, which is vital for strong bones and teeth, as well as proper nerve and muscle function.
- Vitamin B12 (Approx. 2.5mcg): Tilapia is rich in Vitamin B12, a nutrient that plays a key role in nerve function and the formation of DNA and red blood cells, helping to prevent anemia and boost energy levels.
- Selenium (Approx. 54mcg): This powerful antioxidant, found abundantly in tilapia, helps protect your cells from damage, supports a healthy immune system, and is important for thyroid function.
Preparation Time
This recipe is the epitome of a quick and easy meal, designed for busy individuals and families who crave a home-cooked meal without the time commitment. The total time from start to finish is a mere 15 minutes. This breaks down into about 5 minutes of active preparation—patting the fish dry, mixing the topping, and assembling the dish—and 10-12 minutes of hands-off baking time. It’s one of the fastest ways to get a sophisticated and delicious protein on the dinner table.
How to Serve
The beauty of this Garlic Parmesan Tilapia lies in its versatility. It pairs wonderfully with a wide array of side dishes, allowing you to customize your meal based on your tastes, dietary needs, or what you have on hand. Here are some serving suggestions to create a complete and balanced meal:
- Classic and Comforting Pairings
- Creamy Mashed Potatoes: The rich, buttery flavor of mashed potatoes is a perfect complement to the crispy, savory fish.
- Roasted Asparagus with Lemon: The earthy flavor of roasted asparagus, brightened with a squeeze of lemon, cuts through the richness of the Parmesan crust.
- Garlic Bread: For an extra dose of garlic and carb-fueled satisfaction, a warm, crusty slice of garlic bread is an excellent choice.
- Light and Healthy Options
- Quinoa Salad: A vibrant quinoa salad with cherry tomatoes, cucumber, feta, and a lemon vinaigrette makes for a light, refreshing, and protein-packed meal.
- Steamed Green Beans: Simply steamed green beans with a touch of salt and pepper offer a crisp, clean side that lets the tilapia shine.
- A Simple Arugula Salad: A peppery arugula salad tossed with a light balsamic vinaigrette provides a fresh contrast to the warm, cheesy fish.
- Low-Carb and Keto-Friendly Sides
- Zucchini Noodles (Zoodles): Sautéed zucchini noodles with a bit of garlic and olive oil create a fantastic pasta-like base without the carbs.
- Cauliflower Rice: Fluffy cauliflower rice, either plain or seasoned with herbs, is a superb low-carb alternative to traditional rice.
- Sautéed Spinach and Mushrooms: A hearty side of spinach and mushrooms sautéed in garlic and butter complements the flavors of the tilapia perfectly.
- Grains and Starches
- Lemon Herb Rice Pilaf: A fragrant rice pilaf infused with lemon and fresh herbs is a classic and elegant accompaniment.
- Orzo with Feta and Dill: A simple orzo pasta salad with crumbles of feta cheese and fresh dill offers a delightful Mediterranean twist.
Additional Tips
To ensure your Garlic Parmesan Tilapia is a culinary triumph every time, here are eight expert tips to elevate the recipe from great to absolutely perfect.
1. Don’t Dare Overbake the Fish
The number one rule of cooking fish is not to overcook it. Tilapia is a lean fish, and overbaking it by even a minute can turn it from flaky and moist to dry and tough. The best way to check for doneness is with a fork. Insert it into the thickest part of the fillet and give it a gentle twist. If the fish flakes apart easily and is opaque throughout, it’s done. Remember that it will continue to cook slightly from residual heat after you remove it from the oven.
2. Fresh is Best, but Frozen Works in a Pinch
While fresh tilapia will often yield the best texture, high-quality frozen tilapia is a fantastic and convenient option. The key is to thaw it properly. The best method is to let it thaw overnight in the refrigerator. If you’re short on time, you can place the vacuum-sealed fish in a bowl of cold water for about 30-45 minutes. Crucially, make sure the thawed fillets are patted extremely dry to remove all excess water before seasoning.
3. The Broiler is Your Secret Weapon for a Crispy Top
For a truly restaurant-quality, crispy, golden-brown crust, utilize your oven’s broiler. After the fish is cooked through, switch the oven to the broil setting and cook for 1-2 minutes. This intense, direct heat will toast the panko and melt the Parmesan to perfection. You must watch it like a hawk during this step, as the topping can burn in an instant.
4. Choose Your Parmesan Wisely
For the best flavor and texture, always opt for a block of Parmesan cheese and grate it yourself. Pre-shredded cheeses often contain anti-caking agents like cellulose, which can prevent them from melting as smoothly and can impart a slightly powdery texture. Freshly grated Parmesan offers a superior nutty, salty flavor that makes a noticeable difference.
5. Don’t Be Afraid to Spice It Up
This recipe is a fantastic base for customization. Feel free to add other spices to the panko mixture to suit your taste. A pinch of red pepper flakes will add a welcome kick of heat. Smoked paprika can be used in place of sweet paprika for a deeper, smokier flavor. A dash of onion powder or some dried oregano can also add another layer of savory depth.
6. Experiment with Other Fish
While this recipe is designed for tilapia, the garlic Parmesan topping is incredibly versatile and works well with many other types of white fish. Try it with cod, haddock, pollock, or even sole. You may need to adjust the baking time slightly depending on the thickness of the fish you choose, but the principle remains the same.
7. Make the Topping Ahead of Time
To make your weeknight dinner prep even faster, you can prepare the garlic Parmesan topping ahead of time. Simply mix all the topping ingredients together (except the melted butter) and store them in an airtight container in the refrigerator for up to 2-3 days. When you’re ready to cook, just melt the butter, mix it in, top your fish, and bake.
8. Parchment Paper is Your Best Friend
Lining your baking sheet with parchment paper is a small step that makes a huge difference. Not only does it guarantee that the delicate tilapia fillets won’t stick to the pan, but it also makes cleanup an absolute breeze. Simply slide the cooked fish off the paper and then discard the parchment—no scrubbing required.
FAQ Section
Here are answers to some of the most frequently asked questions about this 15-Minute Garlic Parmesan Tilapia recipe.
1. Can I make this recipe in an air fryer?
Absolutely! The air fryer is a fantastic tool for this recipe as it circulates hot air, creating an exceptionally crispy crust. To adapt it, preheat your air fryer to 375°F (190°C). Prepare the fish as directed and place the topped fillets in the air fryer basket in a single layer (you may need to cook in batches). Air fry for 7-9 minutes, or until the fish is cooked through and the topping is golden and crisp.
2. My tilapia came out watery. What did I do wrong?
A watery result is almost always due to excess moisture on the fish before baking. This is especially common with frozen fish that hasn’t been thawed and dried properly. To prevent this, make sure you pat the tilapia fillets very thoroughly with paper towels on all sides until they are as dry as possible. This ensures the fish bakes rather than steams.
3. How do I store and reheat leftovers?
Store any leftover tilapia in an airtight container in the refrigerator for up to 2 days. While microwaving is an option, it can make the fish rubbery and the topping soggy. The best way to reheat it is in an oven or toaster oven at 350°F (175°C) for 5-7 minutes, or in an air fryer for 3-4 minutes. This will help re-crisp the crust and gently warm the fish through without overcooking it.
4. I’ve heard tilapia isn’t a healthy fish. Is it safe to eat?
This is a common concern. Tilapia is one of the most widely consumed fish globally, but its nutritional profile can depend on how it was farmed. Look for tilapia raised in responsible farming conditions (often labeled with certifications like the Aquaculture Stewardship Council). While it’s lower in omega-3s than fatty fish like salmon, it is still a fantastic source of lean protein, vitamins, and minerals, making it a healthy and affordable choice for a balanced diet.
5. Can I use regular breadcrumbs instead of panko?
You can, but the texture will be different. Panko breadcrumbs are made from crustless bread and are flakier and lighter, which results in a much crispier and crunchier coating. Regular breadcrumbs are finer and will create a denser, more traditional crust. If using regular breadcrumbs, the result will still be delicious, just not as light and crispy.
6. What’s the best way to mince garlic for this recipe?
For the most potent and best-distributed flavor, using freshly minced garlic is key. A garlic press is the easiest way to get a fine, paste-like consistency. Alternatively, you can use a sharp knife to chop the garlic as finely as possible, then use the side of the blade to press and smear it on the cutting board with a pinch of salt to create a paste. Avoid using pre-minced jarred garlic, as it often has a duller, more acidic flavor.
7. Can I double this recipe for a larger group?
Yes, this recipe scales up beautifully. Simply double or triple all the ingredients according to how many people you are serving. The most important thing is to use a larger baking sheet (or multiple sheets) to ensure the fillets can still be arranged in a single layer with space between them. Overcrowding the pan will cause the fish to steam instead of bake, preventing the crust from getting crispy.
8. My topping didn’t get golden brown. How can I fix this?
If your fish is cooked through but the topping is still pale, it’s likely due to your oven’s specific heating patterns or the placement of the rack. The easiest fix is to move the baking sheet to a higher rack in the oven and switch on the broiler for 1-2 minutes. Keep a very close eye on it to get that perfect golden color without burning it.

15-Minute Garlic Parmesan Tilapia
Ingredients
Here is the simple, yet powerful, list of ingredients you’ll need to create this incredibly flavorful dish. Each component plays a crucial role in building the layers of taste and texture that make this tilapia recipe unforgettable.
- 4 (6-ounce) Tilapia Fillets: The star of the show. Choose fillets that are roughly the same thickness to ensure they cook evenly. Tilapia’s mild, slightly sweet flavor makes it the perfect canvas for the bold garlic and Parmesan topping.
- 4 Tablespoons Unsalted Butter, Melted: Melted butter acts as the binding agent for our delicious crust. It infuses the topping with richness and helps it achieve that beautiful golden-brown color in the oven.
- 1/2 Cup Grated Parmesan Cheese: For the best flavor and melting quality, use freshly grated Parmesan from a block. It provides a sharp, nutty, and salty bite that is the signature flavor of this dish.
- 1/2 Cup Panko Breadcrumbs: These Japanese-style breadcrumbs are lighter and flakier than traditional breadcrumbs, which is the secret to achieving a wonderfully crispy, crunchy crust that contrasts perfectly with the tender fish.
- 2 Cloves Garlic, Minced: Freshly minced garlic is essential for a vibrant, aromatic flavor. It infuses the butter and topping with its pungent, savory essence that pairs beautifully with the cheese and fish.
- 1 Tablespoon Fresh Parsley, Chopped: A touch of fresh parsley adds a bright, clean, and slightly peppery note that cuts through the richness of the butter and cheese, balancing the flavors and adding a pop of color.
- 1/2 Teaspoon Paprika: This adds a subtle warmth and a beautiful reddish hue to the crust. You can use sweet paprika for a mild flavor or smoked paprika for a deeper, smokier taste.
- Salt and Black Pepper, to taste: Essential for seasoning the fish and enhancing all the other flavors. Seasoning the fillets directly before adding the topping ensures the entire dish is well-seasoned.
- 1 Lemon, cut into wedges for serving: A fresh squeeze of lemon juice at the end is non-negotiable! The acidity brightens up the entire dish, cutting through the richness and making all the flavors sing.
Instructions
Follow these simple, step-by-step instructions to achieve perfectly cooked, crispy, and flavorful tilapia every single time. The process is straightforward and designed for a quick and effortless cooking experience.
Step 1: Preheat and Prepare
First things first, preheat your oven to 400°F (200°C). This ensures the oven is hot enough to cook the fish quickly and help the topping become crispy. Line a large baking sheet with parchment paper or aluminum foil. This is a crucial step for easy cleanup and prevents the delicate fish from sticking to the pan.
Step 2: Prepare the Tilapia Fillets
Gently pat the tilapia fillets dry on all sides with a paper towel. Removing excess moisture is key to preventing the fish from steaming in the oven; it helps the topping adhere better and allows the fish to bake to a perfect flaky texture. Arrange the dried fillets in a single layer on the prepared baking sheet, ensuring there is a little space between each one for even air circulation. Season both sides of the fillets generously with salt and black pepper.
Step 3: Mix the Garlic Parmesan Topping
In a small to medium-sized bowl, combine the grated Parmesan cheese, panko breadcrumbs, minced garlic, chopped fresh parsley, and paprika. Stir them together until they are evenly distributed. Now, pour the melted butter over the dry ingredients. Use a fork or a small spatula to toss everything together until the breadcrumbs are evenly coated and the mixture resembles wet sand. This buttery mixture is what will transform into your golden, crispy crust.
Step 4: Top the Tilapia
Spoon the garlic Parmesan mixture evenly over the top of each tilapia fillet. Use your fingers or the back of the spoon to gently press the topping onto the fish. This helps it adhere during baking. Be generous with the topping; you want a nice, thick layer on each fillet to create that satisfying crunch.
Step 5: Bake to Perfection
Place the baking sheet in the preheated oven on the middle rack. Bake for 10-12 minutes. The exact time will depend on the thickness of your fillets. The fish is done when it is opaque all the way through and flakes easily when tested with a fork at its thickest point. The topping should be a beautiful golden brown and crispy.
Step 6: Broil for Extra Crispiness (Optional but Recommended)
If you want an even crispier, more deeply golden crust, switch the oven setting to a high broil for the last 1-2 minutes of cooking. Watch it very carefully during this step, as the topping can go from golden to burnt in a matter of seconds. Stay by the oven and remove the pan as soon as it reaches your desired color.
Step 7: Rest and Serve
Remove the baking sheet from the oven. Let the fish rest for a minute or two before serving. This allows the juices to redistribute, ensuring a moist and tender fillet. Serve immediately with fresh lemon wedges on the side for squeezing over the top.
Nutrition
- Serving Size: one normal portion
- Calories: 350
- Protein: 38g