")

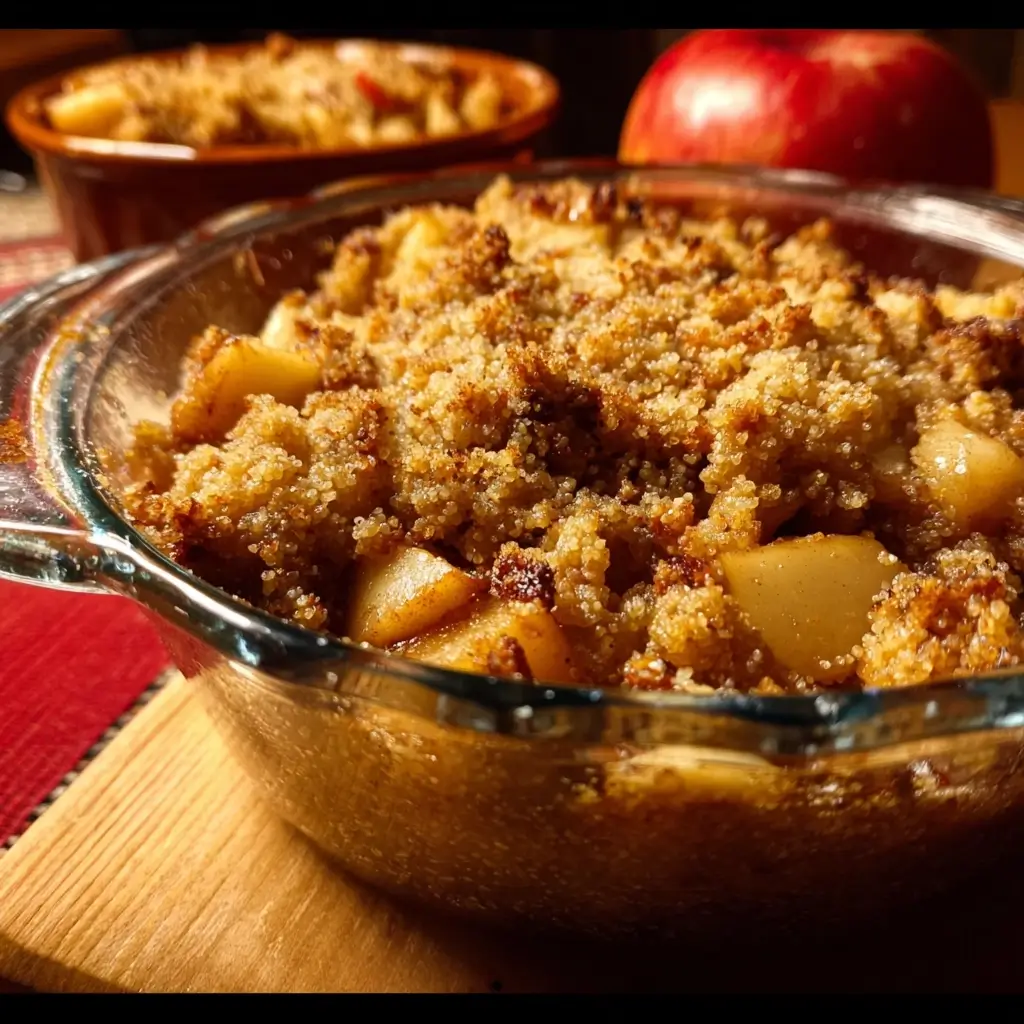

Of all the scents that can fill a home, the aroma of apples and cinnamon baking in the oven has to be one of the most comforting. It’s a smell that instantly transports me back to cozy autumn mornings and festive holiday gatherings. For the longest time, my go-to for this sensory experience was an apple crumble or a classic pie, but I was searching for something healthier, something that could double as a hearty breakfast or a guilt-free dessert. That’s when I stumbled upon the magic of millet. Initially, I was skeptical. Millet, to me, was just birdseed. But after some research into this incredible ancient grain, I decided to give it a try. The result was this Baked Millet with Apples recipe, a dish that has since become an absolute staple in our household. The first time I served it, I was nervous. Would the kids turn up their noses at the unfamiliar grain? To my delight, they devoured it. My husband, who is notoriously picky about breakfast foods, went back for a second helping, praising the creamy, almost custardy texture of the millet and the way the sweet, tender apples melted in his mouth. It’s the perfect harmony of textures and flavors—the slightly nutty, fluffy millet, the soft and tangy baked apples, the gentle warmth of cinnamon and nutmeg, and the subtle sweetness from a touch of maple syrup. This dish is not just food; it’s a warm hug in a bowl. It’s become our favorite weekend breakfast, our go-to for a healthy meal prep option, and even a light dessert topped with a scoop of vanilla yogurt. It’s incredibly versatile, satisfying, and packed with wholesome goodness. I’m so excited to share this recipe with you, and I truly hope it brings as much warmth and joy to your kitchen as it has to mine.
Ingredients
- 1 cup Hulled Millet: The foundation of our dish. It’s essential to use hulled millet, which has had its tough outer layer removed, allowing it to become wonderfully soft and creamy when cooked. Be sure to rinse it thoroughly before use.
- 4 cups Milk of Choice: You have complete freedom here. Whole dairy milk will result in the creamiest, most decadent bake. However, almond milk, soy milk, oat milk, or coconut milk work beautifully for a dairy-free or vegan version, each imparting a subtle flavor of its own.
- 3 medium Apples: The type of apple you choose can significantly influence the final taste. Honeycrisp or Braeburn apples hold their shape well and offer a perfect balance of sweet and tart. For a more pronounced tartness, Granny Smith is an excellent choice.
- 1/4 cup Maple Syrup: This provides a natural and gentle sweetness that complements the apples and spices perfectly. You can substitute with honey (if not vegan) or agave nectar. Adjust the amount based on the sweetness of your apples and your personal preference.
- 1 teaspoon Ground Cinnamon: The classic warming spice that is essential for any apple-based dish. Its sweet and woody aroma is the heart of this recipe’s comforting flavor profile.
- 1/2 teaspoon Ground Nutmeg: Adds a deep, warm, and slightly sweet flavor that pairs beautifully with cinnamon and enhances the overall complexity of the dish. A little goes a long way.
- 1/4 teaspoon Ground Ginger: Provides a subtle, zesty warmth that cuts through the sweetness and adds another layer of spice. It’s an optional but highly recommended addition.
- 1 teaspoon Vanilla Extract: Pure vanilla extract enhances all the other flavors in the dish, adding a fragrant aroma and a touch of creamy sweetness.
- 1/4 teaspoon Salt: A crucial ingredient that balances the sweetness and brings out the individual flavors of the millet, apples, and spices. Don’t skip it.
- 2 tablespoons Butter or Coconut Oil, melted: This adds richness and helps the top of the bake brown beautifully. Use coconut oil for a dairy-free or vegan option.
- Optional Toppings: Chopped walnuts or pecans, a sprinkle of hemp or chia seeds, a dollop of yogurt, or an extra drizzle of maple syrup.
Instructions
- Preheat and Prepare: Begin by preheating your oven to 375°F (190°C). Grease a 9×9 inch square baking dish or a similar-sized 2-quart casserole dish with a little butter or cooking spray. This will prevent the millet from sticking and ensure easy serving.
- Rinse the Millet: This is a non-negotiable step for a delicious result. Place the millet in a fine-mesh sieve and rinse it thoroughly under cold running water for at least 30-60 seconds, using your fingers to move the grains around. This process removes saponin, a natural coating on the millet that can impart a bitter or soapy taste if not washed away.
- Prepare the Apples: Wash, core, and chop the apples into small, roughly 1/2-inch cubes. You can choose to peel them for a smoother texture or leave the skin on for extra fiber and a more rustic feel. Leaving the skin on also adds a lovely color to the finished dish.
- Combine the Ingredients: In a large mixing bowl, combine the rinsed millet, chopped apples, your milk of choice, maple syrup, vanilla extract, cinnamon, nutmeg, ginger, and salt. Stir everything together until it is well-combined and the spices are evenly distributed throughout the liquid.
- Assemble the Bake: Pour the entire mixture from the bowl into your prepared baking dish. Spread it out into an even layer. Drizzle the melted butter or coconut oil evenly over the top surface. This will help create a beautiful, lightly golden-brown crust as it bakes.
- Bake to Perfection: Place the baking dish in the preheated oven. Bake, uncovered, for 55 to 65 minutes. You’ll know it’s done when the edges are bubbling, the top is golden brown, and most of the liquid has been absorbed by the millet. The center should be set but still have a slightly creamy, porridge-like consistency underneath the crust.
- Rest Before Serving: This is another crucial step. Remove the bake from the oven and let it rest on a wire rack for at least 10-15 minutes before serving. This allows the millet to absorb any remaining liquid and helps the casserole set up properly, making it easier to slice and serve. It will be incredibly hot straight out of the oven, so this resting period also serves as a necessary cooling time.
Nutrition Facts
- Servings: 6-8 servings
- Calories: Approximately 250-300 kcal per serving (will vary based on milk and sweetener choices)
- Fiber: This dish is an excellent source of dietary fiber, thanks to both the whole-grain millet and the apples (especially if you leave the skin on). Fiber is crucial for digestive health and helps keep you feeling full and satisfied.
- Complex Carbohydrates: Millet provides a steady release of energy from complex carbohydrates, making this an ideal breakfast to fuel your morning without the sugar crash associated with refined grains.
- Manganese: Millet is rich in manganese, an essential mineral that acts as an antioxidant and plays a vital role in bone development, metabolism, and wound healing.
- Magnesium: A good source of magnesium, which is important for muscle and nerve function, blood sugar control, and blood pressure regulation.
- Plant-Based Protein: This recipe offers a decent amount of plant-based protein, which is essential for building and repairing tissues in the body.
Preparation Time
This recipe is wonderfully straightforward and requires minimal hands-on effort. The total time is mostly passive baking time, allowing you to focus on other things.
- Prep Time: 15 minutes. This includes rinsing the millet, chopping the apples, and mixing all the ingredients together.
- Cook Time: 60 minutes. This is the time the dish spends in the oven, filling your home with a wonderful aroma.
- Total Time: 1 hour and 15 minutes.
How to Serve
This Baked Millet with Apples is incredibly versatile. It can be served warm, at room temperature, or even cold straight from the refrigerator. Here are some of our favorite ways to enjoy it:
- As a Hearty Breakfast Bowl:
- Scoop a generous portion into a bowl while it’s still warm.
- Add a large dollop of Greek yogurt, plain yogurt, or a dairy-free alternative for a creamy, tangy contrast.
- Sprinkle with a handful of toasted pecans or walnuts for a delightful crunch.
- For an extra boost of nutrients, add a sprinkle of hemp hearts, chia seeds, or ground flaxseed.
- Finish with an extra drizzle of maple syrup if you have a sweet tooth.
- As a Simple and Healthy Dessert:
- Serve a warm slice with a scoop of high-quality vanilla bean ice cream or frozen yogurt. The contrast between the warm, spiced millet and the cold, creamy ice cream is divine.
- Drizzle with a simple caramel sauce or a spoonful of apple butter for an even more decadent treat.
- Top with a sprinkle of flaky sea salt to enhance the sweet flavors.
- For On-the-Go Meal Prep:
- Once the bake has cooled completely, cut it into squares or bars.
- Wrap the individual portions in plastic wrap or store them in an airtight container in the refrigerator.
- They make for a perfect, easy-to-grab breakfast or snack throughout the week. They can be eaten cold or quickly reheated in the microwave.
Additional Tips
- Toast the Millet First: For a deeper, nuttier flavor, you can toast the dry, rinsed millet before adding it to the other ingredients. Simply place it in a dry skillet over medium heat and stir frequently for 3-5 minutes, until it becomes fragrant and lightly golden. This small step adds a remarkable depth of flavor.
- Choose Your Apples Wisely: The texture of your bake depends heavily on your apple choice. For distinct chunks of apple in the final dish, use firm baking apples like Honeycrisp, Braeburn, Gala, or Jonagold. If you prefer a smoother, more applesauce-like consistency, use softer apples like McIntosh. A mix of the two can provide the best of both worlds.
- Make It Vegan and Dairy-Free: This recipe is easily adaptable. To make it 100% vegan, ensure you are using a plant-based milk (almond, soy, or oat are great), maple syrup instead of honey, and melted coconut oil or a vegan butter substitute instead of dairy butter.
- Boost the Protein: To make this an even more filling and protein-packed meal, you can add 1/4 cup of your favorite unflavored or vanilla protein powder to the liquid mixture before baking. You may need to add an extra splash of milk to maintain the right consistency. Alternatively, stirring in some cottage cheese or Greek yogurt before serving is a great option.
- Control the Sweetness: This recipe is moderately sweet. If you are using very sweet apples or prefer a less sweet dish, you can reduce the maple syrup to 2-3 tablespoons. Conversely, if you have very tart apples or a major sweet tooth, feel free to increase it to 1/3 cup.
- Achieve the Perfect Texture: The final texture can be adjusted. For a creamier, more porridge-like bake, you can add an extra 1/2 cup of milk. For a firmer, more sliceable casserole, ensure you let it rest for a full 20-30 minutes after baking to allow it to set up completely.
- Prepare It Ahead of Time: You can assemble the entire casserole the night before. Combine all ingredients in the baking dish, cover it tightly with plastic wrap, and store it in the refrigerator overnight. In the morning, remove it from the fridge while the oven preheats, and then bake as directed. You may need to add 5-10 minutes to the baking time since you’re starting with a cold dish.
- Freezing for Later: This dish freezes beautifully. Let the baked millet cool completely, then either wrap the entire dish tightly in a layer of plastic wrap followed by a layer of aluminum foil, or cut it into individual portions and store them in freezer-safe bags or containers. It can be frozen for up to 3 months. To reheat, thaw overnight in the refrigerator and warm in the microwave or in a 350°F (175°C) oven until heated through.
Frequently Asked Questions (FAQ)
1. What does millet actually taste like in this recipe?
Millet has a very mild, slightly nutty, and subtly sweet flavor that is often compared to corn or quinoa. In this baked recipe, its primary role is to provide a wonderful texture. It becomes soft, creamy, and almost custardy, absorbing all the delicious flavors of the apple, milk, and spices. It doesn’t have an overpowering taste, making it the perfect neutral canvas for the other ingredients to shine.
2. Is this Baked Millet with Apples recipe genuinely gluten-free?
Yes, it is naturally gluten-free. Millet is an ancient grain that does not contain gluten, making it an excellent and safe choice for individuals with celiac disease or gluten sensitivity. Just be sure to use certified gluten-free ingredients for all other components if you are highly sensitive to cross-contamination.
3. Can I use a different grain instead of millet?
While this recipe is specifically designed for millet’s unique texture, you could experiment with other grains. Quinoa would work well and would require a similar cooking time, resulting in a slightly firmer texture. Steel-cut oats could also be used, but they would create a much denser, chewier result, and you might need to adjust the liquid ratio and baking time. Rolled oats are not recommended as they would become mushy.
4. My millet bake came out too dry or too soggy. What went wrong?
This usually comes down to the liquid-to-grain ratio or baking time. If it’s too dry, your oven may run hot, causing too much liquid to evaporate. Next time, try reducing the bake time by 5-10 minutes or adding an extra 1/4 to 1/2 cup of milk. If it’s too soggy, it likely needed more time in the oven. Ovens vary, so look for the visual cues: the liquid should be mostly absorbed, and the center should be set. Also, don’t skip the crucial resting period, as the millet continues to absorb liquid as it cools.
5. Can I use a different type of milk? Will it change the recipe?
Absolutely! You can use any milk you prefer. Dairy milk (whole or 2%) will yield the richest, most traditional casserole. For dairy-free options, canned full-fat coconut milk will make it incredibly creamy and decadent with a hint of coconut flavor. Almond milk is a lighter option with a nutty undertone. Oat milk is naturally creamy and a great neutral-tasting choice. The recipe is very forgiving, so feel free to use whatever you have on hand.
6. How do I properly store and reheat the leftovers?
Store any leftover baked millet in an airtight container in the refrigerator for up to 4-5 days. The texture will firm up as it chills. You can enjoy it cold straight from the fridge, or you can reheat it. For a single serving, the microwave is quickest—just heat for 60-90 seconds. To reheat a larger portion, place it in an oven-safe dish, add a splash of milk to prevent it from drying out, cover with foil, and warm in a 350°F (175°C) oven for 15-20 minutes.
7. Can I add other fruits or nuts directly into the bake?
Yes, this recipe is a great base for customization! You could substitute half of the apples with firm pears or add a cup of fresh or frozen cranberries for a tart kick. For nuts, you can stir 1/2 cup of chopped walnuts, pecans, or slivered almonds directly into the mixture before baking to add texture throughout the entire dish. A handful of raisins or dried cherries would also be a delicious addition.
8. You emphasize rinsing the millet. Is it really that important?
Yes, it is arguably the most important step for ensuring a delicious outcome. Unrinsed millet is coated in a natural compound called saponin, which protects the grain in the wild but has a noticeably bitter and sometimes soapy taste. A thorough rinse under cold water completely removes this coating, leaving you with the pure, mild, and nutty flavor of the millet grain. Skipping this step can unfortunately ruin the taste of the entire dish.thumb_upthumb_down
Baked Millet with Apples Recipe
Ingredients
- 1 cup Hulled Millet: The foundation of our dish. It’s essential to use hulled millet, which has had its tough outer layer removed, allowing it to become wonderfully soft and creamy when cooked. Be sure to rinse it thoroughly before use.
- 4 cups Milk of Choice: You have complete freedom here. Whole dairy milk will result in the creamiest, most decadent bake. However, almond milk, soy milk, oat milk, or coconut milk work beautifully for a dairy-free or vegan version, each imparting a subtle flavor of its own.
- 3 medium Apples: The type of apple you choose can significantly influence the final taste. Honeycrisp or Braeburn apples hold their shape well and offer a perfect balance of sweet and tart. For a more pronounced tartness, Granny Smith is an excellent choice.
- 1/4 cup Maple Syrup: This provides a natural and gentle sweetness that complements the apples and spices perfectly. You can substitute with honey (if not vegan) or agave nectar. Adjust the amount based on the sweetness of your apples and your personal preference.
- 1 teaspoon Ground Cinnamon: The classic warming spice that is essential for any apple-based dish. Its sweet and woody aroma is the heart of this recipe’s comforting flavor profile.
- 1/2 teaspoon Ground Nutmeg: Adds a deep, warm, and slightly sweet flavor that pairs beautifully with cinnamon and enhances the overall complexity of the dish. A little goes a long way.
- 1/4 teaspoon Ground Ginger: Provides a subtle, zesty warmth that cuts through the sweetness and adds another layer of spice. It’s an optional but highly recommended addition.
- 1 teaspoon Vanilla Extract: Pure vanilla extract enhances all the other flavors in the dish, adding a fragrant aroma and a touch of creamy sweetness.
- 1/4 teaspoon Salt: A crucial ingredient that balances the sweetness and brings out the individual flavors of the millet, apples, and spices. Don’t skip it.
- 2 tablespoons Butter or Coconut Oil, melted: This adds richness and helps the top of the bake brown beautifully. Use coconut oil for a dairy-free or vegan option.
- Optional Toppings: Chopped walnuts or pecans, a sprinkle of hemp or chia seeds, a dollop of yogurt, or an extra drizzle of maple syrup.
Instructions
- Preheat and Prepare: Begin by preheating your oven to 375°F (190°C). Grease a 9×9 inch square baking dish or a similar-sized 2-quart casserole dish with a little butter or cooking spray. This will prevent the millet from sticking and ensure easy serving.
- Rinse the Millet: This is a non-negotiable step for a delicious result. Place the millet in a fine-mesh sieve and rinse it thoroughly under cold running water for at least 30-60 seconds, using your fingers to move the grains around. This process removes saponin, a natural coating on the millet that can impart a bitter or soapy taste if not washed away.
- Prepare the Apples: Wash, core, and chop the apples into small, roughly 1/2-inch cubes. You can choose to peel them for a smoother texture or leave the skin on for extra fiber and a more rustic feel. Leaving the skin on also adds a lovely color to the finished dish.
- Combine the Ingredients: In a large mixing bowl, combine the rinsed millet, chopped apples, your milk of choice, maple syrup, vanilla extract, cinnamon, nutmeg, ginger, and salt. Stir everything together until it is well-combined and the spices are evenly distributed throughout the liquid.
- Assemble the Bake: Pour the entire mixture from the bowl into your prepared baking dish. Spread it out into an even layer. Drizzle the melted butter or coconut oil evenly over the top surface. This will help create a beautiful, lightly golden-brown crust as it bakes.
- Bake to Perfection: Place the baking dish in the preheated oven. Bake, uncovered, for 55 to 65 minutes. You’ll know it’s done when the edges are bubbling, the top is golden brown, and most of the liquid has been absorbed by the millet. The center should be set but still have a slightly creamy, porridge-like consistency underneath the crust.
- Rest Before Serving: This is another crucial step. Remove the bake from the oven and let it rest on a wire rack for at least 10-15 minutes before serving. This allows the millet to absorb any remaining liquid and helps the casserole set up properly, making it easier to slice and serve. It will be incredibly hot straight out of the oven, so this resting period also serves as a necessary cooling time.
Nutrition
- Serving Size: one normal portion
- Calories: 300