")


Of all the recipes I’ve developed for our annual Halloween party, this one always steals the show. The first time I served it, I watched with amusement as my guests hesitantly approached the vibrant, shockingly crimson dip, their curiosity piqued by its dramatic name. A few brave souls dipped a black tortilla chip in, and their eyes widened. “What is this?!” became the refrain of the evening. The initial spooky aesthetic gives way to a flavor that is unexpectedly delightful—earthy, sweet, tangy, and incredibly creamy. My kids, who usually turn their noses up at beets, now request this “monster dip” year-round. It has become more than just a recipe; it’s a conversation starter, a centerpiece, and a deliciously healthy trick that’s all treat. This Bloody Beet Hummus recipe isn’t just for Halloween; its stunning color and sophisticated flavor make it a perfect addition to any gathering, proving that sometimes the most intimidating dishes are the most rewarding.
Bloody Beet Hummus: Ingredients
Here is everything you will need to create this stunning and flavorful dip. Using fresh, high-quality ingredients is the key to achieving both the vibrant color and the deep, complex taste that makes this hummus so unforgettable.
- 1 lb (about 450g) Raw Beets (approx. 2 medium beets): The star of the show. Roasting raw beets, rather than boiling or using canned, coaxes out their natural sweetness and deepens their earthy flavor, forming the delicious foundation of the hummus.
- 1 (15-ounce) can Chickpeas (Garbanzo Beans): The classic hummus base, providing a creamy texture and a dose of plant-based protein and fiber. Be sure to rinse and drain them well.
- ½ cup High-Quality Tahini: This sesame seed paste is non-negotiable for authentic hummus. A good quality brand will be smooth, nutty, and slightly bitter, not overly astringent. It’s the secret to a rich, velvety texture.
- ¼ cup Freshly Squeezed Lemon Juice: Essential for brightness and tang. Fresh juice provides a clean, zesty flavor that bottled juice simply cannot match, cutting through the richness of the tahini and the earthiness of the beets.
- 2-3 Cloves Garlic, roughly chopped: Adds a pungent, savory kick. Start with two cloves and add a third if you prefer a more pronounced garlic flavor.
- 2 tablespoons Extra Virgin Olive Oil: A good quality olive oil adds richness, flavor, and helps create a smoother consistency. An extra drizzle on top before serving is highly recommended.
- 1 teaspoon Ground Cumin: This warm, earthy spice is a classic hummus ingredient that pairs beautifully with both the chickpeas and the beets, adding a layer of savory depth.
- 1 teaspoon Kosher Salt (or to taste): Crucial for enhancing all the other flavors in the dish. Start with one teaspoon and adjust as needed after blending.
- 3-6 tablespoons Ice Cold Water: The secret weapon for fluffy, creamy hummus. Adding ice-cold water while the processor is running helps emulsify the mixture into a lighter, smoother dip.
Instructions
Follow these step-by-step instructions carefully to achieve the perfect consistency and flavor balance. While it takes a little time to roast the beets, the active preparation is quick and the results are well worth the wait.
Step 1: Roast the Beets
Roasting is the most important step for developing a deep, sweet flavor that canned or boiled beets lack.
- Preheat and Prep: Preheat your oven to 400°F (200°C). Wash and scrub the beets thoroughly under running water to remove any dirt. There’s no need to peel them at this stage. Trim off the leafy tops and the long root tail.
- Wrap in Foil: Place each beet on a separate piece of aluminum foil. Drizzle each one with a small amount of olive oil and rub it over the entire surface. Wrap the beets tightly in the foil, creating a sealed packet. This will trap the steam and help them cook evenly.
- Roast to Perfection: Place the foil-wrapped beets directly on the middle oven rack or on a small baking sheet. Roast for 50-70 minutes. The exact time will depend on the size of your beets. They are done when a sharp knife or skewer can be easily inserted into the center with little resistance.
- Cool and Peel: Once cooked, carefully remove the beets from the oven and open the foil packets to let the steam escape. Let them cool for about 15-20 minutes, or until they are comfortable to handle. The skins should slide off easily with your fingers or by gently rubbing them with a paper towel. For a mess-free experience, wear disposable gloves!
- Chop: Roughly chop the peeled, roasted beets into 1-inch chunks and set them aside. This makes them easier for your food processor to handle.
Step 2: Prepare the Hummus Base
Creating a smooth base before adding the main ingredients is a key technique for achieving a professional, silky texture.
- Process Tahini and Lemon Juice: In the bowl of a food processor, combine the ½ cup of tahini and ¼ cup of fresh lemon juice. Process for about 60 seconds. The mixture will seize up and look thick and pasty. Scrape down the sides and bottom of the bowl.
- Whip the Base: With the processor running, slowly stream in 2 tablespoons of the ice-cold water. Continue to process for another 60-90 seconds. You will see the mixture transform; it will become pale, fluffy, and much smoother. This step, often called “whipping the tahini,” is crucial for a light and airy final product.
Step 3: Combine and Blend
Now it’s time to bring everything together to create the vibrant, delicious hummus.
- Add Ingredients: Add the rinsed and drained chickpeas, the chopped roasted beets, the chopped garlic, extra virgin olive oil, ground cumin, and 1 teaspoon of kosher salt to the food processor with the whipped tahini mixture.
- Initial Blend: Secure the lid and process continuously for 2-3 minutes. Stop and scrape down the sides and bottom of the bowl with a spatula to ensure everything is being incorporated evenly.
- Achieve Smoothness: Place the lid back on and continue to process. With the machine running, slowly drizzle in the remaining ice-cold water, 1 tablespoon at a time, until you reach your desired consistency. For an ultra-creamy, smooth hummus, let the processor run for a full 4-5 minutes. Be patient! The longer it blends, the smoother it will become.
- Taste and Adjust: Once the hummus is perfectly smooth, taste it. This is your chance to customize. Does it need more salt? A little more lemon juice for tang? Another small pinch of cumin for earthiness? Add any adjustments and pulse a few more times to combine.
Step 4: Serve and Garnish
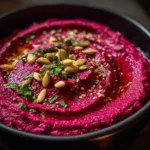
Transfer the finished Bloody Beet Hummus to a serving bowl. Use the back of a spoon to create an attractive swirl on top. Garnish as desired before serving (see “How to Serve” section for ideas).
Nutrition Facts
This recipe yields approximately 3 cups of hummus. The following nutritional information is an estimate for one serving, assuming 12 servings per batch (¼ cup per serving).
- Servings: 12
- Calories per serving: Approximately 110 kcal
- Fiber (4g): Excellent source of dietary fiber from both the beets and chickpeas, which is essential for digestive health, blood sugar regulation, and promoting a feeling of fullness.
- Healthy Fats (7g): Primarily monounsaturated fats from the tahini and extra virgin olive oil. These fats are heart-healthy and help with the absorption of fat-soluble vitamins.
- Protein (4g): A good source of plant-based protein, making this a satisfying and nourishing snack that helps build and repair tissues in the body.
- Manganese (0.3mg): Beets are a fantastic source of manganese, an essential mineral that plays a role in bone formation, metabolism, and protecting cells from oxidative damage.
- Folate (50mcg): Both chickpeas and beets provide a healthy dose of folate (Vitamin B9), which is vital for cell growth and function.
Preparation Time
The majority of the time required for this recipe is hands-off while the beets roast in the oven.
- Active Preparation Time: Approximately 20 minutes. This includes washing and prepping the beets, measuring ingredients, and the blending process.
- Roasting & Cooling Time: Approximately 60-90 minutes. This is the passive time where the oven does all the work.
- Total Time: Approximately 1 hour and 40 minutes. This can be shortened significantly by using pre-cooked beets, though the flavor may be slightly different.
How to Serve
The dramatic color of this Bloody Beet Hummus makes it a visual feast. How you serve it can elevate it from a simple dip to a stunning appetizer or a versatile component in a larger meal.
As a Spooky Centerpiece Dip
This is the perfect way to present the hummus for a Halloween party or themed gathering.
- Create a “Graveyard” Platter: Spread the hummus in a shallow dish or platter. Use dark-colored crackers (like pumpernickel or black sesame) as “tombstones” stuck into the hummus.
- Pair with Spooky Dippers:
- Witch Fingers: Use pretzel sticks or carrot sticks with a blanched almond “fingernail” attached at the end with a dab of hummus.
- Bone Sticks: Jicama or pale bell peppers cut into bone shapes.
- Ghost Chips: Use a ghost-shaped cookie cutter on flour tortillas, brush with oil, sprinkle with salt, and bake until crisp.
- Dramatic Contrast: Serve with black tortilla chips, dark rye bread, or charcoal crackers for a striking color contrast.
For an Elegant Appetizer Board
Beyond the spooky theme, this hummus adds a touch of sophistication and a pop of color to any charcuterie or mezze platter.
- Classic Pairings:
- Warm, soft pita bread, cut into wedges.
- Crispy pita chips.
- A variety of crackers: seeded, whole wheat, or gluten-free.
- Fresh vegetable crudités: cucumber slices, bell pepper strips, celery sticks, and cherry tomatoes.
- Gourmet Additions:
- Serve alongside a bowl of mixed olives, crumbled feta or goat cheese, and marinated artichoke hearts.
- The vibrant pink looks beautiful next to green items like snap peas or blanched asparagus spears.
As a Versatile Spread or Condiment
Don’t limit this hummus to just dipping!
- Sandwich and Wrap Enhancer: Use it as a flavorful and colorful spread on sandwiches or wraps instead of mayonnaise. It’s particularly delicious with roasted turkey, grilled chicken, or a veggie-packed wrap.
- Grain Bowl Base: Swirl a generous amount at the bottom of a bowl before topping with quinoa, roasted vegetables, and a protein source for a beautiful and nutritious meal.
- Avocado Toast Upgrade: Spread a layer on your toast before adding sliced avocado for a colorful, nutrient-dense breakfast.
- Savory Dollop: Add a dollop on top of grilled fish, roasted beef, or baked sweet potatoes for a burst of color and flavor.
Additional Tips
Here are eight expert tips to help you perfect your Bloody Beet Hummus, customize it to your liking, and get the most out of every batch.
- For the Silkiest Texture, Peel the Chickpeas: While optional, this step makes a noticeable difference. After rinsing the canned chickpeas, you can easily pop them out of their thin skins by gently pinching them. It takes about 10 minutes but results in an unbelievably smooth and creamy hummus, rivaling any store-bought version.
- Adjust Flavors After Blending: The flavors will meld and change slightly as they sit. After you’ve blended the hummus to your desired consistency, let it rest for 5-10 minutes before doing your final taste test. You may find you want to add an extra squeeze of lemon for brightness or a pinch more salt to make the flavors pop.
- Make-Ahead for Better Flavor: This is a fantastic make-ahead recipe. The flavors actually deepen and become more cohesive after a day in the refrigerator. Prepare it a day before your party or event for less stress and a more delicious dip.
- Proper Storage is Key: Store your beet hummus in an airtight container in the refrigerator. To prevent a “skin” from forming on top, you can either press a piece of plastic wrap directly onto the surface of the hummus or pour a thin layer of extra virgin olive oil over the top. It will keep well for up to 5-7 days.
- Using Pre-Cooked Beets (The Shortcut): If you’re short on time, you can use pre-cooked, vacuum-sealed beets (often found in the produce section). This will save you over an hour. However, be aware that roasted beets provide a deeper, sweeter, and more complex flavor. If using pre-cooked, ensure they are plain and not pickled or marinated.
- Don’t Fear the Beet Stains: Beets are notorious for staining everything they touch—hands, cutting boards, and clothes. To prevent this, wear disposable gloves when peeling and chopping the roasted beets. Use a plastic or glass cutting board, as wood is more porous and likely to stain. If you do get beet juice on your hands, a little lemon juice mixed with salt can help scrub it off.
- Experiment with Flavor Variations: This recipe is a wonderful canvas for other flavors. Try adding ½ teaspoon of smoked paprika for a smoky depth, a tablespoon of za’atar for a Middle Eastern flair, or even a pinch of cayenne pepper or a chopped jalapeño for a spicy kick.
- Freezing for Future Cravings: Hummus freezes surprisingly well! If you make a large batch, portion it into freezer-safe containers, leaving a little space at the top for expansion. Drizzle a layer of olive oil on top to prevent freezer burn. It can be frozen for up to 3 months. To serve, thaw it overnight in the refrigerator and give it a vigorous stir to restore its creamy texture.
FAQ: Your Bloody Beet Hummus Questions Answered
Here are answers to some of the most common questions about making this vibrant and delicious recipe.
1. Why is it called “Bloody” Beet Hummus?
The name is primarily a fun, thematic title perfect for Halloween. The deep, rich crimson color, which comes naturally from the beets, resembles the color of blood, making it a perfectly spooky and eye-catching dish for a themed party. There is nothing “bloody” in the ingredients; it’s a completely vegetarian and vegan dish.
2. Can I use canned beets instead of roasting fresh ones?
Yes, you can use canned beets as a shortcut. However, the final flavor and texture will be different. Roasted beets develop a deep, earthy sweetness that you won’t get from canned beets, which tend to have a softer texture and a slightly more “canned” or watery flavor. If using canned, be sure to drain them very well and pat them dry to avoid a watery hummus.
3. My hummus tastes a little bitter. What went wrong?
Bitterness in hummus almost always comes from the tahini. It can be caused by two things: using a low-quality brand of tahini, or using tahini that is old and has gone rancid. Always use a fresh, high-quality tahini for the best results. The “whipping” step with the lemon juice also helps to mellow out any potential bitterness.
4. How long will this beet hummus last in the refrigerator?
When stored properly in an airtight container, your homemade Bloody Beet Hummus will stay fresh and delicious for 5 to 7 days in the refrigerator. The flavors will actually meld and become even better on the second day.
5. Is beet hummus a healthy snack?
Absolutely! It’s packed with nutrients. You get fiber and plant-based protein from the chickpeas, vitamins and minerals (like folate and manganese) from the beets, and healthy monounsaturated fats from the tahini and olive oil. It’s a fantastic, whole-food alternative to many processed dips and spreads.
6. Can I make this recipe without tahini?
While tahini is traditional and provides the signature nutty flavor and creamy texture of hummus, you can make a version without it if you have an allergy or don’t have it on hand. You can substitute a creamy, unsalted nut butter like cashew butter, or for a nut-free option, try sunflower seed butter. Alternatively, you can simply omit it and add a bit more extra virgin olive oil to help with the creaminess, though the result will be more of a “beet and chickpea dip” than a true hummus.
7. How can I ensure my hummus has a super vibrant red color?
The key to a brilliantly colored hummus is the beets themselves. Use fresh, dark red beets. The color is most potent right after they are roasted. Over-roasting to the point where they start to caramelize and brown too much can slightly dull the color. Blending the hummus thoroughly also helps to fully incorporate the beet’s pigment into the entire dip.
8. My hummus is too thick (or too thin). How can I fix it?
This is an easy fix! The consistency is controlled by the amount of liquid. If your hummus is too thick, simply add more ice-cold water, one tablespoon at a time, with the food processor running until it reaches your desired creaminess. If your hummus is too thin, you can thicken it by adding a handful of extra chickpeas or another tablespoon of tahini and blending again.
Bloody Beet Hummus Recipe
Ingredients
Here is everything you will need to create this stunning and flavorful dip. Using fresh, high-quality ingredients is the key to achieving both the vibrant color and the deep, complex taste that makes this hummus so unforgettable.
- 1 lb (about 450g) Raw Beets (approx. 2 medium beets): The star of the show. Roasting raw beets, rather than boiling or using canned, coaxes out their natural sweetness and deepens their earthy flavor, forming the delicious foundation of the hummus.
- 1 (15-ounce) can Chickpeas (Garbanzo Beans): The classic hummus base, providing a creamy texture and a dose of plant-based protein and fiber. Be sure to rinse and drain them well.
- ½ cup High-Quality Tahini: This sesame seed paste is non-negotiable for authentic hummus. A good quality brand will be smooth, nutty, and slightly bitter, not overly astringent. It’s the secret to a rich, velvety texture.
- ¼ cup Freshly Squeezed Lemon Juice: Essential for brightness and tang. Fresh juice provides a clean, zesty flavor that bottled juice simply cannot match, cutting through the richness of the tahini and the earthiness of the beets.
- 2–3 Cloves Garlic, roughly chopped: Adds a pungent, savory kick. Start with two cloves and add a third if you prefer a more pronounced garlic flavor.
- 2 tablespoons Extra Virgin Olive Oil: A good quality olive oil adds richness, flavor, and helps create a smoother consistency. An extra drizzle on top before serving is highly recommended.
- 1 teaspoon Ground Cumin: This warm, earthy spice is a classic hummus ingredient that pairs beautifully with both the chickpeas and the beets, adding a layer of savory depth.
- 1 teaspoon Kosher Salt (or to taste): Crucial for enhancing all the other flavors in the dish. Start with one teaspoon and adjust as needed after blending.
- 3–6 tablespoons Ice Cold Water: The secret weapon for fluffy, creamy hummus. Adding ice-cold water while the processor is running helps emulsify the mixture into a lighter, smoother dip.
Instructions
Follow these step-by-step instructions carefully to achieve the perfect consistency and flavor balance. While it takes a little time to roast the beets, the active preparation is quick and the results are well worth the wait.
Step 1: Roast the Beets
Roasting is the most important step for developing a deep, sweet flavor that canned or boiled beets lack.
- Preheat and Prep: Preheat your oven to 400°F (200°C). Wash and scrub the beets thoroughly under running water to remove any dirt. There’s no need to peel them at this stage. Trim off the leafy tops and the long root tail.
- Wrap in Foil: Place each beet on a separate piece of aluminum foil. Drizzle each one with a small amount of olive oil and rub it over the entire surface. Wrap the beets tightly in the foil, creating a sealed packet. This will trap the steam and help them cook evenly.
- Roast to Perfection: Place the foil-wrapped beets directly on the middle oven rack or on a small baking sheet. Roast for 50-70 minutes. The exact time will depend on the size of your beets. They are done when a sharp knife or skewer can be easily inserted into the center with little resistance.
- Cool and Peel: Once cooked, carefully remove the beets from the oven and open the foil packets to let the steam escape. Let them cool for about 15-20 minutes, or until they are comfortable to handle. The skins should slide off easily with your fingers or by gently rubbing them with a paper towel. For a mess-free experience, wear disposable gloves!
- Chop: Roughly chop the peeled, roasted beets into 1-inch chunks and set them aside. This makes them easier for your food processor to handle.
Step 2: Prepare the Hummus Base
Creating a smooth base before adding the main ingredients is a key technique for achieving a professional, silky texture.
- Process Tahini and Lemon Juice: In the bowl of a food processor, combine the ½ cup of tahini and ¼ cup of fresh lemon juice. Process for about 60 seconds. The mixture will seize up and look thick and pasty. Scrape down the sides and bottom of the bowl.
- Whip the Base: With the processor running, slowly stream in 2 tablespoons of the ice-cold water. Continue to process for another 60-90 seconds. You will see the mixture transform; it will become pale, fluffy, and much smoother. This step, often called “whipping the tahini,” is crucial for a light and airy final product.
Step 3: Combine and Blend
Now it’s time to bring everything together to create the vibrant, delicious hummus.
- Add Ingredients: Add the rinsed and drained chickpeas, the chopped roasted beets, the chopped garlic, extra virgin olive oil, ground cumin, and 1 teaspoon of kosher salt to the food processor with the whipped tahini mixture.
- Initial Blend: Secure the lid and process continuously for 2-3 minutes. Stop and scrape down the sides and bottom of the bowl with a spatula to ensure everything is being incorporated evenly.
- Achieve Smoothness: Place the lid back on and continue to process. With the machine running, slowly drizzle in the remaining ice-cold water, 1 tablespoon at a time, until you reach your desired consistency. For an ultra-creamy, smooth hummus, let the processor run for a full 4-5 minutes. Be patient! The longer it blends, the smoother it will become.
- Taste and Adjust: Once the hummus is perfectly smooth, taste it. This is your chance to customize. Does it need more salt? A little more lemon juice for tang? Another small pinch of cumin for earthiness? Add any adjustments and pulse a few more times to combine.
Step 4: Serve and Garnish
Transfer the finished Bloody Beet Hummus to a serving bowl. Use the back of a spoon to create an attractive swirl on top. Garnish as desired before serving (see “How to Serve” section for ideas).
Nutrition
- Serving Size: one normal portion
- Calories: 110
- Fat: 7g
- Fiber: 4g
- Protein: 4g