Ingredients
Scale
Here are the components you’ll need to create these delightful individual Tiramisu desserts. Using high-quality ingredients is key to achieving the authentic, rich flavour profile.
- 6 Large Egg Yolks: These form the rich, custardy base of the mascarpone cream. Ensure they are fresh, preferably from pasture-raised hens for a deeper yellow colour and richer flavour. They need to be separated carefully from the whites (you can save the whites for another recipe like meringues or an omelette).
- ¾ cup (150g) Granulated Sugar, divided: Provides sweetness to balance the bitterness of the coffee and the richness of the mascarpone. We’ll use part of it with the egg yolks and potentially part if whipping egg whites (though this recipe focuses on a yolk-only base for simplicity and safety unless specified otherwise). Fine granulated sugar dissolves more easily.
- 16 oz (about 2 cups or 450g) Mascarpone Cheese, room temperature: This Italian cream cheese is the heart of Tiramisu. It’s crucial that it’s at room temperature to ensure a smooth, lump-free cream when mixed with the egg yolk base. Avoid low-fat versions; the richness is essential. Look for authentic Italian brands if possible.
- 1 ½ cups (360ml) Strong Brewed Espresso or Very Strong Coffee, cooled: The signature flavour soak for the ladyfingers. It must be strong to impart enough coffee flavour and completely cooled to prevent melting the mascarpone cream or cooking the eggs indirectly. Espresso is traditional, but high-quality, strongly brewed drip coffee works well too.
- 2 tablespoons (30ml) Marsala Wine, Dark Rum, or Coffee Liqueur (Optional): Adds depth and complexity to the coffee soak. Marsala wine is traditional, but dark rum, brandy, or a coffee liqueur like Kahlúa are excellent substitutes. Omit entirely for an alcohol-free version, perhaps adding a teaspoon of vanilla extract to the coffee instead.
- Approximately 24–30 Savoiardi (Ladyfingers): These dry, finger-shaped sponge biscuits are specifically designed for Tiramisu. They absorb the coffee mixture perfectly without becoming overly mushy (if dipped quickly). The exact number will depend on the size of your cups and how you break/arrange them. Look for authentic Italian brands.
- Unsweetened Cocoa Powder, for dusting: Provides the finishing touch, adding a slight bitterness that contrasts beautifully with the sweet cream. Use good quality Dutch-processed cocoa powder for a deep colour and smooth flavour.
Instructions
Follow these steps carefully to assemble your perfect Classic Tiramisu Cups. Patience during chilling is key!
- Prepare the Coffee Soak: Brew your espresso or strong coffee. Once brewed, pour it into a shallow dish or bowl that’s wide enough to dip the ladyfingers easily. Allow it to cool completely to room temperature. This is crucial; hot coffee will make the ladyfingers disintegrate and could affect the texture of the cream. Once cooled, stir in the Marsala wine, rum, or liqueur, if using. Set aside.
- Make the Mascarpone Cream Base (Zabaglione-style): Find a heatproof bowl (preferably stainless steel or glass) that can sit comfortably over a saucepan partially filled with water, without the bottom of the bowl touching the water (this creates a double boiler or bain-marie). Add about an inch of water to the saucepan and bring it to a gentle simmer over medium-low heat.
- Whisk Yolks and Sugar: In the heatproof bowl (off the heat for now), add the egg yolks and ¾ cup of granulated sugar. Whisk them together vigorously with a hand whisk until the mixture becomes pale yellow, thick, and ribbony. This might take 3-5 minutes of consistent whisking. You should be able to lift the whisk and see a ribbon-like trail momentarily sit on the surface before dissolving.
- Cook the Egg Yolk Mixture: Place the bowl containing the yolk-sugar mixture over the saucepan with simmering water. Ensure the water is simmering gently, not boiling rapidly, and the bottom of the bowl isn’t touching the water. Continuously whisk the mixture while it heats gently. Keep whisking for about 8-10 minutes. The mixture will become lighter, increase slightly in volume, and heat up. The goal is to cook the yolks gently, making them safe to eat and creating a stable base. Use an instant-read thermometer if you have one – the mixture should reach 160-170°F (71-77°C) to be considered fully cooked and safe. It will be noticeably thicker and warmer.
- Cool the Yolk Mixture: Once cooked, immediately remove the bowl from the heat. To stop the cooking process and cool it down faster, you can place the bowl into a larger bowl filled with ice water (an ice bath), being careful not to get water into the yolk mixture. Continue to whisk occasionally as it cools down to room temperature. If you don’t use an ice bath, just set it aside and whisk periodically until cool. It needs to be cool before adding the mascarpone.
- Incorporate the Mascarpone: Ensure your mascarpone cheese is truly at room temperature (take it out of the fridge about 30-60 minutes before starting). Add the room temperature mascarpone cheese to the cooled egg yolk mixture. Using a rubber spatula or a whisk on a very low speed (if using an electric mixer, though manual is often better to avoid overmixing), gently fold or stir the mascarpone into the yolk mixture. Mix just until it’s smooth and fully combined. Be careful not to overmix, as mascarpone can curdle or become grainy if agitated too much. The final cream should be thick, smooth, and luscious.
- Prepare Your Cups/Glasses: Select your serving vessels. Small glasses, ramekins, small bowls, or even elegant tea cups work beautifully. Aim for vessels that hold approximately 6-8 ounces (180-240ml). Have them clean, dry, and ready nearby. You’ll likely need 6-8 cups depending on their size.
- Assemble the Layers – First Layer: Now begins the layering process. Take one ladyfinger at a time. Quickly – very quickly! – dip it into the cooled coffee mixture. Do not soak it; a brief dip (1-2 seconds per side maximum) is all that’s needed. They absorb liquid fast, and soggy ladyfingers are the enemy of good Tiramisu. Immediately place the dipped ladyfinger(s) into the bottom of a serving cup. You may need to break the ladyfingers in half or thirds to fit snugly into the base of the cup, covering as much surface area as possible.
- Assemble the Layers – Second Layer: Spoon a layer of the mascarpone cream mixture over the coffee-dipped ladyfingers in the cup. Spread it gently with the back of the spoon to create an even layer. The thickness is up to you, but aim for roughly ½ to ¾ inch (1-2 cm).
- Assemble the Layers – Repeat: Dip more ladyfingers quickly into the coffee mixture and arrange them over the first cream layer. Again, break them as needed to fit the shape of the cup. Follow with another layer of the mascarpone cream, spreading it evenly.
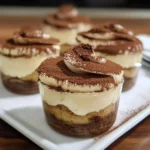
- Final Layer & Finishing: Depending on the depth of your cups, you might have two layers of ladyfingers and two layers of cream, or potentially three. Aim to finish with a layer of mascarpone cream on top. Smooth the top layer as neatly as possible.
- Repeat for All Cups: Continue this layering process – dipped ladyfingers, cream, dipped ladyfingers, cream – until all your serving cups are filled or you run out of ingredients. Ensure the top layer on all cups is the mascarpone cream.
- Chill Thoroughly: Cover each cup loosely with plastic wrap (try not to let the wrap touch the cream surface if possible, or cover the tray/group of cups). Place the Tiramisu cups in the refrigerator to chill for at least 6 hours. However, chilling overnight (8-12 hours) is highly recommended. This crucial chilling time allows the flavours to meld beautifully, the cream to set firmly, and the ladyfingers to soften to the perfect cake-like consistency without being mushy. Do not skip or shorten this step!
- Dust with Cocoa: Just before serving, remove the Tiramisu cups from the refrigerator and uncover them. Place a generous amount of unsweetened cocoa powder into a fine-mesh sieve. Hold the sieve over one cup at a time and gently tap the side to dust the top surface evenly with cocoa powder. Cover the entire surface for the classic look.
- Serve: Serve the Tiramisu cups immediately after dusting with cocoa for the best presentation and texture contrast.
Nutrition
- Serving Size: one normal portion
- Calories: 550
- Sugar: 35g
- Fat: 40g
- Protein: 10g