")


There are certain recipes that feel less like a set of instructions and more like a cherished memory, and for my family, this Classic Whoopie Pie Bites recipe is exactly that. I still remember the first time I decided to tackle these iconic treats, not as the large, hand-sized pies of my childhood, but as delightful, two-bite morsels perfect for sharing. The kitchen filled with the deep, intoxicating aroma of rich chocolate cake as the little domes puffed up perfectly in the oven. My kids, drawn in by the smell, watched with wide eyes as I whipped up the sweet, creamy marshmallow filling. The real magic, however, happened during assembly. Seeing those dark, tender cakes sandwiching the bright white, fluffy filling was pure joy. When I finally presented the finished platter, a hush fell over the living room, quickly replaced by contented murmurs and exclamations of “These are the best things ever!” These little bites have since become a staple for every family gathering, holiday party, and potluck. They disappear in a flash, leaving behind only happy smiles and a few tell-tale crumbs. This recipe isn’t just about baking; it’s about creating small, shareable moments of happiness, one delicious whoopie pie bite at a time.
A Bite-Sized History of the Beloved Whoopie Pie
Before we dive into the mixing bowls and preheat our ovens, it’s worth taking a moment to appreciate the rich history of this classic American dessert. The true origin of the whoopie pie is a hotly debated topic, primarily between two states: Maine and Pennsylvania.
In New England, particularly Maine, the whoopie pie is the official state treat. The story goes that a bakery named Labadie’s in Lewiston, Maine, has been making them since 1925. They are a cornerstone of local culture, found in bakeries, general stores, and family kitchens across the state. The New England version typically features a rich, dark chocolate cake with a purely shortening-based or marshmallow fluff filling.
Meanwhile, in Pennsylvania, the whoopie pie is a treasured tradition within the Amish and Pennsylvania Dutch communities. The legend here suggests that Amish women would bake these treats using leftover cake batter and frosting. They would pack them in their husbands’ and children’s lunch pails, and upon discovering the delightful surprise, they would shout, “Whoopie!” in excitement. This charming tale gives the dessert its whimsical name. The Pennsylvania version often has a slightly different texture and frequently incorporates marshmallow cream into its fluffy filling.
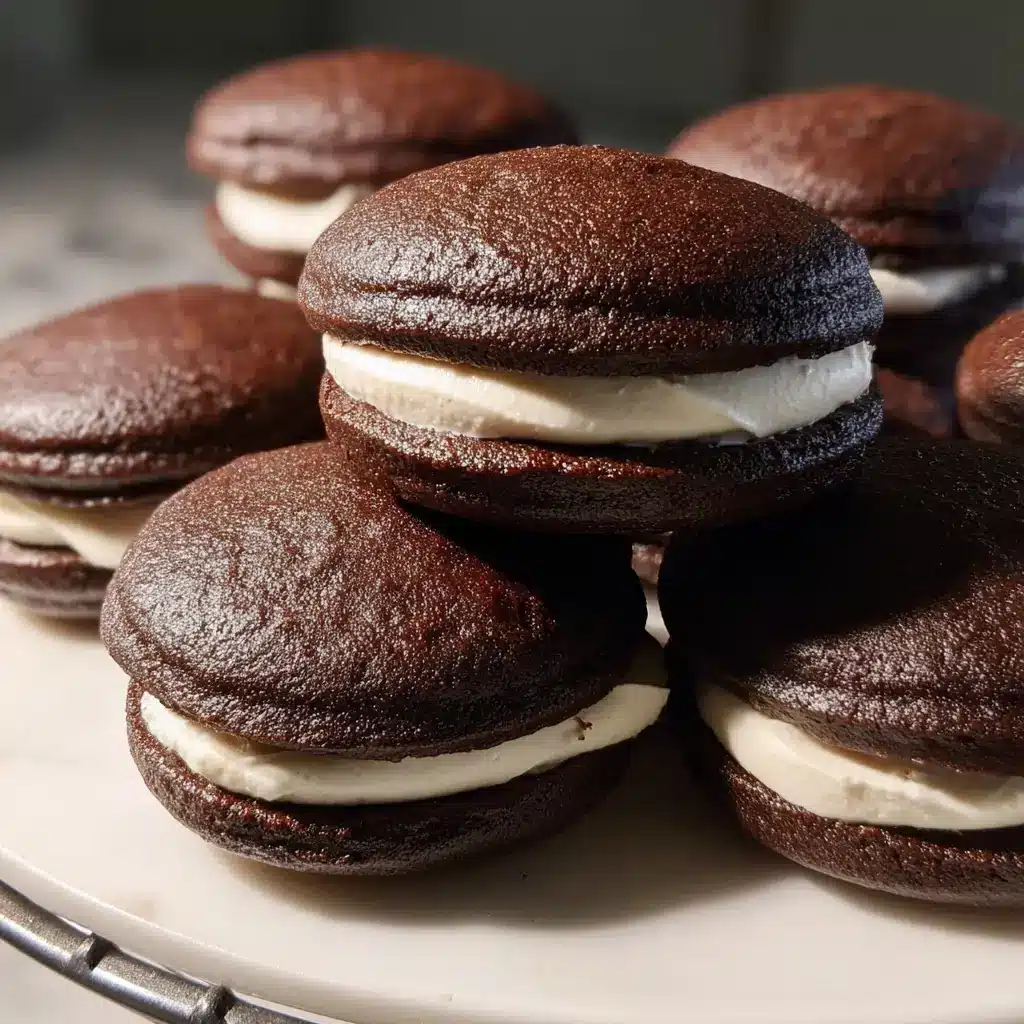
Regardless of its exact birthplace, the whoopie pie occupies a unique space in the dessert world. It’s not quite a cookie, and it’s not quite a cake; it’s the perfect hybrid of both. It consists of two soft, pillowy, dome-shaped chocolate cakes sandwiching a sweet, creamy filling. While our recipe focuses on creating “bites,” the fundamental principle remains the same: delivering that perfect ratio of tender cake to luscious filling in every single mouthful. This recipe honors that tradition, creating a classic experience in a modern, shareable format.
Ingredients for Classic Whoopie Pie Bites
Crafting the perfect whoopie pie bite starts with quality ingredients. Each component plays a vital role in achieving the signature soft cake and fluffy, stable filling. Below are the ingredients you’ll need, broken down for clarity.
For the Chocolate Cake Bites:
- 2 cups all-purpose flour: This is the structural foundation of our cake bites. It provides the necessary gluten to give the cakes their shape and soft, tender crumb.
- ½ cup Dutch-processed unsweetened cocoa powder: This is the secret to a deep, rich, and intensely chocolatey flavor. Dutch-processing neutralizes the cocoa’s acidity, resulting in a darker color and smoother, less bitter taste than natural cocoa.
- 1 ½ teaspoons baking soda: This is our primary leavening agent. It reacts with the acidic buttermilk to create carbon dioxide bubbles, which cause the cakes to rise and become light and airy.
- ½ teaspoon salt: Salt is a flavor enhancer. It doesn’t make the cakes salty, but rather, it balances the sweetness and intensifies the chocolate notes.
- ½ cup unsalted butter, softened: Softened butter is crucial for the creaming process. It incorporates air into the batter, which contributes to a light, fluffy texture. Using unsalted butter allows you to control the total salt content of the recipe.
- 1 cup packed light brown sugar: Brown sugar adds moisture and a subtle caramel-like depth of flavor that complements the chocolate perfectly. Packing it ensures you have the correct amount for optimal sweetness and texture.
- 1 large egg, at room temperature: The egg acts as a binder, holding the ingredients together. It also adds richness and moisture. A room temperature egg will incorporate more smoothly into the batter.
- 1 teaspoon vanilla extract: A high-quality vanilla extract enhances all the other flavors in the cake, especially the chocolate and brown sugar.
- 1 cup buttermilk, at room temperature: Buttermilk provides the necessary acidity to activate the baking soda. Its tangy flavor also adds a wonderful complexity, and the fat content contributes to a moist, tender crumb.
For the Classic Cream Filling:
- ½ cup unsalted butter, softened: Just as in the cakes, softened butter is the base of our filling, providing a rich, creamy texture and flavor.
- 1 ½ cups confectioners’ sugar (powdered sugar): This sugar dissolves instantly, creating a smooth, non-gritty filling. It also contains cornstarch, which helps to stabilize the frosting.
- 7-ounce jar marshmallow fluff (or crème): This is the key to the classic whoopie pie filling. It provides the signature sweet, sticky, and incredibly fluffy texture that is both light and stable.
- 1 teaspoon vanilla extract: Adds a clean, sweet flavor to the filling that complements the buttery, marshmallowy base.
- Pinch of salt: A tiny pinch of salt is essential to cut through the sweetness of the sugar and marshmallow, creating a more balanced and delicious filling.
Step-by-Step Instructions for Perfect Whoopie Pie Bites
Follow these detailed instructions carefully to ensure your whoopie pie bites are flawless. We’ll break the process down into three manageable stages: making the cakes, whipping up the filling, and assembling the final treats.
Part 1: Making the Chocolate Cakes
- Preheat and Prepare: Begin by preheating your oven to 375°F (190°C). Line two large baking sheets with parchment paper or silicone baking mats. This is a critical step that prevents the cakes from sticking and ensures easy cleanup.
- Combine Dry Ingredients: In a medium-sized bowl, whisk together the all-purpose flour, Dutch-processed cocoa powder, baking soda, and salt. Whisking is important as it aerates the ingredients and ensures they are evenly distributed, which is key for a uniform rise and flavor. Set this bowl aside.
- Cream Butter and Sugar: In the bowl of a stand mixer fitted with the paddle attachment, or in a large bowl with a hand mixer, beat the softened unsalted butter and packed light brown sugar together on medium-high speed. Continue creaming for about 3-4 minutes, until the mixture is light, pale, and fluffy. This process incorporates air into the batter, which is essential for a tender cake.
- Add Egg and Vanilla: Scrape down the sides of the bowl with a rubber spatula. Add the room temperature egg and vanilla extract to the creamed butter and sugar. Beat on medium speed until everything is well combined and the mixture is smooth, about another minute.
- Alternate Wet and Dry Ingredients: Reduce the mixer speed to low. Add about one-third of the dry ingredient mixture to the wet ingredients and mix until just barely combined. Then, pour in about half of the buttermilk and mix until incorporated. Repeat this process, alternating between the dry mixture and the buttermilk, ending with the final third of the dry ingredients. Be careful not to overmix the batter. Mix only until the last streaks of flour disappear. Overmixing can develop the gluten in the flour, leading to tough, dense cakes instead of soft, pillowy ones.
- Scoop the Batter: Using a small cookie scoop (about 1 tablespoon in size), drop rounded mounds of batter onto the prepared baking sheets. Be sure to space them about 2 inches apart, as they will spread while baking. A cookie scoop is highly recommended for creating uniform, consistently sized cakes.
- Bake to Perfection: Place the baking sheets in the preheated oven and bake for 9-11 minutes. The cakes are done when the tops are puffed and spring back when you gently touch them. Be careful not to overbake, as this can dry them out.
- Cool Completely: Remove the baking sheets from the oven and let the chocolate cakes cool on the sheets for about 5 minutes. This allows them to set slightly. Then, carefully transfer the cakes to a wire rack to cool completely. It is absolutely essential that the cakes are at room temperature before you add the filling; otherwise, the filling will melt and slide right out.
Part 2: Whipping Up the Fluffy Filling
- Beat the Butter: While the cakes are cooling, prepare the filling. In a clean bowl of a stand mixer with the whisk attachment (or a large bowl with a hand mixer), beat the softened unsalted butter on medium-high speed for about 2 minutes until it’s very smooth and creamy.
- Incorporate Sugar: Reduce the mixer speed to low and gradually add the confectioners’ sugar. Mix until it’s just combined, then increase the speed back to medium-high and beat for another 2-3 minutes until the mixture is light and fluffy.
- Add the Magic Ingredients: Add the entire jar of marshmallow fluff, the vanilla extract, and the pinch of salt to the bowl. Beat on medium-high speed for another 3-4 minutes. The mixture will transform, becoming exceptionally light, glossy, and voluminous. This extended whipping time is key to the filling’s signature airy texture.
Part 3: Assembling Your Whoopie Pie Bites
- Pair the Cakes: Once the chocolate cakes have cooled completely, turn half of them over so their flat bottoms are facing up. These will be the bases for your whoopie pie bites.
- Fill the Bites: You can either use a spoon to drop a dollop of filling (about 1 to 1 ½ teaspoons) onto the center of each overturned cake, or for a neater look, transfer the filling to a piping bag fitted with a large round tip and pipe a swirl onto the cakes.
- Create the Sandwich: Gently place a second cake, top-side up, on top of the filling and press down slightly until the filling spreads to the edges.
- Serve or Chill: The whoopie pie bites can be served immediately for the softest texture. Alternatively, for a firmer filling, you can chill them in the refrigerator for about 30 minutes before serving.
Nutrition Facts
This recipe yields approximately 30-36 whoopie pie bites. The nutritional information is an estimate per bite.
- Servings: 30-36 bites
- Calories per serving: Approximately 150-175 kcal
- Carbohydrates: The primary source of energy, coming from the flour and sugars in both the cake and the filling.
- Fat: Primarily from the butter in the cakes and filling, contributing to the rich flavor and tender texture.
- Protein: A small amount of protein is present from the flour, egg, and buttermilk.
- Sugar: Provides the sweetness that makes these treats so irresistible, coming from the brown sugar, confectioners’ sugar, and marshmallow fluff.
- Sodium: A small amount from the salt and baking soda, which helps to balance the overall flavor profile.
Preparation Time
This recipe is relatively quick to come together, but cooling time is essential.
- Prep Time: 20 minutes (for mixing batter and filling)
- Cook Time: 9-11 minutes per batch
- Cooling Time: 60 minutes (essential for assembly)
- Assembly Time: 15 minutes
- Total Time: Approximately 1 hour and 55 minutes
How to Serve
These versatile little treats can be served in a multitude of delightful ways. Here are a few ideas to inspire you:
- The Classic Platter: Arrange the whoopie pie bites neatly on a large white platter or a rustic wooden board. This simple, elegant presentation allows the beautiful contrast between the dark chocolate cake and the white filling to shine. It’s perfect for parties, potlucks, and family gatherings.
- Dessert Board Centerpiece: Create a stunning dessert charcuterie board. Surround a central pile of whoopie pie bites with other small treats like fresh berries (raspberries and strawberries are excellent), mini chocolate bars, a bowl of caramel or chocolate dipping sauce, and a variety of nuts.
- With a Glass of Milk: Serve them the old-fashioned way, paired with a tall, cold glass of milk. The simple creaminess of the milk is the perfect counterpoint to the rich chocolate and sweet filling.
- Coffee & Cake Break: Whoopie pie bites make a wonderful afternoon treat alongside a hot cup of coffee or a latte. The bitterness of the coffee beautifully balances the sweetness of the dessert.
- Ice Cream Sandwiches: For an extra-decadent dessert, gently press a small scoop of vanilla bean ice cream between two chocolate cakes instead of the traditional filling. Serve immediately for an unforgettable treat.
- Party Favors: Individually wrap the whoopie pie bites in small cellophane bags tied with a ribbon. They make adorable and delicious take-home favors for birthdays, baby showers, or holiday parties.
Additional Tips for Whoopie Pie Perfection
Achieve bakery-quality results every time with these eight essential tips.
- Room Temperature is Key: For the best results, ensure your butter, egg, and buttermilk are all at room temperature. Room temperature ingredients emulsify and blend together much more smoothly, creating a uniform batter and a lighter, more tender final product.
- Use a Cookie Scoop for Uniformity: A small (1-tablespoon) cookie scoop is your best friend for this recipe. It ensures that all your cake mounds are the same size, which means they will bake evenly and be easy to pair up for sandwiching.
- Don’t Overbake the Cakes: The line between a perfectly soft whoopie pie cake and a dry, crumbly one is thin. Keep a close eye on them. They are ready when the centers are set and spring back lightly when touched. It’s better to slightly underbake them than to overbake.
- Parchment Paper is a Must: While you can grease and flour your baking sheets, parchment paper provides a non-stick surface that guarantees your delicate cakes will release easily without breaking. It also makes cleanup a breeze.
- Cool, Cool, Cool: We can’t stress this enough: the chocolate cakes must be completely cool before you attempt to fill them. Any residual warmth will cause the buttery, marshmallowy filling to melt into a sticky mess. Be patient; it’s worth the wait.
- Pipe for a Professional Finish: For a clean, uniform look, transfer your filling to a piping bag. You don’t need a fancy tip; a large round tip (like a Wilton 1A) or even just snipping the corner off a sturdy zip-top bag works perfectly. It allows for better control and a more professional presentation.
- Sift Your Dry Ingredients: For the smoothest possible cake texture, take an extra minute to sift your flour and cocoa powder. Cocoa powder, in particular, has a tendency to clump. Sifting ensures there are no lumps in your finished batter.
- Customize Your Filling: While the classic marshmallow fluff filling is iconic, feel free to experiment! You can add a tablespoon of peanut butter for a chocolate-peanut butter version, or a few tablespoons of seedless raspberry jam for a fruity twist. You could even add a dash of peppermint extract for a holiday-themed treat.
Frequently Asked Questions (FAQ)
Here are answers to some of the most common questions about making classic whoopie pie bites.
1. Why did my whoopie pie cakes come out flat instead of domed?
This is a common issue that can be caused by a few things. The most likely culprits are overmixing the batter, which deflates the air you incorporated, or using expired baking soda that has lost its leavening power. Also, ensure your butter and sugar are properly creamed to incorporate enough air from the start.
2. Can I make these ahead of time?
Yes, absolutely! You can bake the chocolate cakes up to two days in advance. Store them in an airtight container at room temperature. The filling can also be made a day ahead and kept in an airtight container in the refrigerator. Assemble the whoopie pies a few hours before serving for the best texture.
3. How should I store leftover whoopie pie bites?
Store assembled whoopie pie bites in a single layer in an airtight container in the refrigerator for up to 4-5 days. The refrigeration helps the filling stay firm and keeps the cakes moist. Let them sit at room temperature for about 15-20 minutes before serving to soften slightly.
4. Are whoopie pies considered cakes or cookies?
This is the great debate! Texturally, they are much more like small, soft cakes. However, they are prepared and assembled much like a sandwich cookie. Most people agree they are a unique hybrid, but if you have to choose, their soft, airy crumb puts them firmly in the “cake” category.
5. Can I freeze whoopie pies?
Yes, they freeze beautifully! For best results, flash-freeze the assembled pies on a baking sheet for about an hour until firm. Then, wrap each one individually in plastic wrap and place them in a freezer-safe bag or container. They can be frozen for up to 3 months. To thaw, simply unwrap them and let them sit at room temperature for an hour or two.
6. Why is Dutch-processed cocoa powder recommended over natural cocoa?
Dutch-processed cocoa has been treated with an alkali to neutralize its natural acidity. This results in a darker color and a smoother, richer, less bitter chocolate flavor that is perfect for classic whoopie pies. It also reacts differently with leaveners, which is why this recipe pairs it with baking soda and acidic buttermilk for the perfect rise.
7. I don’t have buttermilk. What’s a good substitute?
If you don’t have buttermilk on hand, you can easily make a substitute. For every 1 cup of buttermilk needed, measure out 1 cup of regular milk and stir in 1 tablespoon of either white vinegar or lemon juice. Let the mixture sit for 5-10 minutes. It will curdle slightly and be ready to use as a buttermilk replacement.
8. Can I use a different type of filling?
Of course! While the marshmallow fluff filling is classic, a cream cheese frosting is another very popular option that provides a tangy contrast to the sweet chocolate cakes. A simple buttercream, a rich chocolate ganache, or even a peanut butter frosting would also be delicious. This recipe is a fantastic canvas for your creativity.thumb_upthumb_down

Classic Whoopie Pie Bites Recipe
Ingredients
Crafting the perfect whoopie pie bite starts with quality ingredients. Each component plays a vital role in achieving the signature soft cake and fluffy, stable filling. Below are the ingredients you’ll need, broken down for clarity.
For the Chocolate Cake Bites:
- 2 cups all-purpose flour: This is the structural foundation of our cake bites. It provides the necessary gluten to give the cakes their shape and soft, tender crumb.
- ½ cup Dutch-processed unsweetened cocoa powder: This is the secret to a deep, rich, and intensely chocolatey flavor. Dutch-processing neutralizes the cocoa’s acidity, resulting in a darker color and smoother, less bitter taste than natural cocoa.
- 1 ½ teaspoons baking soda: This is our primary leavening agent. It reacts with the acidic buttermilk to create carbon dioxide bubbles, which cause the cakes to rise and become light and airy.
- ½ teaspoon salt: Salt is a flavor enhancer. It doesn’t make the cakes salty, but rather, it balances the sweetness and intensifies the chocolate notes.
- ½ cup unsalted butter, softened: Softened butter is crucial for the creaming process. It incorporates air into the batter, which contributes to a light, fluffy texture. Using unsalted butter allows you to control the total salt content of the recipe.
- 1 cup packed light brown sugar: Brown sugar adds moisture and a subtle caramel-like depth of flavor that complements the chocolate perfectly. Packing it ensures you have the correct amount for optimal sweetness and texture.
- 1 large egg, at room temperature: The egg acts as a binder, holding the ingredients together. It also adds richness and moisture. A room temperature egg will incorporate more smoothly into the batter.
- 1 teaspoon vanilla extract: A high-quality vanilla extract enhances all the other flavors in the cake, especially the chocolate and brown sugar.
- 1 cup buttermilk, at room temperature: Buttermilk provides the necessary acidity to activate the baking soda. Its tangy flavor also adds a wonderful complexity, and the fat content contributes to a moist, tender crumb.
For the Classic Cream Filling:
- ½ cup unsalted butter, softened: Just as in the cakes, softened butter is the base of our filling, providing a rich, creamy texture and flavor.
- 1 ½ cups confectioners’ sugar (powdered sugar): This sugar dissolves instantly, creating a smooth, non-gritty filling. It also contains cornstarch, which helps to stabilize the frosting.
- 7-ounce jar marshmallow fluff (or crème): This is the key to the classic whoopie pie filling. It provides the signature sweet, sticky, and incredibly fluffy texture that is both light and stable.
- 1 teaspoon vanilla extract: Adds a clean, sweet flavor to the filling that complements the buttery, marshmallowy base.
- Pinch of salt: A tiny pinch of salt is essential to cut through the sweetness of the sugar and marshmallow, creating a more balanced and delicious filling.
Instructions
Follow these detailed instructions carefully to ensure your whoopie pie bites are flawless. We’ll break the process down into three manageable stages: making the cakes, whipping up the filling, and assembling the final treats.
Part 1: Making the Chocolate Cakes
- Preheat and Prepare: Begin by preheating your oven to 375°F (190°C). Line two large baking sheets with parchment paper or silicone baking mats. This is a critical step that prevents the cakes from sticking and ensures easy cleanup.
- Combine Dry Ingredients: In a medium-sized bowl, whisk together the all-purpose flour, Dutch-processed cocoa powder, baking soda, and salt. Whisking is important as it aerates the ingredients and ensures they are evenly distributed, which is key for a uniform rise and flavor. Set this bowl aside.
- Cream Butter and Sugar: In the bowl of a stand mixer fitted with the paddle attachment, or in a large bowl with a hand mixer, beat the softened unsalted butter and packed light brown sugar together on medium-high speed. Continue creaming for about 3-4 minutes, until the mixture is light, pale, and fluffy. This process incorporates air into the batter, which is essential for a tender cake.
- Add Egg and Vanilla: Scrape down the sides of the bowl with a rubber spatula. Add the room temperature egg and vanilla extract to the creamed butter and sugar. Beat on medium speed until everything is well combined and the mixture is smooth, about another minute.
- Alternate Wet and Dry Ingredients: Reduce the mixer speed to low. Add about one-third of the dry ingredient mixture to the wet ingredients and mix until just barely combined. Then, pour in about half of the buttermilk and mix until incorporated. Repeat this process, alternating between the dry mixture and the buttermilk, ending with the final third of the dry ingredients. Be careful not to overmix the batter. Mix only until the last streaks of flour disappear. Overmixing can develop the gluten in the flour, leading to tough, dense cakes instead of soft, pillowy ones.
- Scoop the Batter: Using a small cookie scoop (about 1 tablespoon in size), drop rounded mounds of batter onto the prepared baking sheets. Be sure to space them about 2 inches apart, as they will spread while baking. A cookie scoop is highly recommended for creating uniform, consistently sized cakes.
- Bake to Perfection: Place the baking sheets in the preheated oven and bake for 9-11 minutes. The cakes are done when the tops are puffed and spring back when you gently touch them. Be careful not to overbake, as this can dry them out.
- Cool Completely: Remove the baking sheets from the oven and let the chocolate cakes cool on the sheets for about 5 minutes. This allows them to set slightly. Then, carefully transfer the cakes to a wire rack to cool completely. It is absolutely essential that the cakes are at room temperature before you add the filling; otherwise, the filling will melt and slide right out.
Part 2: Whipping Up the Fluffy Filling
- Beat the Butter: While the cakes are cooling, prepare the filling. In a clean bowl of a stand mixer with the whisk attachment (or a large bowl with a hand mixer), beat the softened unsalted butter on medium-high speed for about 2 minutes until it’s very smooth and creamy.
- Incorporate Sugar: Reduce the mixer speed to low and gradually add the confectioners’ sugar. Mix until it’s just combined, then increase the speed back to medium-high and beat for another 2-3 minutes until the mixture is light and fluffy.
- Add the Magic Ingredients: Add the entire jar of marshmallow fluff, the vanilla extract, and the pinch of salt to the bowl. Beat on medium-high speed for another 3-4 minutes. The mixture will transform, becoming exceptionally light, glossy, and voluminous. This extended whipping time is key to the filling’s signature airy texture.
Part 3: Assembling Your Whoopie Pie Bites
- Pair the Cakes: Once the chocolate cakes have cooled completely, turn half of them over so their flat bottoms are facing up. These will be the bases for your whoopie pie bites.
- Fill the Bites: You can either use a spoon to drop a dollop of filling (about 1 to 1 ½ teaspoons) onto the center of each overturned cake, or for a neater look, transfer the filling to a piping bag fitted with a large round tip and pipe a swirl onto the cakes.
- Create the Sandwich: Gently place a second cake, top-side up, on top of the filling and press down slightly until the filling spreads to the edges.
- Serve or Chill: The whoopie pie bites can be served immediately for the softest texture. Alternatively, for a firmer filling, you can chill them in the refrigerator for about 30 minutes before serving.
Nutrition
- Serving Size: one normal portion
- Calories: 175