")


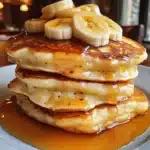
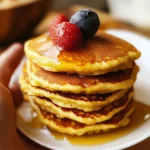
Our household has a weekend breakfast tradition, and pancakes are almost always at the top of the request list. For a long time, I struggled to find a gluten-free pancake recipe that didn’t taste like cardboard or fall apart the moment you tried to flip it. Then, I discovered the magic of coconut flour. Initially, there was some skepticism – “Coconut? In pancakes?” – but after the first batch of these Coconut Flour Pancakes, my family was completely won over. They are surprisingly light, subtly sweet with a hint of coconut, and incredibly satisfying. They’ve become our go-to, not just because they’re gluten-free and lower in carbs, but because they are genuinely delicious. My kids love them with a drizzle of maple syrup and fresh berries, and I appreciate that they keep us feeling full and energized for hours. They’ve truly transformed our weekend breakfast game, making it both healthier and more enjoyable.
Ingredients
Here’s what you’ll need to gather to create these delightful and wholesome Coconut Flour Pancakes. Each ingredient plays a crucial role in achieving the perfect texture and flavor.
- 1/2 cup (60g) Coconut Flour: The star of our recipe! This gluten-free flour is highly absorbent and provides a lovely, slightly sweet, and tender crumb. Ensure it’s sifted to prevent lumps.
- 1 teaspoon Baking Powder: This leavening agent is essential for giving the pancakes their lift, making them light and fluffy rather than dense. Make sure it’s fresh for optimal results.
- 1/4 teaspoon Salt: A small amount of salt enhances all the other flavors in the pancakes, balancing the sweetness and bringing out the richness of the eggs and coconut.
- 1 tablespoon Granulated Sweetener of Choice (e.g., coconut sugar, erythritol, or regular sugar): This adds a touch of sweetness. Adjust the amount based on your preference and the type of sweetener used. For a keto or low-carb version, use a sugar-free alternative.
- 4 Large Eggs: Coconut flour requires a higher ratio of eggs compared to traditional flours. Eggs provide structure, moisture, and richness, binding the ingredients together.
- 1/2 cup (120ml) Unsweetened Almond Milk (or other milk of choice, like coconut milk or dairy milk): This provides the necessary liquid for the batter. The amount might need slight adjustment depending on your coconut flour’s absorbency.
- 2 tablespoons Melted Coconut Oil (or butter/other neutral oil): Adds moisture and fat, contributing to a tender texture and helping to prevent sticking. Plus, coconut oil complements the coconut flour beautifully.
- 1 teaspoon Vanilla Extract: Enhances the sweetness and adds a lovely aromatic depth to the pancakes. Pure vanilla extract is recommended for the best flavor.
- Optional: 1/4 teaspoon Cinnamon or Nutmeg: For an extra layer of warmth and spice, feel free to add a pinch of your favorite baking spice.
Instructions
Follow these simple steps to whip up a batch of perfect Coconut Flour Pancakes every time. Working with coconut flour is a bit different, so paying attention to the details will yield the best results.
- Combine Dry Ingredients: In a medium-sized mixing bowl, whisk together the sifted coconut flour, baking powder, salt, and your chosen sweetener (and optional spices, if using). Whisking thoroughly ensures the baking powder is evenly distributed, which is key for even rising.
- Combine Wet Ingredients: In a separate, larger mixing bowl, crack the eggs and whisk them well until they are light and slightly frothy. Add the almond milk (or your milk of choice), melted coconut oil, and vanilla extract. Whisk again until all wet ingredients are fully combined and smooth.
- Marry Wet and Dry: Gradually pour the dry ingredient mixture into the wet ingredient mixture. Whisk gently but thoroughly until just combined. Be careful not to overmix; a few small lumps are okay. Overmixing can lead to tougher pancakes.
- Rest the Batter: This is a crucial step when working with coconut flour! Let the batter sit for 5-10 minutes. Coconut flour is very absorbent, and this resting period allows it to fully hydrate, thickening the batter to the right consistency. The batter should be thick but still pourable, similar to a traditional pancake batter but perhaps a bit denser. If it’s too thick (like paste), add a tablespoon more milk at a time until it reaches the desired consistency. If it’s too thin, you can add a tiny bit more coconut flour (start with 1 teaspoon), but do so sparingly.
- Preheat the Pan: Place a non-stick skillet, griddle, or well-seasoned cast-iron pan over medium-low to medium heat. Coconut flour pancakes can burn more easily than traditional ones, so a lower heat setting is generally better. Add a small amount of coconut oil, butter, or cooking spray to the pan to prevent sticking, even if using a non-stick pan.
- Cook the Pancakes: Once the pan is heated (a drop of water should sizzle and evaporate quickly), pour or scoop about 1/4 cup of batter per pancake onto the hot surface. Keep the pancakes relatively small (around 3-4 inches in diameter) as they are more delicate than wheat-based pancakes and can be harder to flip if too large. Don’t overcrowd the pan; cook in batches if necessary.
- Flip with Care: Cook for about 2-4 minutes on the first side, or until the edges look set and bubbles start to appear on the surface and pop. The underside should be golden brown. Carefully slide a thin spatula underneath and gently flip the pancake.
- Cook the Other Side: Cook for another 2-3 minutes on the second side, or until golden brown and cooked through. The pancakes should feel slightly firm to the touch.
- Serve and Repeat: Transfer the cooked pancakes to a plate. You can keep them warm in a low oven (around 200°F or 90°C) on an oven-safe plate while you cook the remaining batter, adding more oil or butter to the pan as needed between batches.
- Enjoy: Serve immediately with your favorite toppings and enjoy your delicious, healthy Coconut Flour Pancakes!
Nutrition Facts
These figures are an approximation and can vary based on the specific ingredients used (e.g., type of milk, sweetener) and exact serving size.
- Servings: This recipe typically makes about 8-10 small (3-4 inch) pancakes, serving 2-3 people.
- Calories per serving (assuming 3 pancakes per serving, approx. 3 servings total): Roughly 280-350 calories.
- High in Fiber: Coconut flour is an excellent source of dietary fiber, which aids digestion, helps regulate blood sugar levels, and promotes a feeling of fullness. This makes these pancakes quite satisfying.
- Good Source of Protein: Thanks to the generous amount of eggs, these pancakes provide a decent protein punch, contributing to satiety and muscle maintenance.
- Lower in Carbohydrates: Compared to traditional pancakes made with wheat flour, coconut flour pancakes are significantly lower in net carbohydrates, making them a great option for those following a low-carb or ketogenic lifestyle (especially when using a sugar-free sweetener).
- Rich in Healthy Fats: The use of coconut oil and the natural fats from eggs contribute healthy fats, which are essential for hormone production, nutrient absorption, and sustained energy.
- Gluten-Free: Naturally gluten-free, making them suitable for individuals with celiac disease or gluten sensitivity.
Preparation Time
Creating these delightful Coconut Flour Pancakes is a relatively quick process, perfect for a weekend treat or even a special weekday breakfast.
- Prep Time: 10-15 minutes. This includes gathering your ingredients, measuring them out, mixing the batter, and the crucial 5-10 minute resting period for the batter to allow the coconut flour to hydrate.
- Cook Time: 15-20 minutes. This depends on the size of your pancakes, the heat of your pan, and how many batches you need to cook. Each batch typically takes 4-7 minutes to cook thoroughly.
- Total Time: Approximately 25-35 minutes from start to finish. This makes it a manageable recipe even on slightly busier mornings.
How to Serve
Coconut Flour Pancakes are wonderfully versatile and can be dressed up in countless ways to suit any palate or dietary preference. Here are some delightful serving suggestions:
- Classic Sweet Toppings:
- Maple Syrup: A drizzle of pure maple syrup is a timeless classic. For a lower-carb option, use a sugar-free maple-flavored syrup.
- Fresh Berries: A handful of blueberries, raspberries, strawberries, or a mixed berry medley adds natural sweetness, vibrant color, and a boost of antioxidants.
- Sliced Bananas: Adds natural sweetness and a creamy texture. A sprinkle of cinnamon on top complements bananas beautifully.
- Honey or Agave Nectar: Natural liquid sweeteners that offer a different flavor profile than maple syrup.
- Whipped Cream or Coconut Cream: A dollop of freshly whipped cream or dairy-free coconut whipped cream makes them feel extra decadent.
- Chocolate Chips: Stir a few into the batter or sprinkle on top while cooking or after. Dark chocolate chips are a great choice.
- Fruit Compote: A warm homemade berry or apple compote is a comforting and delicious topping.
- Nut Butters: A smear of almond butter, peanut butter, cashew butter, or sunflower seed butter adds protein, healthy fats, and rich flavor.
- Toasted Nuts or Seeds: Chopped walnuts, pecans, almonds, or a sprinkle of chia seeds, flax seeds, or hemp hearts for added crunch and nutrients.
- Jam or Preserves: Your favorite fruit jam can add a burst of fruity sweetness.
- Powdered Sweetener: A light dusting of powdered sugar or a powdered sugar-free alternative for a simple, elegant finish.
- Healthy & Wholesome Twists:
- Greek Yogurt or Skyr: A dollop of plain or vanilla Greek yogurt or Skyr adds protein and a pleasant tang.
- Cottage Cheese: For an extra protein boost, serve with a side of cottage cheese and fruit.
- Shredded Coconut: Toasted or untoasted shredded coconut enhances the coconut flavor and adds texture.
- Lemon Zest & Juice: A squeeze of fresh lemon juice and a sprinkle of zest can brighten up the flavors, especially when paired with berries.
- Savory (Less Common, but Possible!):
- While these pancakes lean sweet due to the coconut flour, you could experiment with a less sweet version (omit or significantly reduce sweetener) and serve with:
- Fried egg and bacon
- Avocado slices
- A sprinkle of cheese melted on top
- While these pancakes lean sweet due to the coconut flour, you could experiment with a less sweet version (omit or significantly reduce sweetener) and serve with:
- Drink Pairings:
- Freshly brewed coffee or tea
- A glass of cold milk or almond milk
- Freshly squeezed orange juice
- A healthy smoothie on the side
- Presentation Matters:
- Stack them high!
- Arrange fruit artfully.
- Serve on a warm plate.
No matter how you choose to serve them, these Coconut Flour Pancakes are sure to be a hit!
Additional Tips
To ensure your Coconut Flour Pancakes turn out perfectly every time, keep these additional tips in mind. Working with coconut flour has its quirks, but these pointers will help you master the art.
- Do Not Overcrowd the Pan: Cook only 2-3 small pancakes at a time, depending on the size of your skillet. Overcrowding lowers the pan’s temperature, leading to uneven cooking and making flipping more difficult. Giving them space ensures they cook through and brown nicely.
- Low and Slow is Key: Coconut flour pancakes are prone to burning on the outside before the inside is fully cooked if the heat is too high. Maintain a medium-low to medium heat. It’s better to cook them a bit longer at a lower temperature for a perfectly golden and cooked-through result.
- Sift Your Coconut Flour: Coconut flour can be clumpy. Sifting it before mixing with other dry ingredients helps to break up these clumps, ensuring a smoother batter and more evenly textured pancakes. This small step makes a noticeable difference.
- Adjust Batter Consistency Wisely: Coconut flour’s absorbency can vary slightly by brand. After the initial 5-10 minute rest, check the batter. If it’s overly thick (like a paste), add a tablespoon of your chosen milk at a time until it’s a thick but pourable consistency. If you accidentally make it too thin, add a tiny bit more coconut flour (start with 1 teaspoon), let it rest again, and re-evaluate.
- Embrace the Eggs: Don’t be tempted to reduce the number of eggs. Coconut flour is dense and lacks gluten, so eggs are crucial for binding, structure, moisture, and lift. They are what makes these pancakes hold together and have a pleasant texture.
- Consider Your Sweetener: The type of sweetener can slightly affect the texture and browning. Liquid sweeteners (like maple syrup added directly to the batter) can make the batter thinner, so you might need to adjust accordingly. Granulated sweeteners are generally easier to work with in this recipe.
- Flip Gently and with Confidence: These pancakes can be a bit more delicate than their wheat-based counterparts, especially if made larger. Use a thin, wide spatula and flip them gently but decisively. Keeping them smaller (3-4 inches) makes flipping much easier.
- Make Ahead & Reheating: Coconut flour pancakes store and reheat surprisingly well.
- Refrigerating: Store leftover cooked pancakes in an airtight container in the refrigerator for up to 3-4 days.
- Freezing: For longer storage, allow pancakes to cool completely. Stack them with parchment paper between each pancake to prevent sticking, then place them in a freezer-safe bag or container. They can be frozen for up to 2-3 months.
- Reheating: Reheat from refrigerated or frozen in a toaster, toaster oven, microwave, or lightly greased skillet over low heat until warmed through. The toaster often gives the best texture, making them slightly crispy on the edges again.
FAQ Section
Here are answers to some frequently asked questions about making Coconut Flour Pancakes.
- Q: Why use coconut flour for pancakes? What are the benefits?
A: Coconut flour is a fantastic alternative to traditional wheat flour for several reasons. Firstly, it’s naturally gluten-free, making it suitable for individuals with celiac disease or gluten sensitivity. Secondly, it’s high in fiber and lower in carbohydrates than most other flours, which can help with blood sugar management and promote satiety, keeping you fuller for longer. It’s also a good source of protein and healthy fats. Plus, it imparts a subtle, natural sweetness and a tender texture to baked goods. - Q: Can I substitute coconut flour with almond flour or another gluten-free flour?
A: Unfortunately, coconut flour is unique in its properties, particularly its high absorbency. You generally cannot substitute it 1:1 with almond flour or other gluten-free flours without significant adjustments to the liquid and egg ratios. Coconut flour requires a lot more moisture and binders (like eggs) than almond flour. If you were to use almond flour, you’d need a recipe specifically developed for almond flour pancakes. - Q: My coconut flour pancakes are too dry or crumbly. What did I do wrong?
A: This is a common issue if the batter proportions aren’t quite right or if they are overcooked.- Not enough liquid/eggs: Coconut flour soaks up a lot of liquid. Ensure you’ve used the correct amount of eggs and milk. Let the batter rest so the flour can fully hydrate; if it’s too thick afterwards, add a bit more milk.
- Too much coconut flour: Accurate measurement is key. Even a little extra coconut flour can make the batter too dense.
- Overcooking: Cooking them for too long or on too high heat can dry them out. Aim for golden brown and just cooked through.
- Not enough fat: The melted coconut oil or butter adds necessary moisture.
- Q: Can I make these coconut flour pancakes vegan (egg-free and dairy-free)?
A: Making coconut flour pancakes vegan is challenging because eggs play such a crucial structural role. Traditional egg replacers like flax eggs or chia eggs often don’t provide enough binding power for the dense nature of coconut flour in pancakes. While you can use dairy-free milk (as the recipe suggests with almond milk), successfully replacing 4 eggs in a coconut flour recipe is difficult without it significantly changing the texture or outcome. You might find recipes specifically developed for “vegan coconut flour pancakes” that use a combination of other binders, but this particular recipe relies heavily on eggs. - Q: How do I store leftover coconut flour pancakes?
A: Leftover pancakes can be stored in an airtight container in the refrigerator for up to 3-4 days. For longer storage, freeze them. To freeze, let the pancakes cool completely, then stack them with small pieces of parchment paper between each one to prevent sticking. Place the stack in a freezer-safe bag or container. They will keep well in the freezer for up to 2-3 months. Reheat in a toaster, microwave, or on a skillet. - Q: Are these pancakes suitable for a keto or paleo diet?
A: Yes, they can be!- Keto: To make them keto-friendly, ensure you use a low-carb sweetener like erythritol, monk fruit, or stevia. Also, opt for unsweetened almond milk or coconut milk and be mindful of your toppings (e.g., berries in moderation, sugar-free syrup, nut butters). Coconut flour itself is low in net carbs.
- Paleo: This recipe is inherently quite paleo-friendly. Use coconut oil for cooking, a paleo-approved sweetener like coconut sugar, maple syrup (in moderation), or honey. Ensure your milk choice is paleo (e.g., unsweetened almond or coconut milk).
- Q: Why does this recipe call for so many eggs compared to traditional pancake recipes?
A: Coconut flour is extremely absorbent and has no gluten. Gluten in traditional wheat flour provides structure and elasticity. In gluten-free baking with coconut flour, eggs are the primary binding agent. They provide the necessary structure to hold the pancakes together, add moisture, richness, and help with leavening. Without enough eggs, coconut flour baked goods tend to be very dry and crumbly. - Q: Can I add mix-ins like blueberries or chocolate chips to the batter?
A: Absolutely! You can gently fold in mix-ins after the batter has rested.- Blueberries (fresh or frozen): About 1/2 cup. If using frozen, don’t thaw them first to prevent them from bleeding too much color into the batter.
- Chocolate Chips: About 1/4 to 1/2 cup of your favorite chocolate chips (dark, semi-sweet, or sugar-free for keto).
- Other ideas: Finely chopped nuts, a sprinkle of shredded coconut, or even a bit of citrus zest.
Be mindful not to overload the batter with mix-ins, as this can make the pancakes more prone to falling apart. You can also sprinkle them on top of the pancakes once you’ve poured the batter onto the skillet.
Coconut Flour Pancakes
Ingredients
Here’s what you’ll need to gather to create these delightful and wholesome Coconut Flour Pancakes. Each ingredient plays a crucial role in achieving the perfect texture and flavor.
- 1/2 cup (60g) Coconut Flour: The star of our recipe! This gluten-free flour is highly absorbent and provides a lovely, slightly sweet, and tender crumb. Ensure it’s sifted to prevent lumps.
- 1 teaspoon Baking Powder: This leavening agent is essential for giving the pancakes their lift, making them light and fluffy rather than dense. Make sure it’s fresh for optimal results.
- 1/4 teaspoon Salt: A small amount of salt enhances all the other flavors in the pancakes, balancing the sweetness and bringing out the richness of the eggs and coconut.
- 1 tablespoon Granulated Sweetener of Choice (e.g., coconut sugar, erythritol, or regular sugar): This adds a touch of sweetness. Adjust the amount based on your preference and the type of sweetener used. For a keto or low-carb version, use a sugar-free alternative.
- 4 Large Eggs: Coconut flour requires a higher ratio of eggs compared to traditional flours. Eggs provide structure, moisture, and richness, binding the ingredients together.
- 1/2 cup (120ml) Unsweetened Almond Milk (or other milk of choice, like coconut milk or dairy milk): This provides the necessary liquid for the batter. The amount might need slight adjustment depending on your coconut flour’s absorbency.
- 2 tablespoons Melted Coconut Oil (or butter/other neutral oil): Adds moisture and fat, contributing to a tender texture and helping to prevent sticking. Plus, coconut oil complements the coconut flour beautifully.
- 1 teaspoon Vanilla Extract: Enhances the sweetness and adds a lovely aromatic depth to the pancakes. Pure vanilla extract is recommended for the best flavor.
- Optional: 1/4 teaspoon Cinnamon or Nutmeg: For an extra layer of warmth and spice, feel free to add a pinch of your favorite baking spice.
Instructions
Follow these simple steps to whip up a batch of perfect Coconut Flour Pancakes every time. Working with coconut flour is a bit different, so paying attention to the details will yield the best results.
- Combine Dry Ingredients: In a medium-sized mixing bowl, whisk together the sifted coconut flour, baking powder, salt, and your chosen sweetener (and optional spices, if using). Whisking thoroughly ensures the baking powder is evenly distributed, which is key for even rising.
- Combine Wet Ingredients: In a separate, larger mixing bowl, crack the eggs and whisk them well until they are light and slightly frothy. Add the almond milk (or your milk of choice), melted coconut oil, and vanilla extract. Whisk again until all wet ingredients are fully combined and smooth.
- Marry Wet and Dry: Gradually pour the dry ingredient mixture into the wet ingredient mixture. Whisk gently but thoroughly until just combined. Be careful not to overmix; a few small lumps are okay. Overmixing can lead to tougher pancakes.
- Rest the Batter: This is a crucial step when working with coconut flour! Let the batter sit for 5-10 minutes. Coconut flour is very absorbent, and this resting period allows it to fully hydrate, thickening the batter to the right consistency. The batter should be thick but still pourable, similar to a traditional pancake batter but perhaps a bit denser. If it’s too thick (like paste), add a tablespoon more milk at a time until it reaches the desired consistency. If it’s too thin, you can add a tiny bit more coconut flour (start with 1 teaspoon), but do so sparingly.
- Preheat the Pan: Place a non-stick skillet, griddle, or well-seasoned cast-iron pan over medium-low to medium heat. Coconut flour pancakes can burn more easily than traditional ones, so a lower heat setting is generally better. Add a small amount of coconut oil, butter, or cooking spray to the pan to prevent sticking, even if using a non-stick pan.
- Cook the Pancakes: Once the pan is heated (a drop of water should sizzle and evaporate quickly), pour or scoop about 1/4 cup of batter per pancake onto the hot surface. Keep the pancakes relatively small (around 3-4 inches in diameter) as they are more delicate than wheat-based pancakes and can be harder to flip if too large. Don’t overcrowd the pan; cook in batches if necessary.
- Flip with Care: Cook for about 2-4 minutes on the first side, or until the edges look set and bubbles start to appear on the surface and pop. The underside should be golden brown. Carefully slide a thin spatula underneath and gently flip the pancake.
- Cook the Other Side: Cook for another 2-3 minutes on the second side, or until golden brown and cooked through. The pancakes should feel slightly firm to the touch.
- Serve and Repeat: Transfer the cooked pancakes to a plate. You can keep them warm in a low oven (around 200°F or 90°C) on an oven-safe plate while you cook the remaining batter, adding more oil or butter to the pan as needed between batches.
- Enjoy: Serve immediately with your favorite toppings and enjoy your delicious, healthy Coconut Flour Pancakes!
Nutrition
- Serving Size: one normal portion
- Calories: 350