")

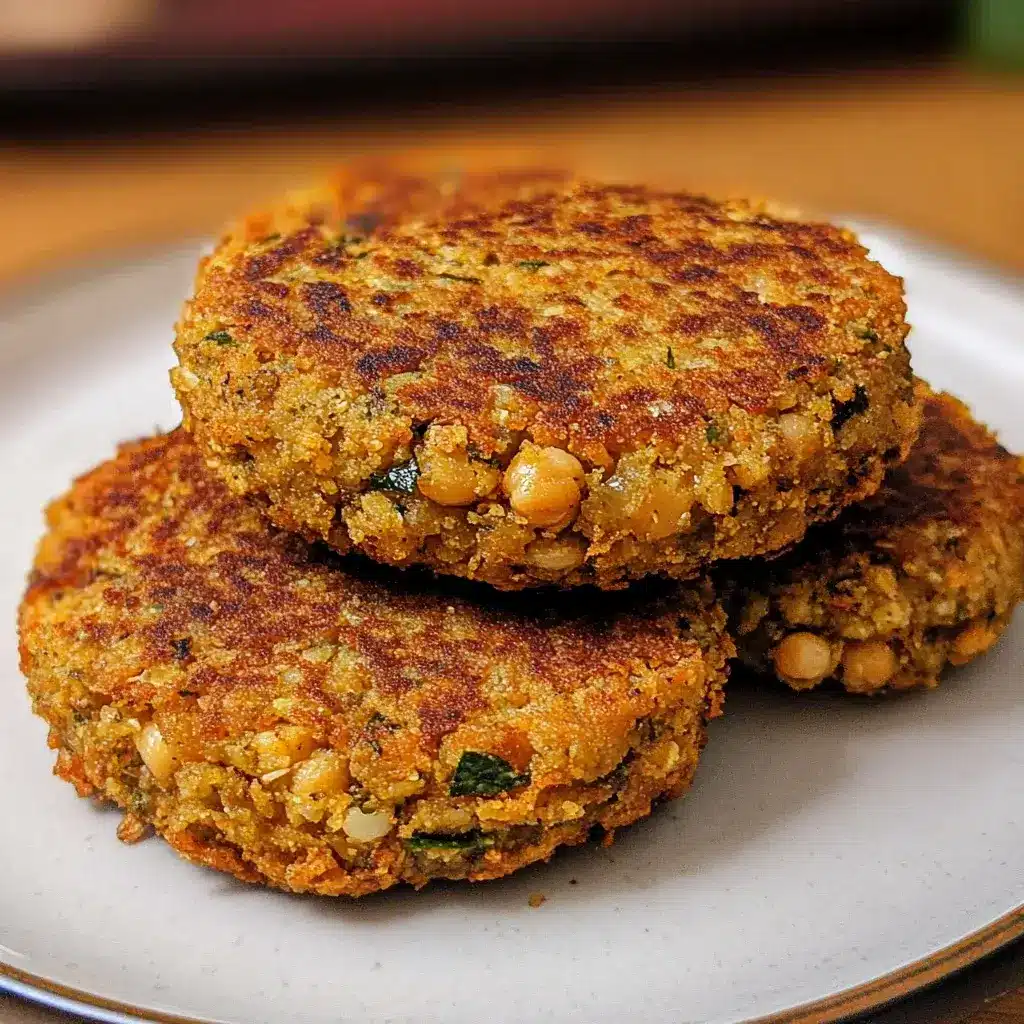

It was one of those Tuesday evenings. You know the kind – everyone’s a bit tired, a bit fractious, and the thought of cooking an elaborate meal feels like climbing a mountain. I’d been staring into the pantry, willing inspiration to strike, when my eyes landed on a couple of cans of chickpeas. I’d been meaning to try a baked chickpea patty recipe for ages, something healthier than fried falafel but just as satisfying. My family, particularly my two usually picky eaters, are always a tough crowd for new vegetarian dishes. I decided this was the night. As the aroma of garlic, cumin, and baking chickpeas began to fill the kitchen, I started to feel hopeful. The patties emerged from the oven golden brown, with an audibly crispy crust. I served them simply in whole-wheat pitas with some lettuce, tomato, and a quick tahini-yogurt sauce. The verdict? Silence at first (always a good sign with kids), then a chorus of “Wow, Mom, these are actually really good!” My husband, a self-proclaimed carnivore, even asked for seconds. Since that first successful attempt, these Crispy Baked Chickpea Patties have become a firm favourite, a go-to for a quick, healthy, and utterly delicious meal that genuinely pleases everyone. They’re versatile, easy to whip up, and proof that simple ingredients can create something truly special.
Ingredients
- 2 (15-ounce) cans chickpeas (garbanzo beans): Rinsed, thoroughly drained, and patted dry. These are the star of our patties, providing a creamy texture and plant-based protein.
- 1 small red onion (or 1/2 medium yellow onion): Finely chopped. Adds a pungent, sweet bite.
- 3-4 cloves garlic: Minced. For that essential aromatic, savoury depth.
- 1/2 cup fresh parsley: Roughly chopped. Lends a bright, herbaceous note.
- 1/4 cup fresh cilantro (coriander leaves): Roughly chopped (optional, but recommended). Adds a distinct, fresh, citrusy flavour.
- 1/2 cup plain breadcrumbs (panko or regular): Plus more for coating if desired. Acts as a binder and helps create a crispy exterior. Use gluten-free if needed.
- 1/4 cup all-purpose flour (or oat flour for gluten-free): Helps bind the patties.
- 1 teaspoon ground cumin: A warm, earthy spice crucial for that classic chickpea flavour.
- 1 teaspoon ground coriander: Provides a lemony, floral spice note that complements cumin.
- 1/2 teaspoon smoked paprika: Adds a subtle smoky flavour and beautiful colour.
- 1/4 teaspoon cayenne pepper (optional): For a little kick of heat.
- Juice of 1/2 lemon (about 1-2 tablespoons): Brightens all the flavours.
- 2 tablespoons olive oil: Plus more for brushing or spraying. Adds richness and helps with crisping.
- 1 teaspoon salt (or to taste): Enhances all the other flavours.
- 1/2 teaspoon black pepper (or to taste): Adds a touch of spice.
Instructions
- Preheat and Prepare: Preheat your oven to 400°F (200°C). Line a large baking sheet with parchment paper for easy cleanup and to prevent sticking. Lightly grease the parchment paper with a bit of olive oil or cooking spray.
- Dry the Chickpeas: This is a crucial step for crispy patties! After rinsing and draining the chickpeas, spread them on a clean kitchen towel or paper towels and gently pat them as dry as possible. Remove any loose skins that come off easily.
- Process Aromatics and Herbs: In the bowl of a food processor, add the chopped red onion, minced garlic, fresh parsley, and fresh cilantro (if using). Pulse a few times until they are finely minced but not a paste. Scrape down the sides of the bowl.
- Add Chickpeas and Spices: Add the dried chickpeas, breadcrumbs, flour, ground cumin, ground coriander, smoked paprika, cayenne pepper (if using), lemon juice, 2 tablespoons of olive oil, salt, and black pepper to the food processor.
- Pulse to Combine: Pulse the mixture 10-15 times, or until the chickpeas are mostly broken down and the mixture starts to come together. You want some texture remaining – avoid over-processing into a completely smooth hummus-like paste. It should be slightly coarse but hold together when pressed. Scrape down the sides as needed.
- Chill (Optional but Recommended): Transfer the chickpea mixture to a bowl, cover, and refrigerate for at least 15-30 minutes. Chilling helps the mixture firm up, making the patties easier to shape and less likely to fall apart.
- Shape the Patties: Using slightly damp hands (to prevent sticking) or an ice cream scoop for uniform size, take about 1/3 to 1/2 cup of the mixture and form it into a firm patty, about 3/4-inch thick and 2.5-3 inches in diameter. You should get about 8-10 patties. If you want an extra crispy coating, you can lightly dredge each patty in additional breadcrumbs before placing it on the prepared baking sheet.
- Arrange on Baking Sheet: Place the formed patties on the prepared baking sheet, ensuring there’s a little space between each one for even air circulation and crisping.
- Brush with Oil: Lightly brush or spray the tops of the patties with a little more olive oil. This helps them achieve that desirable golden-brown and crispy exterior.
- Bake: Bake in the preheated oven for 15-20 minutes on the first side.
- Flip and Bake Again: Carefully flip the patties using a thin spatula. Brush or spray the new top sides with a touch more olive oil if they look dry. Bake for another 10-15 minutes, or until the patties are golden brown, crispy on the outside, and heated through. Total baking time will be around 25-35 minutes.
- Rest and Serve: Let the patties rest on the baking sheet for a few minutes before serving. They will firm up a bit more as they cool slightly. Serve warm with your favourite accompaniments.
Nutrition Facts
- Servings: This recipe makes approximately 8-10 patties, serving 4-5 people (2 patties per serving).
- Calories per serving (approx. 2 patties): Around 350-400 calories.
- Protein: A good source of plant-based protein, essential for muscle repair and satiety. Chickpeas are a protein powerhouse.
- Fiber: High in dietary fiber, which aids digestion, helps regulate blood sugar, and promotes a feeling of fullness.
- Healthy Fats: Contains monounsaturated fats from olive oil, which are beneficial for heart health.
- Low in Saturated Fat: Being plant-based and baked, these patties are naturally lower in saturated fat compared to meat-based or fried alternatives.
- Micronutrients: Provides essential vitamins and minerals like iron, folate, and manganese from the chickpeas and fresh herbs.
(Note: Nutritional information is an estimate and can vary based on specific ingredients and portion sizes.)
Preparation Time
- Active Preparation Time: Approximately 20-25 minutes (chopping vegetables, processing ingredients, shaping patties).
- Chilling Time (Optional): 15-30 minutes.
- Cooking Time: 25-35 minutes.
- Total Time (including optional chilling): Approximately 1 hour to 1 hour 30 minutes.
This recipe for Crispy Baked Chickpea Patties is relatively quick to assemble, with the oven doing most of the work, making it an excellent option for weeknight dinners or meal prepping.
How to Serve
These Crispy Baked Chickpea Patties are incredibly versatile! Here are some delicious ways to serve them:
- Classic Chickpea Burgers:
- Serve on toasted whole wheat or brioche buns.
- Top with crisp lettuce, juicy tomato slices, red onion rings, and pickles.
- Add your favourite sauce: tahini dressing, tzatziki, hummus, vegan mayo, sriracha aioli, or even ketchup and mustard.
- In Pita Pockets:
- Stuff into warm pita bread pockets, falafel-style.
- Fill with shredded lettuce, chopped cucumber and tomato salad (Israeli salad), pickled turnips, and a generous drizzle of tahini sauce or garlic yogurt sauce.
- As a Salad Topper:
- Crumble one or two warm patties over a fresh green salad or a Mediterranean quinoa salad.
- This adds a satisfying protein boost and wonderful texture.
- Part of a Mezze Platter:
- Serve smaller-sized patties alongside hummus, baba ghanoush, olives, feta cheese (or vegan alternative), dolmades, and warm flatbreads for a delightful appetizer spread.
- In a Grain Bowl:
- Build a nourishing bowl with a base of quinoa, brown rice, or farro.
- Add roasted vegetables (like bell peppers, zucchini, eggplant), fresh greens, and top with a chickpea patty or two.
- Drizzle with a lemon-herb vinaigrette or a creamy avocado dressing.
- With a Side of Roasted Vegetables:
- Serve alongside a medley of roasted seasonal vegetables like broccoli, sweet potatoes, carrots, or asparagus for a complete and healthy meal.
- As an Appetizer with Dipping Sauces:
- Make mini patties and serve them with an array of dipping sauces:
- Spicy harissa yogurt dip
- Cool cucumber raita
- Sweet chili sauce
- Garlic aioli
- Make mini patties and serve them with an array of dipping sauces:
- Lettuce Wraps:
- For a lighter, low-carb option, serve the patties in large lettuce cups (like butter lettuce or romaine) with your favourite burger toppings and sauce.
- Breakfast Patties:
- Serve alongside scrambled eggs (or tofu scramble) and avocado for a protein-packed breakfast or brunch.
Additional Tips
- Dry Those Chickpeas Thoroughly: This cannot be stressed enough! Excess moisture is the enemy of crispiness. After rinsing and draining, lay them on a towel and pat them really dry. Some people even let them air dry for a bit. This small step makes a huge difference in the final texture.
- Don’t Over-Process the Mixture: You’re aiming for a coarse, slightly chunky texture, not a smooth paste like hummus. Over-processing can lead to dense, gummy patties. Pulse the food processor just until the ingredients are combined and the chickpeas are mostly broken down but still have some definition.
- Chill the Mixture for Easier Handling: While optional, chilling the chickpea mixture in the refrigerator for at least 15-30 minutes (or even longer) makes it much firmer and less sticky. This significantly helps when shaping the patties, preventing them from falling apart.
- Uniform Patty Size and Thickness: Try to make your patties roughly the same size and thickness. This ensures they cook evenly. An ice cream scoop or a measuring cup (like 1/3 or 1/2 cup) can be very helpful for portioning out the mixture consistently.
- Don’t Crowd the Baking Sheet: Give your patties some space on the baking sheet. If they’re too close together, they’ll steam rather than bake and crisp up. Use two baking sheets if necessary to ensure proper air circulation around each patty.
- Taste and Adjust Seasoning: Before shaping all the patties, you can cook a tiny “test” patty in a skillet or even microwave a small amount of the mixture to check the seasoning. Adjust salt, pepper, lemon juice, or spices as needed to suit your taste.
- Gluten-Free Adaptation: To make these patties gluten-free, simply substitute the all-purpose flour with oat flour (you can make your own by grinding rolled oats in a blender) or a good quality gluten-free all-purpose blend. Ensure your breadcrumbs are also certified gluten-free, or use ground oats or almond flour as a substitute for breadcrumbs.
- Get Creative with Spices and Herbs: Don’t be afraid to experiment! Add a pinch of turmeric for colour and anti-inflammatory benefits, a dash of cayenne for more heat, or try different fresh herbs like dill or mint. A teaspoon of za’atar or ras el hanout can also lend a wonderful Middle Eastern or North African flair.
FAQ Section
Q1: Can I make these chickpea patties vegan?
A1: Yes, absolutely! This recipe is very easily made vegan. The primary ingredients (chickpeas, vegetables, herbs, spices) are already vegan. The main things to check are:
* Breadcrumbs: Ensure the breadcrumbs you use are vegan, as some brands can contain dairy or egg. Panko breadcrumbs are often a good vegan choice, but always check the label. You can also make your own from stale vegan bread.
* Flour: All-purpose flour is vegan.
This recipe as written, with vegan breadcrumbs, is fully vegan. No egg replacers are typically needed as the chickpeas and flour/breadcrumbs provide enough binding.
Q2: Can I pan-fry these chickpea patties instead of baking them?
A2: Yes, you can pan-fry them for an even crispier, albeit slightly less healthy, result. To do so:
* Heat a tablespoon or two of olive oil or another cooking oil in a large non-stick skillet over medium heat.
* Once the oil is hot, carefully place the patties in the skillet, ensuring not to overcrowd it (cook in batches if necessary).
* Cook for about 4-5 minutes per side, or until golden brown and crispy.
* Drain on a paper towel-lined plate to remove excess oil before serving.
They will cook faster than baking, so keep a close eye on them.
Q3: How do I store leftover chickpea patties? Can they be frozen?
A3: Leftover patties store very well!
* Refrigerating: Allow the patties to cool completely, then store them in an airtight container in the refrigerator for up to 4-5 days.
* Freezing: For longer storage, freezing is an excellent option. Once cooled, you can freeze them in a single layer on a baking sheet until solid. Then, transfer them to a freezer-safe bag or container, placing parchment paper between layers if stacking. They can be frozen for up to 2-3 months.
* Reheating: Reheat refrigerated or frozen (thaw first for best results, or add a few extra minutes to cooking time) patties in a preheated oven at 350°F (175°C) for 10-15 minutes, or until heated through and re-crisped. You can also reheat them in an air fryer or lightly pan-fry them. Microwaving works but they won’t be as crispy.
Q4: Can I make the chickpea patty mixture ahead of time?
A4: Yes, making the mixture ahead of time is a great way to save time. Prepare the chickpea mixture as directed in the recipe, then cover it tightly and store it in the refrigerator for up to 24-48 hours. When you’re ready to cook, simply shape the patties and bake as instructed. The flavours might even meld and improve with a little time.
Q5: My chickpea patties are falling apart. What did I do wrong?
A5: This is a common issue with homemade veggie patties. Here are a few potential reasons and solutions:
* Mixture too wet: Chickpeas might not have been dried thoroughly enough, or you might have added too much liquid (e.g., lemon juice). Try adding a bit more breadcrumbs or flour, one tablespoon at a time, until the mixture holds together better.
* Not enough binder: Ensure you’ve used the right amount of breadcrumbs and flour.
* Over-processing: If the mixture is too smooth, it can sometimes be more prone to falling apart. Aim for some texture.
* Not chilled: Chilling the mixture helps it firm up. Don’t skip this step if you’re having trouble.
* Handling too roughly: Be gentle when shaping and flipping the patties.
Q6: Can I use dried chickpeas instead of canned ones?
A6: Yes, you can use dried chickpeas, and many people prefer them for flavour and texture. You’ll need to cook them first:
* Soak about 1 cup of dried chickpeas in plenty of water overnight (or for at least 8 hours).
* Drain the soaked chickpeas and transfer them to a pot. Cover with fresh water and bring to a boil. Reduce heat and simmer for 1-1.5 hours, or until tender but not mushy.
* Drain well and allow them to cool and dry as much as possible before using in the recipe. Approximately 1 cup of dried chickpeas will yield about 2.5-3 cups of cooked chickpeas, so you’ll have a bit more than two 15-ounce cans. Adjust other ingredients slightly if needed.
Q7: What other herbs and spices can I use in these patties?
A7: Feel free to customize the flavour profile!
* Herbs: Fresh dill, mint, or even a bit of oregano or thyme can be lovely additions or substitutions.
* Spices: Try adding a pinch of turmeric for colour, ground ginger for a different warmth, a dash of allspice, or a spice blend like garam masala for an Indian twist, or za’atar for a Middle Eastern flavour.
* Heat: Adjust cayenne, or add red pepper flakes, a finely minced jalapeño (seeds removed for less heat), or a touch of harissa paste to the mixture.
Q8: Are these Crispy Baked Chickpea Patties healthy?
A8: Yes, these baked chickpea patties are generally considered a very healthy option, especially when compared to traditional meat burgers or fried falafel. Here’s why:
* Plant-Based Protein: Chickpeas are an excellent source of protein and fiber.
* Baked, Not Fried: Baking significantly reduces the amount of oil and unhealthy fats compared to frying.
* Rich in Fiber: Promotes digestive health and satiety.
* Nutrient-Dense: Packed with vitamins and minerals from chickpeas, vegetables, and herbs.
* Customizable: You can control the ingredients, like using whole wheat breadcrumbs or oat flour for added nutrition.
They are a great way to incorporate more plant-based meals into your diet. As with any food, portion control and what you serve them with (e.g., whole grain buns, plenty of fresh vegetables) contribute to the overall healthiness of the meal.

Crispy Baked Chickpea Patties
Ingredients
- 2 (15-ounce) cans chickpeas (garbanzo beans): Rinsed, thoroughly drained, and patted dry. These are the star of our patties, providing a creamy texture and plant-based protein.
- 1 small red onion (or 1/2 medium yellow onion): Finely chopped. Adds a pungent, sweet bite.
- 3–4 cloves garlic: Minced. For that essential aromatic, savoury depth.
- 1/2 cup fresh parsley: Roughly chopped. Lends a bright, herbaceous note.
- 1/4 cup fresh cilantro (coriander leaves): Roughly chopped (optional, but recommended). Adds a distinct, fresh, citrusy flavour.
- 1/2 cup plain breadcrumbs (panko or regular): Plus more for coating if desired. Acts as a binder and helps create a crispy exterior. Use gluten-free if needed.
- 1/4 cup all-purpose flour (or oat flour for gluten-free): Helps bind the patties.
- 1 teaspoon ground cumin: A warm, earthy spice crucial for that classic chickpea flavour.
- 1 teaspoon ground coriander: Provides a lemony, floral spice note that complements cumin.
- 1/2 teaspoon smoked paprika: Adds a subtle smoky flavour and beautiful colour.
- 1/4 teaspoon cayenne pepper (optional): For a little kick of heat.
- Juice of 1/2 lemon (about 1–2 tablespoons): Brightens all the flavours.
- 2 tablespoons olive oil: Plus more for brushing or spraying. Adds richness and helps with crisping.
- 1 teaspoon salt (or to taste): Enhances all the other flavours.
- 1/2 teaspoon black pepper (or to taste): Adds a touch of spice.
Instructions
- Preheat and Prepare: Preheat your oven to 400°F (200°C). Line a large baking sheet with parchment paper for easy cleanup and to prevent sticking. Lightly grease the parchment paper with a bit of olive oil or cooking spray.
- Dry the Chickpeas: This is a crucial step for crispy patties! After rinsing and draining the chickpeas, spread them on a clean kitchen towel or paper towels and gently pat them as dry as possible. Remove any loose skins that come off easily.
- Process Aromatics and Herbs: In the bowl of a food processor, add the chopped red onion, minced garlic, fresh parsley, and fresh cilantro (if using). Pulse a few times until they are finely minced but not a paste. Scrape down the sides of the bowl.
- Add Chickpeas and Spices: Add the dried chickpeas, breadcrumbs, flour, ground cumin, ground coriander, smoked paprika, cayenne pepper (if using), lemon juice, 2 tablespoons of olive oil, salt, and black pepper to the food processor.
- Pulse to Combine: Pulse the mixture 10-15 times, or until the chickpeas are mostly broken down and the mixture starts to come together. You want some texture remaining – avoid over-processing into a completely smooth hummus-like paste. It should be slightly coarse but hold together when pressed. Scrape down the sides as needed.
- Chill (Optional but Recommended): Transfer the chickpea mixture to a bowl, cover, and refrigerate for at least 15-30 minutes. Chilling helps the mixture firm up, making the patties easier to shape and less likely to fall apart.
- Shape the Patties: Using slightly damp hands (to prevent sticking) or an ice cream scoop for uniform size, take about 1/3 to 1/2 cup of the mixture and form it into a firm patty, about 3/4-inch thick and 2.5-3 inches in diameter. You should get about 8-10 patties. If you want an extra crispy coating, you can lightly dredge each patty in additional breadcrumbs before placing it on the prepared baking sheet.
- Arrange on Baking Sheet: Place the formed patties on the prepared baking sheet, ensuring there’s a little space between each one for even air circulation and crisping.
- Brush with Oil: Lightly brush or spray the tops of the patties with a little more olive oil. This helps them achieve that desirable golden-brown and crispy exterior.
- Bake: Bake in the preheated oven for 15-20 minutes on the first side.
- Flip and Bake Again: Carefully flip the patties using a thin spatula. Brush or spray the new top sides with a touch more olive oil if they look dry. Bake for another 10-15 minutes, or until the patties are golden brown, crispy on the outside, and heated through. Total baking time will be around 25-35 minutes.
- Rest and Serve: Let the patties rest on the baking sheet for a few minutes before serving. They will firm up a bit more as they cool slightly. Serve warm with your favourite accompaniments.
Nutrition
- Serving Size: one normal portion
- Calories: 400


