")

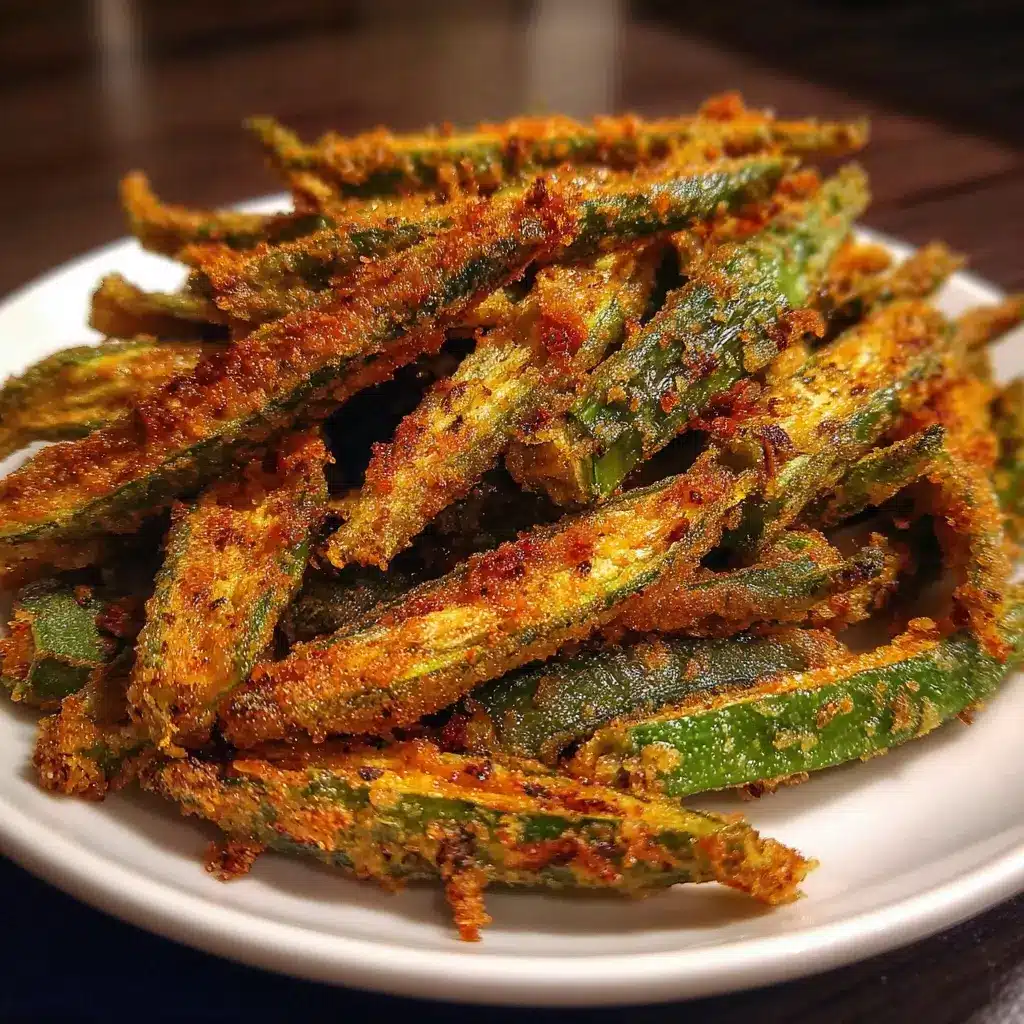

Of all the vegetables that get a bad rap, okra might just be at the top of the list. For years, my own family turned their noses up at the mere mention of it, scarred by memories of slimy, overcooked stews. I was on a mission to change their minds. I knew that hidden within that misunderstood green pod was the potential for greatness—a crispy, crunchy, utterly addictive snack that could rival any French fry. So, I went to work. After a few experiments, I pulled a golden-brown tray of these Crispy Baked Okra Fries from the oven. The aroma alone—toasty, savory, with a hint of spice—was enough to pique their curiosity. Tentatively, my husband picked one up, dipped it in some ranch, and took a bite. His eyes widened. “This is… okra?” he asked, already reaching for another. The kids, notorious vegetable detectives, followed suit and were soon fighting over the last few “fries.” That was the moment of victory. This recipe didn’t just make okra edible; it made it crave-worthy. It completely transforms the vegetable, eliminating any hint of sliminess and replacing it with a satisfying crunch and a tender, flavorful interior. It’s now a staple in our home for game nights, movie nights, or just as a healthy side dish that disappears faster than I can make it. If you’re an okra skeptic, I promise this recipe will be the one to convert you.
The Magic of Okra: More Than Just a Southern Staple
Before we dive into the crunchy goodness of the recipe, let’s take a moment to appreciate the star ingredient: okra. Also known as “lady’s fingers” for its long, elegant shape, okra is a flowering plant with edible green seed pods. While it’s most famously associated with Southern American and Creole cuisine, particularly in gumbos and stews, its roots trace back to Africa and it’s a beloved ingredient in cuisines across the Middle East, the Caribbean, South America, and Asia.
The characteristic that gives okra its reputation—the “slime”—is scientifically known as mucilage. This substance is a soluble fiber, which is fantastic for digestion, but can be texturally challenging when not prepared correctly. However, this same property makes it a brilliant natural thickener for soups and stews. The secret to enjoying okra in other forms, like our fries, is to master techniques that minimize this mucilage, such as high-heat cooking and ensuring the pods are completely dry before you begin.
Beyond its unique texture, okra is a nutritional powerhouse. It’s low in calories and carbs but packed with essential nutrients. It’s an excellent source of vitamins C and K, as well as folate and magnesium. The soluble fiber not only aids digestion but can also help regulate blood sugar levels and lower cholesterol. So, while you’re enjoying these delicious fries, you’re also giving your body a significant boost of vitamins and fiber. This recipe isn’t just about making a vegetable taste good; it’s about unlocking its full potential as a healthy, versatile, and delicious ingredient.
Why Bake Instead of Fry? The Healthier Choice
The traditional Southern way to get crispy okra is to deep-fry it. While undeniably delicious, deep-frying comes with a significant amount of added oil, calories, and fat. Baking offers a fantastic alternative that achieves that same crave-able crunch without the guilt or the messy cleanup.
By choosing to bake, you are drastically reducing the amount of oil used. Instead of submerging the okra in a vat of hot oil, we simply use a light coating to help the breading adhere and turn golden brown in the oven. This simple switch can save hundreds of calories and a significant amount of saturated and trans fats per serving, making these okra fries a heart-healthy choice you can feel good about.
Furthermore, baking at a high temperature is one of the key methods for combating okra’s sliminess. The dry, intense heat of the oven quickly cooks the exterior, creating a seal that locks in flavor while allowing the interior to become tender without turning gummy. Finally, let’s not forget the cleanup. There’s no large pot of used oil to deal with, no splatters all over your stovetop. A simple sheet of parchment paper means your baking sheet will be almost as clean as when you started. Baking is the smarter, healthier, and easier path to crispy perfection.
Ingredients
- 1 pound Fresh Okra: The star of our show. Look for bright green, firm pods that are no longer than 4 inches for the best texture and flavor.
- 1/2 cup All-Purpose Flour: This first layer is crucial for helping the egg wash stick to the okra pods.
- 2 large Eggs: Beaten to create an egg wash, which acts as the “glue” for our crispy panko coating.
- 1 1/2 cups Panko Breadcrumbs: These Japanese-style breadcrumbs are lighter and flakier than traditional breadcrumbs, guaranteeing a superior crunch.
- 1 teaspoon Smoked Paprika: Adds a lovely, smoky depth of flavor and a beautiful reddish hue to the fries.
- 1 teaspoon Garlic Powder: Provides a savory, aromatic base note that complements the okra perfectly.
- 1/2 teaspoon Onion Powder: Works in harmony with the garlic powder to build a foundational savory flavor.
- 1/2 teaspoon Salt (or to taste): Enhances all the other flavors.
- 1/4 teaspoon Black Pepper (or to taste): Adds a subtle, gentle heat.
- Olive Oil Spray or Cooking Spray: A light spritz is all you need to help the fries become golden and crispy in the oven.
Instructions
- Preheat and Prepare: Start by preheating your oven to 425°F (220°C). Line a large baking sheet with parchment paper. Using parchment paper is essential for preventing sticking and ensuring an easy cleanup.
- Wash and Dry the Okra: Rinse the okra pods under cool water. This next step is the most critical for preventing slime: dry the okra thoroughly. Pat them completely dry with paper towels or a clean kitchen towel. Any remaining moisture will turn to steam in the oven and can result in a gummy texture.
- Trim the Okra: Once dry, trim off the top stems and the very tips of the okra pods. For larger pods, you can slice them in half lengthwise to create more surface area for the crispy coating. Smaller pods can be left whole.
- Set Up the Breading Station: You will need three shallow dishes or plates.
- Dish 1 (Flour): Combine the all-purpose flour with a pinch of salt and pepper.
- Dish 2 (Egg): In the second dish, whisk the two large eggs until they are smooth and uniform.
- Dish 3 (Panko Mix): In the third dish, combine the panko breadcrumbs, smoked paprika, garlic powder, onion powder, ½ teaspoon of salt, and ¼ teaspoon of black pepper. Mix thoroughly until the spices are evenly distributed throughout the breadcrumbs.
- Bread the Okra: Working with a few pieces of okra at a time, follow this three-step process:
- First, dredge the okra in the flour mixture, shaking off any excess. This dry layer is key for the egg to adhere properly.
- Next, dip the flour-coated okra into the beaten eggs, allowing any excess to drip off.
- Finally, press the okra firmly into the panko breadcrumb mixture, ensuring it is completely coated on all sides.
- Arrange on the Baking Sheet: As you bread the okra, place each piece on the prepared baking sheet in a single layer. It is crucial not to overcrowd the pan. Leave a little space between each fry to allow hot air to circulate around them. This is essential for achieving maximum crispiness. Use a second baking sheet if necessary.
- Bake to Perfection: Lightly spray the tops of the breaded okra with olive oil spray or cooking spray. This will help them brown and get extra crispy. Bake for 15-20 minutes, flipping them halfway through, until they are golden brown and crispy.
- Serve Immediately: For the best texture, serve the okra fries hot and fresh from the oven with your favorite dipping sauce.
Nutrition Facts
- Servings: 4
- Calories per Serving: Approximately 185 kcal
- Excellent Source of Fiber (4g per serving): The combination of okra and whole-grain breading contributes to a high fiber content, which is essential for digestive health, blood sugar regulation, and promoting a feeling of fullness.
- Rich in Vitamin C: Okra is naturally high in Vitamin C, a powerful antioxidant that supports the immune system, skin health, and collagen production.
- Good Source of Vitamin K: This fat-soluble vitamin plays a crucial role in blood clotting and bone health, and okra provides a significant amount.
- Low in Saturated Fat: By baking instead of frying, this recipe is very low in saturated fat, making it a heart-friendly snack or side dish.
- Packed with Folate: Okra is a great source of folate (Vitamin B9), which is vital for cell growth and metabolism, and is especially important during pregnancy for fetal development.
Preparation Time
- Total Time: Approximately 35 minutes
- Prep Time: 15 minutes
- Cook Time: 20 minutes
This recipe is wonderfully efficient, making it perfect for a quick weeknight side dish or a last-minute appetizer for guests. The preparation is straightforward, and the oven does most of the work.
How to Serve
These Crispy Baked Okra Fries are incredibly versatile. Here are a few ways to serve them to make them the star of any meal:
- As an Appetizer:
- Arrange them on a platter with a variety of dipping sauces in the center. This makes for a perfect, shareable starter for parties or family gatherings.
- Serve them in individual paper cones or small cups for a fun, snack-bar feel.
- As a Healthy Side Dish:
- They are a fantastic, crunchy alternative to French fries alongside burgers, grilled chicken, or steak.
- Pair them with a simple piece of baked fish and a lemon wedge for a light and healthy meal.
- Serve alongside barbecue beef sandwiches or pulled beef for a classic Southern-inspired plate.
- With Dipping Sauces: The right sauce can take these fries to the next level.
- Classic Cool Ranch: A creamy, herby dip that perfectly balances the savory crunch.
- Spicy Aioli: Mix mayonnaise with a little sriracha, garlic, and a squeeze of lime juice for a creamy dip with a kick.
- Lemon-Garlic Yogurt Dip: Combine Greek yogurt with minced garlic, fresh lemon juice, dill, and a pinch of salt for a refreshing and healthy option.
- Classic Ketchup or Marinara Sauce: You can’t go wrong with the classics, especially for kids.
Additional Tips for Okra Perfection
- Choose Your Okra Wisely: Opt for smaller, younger okra pods (around 3-4 inches long). They are more tender and less woody than larger, more mature pods. Look for a bright green color and a firm texture, avoiding any that are bruised or limp.
- The Dryness Doctrine: I cannot stress this enough: your okra must be bone dry before you start breading. Any moisture will create steam and lead to the dreaded slime. After washing, give them a thorough pat-down with paper towels. You can even let them air-dry on the counter for 15-20 minutes.
- Don’t Crowd the Pan: This is a universal rule for crispy roasted vegetables. Give your okra fries personal space on the baking sheet. If they are too close together, they will steam each other instead of roasting, resulting in a softer texture. Use two sheets if you have to.
- Panko is Paramount: While you can use regular breadcrumbs in a pinch, panko breadcrumbs make a world of difference. Their larger, flakier structure absorbs less oil and creates a significantly lighter, crispier coating. It’s worth seeking them out.
- Spice It Up: Don’t be afraid to customize the spice blend. Add a pinch of cayenne pepper for heat, some cumin for an earthy flavor, or even a pre-made Cajun or Italian seasoning blend to the panko mix for a different flavor profile.
- Get an Extra-Crispy Finish: For an even crunchier result, turn on your oven’s broiler for the last 1-2 minutes of cooking. Watch them very carefully, as they can go from golden brown to burnt in a matter of seconds.
- Reheating for a Second-Day Crunch: While best fresh, you can reheat leftovers. The best way is in an oven or toaster oven at 400°F (200°C) for 5-7 minutes, or in an air fryer for 3-4 minutes. Avoid the microwave, as it will make them soggy.
- The Double-Dip Method (Optional): For an extra-thick and crunchy crust, you can perform a double dip. After the panko coating, dip the okra back into the egg wash and then back into the panko mixture one more time before baking.
Frequently Asked Questions (FAQ)
1. My okra still came out a little slimy. What went wrong?
This is the most common issue, and it almost always comes down to moisture. There are two likely culprits: either the okra wasn’t dried completely after washing, or the baking sheet was overcrowded. When the okra is wet or too close together, it steams instead of bakes. Ensure the pods are bone dry and give them plenty of space on the pan for the hot air to circulate.
2. Can I make these okra fries in an air fryer?
Absolutely! An air fryer is perfect for this recipe. Follow all the same preparation and breading steps. Preheat your air fryer to 400°F (200°C). Place the breaded okra in the air fryer basket in a single layer (you’ll likely need to work in batches). Cook for 8-10 minutes, shaking the basket halfway through, until golden and crispy.
3. How can I make this recipe gluten-free?
It’s very easy to adapt this recipe to be gluten-free. Simply substitute the all-purpose flour with a gluten-free all-purpose blend and use gluten-free panko breadcrumbs, which are widely available in most supermarkets. The results will be just as crispy and delicious.
4. Can I use frozen okra for this recipe?
While fresh okra is highly recommended for the best texture, you can use frozen cut okra in a pinch. Do not thaw it first. Tossing the frozen okra directly in the flour and proceeding with the breading helps prevent it from becoming too soft. You may need to add a few extra minutes to the baking time.
5. What is the best dipping sauce for okra fries?
This is a matter of personal preference! A creamy dip provides a great contrast to the crunch. A spicy aioli (mayonnaise, sriracha, lime) is a popular choice. A classic ranch or a simple garlic-yogurt dip are also fantastic. For a different twist, try a sweet chili sauce or a savory barbecue sauce.
6. How do I store and reheat leftovers?
Store any leftover okra fries in an airtight container in the refrigerator for up to 3 days. To reheat and restore their crispiness, do not use a microwave. The best method is to bake them on a sheet pan in a 400°F (200°C) oven for 5-7 minutes or heat them in an air fryer at 380°F (190°C) for 3-4 minutes until hot and crispy again.
7. Can I prepare these ahead of time?
You can do some of the prep ahead. You can wash, dry, and trim the okra and prepare the seasoned panko mixture. However, it’s best to bread and bake them just before serving. Breading them too far in advance can make the coating soggy as it absorbs moisture from the okra.
8. My breading isn’t sticking to the okra. What’s the problem?
The three-step breading process is designed to prevent this. If the breading is falling off, you may have skipped or rushed a step. Ensure the okra is first coated in flour—this gives the egg something to cling to. Then, make sure the okra is fully coated in the egg wash before pressing it firmly into the panko. Shaking off the excess at each stage is also important to avoid a heavy, clumpy coating that can fall off.

Crispy Baked Okra Fries
Ingredients
- 1 pound Fresh Okra: The star of our show. Look for bright green, firm pods that are no longer than 4 inches for the best texture and flavor.
- 1/2 cup All-Purpose Flour: This first layer is crucial for helping the egg wash stick to the okra pods.
- 2 large Eggs: Beaten to create an egg wash, which acts as the “glue” for our crispy panko coating.
- 1 1/2 cups Panko Breadcrumbs: These Japanese-style breadcrumbs are lighter and flakier than traditional breadcrumbs, guaranteeing a superior crunch.
- 1 teaspoon Smoked Paprika: Adds a lovely, smoky depth of flavor and a beautiful reddish hue to the fries.
- 1 teaspoon Garlic Powder: Provides a savory, aromatic base note that complements the okra perfectly.
- 1/2 teaspoon Onion Powder: Works in harmony with the garlic powder to build a foundational savory flavor.
- 1/2 teaspoon Salt (or to taste): Enhances all the other flavors.
- 1/4 teaspoon Black Pepper (or to taste): Adds a subtle, gentle heat.
- Olive Oil Spray or Cooking Spray: A light spritz is all you need to help the fries become golden and crispy in the oven.
Instructions
- Preheat and Prepare: Start by preheating your oven to 425°F (220°C). Line a large baking sheet with parchment paper. Using parchment paper is essential for preventing sticking and ensuring an easy cleanup.
- Wash and Dry the Okra: Rinse the okra pods under cool water. This next step is the most critical for preventing slime: dry the okra thoroughly. Pat them completely dry with paper towels or a clean kitchen towel. Any remaining moisture will turn to steam in the oven and can result in a gummy texture.
- Trim the Okra: Once dry, trim off the top stems and the very tips of the okra pods. For larger pods, you can slice them in half lengthwise to create more surface area for the crispy coating. Smaller pods can be left whole.
- Set Up the Breading Station: You will need three shallow dishes or plates.
- Dish 1 (Flour): Combine the all-purpose flour with a pinch of salt and pepper.
- Dish 2 (Egg): In the second dish, whisk the two large eggs until they are smooth and uniform.
- Dish 3 (Panko Mix): In the third dish, combine the panko breadcrumbs, smoked paprika, garlic powder, onion powder, ½ teaspoon of salt, and ¼ teaspoon of black pepper. Mix thoroughly until the spices are evenly distributed throughout the breadcrumbs.
- Bread the Okra: Working with a few pieces of okra at a time, follow this three-step process:
- First, dredge the okra in the flour mixture, shaking off any excess. This dry layer is key for the egg to adhere properly.
- Next, dip the flour-coated okra into the beaten eggs, allowing any excess to drip off.
- Finally, press the okra firmly into the panko breadcrumb mixture, ensuring it is completely coated on all sides.
- Arrange on the Baking Sheet: As you bread the okra, place each piece on the prepared baking sheet in a single layer. It is crucial not to overcrowd the pan. Leave a little space between each fry to allow hot air to circulate around them. This is essential for achieving maximum crispiness. Use a second baking sheet if necessary.
- Bake to Perfection: Lightly spray the tops of the breaded okra with olive oil spray or cooking spray. This will help them brown and get extra crispy. Bake for 15-20 minutes, flipping them halfway through, until they are golden brown and crispy.
- Serve Immediately: For the best texture, serve the okra fries hot and fresh from the oven with your favorite dipping sauce.
Nutrition
- Serving Size: one normal portion
- Calories: 185
- Fiber: 4g