")


There’s something undeniably comforting about sinking your teeth into a perfectly crispy chicken tender. For years, I’ve been on a quest to recreate that satisfying crunch and juicy interior at home, without resorting to deep frying. Honestly, the thought of all that oil and the cleanup always deterred me. Then, I stumbled upon this baked chicken tender recipe, and let me tell you, it’s been a game-changer in our household. My kids, who are notorious chicken tender aficionados (and let’s be honest, aren’t we all a little bit?), devoured these like they were going out of style. Even my husband, who usually prefers grilled or roasted chicken, was raving about the incredible flavor and texture. What impressed me most was how unbelievably easy they were to make! No complicated breading procedures, no messy frying – just simple ingredients and straightforward steps that result in chicken tenders that are truly crispy, incredibly juicy, and baked to golden perfection. If you’re looking for a healthier, hassle-free way to enjoy crispy chicken tenders at home, prepare to be amazed. This recipe is about to become your new family favorite.
Ingredients
This recipe relies on simple, pantry-friendly ingredients to achieve maximum flavor and crispiness. Here’s what you’ll need to gather:
- For the Chicken:
- 1.5 lbs boneless, skinless chicken breasts, cut into tender strips (about 1-inch thick) – Choose breasts that are uniform in thickness for even cooking. You can also use chicken tenderloins for even easier prep.
- 1 tablespoon olive oil (or avocado oil) – This helps the seasonings adhere to the chicken and adds a touch of moisture.
- 1 teaspoon salt – Essential for seasoning the chicken and enhancing its natural flavors.
- ½ teaspoon black pepper – Adds a touch of spice and depth of flavor.
- ½ teaspoon garlic powder – Provides a savory, aromatic base.
- ½ teaspoon onion powder – Complements the garlic powder and adds another layer of savory flavor.
- ½ teaspoon paprika (sweet or smoked) – Adds a hint of color and subtle smoky or sweet flavor, depending on your preference. Smoked paprika enhances the “fried” taste.
- For the Crispy Coating:
- 1 cup panko breadcrumbs – Panko is key to achieving that signature crispy crunch! Their larger, airier texture creates a much crispier coating than regular breadcrumbs.
- ½ cup grated Parmesan cheese – Adds a salty, cheesy flavor and helps with browning and crispiness. Use finely grated for best results.
- ¼ cup all-purpose flour – Helps the breadcrumbs adhere to the chicken and creates a slightly sturdier coating.
- 1 teaspoon dried Italian seasoning – Adds a blend of herbs that complements the other flavors and provides a classic Italian touch.
- ½ teaspoon salt – Enhances the flavor of the breading and balances the Parmesan cheese.
- ¼ teaspoon black pepper – Adds a touch of spice to the breading.
- 1 large egg – Acts as a binder, helping the breading stick to the chicken. Whisk it well for even coating.
- 2 tablespoons milk (or buttermilk) – Thins the egg slightly, making it easier to coat the chicken and adds a touch of richness.
Instructions
Follow these simple steps to create perfectly crispy and juicy baked chicken tenders every time:
- Preheat Your Oven and Prepare a Baking Sheet: Preheat your oven to 425°F (220°C). Line a large baking sheet with parchment paper for easy cleanup and to prevent sticking. Alternatively, you can use a wire rack placed on top of a baking sheet. The wire rack elevates the chicken, allowing air to circulate underneath and promoting even crisping on all sides.
- Prepare the Chicken: In a medium bowl, toss the chicken tender strips with olive oil, salt, black pepper, garlic powder, onion powder, and paprika. Massage the seasonings into the chicken to ensure even distribution. This initial seasoning step is crucial for flavorful chicken tenders. Don’t skip it! Let the chicken sit for about 5-10 minutes while you prepare the breading. This short marinating time allows the flavors to penetrate the chicken.
- Set Up Your Breading Stations: Prepare three shallow dishes or plates for your breading process.
- Dish 1: Flour Mixture: In the first dish, combine the all-purpose flour, Italian seasoning, salt, and black pepper. Whisk together to ensure everything is well combined. The flour mixture is the first layer of the breading, helping the egg adhere properly.
- Dish 2: Egg Wash: In the second dish, whisk together the egg and milk (or buttermilk) until well combined and slightly frothy. The egg wash provides moisture and helps the breadcrumbs stick to the flour-coated chicken.
- Dish 3: Panko Mixture: In the third dish, combine the panko breadcrumbs and grated Parmesan cheese. Stir well to distribute the cheese evenly throughout the panko. This panko and Parmesan mixture is the secret to the ultimate crispy coating.
- Bread the Chicken Tenders: Now it’s time to bread the chicken. Working one piece at a time, follow this three-step breading process:
- Step 1: Flour: Dredge each chicken tender in the flour mixture, ensuring it’s evenly coated on all sides. Shake off any excess flour. This creates a dry base for the egg wash to adhere to.
- Step 2: Egg Wash: Dip the flour-coated chicken tender into the egg wash, making sure it’s fully submerged. Let any excess egg drip off. The egg wash acts as the “glue” for the breadcrumbs.
- Step 3: Panko Mixture: Finally, dredge the egg-washed chicken tender in the panko mixture, pressing gently to ensure the breadcrumbs adhere well to all sides. Make sure the chicken is completely coated with panko. Pressing gently helps the panko stay in place during baking and creates a thicker, crispier crust.
- Arrange Chicken on Baking Sheet: Place the breaded chicken tenders on the prepared baking sheet in a single layer, ensuring they are not overcrowded. Overcrowding can lead to steaming rather than baking, resulting in less crispy chicken. Leave a little space between each tender for even cooking and crisping.
- Bake to Golden Perfection: Bake in the preheated oven for 15-20 minutes, or until the chicken is cooked through and the breading is golden brown and crispy. The cooking time may vary slightly depending on the thickness of your chicken tenders and your oven. To ensure even browning, you can flip the chicken tenders halfway through the baking time, around the 10-minute mark. Flipping helps both sides achieve optimal crispiness.
- Check for Doneness: The chicken is cooked through when it reaches an internal temperature of 165°F (74°C). Use a meat thermometer to check the temperature at the thickest part of a tender. Using a meat thermometer is the most reliable way to ensure your chicken is safely cooked and not overcooked.
- Rest and Serve: Once cooked, remove the baking sheet from the oven and let the chicken tenders rest for a few minutes before serving. Resting allows the juices to redistribute within the chicken, resulting in more tender and flavorful tenders. Serve immediately while they are still hot and crispy.
Nutrition Facts
(Note: Nutritional information is an estimate and can vary based on specific ingredients and serving sizes. The following is an approximate calculation per serving.)
- Servings: Approximately 4-6 servings
- Serving size will depend on individual appetite and whether served as a main course or appetizer. A typical serving might be 3-4 tenders.
- Calories per Serving (estimated): 350-450 calories
- This is an estimated range. Actual calorie count can vary based on chicken portion size, amount of breading adhered, and specific ingredients used.
Approximate Breakdown per Serving (estimated):
- Protein: 30-40g
- Fat: 15-25g
Disclaimer: This nutritional information is an estimate for informational purposes only. For precise nutritional information, use a nutrition calculator with the specific brands and measurements of ingredients used.
Preparation Time
- Prep Time: 20-25 minutes (includes chicken preparation and breading)
- Cook Time: 15-20 minutes
- Total Time: 35-45 minutes
This recipe is relatively quick to prepare, making it perfect for weeknight dinners or weekend lunches.
How to Serve Crispy Crunchy Baked Chicken Tenders
These versatile chicken tenders are delicious on their own, but even better when paired with complementary sides and dipping sauces. Here are some serving suggestions:
- Classic Dipping Sauces:
- Honey Mustard: A timeless favorite that perfectly balances sweet and tangy flavors.
- BBQ Sauce: Adds a smoky and savory dimension.
- Ranch Dressing: Creamy and cool, a classic pairing with chicken tenders.
- Ketchup: Simple and always a kid-pleaser.
- Buffalo Sauce: For those who like a little heat!
- Sweet Chili Sauce: Adds a touch of sweetness and spice.
- Homemade Aioli: Elevate your dipping game with a garlic aioli or flavored aioli (like sriracha aioli).
- Side Dish Pairings:
- French Fries or Sweet Potato Fries: A classic and satisfying combination.
- Coleslaw or Potato Salad: Cool and creamy sides to balance the crispy chicken.
- Mac and Cheese: Ultimate comfort food pairing.
- Corn on the Cob or Grilled Vegetables: Add some healthy and colorful sides.
- Green Salad or Caesar Salad: A lighter option for a balanced meal.
- Roasted Vegetables (broccoli, carrots, Brussels sprouts): Healthy and flavorful roasted veggies complement the chicken well.
- Meal Ideas:
- Chicken Tender Salad: Slice the tenders and top a fresh garden salad or Caesar salad.
- Chicken Tender Wraps or Tacos: Wrap tenders in tortillas with lettuce, tomatoes, cheese, and your favorite sauce.
- Chicken Tender Sandwiches: Serve tenders on buns with lettuce, tomato, and mayo or other condiments.
- Chicken Tender Bowls: Create a bowl with rice, quinoa, or couscous, roasted vegetables, and chicken tenders.
Additional Tips for Perfect Baked Chicken Tenders
Here are five extra tips to ensure your baked chicken tenders are always crispy, juicy, and delicious:
- Don’t Skip the Panko: Panko breadcrumbs are truly the secret to the crispiness in this recipe. Regular breadcrumbs will not provide the same level of crunch. If you can’t find panko, you can try making your own by pulsing day-old bread in a food processor, but panko is highly recommended. Panko’s airy texture allows for better crisping in the oven compared to finer breadcrumbs.
- Pat the Chicken Dry: Before seasoning and breading, pat the chicken tenders dry with paper towels. This removes excess moisture, allowing the seasonings and breading to adhere better and promoting crispier results. Excess moisture can prevent the chicken from browning and crisping properly.
- Don’t Overcrowd the Baking Sheet: As mentioned earlier, overcrowding the baking sheet will cause the chicken to steam instead of bake, leading to soggy tenders. Bake in batches if necessary to ensure the tenders are in a single layer with space between them. Proper air circulation is crucial for achieving crispiness in the oven.
- Use a Wire Rack (Optional but Recommended): Baking the chicken tenders on a wire rack placed on top of a baking sheet elevates them and allows air to circulate underneath, resulting in even crisping on all sides. If you don’t have a wire rack, you can still achieve good results directly on parchment paper, but a rack enhances crispiness. The wire rack method mimics the effect of frying by allowing hot air to circulate around the chicken.
- Adjust Baking Time as Needed: Oven temperatures can vary, and the thickness of your chicken tenders will also affect cooking time. Start checking for doneness around the 15-minute mark and adjust baking time accordingly. The chicken is done when it’s cooked through (165°F internal temperature) and the breading is golden brown and crispy. Always prioritize cooking chicken to a safe internal temperature.
Frequently Asked Questions (FAQ)
Here are some common questions about making crispy baked chicken tenders:
Q1: How do I ensure my baked chicken tenders are crispy and not soggy?
A: The key to crispy baked chicken tenders is using panko breadcrumbs, not overcrowding the baking sheet, and optionally using a wire rack to elevate the chicken during baking. Also, ensure you pat the chicken dry before breading and don’t skip the flour coating step, as it helps the egg wash and breadcrumbs adhere properly. Baking at a higher temperature (425°F) also contributes to crispiness.
Q2: Can I use regular breadcrumbs instead of panko?
A: While you can use regular breadcrumbs, panko breadcrumbs are highly recommended for achieving the best crispy texture. Panko is lighter and airier, resulting in a much crispier coating. Regular breadcrumbs will yield a less crispy and potentially denser coating. If using regular breadcrumbs, you might consider toasting them lightly beforehand to enhance their crispness.
Q3: Can I make these chicken tenders ahead of time?
A: For the best crispy texture, it’s recommended to serve these chicken tenders immediately after baking. However, you can prepare the breaded chicken tenders ahead of time and store them unbaked in the refrigerator for up to 2-3 hours before baking. For longer storage, cooked chicken tenders can be stored in an airtight container in the refrigerator for up to 3-4 days. Reheat them in the oven or air fryer to try and regain some crispiness, but they will be best fresh out of the oven.
Q4: Can I use different seasonings for the breading or chicken?
A: Absolutely! This recipe is very versatile. Feel free to experiment with different seasonings to customize the flavor to your liking. For the chicken, you could try adding Cajun seasoning, chili powder, or lemon pepper. For the breading, consider adding different dried herbs like oregano, thyme, or rosemary. You can also add a pinch of cayenne pepper for a little heat.
Q5: How do I reheat leftover baked chicken tenders and keep them crispy?
A: Reheating baked chicken tenders to maintain crispiness can be a bit challenging, but the best methods are using an oven or air fryer.
* Oven: Preheat your oven to 350°F (175°C). Place the chicken tenders on a baking sheet and bake for 10-15 minutes, or until heated through and crispy.
* Air Fryer: Air fry at 350°F (175°C) for 5-7 minutes, or until heated through and crispy.
* Microwaving is not recommended as it will make the chicken tenders soggy.

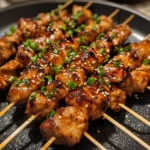
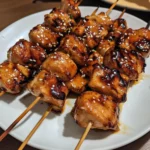
Crispy Crunchy Baked Chicken Tenders
Ingredients
This recipe relies on simple, pantry-friendly ingredients to achieve maximum flavor and crispiness. Here’s what you’ll need to gather:
- For the Chicken:
- 1.5 lbs boneless, skinless chicken breasts, cut into tender strips (about 1-inch thick) – Choose breasts that are uniform in thickness for even cooking. You can also use chicken tenderloins for even easier prep.
- 1 tablespoon olive oil (or avocado oil) – This helps the seasonings adhere to the chicken and adds a touch of moisture.
- 1 teaspoon salt – Essential for seasoning the chicken and enhancing its natural flavors.
- ½ teaspoon black pepper – Adds a touch of spice and depth of flavor.
- ½ teaspoon garlic powder – Provides a savory, aromatic base.
- ½ teaspoon onion powder – Complements the garlic powder and adds another layer of savory flavor.
- ½ teaspoon paprika (sweet or smoked) – Adds a hint of color and subtle smoky or sweet flavor, depending on your preference. Smoked paprika enhances the “fried” taste.
- For the Crispy Coating:
- 1 cup panko breadcrumbs – Panko is key to achieving that signature crispy crunch! Their larger, airier texture creates a much crispier coating than regular breadcrumbs.
- ½ cup grated Parmesan cheese – Adds a salty, cheesy flavor and helps with browning and crispiness. Use finely grated for best results.
- ¼ cup all-purpose flour – Helps the breadcrumbs adhere to the chicken and creates a slightly sturdier coating.
- 1 teaspoon dried Italian seasoning – Adds a blend of herbs that complements the other flavors and provides a classic Italian touch.
- ½ teaspoon salt – Enhances the flavor of the breading and balances the Parmesan cheese.
- ¼ teaspoon black pepper – Adds a touch of spice to the breading.
- 1 large egg – Acts as a binder, helping the breading stick to the chicken. Whisk it well for even coating.
- 2 tablespoons milk (or buttermilk) – Thins the egg slightly, making it easier to coat the chicken and adds a touch of richness.
Instructions
Follow these simple steps to create perfectly crispy and juicy baked chicken tenders every time:
- Preheat Your Oven and Prepare a Baking Sheet: Preheat your oven to 425°F (220°C). Line a large baking sheet with parchment paper for easy cleanup and to prevent sticking. Alternatively, you can use a wire rack placed on top of a baking sheet. The wire rack elevates the chicken, allowing air to circulate underneath and promoting even crisping on all sides.
- Prepare the Chicken: In a medium bowl, toss the chicken tender strips with olive oil, salt, black pepper, garlic powder, onion powder, and paprika. Massage the seasonings into the chicken to ensure even distribution. This initial seasoning step is crucial for flavorful chicken tenders. Don’t skip it! Let the chicken sit for about 5-10 minutes while you prepare the breading. This short marinating time allows the flavors to penetrate the chicken.
- Set Up Your Breading Stations: Prepare three shallow dishes or plates for your breading process.
- Dish 1: Flour Mixture: In the first dish, combine the all-purpose flour, Italian seasoning, salt, and black pepper. Whisk together to ensure everything is well combined. The flour mixture is the first layer of the breading, helping the egg adhere properly.
- Dish 2: Egg Wash: In the second dish, whisk together the egg and milk (or buttermilk) until well combined and slightly frothy. The egg wash provides moisture and helps the breadcrumbs stick to the flour-coated chicken.
- Dish 3: Panko Mixture: In the third dish, combine the panko breadcrumbs and grated Parmesan cheese. Stir well to distribute the cheese evenly throughout the panko. This panko and Parmesan mixture is the secret to the ultimate crispy coating.
- Bread the Chicken Tenders: Now it’s time to bread the chicken. Working one piece at a time, follow this three-step breading process:
- Step 1: Flour: Dredge each chicken tender in the flour mixture, ensuring it’s evenly coated on all sides. Shake off any excess flour. This creates a dry base for the egg wash to adhere to.
- Step 2: Egg Wash: Dip the flour-coated chicken tender into the egg wash, making sure it’s fully submerged. Let any excess egg drip off. The egg wash acts as the “glue” for the breadcrumbs.
- Step 3: Panko Mixture: Finally, dredge the egg-washed chicken tender in the panko mixture, pressing gently to ensure the breadcrumbs adhere well to all sides. Make sure the chicken is completely coated with panko. Pressing gently helps the panko stay in place during baking and creates a thicker, crispier crust.
- Arrange Chicken on Baking Sheet: Place the breaded chicken tenders on the prepared baking sheet in a single layer, ensuring they are not overcrowded. Overcrowding can lead to steaming rather than baking, resulting in less crispy chicken. Leave a little space between each tender for even cooking and crisping.
- Bake to Golden Perfection: Bake in the preheated oven for 15-20 minutes, or until the chicken is cooked through and the breading is golden brown and crispy. The cooking time may vary slightly depending on the thickness of your chicken tenders and your oven. To ensure even browning, you can flip the chicken tenders halfway through the baking time, around the 10-minute mark. Flipping helps both sides achieve optimal crispiness.
- Check for Doneness: The chicken is cooked through when it reaches an internal temperature of 165°F (74°C). Use a meat thermometer to check the temperature at the thickest part of a tender. Using a meat thermometer is the most reliable way to ensure your chicken is safely cooked and not overcooked.
- Rest and Serve: Once cooked, remove the baking sheet from the oven and let the chicken tenders rest for a few minutes before serving. Resting allows the juices to redistribute within the chicken, resulting in more tender and flavorful tenders. Serve immediately while they are still hot and crispy.
Nutrition
- Serving Size: one normal portion
- Calories: 450
- Fat: 25g
- Protein: 40g