")


It started with a familiar predicament: the 4 PM snack attack. My family, like many others, would gravitate towards the usual suspects – chips, crackers, or something sugary. While fine in moderation, I was on a quest for a healthier alternative that didn’t sacrifice the all-important “crunch factor.” I’d tried various healthy snacks, but many were met with lukewarm reception. They were either too bland, not satisfying, or simply didn’t hit that craving for something savory and crispy. Then, I stumbled upon the magic of roasting chickpeas. My first few attempts were okay, but not spectacular. They were a bit soft, a little underwhelming. But I was determined. Through trial and error, I perfected this recipe for Crunchy Herb Roasted Chickpeas, and the result was a game-changer. The first time I served a warm bowl of these golden nuggets, the reaction was immediate. My kids, initially skeptical, were won over by the incredible crunch and the fragrant aroma of rosemary and thyme. My husband, a notorious chip enthusiast, found himself reaching for the chickpea bowl again and again. They have since become a non-negotiable staple in our home. We sprinkle them on salads for a protein boost, garnish our soups with them for a crouton-like texture, and, most often, devour them straight from the baking sheet as they cool. This recipe isn’t just a snack; it’s a versatile, nutritious, and ridiculously delicious solution to our snacking woes, and I’m thrilled to share the simple secrets to achieving perfectly crispy, flavorful roasted chickpeas every single time.
Ingredients
Here is the simple list of ingredients you’ll need to create these irresistibly crunchy and flavorful herb-roasted chickpeas. Each component plays a vital role in achieving the perfect texture and taste.
- 2 (15-ounce) cans of chickpeas (garbanzo beans): This is the star of the show. Using canned chickpeas makes this recipe incredibly convenient and fast. They provide a wonderful, creamy interior that contrasts beautifully with the crispy exterior once roasted.
- 2 tablespoons extra virgin olive oil: A good quality olive oil is essential. It not only helps the chickpeas to crisp up beautifully in the oven but also adds a subtle, fruity flavor that complements the herbs and spices. It’s the key to that golden-brown finish.
- 1 teaspoon dried rosemary: This aromatic herb brings a wonderfully piney, woody, and peppery flavor that is a classic pairing with roasted dishes. Dried rosemary is potent, so a little goes a long way in infusing the chickpeas with its distinctive taste.
- 1 teaspoon dried thyme: Thyme offers a gentle, earthy, and slightly minty flavor that harmonizes perfectly with the rosemary. It adds a layer of complexity to the overall herb profile, making the chickpeas taste sophisticated and savory.
- 1 teaspoon garlic powder: Garlic powder provides a consistent, mellow garlic flavor without the risk of burning that fresh minced garlic would have at high roasting temperatures. It ensures every chickpea is coated in that savory, aromatic essence.
- ½ teaspoon onion powder: Much like garlic powder, onion powder distributes evenly and imparts a sweet and savory depth of flavor that rounds out the spice blend. It’s a subtle but crucial background note.
- ½ teaspoon fine sea salt (plus more for finishing): Salt is a flavor enhancer. Using it in the initial coating helps to season the chickpeas from the start. A final sprinkle after roasting brings out all the other flavors and adds a final touch of savory goodness.
- ¼ teaspoon black pepper: Freshly ground black pepper is always best, providing a mild heat and pungent aroma that cuts through the richness of the olive oil and complements the earthy herbs.
Instructions
Follow these detailed steps carefully to ensure your chickpeas turn out perfectly crunchy and delicious. The secret lies in the preparation, particularly in getting the chickpeas as dry as possible before they go into the oven.
- Preheat and Prepare: Begin by preheating your oven to 400°F (200°C). Position a rack in the middle of the oven for even heat distribution. Line a large, rimmed baking sheet with parchment paper. This prevents the chickpeas from sticking and makes cleanup a breeze.
- Rinse and Drain the Chickpeas: Open the cans of chickpeas and pour them into a colander or fine-mesh sieve. Rinse them thoroughly under cool, running water. This step is important as it removes the starchy liquid (aquafaba) they are canned in, which can prevent them from getting truly crispy. Shake the colander well to get rid of excess water.
- The Crucial Drying Step: This is the most important step for achieving maximum crunch. Spread the rinsed chickpeas out on a clean kitchen towel or a thick layer of paper towels. Gently pat them dry with another towel. For even better results, let them air-dry for about 30 minutes to an hour. You want the surface of each chickpea to be as dry as possible. Any moisture left on the outside will create steam in the oven, leading to softer chickpeas.
- Season the Chickpeas: Transfer the thoroughly dried chickpeas to a medium-sized mixing bowl. Drizzle them with the 2 tablespoons of extra virgin olive oil. Toss them gently with a spoon or your hands until every chickpea has a light, even coating of oil.
- Add the Spices: In a small bowl, combine the dried rosemary, dried thyme, garlic powder, onion powder, ½ teaspoon of fine sea salt, and black pepper. Whisk them together to ensure the blend is evenly mixed. Sprinkle this herb and spice mixture over the oil-coated chickpeas.
- Toss to Coat: Gently toss the chickpeas again until they are uniformly coated with the herb mixture. Make sure every nook and cranny is seasoned. This ensures a consistent, delicious flavor in every single bite.
- Arrange on the Baking Sheet: Pour the seasoned chickpeas onto the prepared baking sheet. Spread them out into a single, even layer. It is vital that the chickpeas are not crowded. If they are too close together, they will steam instead of roast. Use two baking sheets if necessary to give them plenty of space.
- Roast to Perfection: Place the baking sheet in the preheated oven. Roast for 20-30 minutes. About halfway through the cooking time (around the 15-minute mark), take the baking sheet out and give it a good shake. This helps the chickpeas to brown evenly on all sides.
- Check for Doneness: The chickpeas are done when they are a deep golden-brown color, slightly shrunken, and feel dry and firm to the touch. If you test one (after letting it cool for a minute), it should be crunchy. If they are still soft in the center, return them to the oven for another 5-10 minutes, checking frequently to prevent burning.
- Cool and Final Seasoning: Remove the baking sheet from the oven. Let the chickpeas cool directly on the pan for at least 10-15 minutes. They will continue to crisp up significantly as they cool down. Once cooled slightly, taste one and sprinkle with a little extra sea salt, if desired. Serve immediately for the best texture.
Nutrition Facts
This recipe is not only delicious but also packed with nutritional benefits, making it a smart choice for snacking. The following nutritional information is an estimate for one serving.
- Servings: This recipe makes approximately 4 servings.
- Calories per serving: Approximately 180-220 calories.
- High in Plant-Based Protein: Each serving provides a significant amount of protein, which is essential for muscle repair, immune function, and keeping you feeling full and satisfied. This makes it an excellent snack for staving off hunger between meals.
- Excellent Source of Dietary Fiber: Chickpeas are loaded with fiber, which aids in digestion, helps maintain stable blood sugar levels, and contributes to heart health by helping to lower cholesterol.
- Rich in Important Minerals: These roasted chickpeas are a good source of minerals like manganese, which is crucial for bone formation and metabolism, and iron, which is vital for oxygen transport in the blood and preventing fatigue.
- Contains Healthy Fats: The use of extra virgin olive oil provides monounsaturated fats, which are considered heart-healthy. These fats can help reduce bad cholesterol levels and provide antioxidants.
- Naturally Gluten-Free and Vegan: This recipe is made entirely from plant-based ingredients and contains no gluten, making it a suitable and delicious snack for individuals with various dietary restrictions or preferences.
Preparation Time
This recipe is remarkably quick and easy, with most of the time being hands-off while the chickpeas roast to perfection in the oven.
- Prep Time: 10 minutes (This includes rinsing, drying, and seasoning the chickpeas).
- Cook Time: 20-30 minutes.
- Total Time: 30-40 minutes.
The active preparation is minimal, making it an ideal recipe for a busy afternoon or a quick appetizer when you have guests. The key is to factor in a little extra time for air-drying the chickpeas for the best results.
How to Serve
These Crunchy Herb Roasted Chickpeas are incredibly versatile. While they are fantastic on their own, here are some creative and delicious ways to serve them:
- As a Standalone Healthy Snack:
- Serve them warm in a bowl as a healthy alternative to chips or nuts during movie night or when hosting a get-together. They are satisfyingly crunchy and savory, curbing those junk food cravings.
- The Ultimate Salad Topper:
- Forget boring croutons! Sprinkle a generous handful of these roasted chickpeas over any salad. They add a delightful crunch, a boost of plant-based protein, and a savory herb flavor that complements fresh greens and vinaigrettes perfectly. They are especially good on Caesar salads or Mediterranean-style salads.
- A Textural Garnish for Soups:
- Elevate your favorite soups and stews. Garnish creamy tomato soup, hearty lentil soup, or a smooth butternut squash soup with these chickpeas. They provide a wonderful textural contrast to the smoothness of the soup, acting like tiny, flavorful croutons.
- In Grain Bowls and Buddha Bowls:
- Build a nutritious and satisfying meal by adding these chickpeas to a grain bowl. Combine them with quinoa or brown rice, roasted vegetables, fresh greens, and a drizzle of your favorite dressing (like a tahini or lemon vinaigrette) for a complete and balanced meal.
- Tucked into Wraps and Pitas:
- Add a surprising and delightful crunch to your sandwiches and wraps. Tuck them into a pita with hummus, feta cheese, and fresh vegetables, or roll them into a wrap with avocado and greens for a protein-packed and texturally exciting lunch.
- On a Charcuterie or Mezze Platter:
- Feature them on a snack board alongside cheeses, olives, cured meats, hummus, and fresh vegetables. Their savory flavor and crunchy texture make them a perfect component for grazing and entertaining.
- As a Crunchy Trail Mix Component:
- Let the chickpeas cool completely and mix them with your favorite nuts (like almonds or cashews), seeds (pumpkin or sunflower), and a small amount of dried fruit for a custom, savory-forward trail mix perfect for hiking or on-the-go snacking.
Additional Tips
To master the art of the perfect roasted chickpea, keep these eight essential tips in mind. They can make the difference between good and unforgettably great.
- Dryness is Non-Negotiable: This cannot be overstated. The drier your chickpeas are before they hit the oven, the crunchier they will be. After patting them dry, consider letting them sit on the counter on a towel for 30-60 minutes. Some dedicated cooks even peel the skins off each chickpea for ultimate crispiness, but this is a time-consuming step that isn’t necessary for great results.
- Don’t Crowd the Pan: Give your chickpeas personal space on the baking sheet. Spreading them in a single layer with room between each one allows hot air to circulate freely, roasting them evenly instead of steaming them. If your baking sheet looks crowded, it’s always better to use two sheets.
- Consider an Initial “Naked” Roast: For an extra layer of crunch, try this two-stage roasting method. After drying the chickpeas, roast them plain (no oil or spices) at 400°F (200°C) for 15 minutes. Then, remove them from the oven, toss them with the oil and spices, and return them to the oven for another 15-20 minutes until golden and crispy. This initial dry roast helps to remove even more moisture.
- Add Delicate Herbs and Salt at the End: While dried, hardy herbs like rosemary and thyme hold up well to high heat, more delicate spices like smoked paprika or fresh herbs like parsley can burn and become bitter. Consider tossing the chickpeas with these more sensitive ingredients during the last 5 minutes of roasting or immediately after they come out of the oven. Similarly, adding the final sprinkle of salt while they are still hot and fresh from the oven helps it adhere better.
- Experiment with Spice Blends: This recipe is a fantastic template. Feel free to customize it! Try a smoky version with smoked paprika, cumin, and a pinch of cayenne pepper. Go for a zesty flavor with lemon zest (added after roasting) and dried dill. An Indian-inspired blend with curry powder, turmeric, and garam masala is also delicious.
- Air Fryer Instructions: If you have an air fryer, it can make exceptionally crispy chickpeas. Prepare them as directed (dry and season them). Preheat your air fryer to 390°F (195°C). Add the chickpeas to the basket in a single layer (you may need to work in batches) and cook for 12-15 minutes, shaking the basket every 5 minutes until they are golden and crispy.
- Store Them Correctly (It’s Not What You Think): While it seems counterintuitive, storing roasted chickpeas in a completely airtight container can trap residual moisture and cause them to soften. For best results, let them cool completely to room temperature, then store them in a paper bag or a glass jar with the lid slightly ajar on the counter for up to 3 days. They will lose some crunch over time, but this method is better than an airtight seal.
- Re-Crisp if Necessary: If your chickpeas do lose some of their crunch, don’t despair! You can easily revive them. Simply spread them on a baking sheet and pop them into a 350°F (175°C) oven or an air fryer for 3-5 minutes until they are warmed through and crispy again.
FAQ Section
Here are answers to some of the most frequently asked questions about making crunchy herb roasted chickpeas.
1. Why didn’t my roasted chickpeas get crunchy?
This is the most common issue, and it almost always comes down to one thing: moisture. If the chickpeas aren’t dried thoroughly before roasting, the excess water will turn to steam in the oven, preventing them from crisping up. Another culprit could be an overcrowded pan, which also leads to steaming rather than roasting. Finally, they might simply need more time in the oven. Ovens can vary, so roast until they are deeply golden and firm to the touch.
2. How do I store roasted chickpeas to keep them crispy?
The best way to store them is to let them cool completely on the baking sheet. Once at room temperature, place them in a container that allows for some air circulation, like a paper bag or a glass jar with the lid left ajar. Storing them in an airtight container can trap any trace amounts of moisture, which will soften them over time. They are best enjoyed within the first 1-2 days for maximum crunch.
3. Can I make these in an air fryer instead of the oven?
Absolutely! An air fryer is fantastic for making chickpeas extra crispy. Follow all the prep steps for drying and seasoning. Then, cook them in the air fryer at 390°F (195°C) for about 12-15 minutes, shaking the basket a few times throughout the cooking process. Be sure not to overcrowd the air fryer basket; cook in batches if necessary.
4. Are roasted chickpeas actually a healthy snack?
Yes, they are an incredibly healthy snack. They are a great source of plant-based protein and dietary fiber, which helps keep you feeling full and aids in digestion. They are also packed with essential minerals and are naturally vegan and gluten-free. Compared to many processed snacks like potato chips, they are a far more nutrient-dense option.
5. Can I use different types of beans for this recipe?
While you can technically roast other beans, chickpeas (garbanzo beans) are uniquely suited for this recipe. Their starchy texture and low moisture content allow them to become wonderfully crispy on the outside while remaining pleasantly tender on the inside. Other beans, like black beans or kidney beans, tend to dry out and become hard rather than achieving that signature crunch.
6. Can I prepare the chickpeas in advance?
You can do some of the prep in advance. You can rinse, drain, and dry the chickpeas ahead of time. However, it is highly recommended that you roast them just before you plan to serve them. Roasted chickpeas have the best texture—crispy and crunchy—when they are fresh and warm from the oven. They will inevitably lose some of their crunch as they sit.
7. My spices burned while roasting. What went wrong?
This can happen if your oven runs hot or if you’re using very fine, delicate spices. Spices like garlic powder and some dried herbs can burn at high temperatures. To prevent this, you can try the two-stage roasting method mentioned in the tips section: roast the chickpeas plain first, then toss with oil and spices for the final 15 minutes of cooking. This gives the chickpeas a head start on crisping up without exposing the spices to high heat for too long.
8. Is it necessary to remove the skins from the chickpeas?
It is not necessary, but it can result in a slightly crispier and more uniform texture. The skins can sometimes trap moisture. If you have the time and patience, you can gently rub the dried chickpeas between your hands or in a kitchen towel, and many of the loose skins will come right off. However, you can still achieve a fantastic crunch without this extra step.
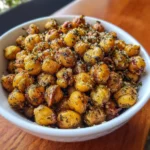
Crunchy Herb Roasted Chickpeas
Ingredients
Here is the simple list of ingredients you’ll need to create these irresistibly crunchy and flavorful herb-roasted chickpeas. Each component plays a vital role in achieving the perfect texture and taste.
- 2 (15-ounce) cans of chickpeas (garbanzo beans): This is the star of the show. Using canned chickpeas makes this recipe incredibly convenient and fast. They provide a wonderful, creamy interior that contrasts beautifully with the crispy exterior once roasted.
- 2 tablespoons extra virgin olive oil: A good quality olive oil is essential. It not only helps the chickpeas to crisp up beautifully in the oven but also adds a subtle, fruity flavor that complements the herbs and spices. It’s the key to that golden-brown finish.
- 1 teaspoon dried rosemary: This aromatic herb brings a wonderfully piney, woody, and peppery flavor that is a classic pairing with roasted dishes. Dried rosemary is potent, so a little goes a long way in infusing the chickpeas with its distinctive taste.
- 1 teaspoon dried thyme: Thyme offers a gentle, earthy, and slightly minty flavor that harmonizes perfectly with the rosemary. It adds a layer of complexity to the overall herb profile, making the chickpeas taste sophisticated and savory.
- 1 teaspoon garlic powder: Garlic powder provides a consistent, mellow garlic flavor without the risk of burning that fresh minced garlic would have at high roasting temperatures. It ensures every chickpea is coated in that savory, aromatic essence.
- ½ teaspoon onion powder: Much like garlic powder, onion powder distributes evenly and imparts a sweet and savory depth of flavor that rounds out the spice blend. It’s a subtle but crucial background note.
- ½ teaspoon fine sea salt (plus more for finishing): Salt is a flavor enhancer. Using it in the initial coating helps to season the chickpeas from the start. A final sprinkle after roasting brings out all the other flavors and adds a final touch of savory goodness.
- ¼ teaspoon black pepper: Freshly ground black pepper is always best, providing a mild heat and pungent aroma that cuts through the richness of the olive oil and complements the earthy herbs.
Instructions
Follow these detailed steps carefully to ensure your chickpeas turn out perfectly crunchy and delicious. The secret lies in the preparation, particularly in getting the chickpeas as dry as possible before they go into the oven.
- Preheat and Prepare: Begin by preheating your oven to 400°F (200°C). Position a rack in the middle of the oven for even heat distribution. Line a large, rimmed baking sheet with parchment paper. This prevents the chickpeas from sticking and makes cleanup a breeze.
- Rinse and Drain the Chickpeas: Open the cans of chickpeas and pour them into a colander or fine-mesh sieve. Rinse them thoroughly under cool, running water. This step is important as it removes the starchy liquid (aquafaba) they are canned in, which can prevent them from getting truly crispy. Shake the colander well to get rid of excess water.
- The Crucial Drying Step: This is the most important step for achieving maximum crunch. Spread the rinsed chickpeas out on a clean kitchen towel or a thick layer of paper towels. Gently pat them dry with another towel. For even better results, let them air-dry for about 30 minutes to an hour. You want the surface of each chickpea to be as dry as possible. Any moisture left on the outside will create steam in the oven, leading to softer chickpeas.
- Season the Chickpeas: Transfer the thoroughly dried chickpeas to a medium-sized mixing bowl. Drizzle them with the 2 tablespoons of extra virgin olive oil. Toss them gently with a spoon or your hands until every chickpea has a light, even coating of oil.
- Add the Spices: In a small bowl, combine the dried rosemary, dried thyme, garlic powder, onion powder, ½ teaspoon of fine sea salt, and black pepper. Whisk them together to ensure the blend is evenly mixed. Sprinkle this herb and spice mixture over the oil-coated chickpeas.
- Toss to Coat: Gently toss the chickpeas again until they are uniformly coated with the herb mixture. Make sure every nook and cranny is seasoned. This ensures a consistent, delicious flavor in every single bite.
- Arrange on the Baking Sheet: Pour the seasoned chickpeas onto the prepared baking sheet. Spread them out into a single, even layer. It is vital that the chickpeas are not crowded. If they are too close together, they will steam instead of roast. Use two baking sheets if necessary to give them plenty of space.
- Roast to Perfection: Place the baking sheet in the preheated oven. Roast for 20-30 minutes. About halfway through the cooking time (around the 15-minute mark), take the baking sheet out and give it a good shake. This helps the chickpeas to brown evenly on all sides.
- Check for Doneness: The chickpeas are done when they are a deep golden-brown color, slightly shrunken, and feel dry and firm to the touch. If you test one (after letting it cool for a minute), it should be crunchy. If they are still soft in the center, return them to the oven for another 5-10 minutes, checking frequently to prevent burning.
- Cool and Final Seasoning: Remove the baking sheet from the oven. Let the chickpeas cool directly on the pan for at least 10-15 minutes. They will continue to crisp up significantly as they cool down. Once cooled slightly, taste one and sprinkle with a little extra sea salt, if desired. Serve immediately for the best texture.
Nutrition
- Serving Size: one normal portion
- Calories: 220