")

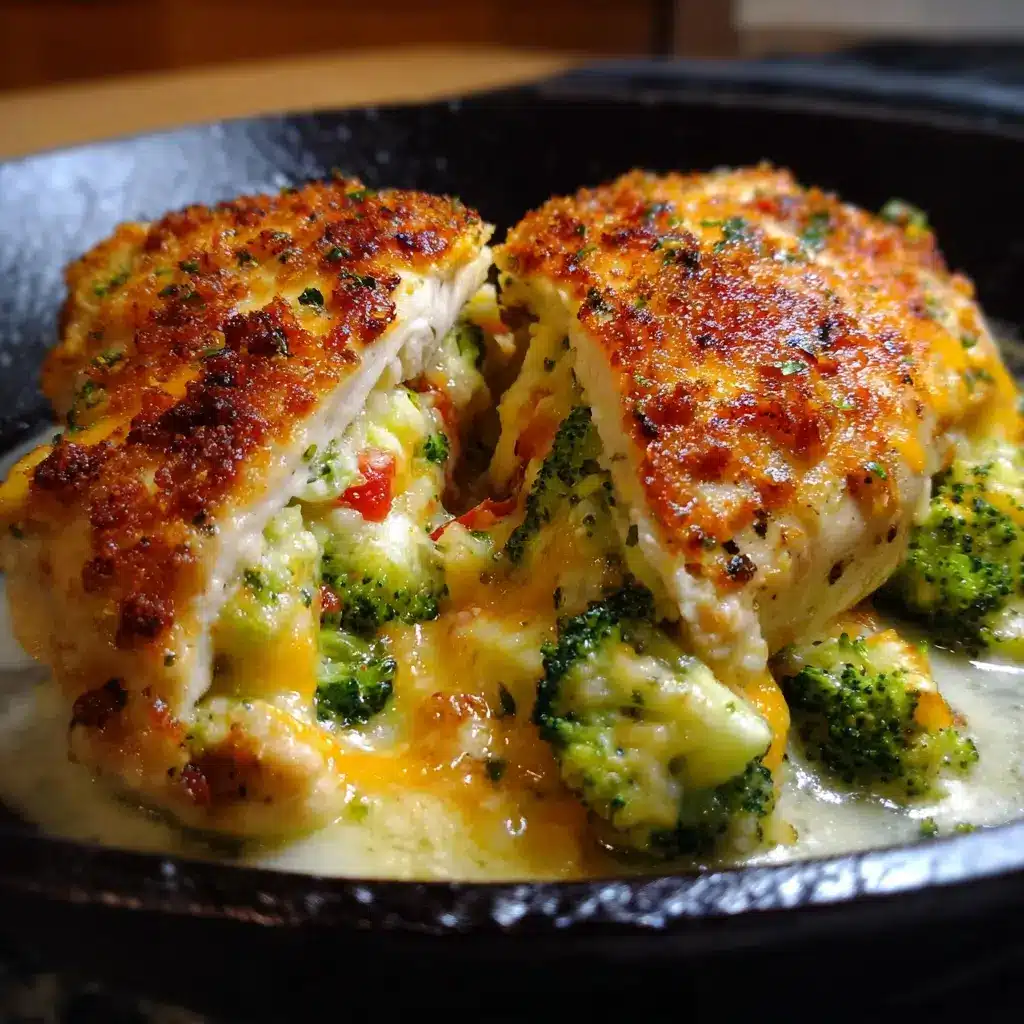

Of all the recipes in my weeknight dinner rotation, this one holds a special place in my heart—and in my family’s stomachs. I remember the first time I made this Easy Broccoli and Cheese Stuffed Chicken. It was one of those hectic Tuesdays where everyone was tired and hungry, and I needed a meal that felt like a hug but didn’t require hours of effort. I was skeptical that something so simple could be so impressive. But when I pulled those golden-brown chicken breasts from the oven, sizzling gently, and cut the first one open to reveal a river of molten cheddar and vibrant green broccoli, the whole table went quiet. That first bite was a revelation: perfectly juicy chicken, a creamy, savory filling, and the satisfying texture of tender-crisp broccoli. My kids, who normally approach green vegetables with suspicion, devoured every last bite and asked when we could have “the fancy cheese chicken” again. It has since become our go-to for a reliable, crowd-pleasing meal that elevates a simple chicken dinner into something truly memorable. It’s the kind of dish that earns you compliments without demanding all your time and energy, and that, in my book, is the definition of a perfect recipe.
Ingredients
- 4 large boneless, skinless chicken breasts: Approximately 8 ounces (225g) each. Using larger breasts provides ample room for a generous amount of filling.
- 1 ½ cups broccoli florets: Finely chopped into small, almost rice-sized pieces to ensure they cook through and mix evenly into the filling.
- 1 cup shredded sharp cheddar cheese: Sharp cheddar provides a robust, tangy flavor that stands up beautifully to the chicken and broccoli. You can also use a blend of cheddar and mozzarella.
- 4 ounces cream cheese: Softened to room temperature. This is the binder for our filling, creating a luxuriously creamy texture.
- 1 teaspoon garlic powder: Adds a deep, savory aroma and flavor that complements both the cheese and the chicken.
- ½ teaspoon onion powder: Provides a subtle, sweet undertone that rounds out the filling’s flavor profile.
- ½ teaspoon paprika: Can be sweet or smoked. It not only adds a gentle warmth but also contributes to the beautiful golden-brown color of the cooked chicken.
- Salt and black pepper: To taste. Essential for seasoning the chicken inside and out and enhancing all the other flavors.
- 2 tablespoons olive oil: Used for searing the chicken, creating a delicious, crispy crust and locking in the juices before baking.
Instructions
- Preheat and Prepare: Begin by preheating your oven to 400°F (200°C). This ensures the oven is at the perfect temperature to cook the chicken through evenly after searing. Line a baking sheet with parchment paper for easy cleanup.
- Prepare the Chicken Breasts: Place the chicken breasts on a clean cutting board. Using a sharp knife, carefully cut a deep pocket into the thickest side of each chicken breast. Be mindful not to cut all the way through to the other side or the ends. The goal is to create a spacious pouch for the filling. Pat the chicken breasts dry with a paper towel, both inside and out. This step is crucial for achieving a perfect sear and golden-brown skin. Season the chicken generously on all sides, and inside the pocket, with salt, pepper, and paprika.
- Create the Creamy Filling: In a medium-sized bowl, combine the softened cream cheese, shredded sharp cheddar, finely chopped broccoli florets, garlic powder, and onion powder. Mix thoroughly with a spatula or spoon until all the ingredients are well-incorporated and the mixture is uniform. The cream cheese should be evenly distributed, creating a thick, creamy paste that holds the broccoli and cheddar together. Season the filling with a pinch of salt and pepper and give it one last stir.
- Stuff the Chicken: Carefully spoon the broccoli and cheese mixture into the pocket of each chicken breast. Distribute the filling evenly among the four breasts. Be careful not to overstuff them, as the filling can ooze out during cooking. Gently press the opening of the chicken breast to seal it. If needed, you can secure the opening with one or two toothpicks to ensure the filling stays put.
- Sear for Color and Flavor: Heat the olive oil in a large, oven-safe skillet over medium-high heat. Once the oil is shimmering, carefully place the stuffed chicken breasts in the skillet. Sear for 2-3 minutes per side, or until a beautiful golden-brown crust forms. This step is not for cooking the chicken through but for developing a deep, savory flavor through the Maillard reaction and creating an appealing texture.
- Bake to Perfection: If you used an oven-safe skillet, you can transfer the entire skillet directly into the preheated oven. If not, transfer the seared chicken breasts to the prepared baking sheet. Bake for 20-25 minutes, or until the chicken is cooked through and the internal temperature reaches 165°F (74°C) when checked with a meat thermometer inserted into the thickest part of the chicken (not the filling).
- Rest and Serve: Once cooked, remove the chicken from the oven and let it rest on the baking sheet or a cutting board for at least 5-10 minutes. This critical step allows the juices to redistribute throughout the meat, ensuring every bite is moist and tender. If you used toothpicks, remember to remove them before serving. Slice and serve warm, enjoying the delicious, cheesy center.
Nutrition Facts
- Servings: 4
- Calories per serving: Approximately 485 kcal
- Protein: 52g. An excellent source of high-quality protein, essential for muscle repair, growth, and overall body function.
- Fat: 29g. Primarily from the cheese, cream cheese, and olive oil, providing satiety and rich flavor.
- Carbohydrates: 4g. This recipe is naturally low in carbohydrates, making it an excellent choice for those following a low-carb or ketogenic diet.
- Vitamin C: 15% of Daily Value. The broccoli in the filling provides a healthy dose of Vitamin C, a powerful antioxidant that supports the immune system.
- Calcium: 20% of Daily Value. The cheddar and cream cheese make this dish a good source of calcium, which is vital for bone health.
Preparation Time
This recipe is designed for efficiency without sacrificing flavor. The total time from start to finish is under an hour, making it perfectly suited for a busy weeknight.
- Preparation Time: 15 minutes (chopping broccoli, mixing the filling, and stuffing the chicken).
- Cook Time: 25-30 minutes (searing and baking).
- Total Time: Approximately 45 minutes.
How to Serve
This Broccoli and Cheese Stuffed Chicken is a versatile main course that pairs wonderfully with a wide variety of side dishes. You can tailor your meal to be a hearty, comforting feast or a light, healthy dinner.
Classic Comfort Pairings
For a truly satisfying and classic comfort food experience, serve the chicken with sides that can soak up its delicious juices.
- Creamy Mashed Potatoes: The ultimate comfort side. The fluffy texture of the potatoes is a perfect contrast to the juicy chicken and its cheesy filling.
- Roasted Root Vegetables: A medley of carrots, parsnips, and sweet potatoes, roasted until caramelized and tender, adds a touch of sweetness and earthiness.
- Egg Noodles with Butter and Parsley: Simple, buttery noodles provide a wonderful base and won’t overpower the star of the show.
- Garlic Bread: Perfect for sopping up any cheese or juices that escape onto the plate.
Lighter and Healthier Options
If you’re looking for a lighter meal, balance the richness of the stuffed chicken with fresh, vibrant sides.
- Quinoa Salad: A salad of quinoa, cucumber, cherry tomatoes, and a light lemon vinaigrette offers a refreshing and nutritious counterpoint.
- Steamed Asparagus or Green Beans: Simply steamed and dressed with a squeeze of lemon juice and a sprinkle of salt, these greens add a crisp, clean element to the plate.
- A Simple Arugula Salad: The peppery bite of arugula tossed with a light balsamic vinaigrette cuts through the richness of the cheese beautifully.
- Cauliflower Rice: A fantastic low-carb alternative to traditional rice that is light and fluffy.
Low-Carb and Keto-Friendly Sides
This recipe is inherently low in carbs, making it a keto favorite. Pair it with these sides to keep the entire meal keto-compliant.
- Creamy Cauliflower Mash: A rich and creamy substitute for mashed potatoes that is both delicious and low in carbs.
- Zucchini Noodles (Zoodles): Sautéed with garlic and olive oil, zoodles are a great pasta alternative.
- Roasted Brussels Sprouts with a sprinkle of Parmesan: Roasting brings out the nutty flavor of the Brussels sprouts, which complements the cheesy chicken.
Additional Tips
- Choose Your Cheese Wisely: While sharp cheddar is fantastic, don’t be afraid to experiment. A mix of Gruyère and mozzarella will give you a nutty flavor with an epic cheese pull. Provolone, Colby Jack, or a spicy pepper jack can also add exciting new dimensions to the dish.
- Don’t Overstuff the Pockets: It’s tempting to pack as much of the delicious filling in as possible, but overstuffing is the number one cause of leakage during cooking. A good rule of thumb is to fill the pocket until it’s full but you can still easily press the opening closed.
- Toothpicks are Your Best Friend: To ensure a perfectly contained filling, secure the opening of each chicken breast with one or two water-soaked toothpicks. This creates a seal that prevents the cheese from melting out in the pan and oven. Just remember to remove them before serving!
- Pat the Chicken Dry for a Perfect Sear: Before seasoning, use paper towels to pat the chicken breasts completely dry. Moisture is the enemy of a good sear. A dry surface allows the chicken to brown beautifully and develop a crispy, flavorful crust in the hot pan.
- Blanch the Broccoli for a Softer Bite: If you prefer your broccoli extra tender, you can blanch the finely chopped florets in boiling water for 1 minute, then immediately transfer them to an ice bath to stop the cooking process. Be sure to squeeze out all excess water before mixing it into the filling.
- Embrace the Meat Thermometer: The most reliable way to ensure your chicken is perfectly cooked—not dry, not undercooked—is to use an instant-read meat thermometer. The internal temperature should register 165°F (74°C) in the thickest part of the meat. This guarantees food safety and juicy results every time.
- Let the Chicken Rest: This step is non-negotiable for juicy chicken. Resting the meat for 5-10 minutes after it comes out of the oven allows the muscle fibers to relax and reabsorb all the flavorful juices. If you cut into it immediately, the juices will run out onto your cutting board, leaving you with drier chicken.
- Customize Your Filling: The broccoli and cheese filling is a perfect canvas for your creativity. Consider adding a ¼ cup of finely diced ham for a savory, smoky flavor, or sautéed mushrooms and spinach for an earthy twist. A pinch of red pepper flakes can also add a welcome kick of heat.
FAQ Section
1. Can I use frozen broccoli for this recipe?
Yes, you absolutely can use frozen broccoli. However, it’s critical that you thaw it completely and then squeeze out as much excess moisture as possible. You can do this by wrapping the thawed broccoli in a clean kitchen towel or several layers of paper towels and wringing it out. If you add wet broccoli to the filling, it will release water during baking and can result in a soggy, separated filling and watery chicken.
2. My cheese filling always leaks out. How can I stop this?
This is a common issue with a few simple solutions. First, make sure you’re not overstuffing the chicken. Second, when you cut the pocket, try to leave at least a half-inch border intact around the edges to create a strong seal. Finally, use toothpicks to pin the opening shut before you sear it. Searing also helps to quickly form a crust that can help seal the pocket.
3. Can I prepare this Broccoli and Cheese Stuffed Chicken ahead of time?
Yes, this recipe is great for meal prep. You can prepare the filling and stuff the raw chicken breasts up to 24 hours in advance. Simply assemble them as directed, place them in an airtight container or on a plate covered tightly with plastic wrap, and store them in the refrigerator. When you’re ready to cook, proceed with the searing and baking steps, adding a few extra minutes to the baking time since the chicken will be cold.
4. How should I store and reheat leftovers?
Store any leftover stuffed chicken in an airtight container in the refrigerator for up to 3-4 days. For the best results when reheating, avoid the microwave, which can make the chicken rubbery. Instead, place the chicken in a baking dish and warm it in a 350°F (175°C) oven for 10-15 minutes, or until heated through. The air fryer also works wonderfully for reheating, making the outside crispy again in about 5-7 minutes at 350°F.
5. Is this recipe keto-friendly or low-carb?
Yes, this recipe is naturally very low in carbohydrates and high in protein and fat, making it an excellent choice for anyone following a ketogenic or low-carb lifestyle. The main ingredients—chicken, broccoli, and cheese—are all keto staples. To keep the entire meal keto, serve it with low-carb sides like cauliflower mash, zucchini noodles, or a simple green salad.
6. Can I cook this recipe in an air fryer?
Absolutely! The air fryer is a fantastic tool for making stuffed chicken. Prepare and stuff the chicken as directed. Preheat your air fryer to 375°F (190°C). Place the stuffed chicken breasts in the air fryer basket in a single layer (you may need to cook in batches). Cook for 15-20 minutes, flipping halfway through, until the chicken is golden brown and the internal temperature reaches 165°F (74°C).
7. Can I use chicken thighs instead of breasts?
You can, but it requires a bit more work. Boneless, skinless chicken thighs are smaller and not as uniform in shape, making it more difficult to cut a neat pocket. A better method for thighs would be to pound them flat, place the filling in the center, and roll them up, securing them with toothpicks. You’ll need to adjust the cooking time as thighs may cook slightly faster.
8. What other vegetables can I use in the filling?
While broccoli is the classic choice, you can easily substitute it with other vegetables. Finely chopped spinach (make sure to squeeze it dry if using frozen) is a popular alternative. Sautéed mushrooms and onions, finely diced bell peppers, or chopped asparagus would also be delicious. Just be sure to pre-cook any hard vegetables and remove excess moisture before mixing them with the cheese.

Easy Broccoli and Cheese Stuffed Chicken
Ingredients
- 4 large boneless, skinless chicken breasts: Approximately 8 ounces (225g) each. Using larger breasts provides ample room for a generous amount of filling.
- 1 ½ cups broccoli florets: Finely chopped into small, almost rice-sized pieces to ensure they cook through and mix evenly into the filling.
- 1 cup shredded sharp cheddar cheese: Sharp cheddar provides a robust, tangy flavor that stands up beautifully to the chicken and broccoli. You can also use a blend of cheddar and mozzarella.
- 4 ounces cream cheese: Softened to room temperature. This is the binder for our filling, creating a luxuriously creamy texture.
- 1 teaspoon garlic powder: Adds a deep, savory aroma and flavor that complements both the cheese and the chicken.
- ½ teaspoon onion powder: Provides a subtle, sweet undertone that rounds out the filling’s flavor profile.
- ½ teaspoon paprika: Can be sweet or smoked. It not only adds a gentle warmth but also contributes to the beautiful golden-brown color of the cooked chicken.
- Salt and black pepper: To taste. Essential for seasoning the chicken inside and out and enhancing all the other flavors.
- 2 tablespoons olive oil: Used for searing the chicken, creating a delicious, crispy crust and locking in the juices before baking.
Instructions
- Preheat and Prepare: Begin by preheating your oven to 400°F (200°C). This ensures the oven is at the perfect temperature to cook the chicken through evenly after searing. Line a baking sheet with parchment paper for easy cleanup.
- Prepare the Chicken Breasts: Place the chicken breasts on a clean cutting board. Using a sharp knife, carefully cut a deep pocket into the thickest side of each chicken breast. Be mindful not to cut all the way through to the other side or the ends. The goal is to create a spacious pouch for the filling. Pat the chicken breasts dry with a paper towel, both inside and out. This step is crucial for achieving a perfect sear and golden-brown skin. Season the chicken generously on all sides, and inside the pocket, with salt, pepper, and paprika.
- Create the Creamy Filling: In a medium-sized bowl, combine the softened cream cheese, shredded sharp cheddar, finely chopped broccoli florets, garlic powder, and onion powder. Mix thoroughly with a spatula or spoon until all the ingredients are well-incorporated and the mixture is uniform. The cream cheese should be evenly distributed, creating a thick, creamy paste that holds the broccoli and cheddar together. Season the filling with a pinch of salt and pepper and give it one last stir.
- Stuff the Chicken: Carefully spoon the broccoli and cheese mixture into the pocket of each chicken breast. Distribute the filling evenly among the four breasts. Be careful not to overstuff them, as the filling can ooze out during cooking. Gently press the opening of the chicken breast to seal it. If needed, you can secure the opening with one or two toothpicks to ensure the filling stays put.
- Sear for Color and Flavor: Heat the olive oil in a large, oven-safe skillet over medium-high heat. Once the oil is shimmering, carefully place the stuffed chicken breasts in the skillet. Sear for 2-3 minutes per side, or until a beautiful golden-brown crust forms. This step is not for cooking the chicken through but for developing a deep, savory flavor through the Maillard reaction and creating an appealing texture.
- Bake to Perfection: If you used an oven-safe skillet, you can transfer the entire skillet directly into the preheated oven. If not, transfer the seared chicken breasts to the prepared baking sheet. Bake for 20-25 minutes, or until the chicken is cooked through and the internal temperature reaches 165°F (74°C) when checked with a meat thermometer inserted into the thickest part of the chicken (not the filling).
- Rest and Serve: Once cooked, remove the chicken from the oven and let it rest on the baking sheet or a cutting board for at least 5-10 minutes. This critical step allows the juices to redistribute throughout the meat, ensuring every bite is moist and tender. If you used toothpicks, remember to remove them before serving. Slice and serve warm, enjoying the delicious, cheesy center.
Nutrition
- Serving Size: one normal portion
- Calories: 485
- Fat: 29g
- Carbohydrates: 4g
- Protein: 52g