")

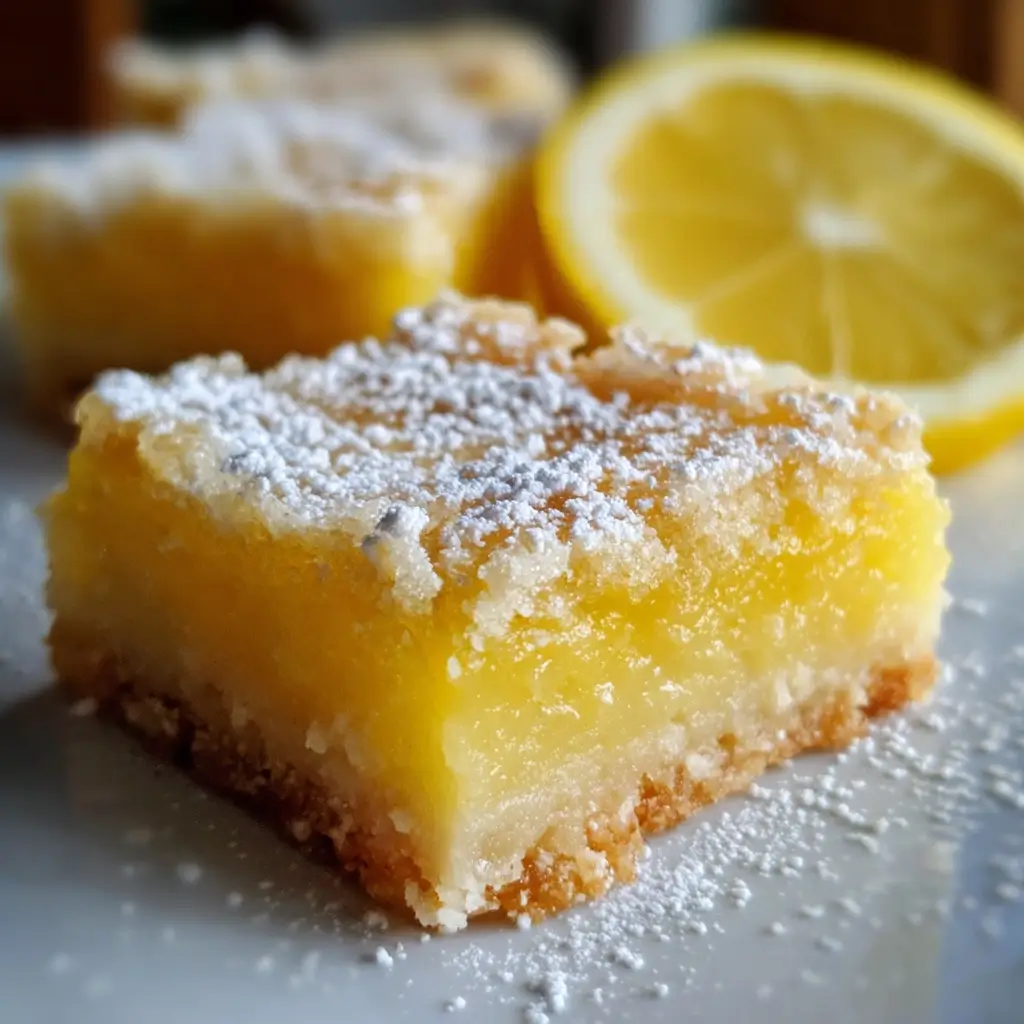

There are some desserts that are simply timeless, and for me, lemon bars sit right at the top of that list. I still remember the first time I pulled a pan of these golden squares from the oven. The entire house filled with the intoxicating aroma of buttery shortbread and bright, zesty lemon. My family, drawn by the scent, gathered in the kitchen, their eyes wide with anticipation. When I finally cut into the cooled bars, revealing that perfect, silky lemon curd over the crisp crust, I knew I had a winner. That first bite was a revelation—the sharp, tangy punch of the lemon filling perfectly balanced by the sweet, crumbly crust. It was an instant hit, and since that day, this Easy Lemon Bars Recipe has become my go-to for everything from family gatherings and potlucks to a simple, sunny afternoon treat. It’s more than just a recipe; it’s a little slice of sunshine, a guaranteed crowd-pleaser that never fails to bring smiles to everyone’s faces.
Ingredients for Perfect Lemon Bars
To create these delightful bars, you will need two sets of simple, high-quality ingredients: one for the buttery base and another for the vibrant filling. Using fresh, quality components is the key to achieving the best possible flavor and texture.
For the Buttery Shortbread Crust:
- All-Purpose Flour (2 cups / 240g): This forms the structural base of our shortbread, providing that classic tender, crumbly texture.
- Granulated Sugar (½ cup / 100g): Adds just the right amount of sweetness to the crust, balancing the tartness of the filling.
- Unsalted Butter (1 cup / 226g): Must be cold and cubed. Cold butter is crucial for creating a flaky, shortbread-like crust rather than a greasy one.
- Salt (¼ teaspoon): A small amount enhances the flavors of the butter and sugar, making the crust more dynamic.
For the Zesty Lemon Filling:
- Granulated Sugar (1 ½ cups / 300g): This is the primary sweetener for the filling. It balances the intense sourness of the lemon juice to create a perfectly sweet-tart curd.
- All-Purpose Flour (¼ cup / 30g): Acts as a thickening agent, ensuring the lemon filling sets up properly into a smooth, sliceable curd.
- Large Eggs (4): The eggs are the foundation of the curd. They provide structure, richness, and are essential for the filling to set when baked.
- Fresh Lemon Juice (⅔ cup / approx. 160ml): The star of the show. Freshly squeezed lemon juice is non-negotiable for a bright, authentic, and vibrant lemon flavor. This will typically require 3-4 large lemons.
- Lemon Zest (1 tablespoon): Finely grated zest from the lemons contains essential oils that impart an intense, aromatic lemon essence that juice alone cannot provide.
- Powdered Sugar (for dusting): An optional but highly recommended final touch for a beautiful presentation and a touch of extra sweetness.
Step-by-Step Instructions
Follow these detailed instructions carefully to ensure your lemon bars come out flawlessly every time. We will first prepare and pre-bake the crust, and then pour over the luscious filling to finish.
Part 1: Preparing the Shortbread Crust
- Preheat and Prepare the Pan: Begin by preheating your oven to 350°F (175°C). Take a 9×13 inch baking pan and line it with parchment paper, leaving some overhang on the two longer sides. This overhang will act as a “sling,” making it incredibly easy to lift the entire slab of lemon bars out of the pan for clean cutting later. Lightly grease the paper and any exposed parts of the pan.
- Combine Dry Ingredients: In a medium-sized mixing bowl, whisk together the 2 cups of all-purpose flour, ½ cup of granulated sugar, and ¼ teaspoon of salt. Whisking ensures that the sugar and salt are evenly distributed throughout the flour, which is key for a uniformly flavored crust.
- Cut in the Cold Butter: Add the cold, cubed butter to the dry ingredients. Using a pastry blender, two knives, or your fingertips, cut the butter into the flour mixture. Continue until the mixture resembles coarse, damp sand with some small, pea-sized butter pieces remaining. These small butter pockets will melt during baking, creating a tender, flaky texture.
- Press the Crust into the Pan: Transfer the crumbly dough mixture into your prepared 9×13 inch pan. Use your fingers or the flat bottom of a measuring cup to press the dough down firmly and evenly across the entire bottom of the pan. Ensure you create a level, compact base.
- Pre-Bake the Crust (Blind Baking): Place the pan in the preheated oven and bake for 20-25 minutes. You’re looking for the crust to be lightly golden brown around the edges and set in the center. This step, known as blind baking, is crucial. It ensures the crust is fully cooked and creates a barrier that prevents the lemon filling from making it soggy.
Part 2: Creating and Baking the Luscious Lemon Filling
- Prepare the Filling While the Crust Bakes: In a large bowl, whisk together the 1 ½ cups of granulated sugar and the ¼ cup of all-purpose flour. Breaking up any lumps is important for a silky-smooth final texture.
- Add the Wet Ingredients: To the sugar and flour mixture, add the 4 large eggs and whisk vigorously until the mixture is smooth, pale, and well-combined. Next, pour in the ⅔ cup of fresh lemon juice and the 1 tablespoon of lemon zest. Continue to whisk until everything is fully incorporated and the filling is uniform.
- Pour and Bake: Once the crust is finished with its pre-bake, carefully remove it from the oven. Immediately and evenly pour the prepared lemon filling over the hot crust. The heat from the crust will begin to set the bottom of the filling right away.
- Final Bake: Return the pan to the 350°F (175°C) oven. Bake for an additional 20-25 minutes. The lemon bars are done when the center is just set and no longer jiggles when the pan is gently shaken. The edges may be slightly puffed and a very light golden brown. Be careful not to overbake, as this can result in a slightly rubbery or eggy texture.
- Cool Completely: This is one of the most important steps. Remove the pan from the oven and place it on a wire rack to cool completely to room temperature, which will take about 1-2 hours. Once at room temperature, transfer the pan to the refrigerator to chill for at least 2 more hours, or preferably overnight. Chilling is essential for the filling to firm up completely, allowing for clean, beautiful slices.
- Cut and Serve: Once thoroughly chilled, use the parchment paper overhang to lift the entire slab of lemon bars out of the pan and onto a cutting board. Dust generously with powdered sugar just before serving. Use a large, sharp knife to cut into squares. For extra-clean cuts, wipe the knife clean between each slice.
Nutrition Facts
This recipe yields approximately 24 servings (bars). The nutritional information is an estimate and can vary based on specific ingredients used.
- Servings: 24 bars
- Calories per serving: Approximately 185 kcal
- Fat: Contains about 8g of fat per serving, primarily from the butter in the crust and the egg yolks in the filling, providing richness and flavor.
- Carbohydrates: Roughly 26g of carbohydrates per bar, which come from the flour and sugar, providing a quick source of energy.
- Protein: Each bar has around 3g of protein, contributed mainly by the eggs, which are essential for the structure of the filling.
- Sugar: Approximately 18g of sugar per serving, giving these bars their signature sweet-tart balance.
- Sodium: A minimal amount, around 85mg per bar, which helps to enhance all the other flavors.
Preparation Time
The beauty of this recipe lies in its simplicity and efficiency.
- Active Preparation Time: 20 minutes (This includes mixing the crust, pressing it into the pan, and whisking together the filling).
- Baking Time: 40-50 minutes total (20-25 minutes for the crust, plus 20-25 minutes for the filling).
- Cooling & Chilling Time: 3-4 hours minimum (This is a crucial, hands-off period that ensures the bars set perfectly).
- Total Time: Approximately 4-5 hours from start to finish, with the majority of that time being inactive cooling.
How to Serve
Lemon bars are wonderfully versatile. While fantastic on their own, they can be elevated with a few simple additions for any occasion.
- The Classic Way: The most traditional and beloved method is to serve them chilled, generously dusted with a layer of powdered sugar. The sweetness of the sugar provides a lovely contrast to the tart filling.
- With Fresh Berries: The bright acidity of lemon pairs beautifully with sweet berries. Serve a square alongside a small handful of fresh raspberries, blueberries, or sliced strawberries for a burst of color and complementary flavor.
- A Dollop of Cream: For a more decadent dessert, top each lemon bar with a dollop of freshly whipped cream or a spoonful of crème fraîche. The creaminess cuts through the richness and tartness, creating a perfectly balanced bite.
- With a Scoop of Ice Cream: Serve a slightly chilled lemon bar with a small scoop of high-quality vanilla bean or raspberry sorbet. The temperature and texture contrast is delightful.
- As Part of a Dessert Platter: Cut the bars into smaller, bite-sized squares and arrange them on a platter with other treats like mini cheesecakes, brownies, and cookies for parties and events.
- Afternoon Tea Pairing: A lemon bar is the perfect companion to a hot cup of black tea (like Earl Grey) or a soothing herbal tea. The flavors complement each other wonderfully for a sophisticated afternoon snack.
Additional Tips for Flawless Lemon Bars
Achieve lemon bar perfection with these eight professional tips and tricks.
- Use Room Temperature Eggs: While the butter for the crust must be cold, the eggs for the filling should be at room temperature. Room temperature eggs whisk more easily and incorporate more fully into the sugar, leading to a smoother, more uniform curd.
- The Parchment Paper Sling is Your Best Friend: Don’t skip the step of leaving an overhang of parchment paper. This simple trick prevents any struggle with getting the first bar out and guarantees that every single square will look perfect and professional.
- Don’t Skimp on the Zest: The lemon zest contains the lemon’s essential oils and provides a depth of floral, aromatic flavor that you cannot get from the juice alone. For best results, use a microplane to get a fine zest without any of the bitter white pith.
- Tap Out the Air Bubbles: After pouring the filling over the crust but before placing it back in the oven, give the pan a few gentle taps on the countertop. This will help release any large air bubbles that may have formed during whisking, resulting in a perfectly smooth, bubble-free top.
- Cooling is Not Optional: The hardest part of making lemon bars is waiting for them to cool. But this step is absolutely critical. Cutting into them while warm will result in a runny, messy filling. The chilling period in the refrigerator is what allows the curd to set into its signature silky, firm texture.
- For Ultra-Clean Cuts: For bakery-level presentation, use a large, very sharp chef’s knife. Run the blade under hot water and wipe it dry before the first cut, and then wipe the blade clean with a damp paper towel between each subsequent cut. This prevents the filling from dragging and ensures razor-sharp edges on every bar.
- Know When They’re Done: The visual cue for perfectly baked lemon bars is subtle. The edges will be set and slightly puffed, but the center should have a very slight wobble, similar to a cheesecake. It will continue to set as it cools. If there are no jiggles at all, it might be slightly overbaked.
- Sift Your Powdered Sugar: For a beautiful, even dusting of powdered sugar that doesn’t clump, always sift it through a fine-mesh sieve over the top of the cooled bars right before you plan to serve them. If you dust them too early, the sugar can absorb moisture from the filling and become damp.
Frequently Asked Questions (FAQ)
Here are answers to some of the most common questions about making homemade lemon bars.
1. Why is my lemon filling runny?
A runny filling is usually caused by one of two things: underbaking or not chilling long enough. Ensure the center of the bars is just barely set (a slight wobble is okay, but it shouldn’t be liquid) before you take them out of the oven. Most importantly, you must let them chill in the refrigerator for at least 2-3 hours for the curd to firm up completely.
2. Can I use bottled lemon juice instead of fresh?
While you technically can, it is highly discouraged. Freshly squeezed lemon juice has a much brighter, more vibrant, and complex flavor. Bottled lemon juice can sometimes have a muted or slightly chemical aftertaste due to preservatives, which will be noticeable in a dessert where lemon is the star flavor.
3. How should I store lemon bars, and how long do they last?
Lemon bars should be stored in an airtight container in the refrigerator. The egg-based filling requires refrigeration. They will stay fresh and delicious for up to 4-5 days. For best texture, keep them uncut and dust with powdered sugar just before serving.
4. Can I freeze lemon bars?
Yes, lemon bars freeze remarkably well! To freeze, let them cool and chill completely. Cut them into squares but do not dust them with powdered sugar. Place them on a baking sheet in a single layer and freeze until solid. Then, wrap each bar individually in plastic wrap and store them in a freezer-safe bag or container for up to 3 months. Thaw them in the refrigerator overnight before dusting with powdered sugar and serving.
5. My shortbread crust turned out soggy. What did I do wrong?
A soggy crust is almost always the result of not pre-baking it for long enough. The “blind bake” step is essential because it creates a sealed, firm layer that can stand up to the wet filling. Make sure your crust is a light golden brown before you pour the filling on top.
6. Can I double this recipe?
Absolutely! This recipe can be doubled and baked in a 10×15 inch jelly roll pan or a larger sheet pan. You will need to increase the baking time slightly. Start checking for doneness around the 25-minute mark for the filling and adjust as needed.
7. Is it possible to make these lemon bars gluten-free?
Yes, you can easily adapt this recipe to be gluten-free. For the crust, simply substitute the all-purpose flour with a high-quality, 1-to-1 measure gluten-free baking flour blend (one that contains xanthan gum). The filling can be made gluten-free by using the same type of flour blend or by substituting the flour with cornstarch (use about 2 tablespoons of cornstarch instead of ¼ cup of flour).
8. Why do my lemon bars sometimes have a thin, crackly white layer on top after baking?
That thin, meringue-like layer is formed by air bubbles from the eggs rising to the surface during baking. Some people love it for the texture it provides! To minimize it, try not to over-whisk the eggs when making the filling—you want them combined, not frothy. Gently tapping the pan on the counter before baking can also help release some of those air bubbles.

Easy Lemon Bars Recipe
Ingredients
To create these delightful bars, you will need two sets of simple, high-quality ingredients: one for the buttery base and another for the vibrant filling. Using fresh, quality components is the key to achieving the best possible flavor and texture.
For the Buttery Shortbread Crust:
- All-Purpose Flour (2 cups / 240g): This forms the structural base of our shortbread, providing that classic tender, crumbly texture.
- Granulated Sugar (½ cup / 100g): Adds just the right amount of sweetness to the crust, balancing the tartness of the filling.
- Unsalted Butter (1 cup / 226g): Must be cold and cubed. Cold butter is crucial for creating a flaky, shortbread-like crust rather than a greasy one.
- Salt (¼ teaspoon): A small amount enhances the flavors of the butter and sugar, making the crust more dynamic.
For the Zesty Lemon Filling:
- Granulated Sugar (1 ½ cups / 300g): This is the primary sweetener for the filling. It balances the intense sourness of the lemon juice to create a perfectly sweet-tart curd.
- All-Purpose Flour (¼ cup / 30g): Acts as a thickening agent, ensuring the lemon filling sets up properly into a smooth, sliceable curd.
- Large Eggs (4): The eggs are the foundation of the curd. They provide structure, richness, and are essential for the filling to set when baked.
- Fresh Lemon Juice (⅔ cup / approx. 160ml): The star of the show. Freshly squeezed lemon juice is non-negotiable for a bright, authentic, and vibrant lemon flavor. This will typically require 3-4 large lemons.
- Lemon Zest (1 tablespoon): Finely grated zest from the lemons contains essential oils that impart an intense, aromatic lemon essence that juice alone cannot provide.
- Powdered Sugar (for dusting): An optional but highly recommended final touch for a beautiful presentation and a touch of extra sweetness.
Instructions
Follow these detailed instructions carefully to ensure your lemon bars come out flawlessly every time. We will first prepare and pre-bake the crust, and then pour over the luscious filling to finish.
Part 1: Preparing the Shortbread Crust
- Preheat and Prepare the Pan: Begin by preheating your oven to 350°F (175°C). Take a 9×13 inch baking pan and line it with parchment paper, leaving some overhang on the two longer sides. This overhang will act as a “sling,” making it incredibly easy to lift the entire slab of lemon bars out of the pan for clean cutting later. Lightly grease the paper and any exposed parts of the pan.
- Combine Dry Ingredients: In a medium-sized mixing bowl, whisk together the 2 cups of all-purpose flour, ½ cup of granulated sugar, and ¼ teaspoon of salt. Whisking ensures that the sugar and salt are evenly distributed throughout the flour, which is key for a uniformly flavored crust.
- Cut in the Cold Butter: Add the cold, cubed butter to the dry ingredients. Using a pastry blender, two knives, or your fingertips, cut the butter into the flour mixture. Continue until the mixture resembles coarse, damp sand with some small, pea-sized butter pieces remaining. These small butter pockets will melt during baking, creating a tender, flaky texture.
- Press the Crust into the Pan: Transfer the crumbly dough mixture into your prepared 9×13 inch pan. Use your fingers or the flat bottom of a measuring cup to press the dough down firmly and evenly across the entire bottom of the pan. Ensure you create a level, compact base.
- Pre-Bake the Crust (Blind Baking): Place the pan in the preheated oven and bake for 20-25 minutes. You’re looking for the crust to be lightly golden brown around the edges and set in the center. This step, known as blind baking, is crucial. It ensures the crust is fully cooked and creates a barrier that prevents the lemon filling from making it soggy.
Part 2: Creating and Baking the Luscious Lemon Filling
- Prepare the Filling While the Crust Bakes: In a large bowl, whisk together the 1 ½ cups of granulated sugar and the ¼ cup of all-purpose flour. Breaking up any lumps is important for a silky-smooth final texture.
- Add the Wet Ingredients: To the sugar and flour mixture, add the 4 large eggs and whisk vigorously until the mixture is smooth, pale, and well-combined. Next, pour in the ⅔ cup of fresh lemon juice and the 1 tablespoon of lemon zest. Continue to whisk until everything is fully incorporated and the filling is uniform.
- Pour and Bake: Once the crust is finished with its pre-bake, carefully remove it from the oven. Immediately and evenly pour the prepared lemon filling over the hot crust. The heat from the crust will begin to set the bottom of the filling right away.
- Final Bake: Return the pan to the 350°F (175°C) oven. Bake for an additional 20-25 minutes. The lemon bars are done when the center is just set and no longer jiggles when the pan is gently shaken. The edges may be slightly puffed and a very light golden brown. Be careful not to overbake, as this can result in a slightly rubbery or eggy texture.
- Cool Completely: This is one of the most important steps. Remove the pan from the oven and place it on a wire rack to cool completely to room temperature, which will take about 1-2 hours. Once at room temperature, transfer the pan to the refrigerator to chill for at least 2 more hours, or preferably overnight. Chilling is essential for the filling to firm up completely, allowing for clean, beautiful slices.
- Cut and Serve: Once thoroughly chilled, use the parchment paper overhang to lift the entire slab of lemon bars out of the pan and onto a cutting board. Dust generously with powdered sugar just before serving. Use a large, sharp knife to cut into squares. For extra-clean cuts, wipe the knife clean between each slice.
Nutrition
- Serving Size: one normal portion
- Calories: 185
- Sugar: 18g
- Fat: 8g
- Carbohydrates: 26g
- Protein: 3g