")

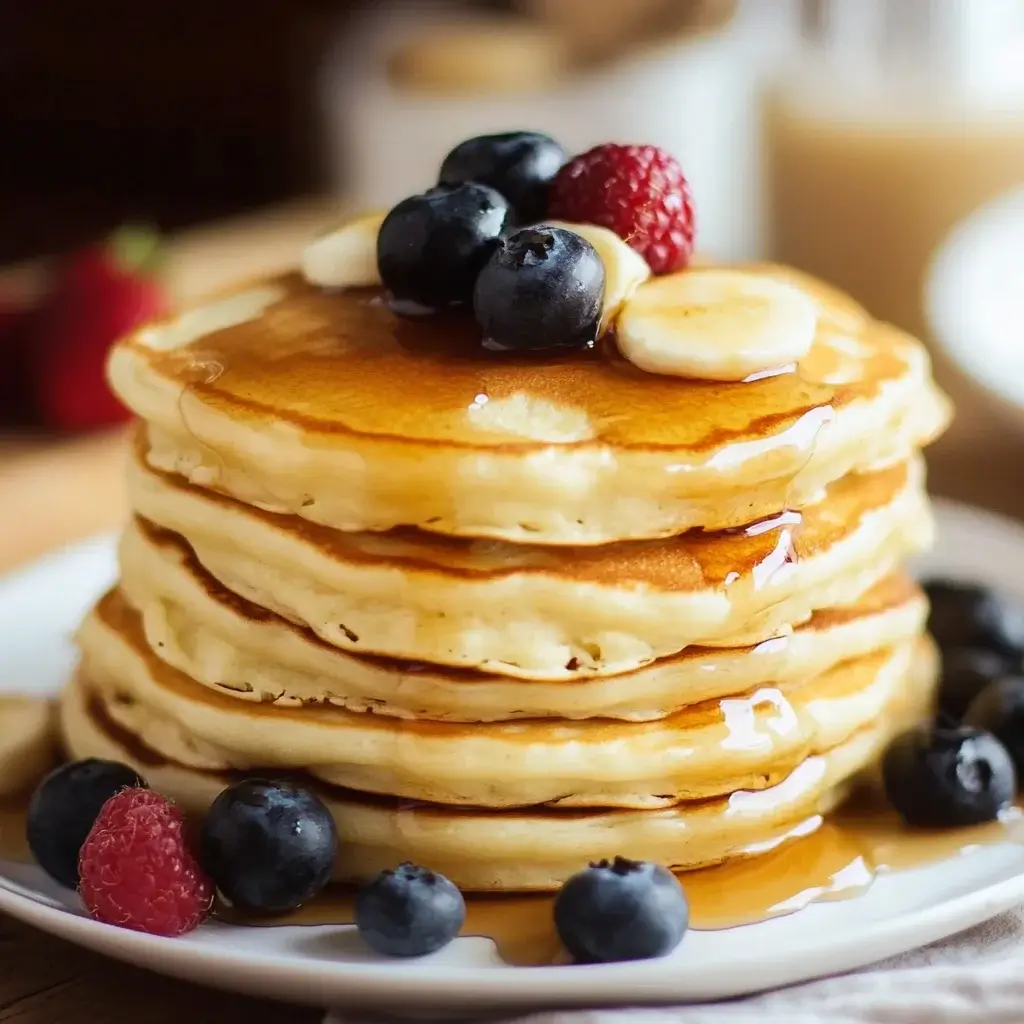

There are few things that scream “perfect weekend morning” quite like a stack of warm, impossibly fluffy pancakes. For years, I was on a quest for the ultimate vegetarian pancake recipe. Some were too dense, others too flat, and many just lacked that certain oomph. Then came this recipe. The first time I made these, the aroma alone filled the kitchen with such a comforting sweetness that my family drifted in, drawn by the promise of breakfast bliss. The moment of truth arrived when my notoriously picky youngest took a bite, eyes widening slightly, followed by an enthusiastic “Mmm, more!”. Success! These pancakes are now our undisputed family favourite – light, airy, tender, and wonderfully satisfying. They are surprisingly simple to whip up, making them perfect for lazy Sundays, special brunches, or even a cheerful “breakfast-for-dinner” treat. They strike that perfect balance – substantial enough to feel like a real meal, yet so light you could almost float away on a pancake cloud. Trust me, once you try this recipe, your search for the perfect fluffy vegetarian pancake will be officially over.
The Secret to Ultimate Fluffiness: Understanding the Ingredients
Before we dive into the mixing and flipping, let’s talk about what makes these vegetarian pancakes truly special: the ingredients. Each component plays a crucial role in achieving that coveted light and airy texture, alongside a delicious flavour profile. Understanding their function helps ensure pancake perfection every single time. This isn’t just a random collection of items; it’s a carefully balanced formula designed for maximum fluffiness and taste, all without relying on any meat products. We’ll use standard pantry staples, making this recipe accessible and easy to prepare whenever the craving strikes. Remember, using fresh, good-quality ingredients will always yield the best results. Pay particular attention to your leavening agent (baking powder) – its freshness is paramount for achieving that signature lift.
Ingredients for Fluffy Vegetarian Pancakes
- 1 ½ cups (190g) All-Purpose Flour: The structural foundation of our pancakes. Provides substance and holds everything together. Spoon and level the flour for accurate measurement; don’t scoop directly from the bag.
- 3 ½ teaspoons Baking Powder: The powerhouse leavening agent. Creates carbon dioxide bubbles when mixed with liquid, causing the batter to rise significantly during cooking, resulting in incredibly fluffy pancakes. Ensure it’s not expired!
- 1 teaspoon Salt: Enhances all the other flavours and balances the sweetness. Don’t skip it!
- 1 tablespoon Granulated Sugar (or Coconut Sugar): Adds a touch of sweetness and helps with browning (caramelization) for that beautiful golden colour. You can adjust slightly based on preference.
- 1 ¼ cups (300ml) Milk: Provides moisture and richness. Whole milk offers the richest flavour, but low-fat, skim, or unsweetened plant-based milks (like almond, soy, or oat milk) work beautifully too for a dairy-free option. Ensure it’s at room temperature for better incorporation.
- 1 Large Egg: Acts as a binder, adds richness, flavour, and contributes to the structure and lift. Ensure it’s at room temperature.
- 3 tablespoons Unsalted Butter, melted (or Neutral Oil): Adds richness, flavour, and tenderness. Melting it ensures it incorporates evenly. You can substitute with a neutral-flavoured oil like vegetable, canola, or melted coconut oil if preferred or for a dairy-free version. Allow it to cool slightly before adding.
Step-by-Step Instructions for Pancake Perfection
Making these fluffy vegetarian pancakes is a straightforward process. Follow these steps carefully, paying attention to the techniques, especially regarding mixing, for the best results.
- Combine Dry Ingredients: In a large bowl, whisk together the all-purpose flour, baking powder, salt, and granulated sugar. Whisking thoroughly ensures the baking powder and salt are evenly distributed, which is crucial for consistent rising and flavour. Break up any clumps in the flour.
- Prepare Wet Ingredients: In a separate medium bowl, whisk together the milk and the large egg until just combined. Make sure the egg is fully incorporated into the milk. Using room temperature milk and egg helps the batter come together more smoothly.
- Melt the Butter: Melt the unsalted butter either in a small saucepan over low heat or in a microwave-safe bowl in short bursts (checking frequently to prevent splattering). Set it aside to cool slightly for a minute or two. You don’t want it to be piping hot when adding it to the wet ingredients, as it could potentially cook the egg.
- Combine Wet and Dry (Gently!): Pour the milk and egg mixture into the bowl containing the dry ingredients. Add the slightly cooled melted butter (or oil) as well.
- Mix Until Just Combined: Using a whisk or a fork, mix the wet and dry ingredients until they are just combined. It is crucial not to overmix the batter. A few lumps are perfectly okay – in fact, they are desirable! Overmixing develops the gluten in the flour, which will result in tough, dense pancakes instead of light and fluffy ones. Stop mixing as soon as you no longer see large streaks of dry flour.
- Rest the Batter (Optional but Recommended): Let the batter rest for 5-10 minutes at room temperature. This allows the flour to fully hydrate and gives the baking powder time to start working its magic, creating even more bubbles for extra fluffiness. You might notice the batter thickening slightly and becoming more bubbly during this time.
- Preheat the Pan/Griddle: While the batter rests, heat a lightly oiled griddle or non-stick frying pan over medium heat. The pan is ready when a drop of water flicked onto the surface sizzles and evaporates immediately. Proper heat is key: too low and the pancakes won’t brown or rise well; too high and they’ll burn on the outside before cooking through. You might need to adjust the heat slightly as you cook subsequent batches. Use a small amount of butter or neutral oil to grease the pan, wiping away any excess with a paper towel – you want a thin, even coating.
- Cook the Pancakes: Pour or scoop the batter onto the preheated griddle, using approximately ¼ cup of batter per pancake. Cook for about 2-3 minutes on the first side, or until bubbles start to form and pop on the surface and the edges look set and slightly dry.
- Flip and Cook: Carefully flip the pancakes using a thin spatula. Cook on the second side for another 1-2 minutes, or until golden brown and cooked through. The second side usually cooks faster than the first. Resist the urge to press down on the pancakes with your spatula, as this will deflate them.
- Serve Immediately: Transfer the cooked pancakes to a plate. Keep them warm in a low oven (around 200°F or 90°C) on an oven-safe plate or wire rack if making a large batch.
- Repeat: Repeat the process with the remaining batter, adding a tiny bit more oil or butter to the pan between batches if needed.
The Science Bit: Why These Pancakes Get So Fluffy
Ever wonder what magic happens inside the bowl and pan to transform simple ingredients into ethereal, fluffy pancakes? It’s mostly chemistry!
- The Leavening Powerhouse: Baking powder is the star player here. It’s typically double-acting, meaning it reacts twice. First, when it comes into contact with the wet ingredients (milk, egg), it releases some carbon dioxide gas bubbles. Second, it reacts again when exposed to the heat of the pan, producing even more gas. These tiny bubbles get trapped within the batter’s structure, causing the pancakes to rise dramatically and become light and airy. That’s why fresh baking powder is crucial!
- Gluten Development (and Why Less is More): Flour contains proteins that form gluten when mixed with liquid and agitated. Gluten provides structure, which is great for bread, but less desirable for tender pancakes. Overmixing develops too much gluten, leading to tough, chewy pancakes. Mixing just until combined keeps gluten development minimal, ensuring a tender crumb. The lumps you see are pockets of flour that haven’t fully hydrated, which is fine and actually helps prevent overmixing.
- The Role of Fat and Sugar: The melted butter (or oil) coats the flour particles, inhibiting some gluten development and adding moisture and tenderness. Sugar not only adds sweetness but also helps with browning through the Maillard reaction and caramelization, giving the pancakes their appealing golden colour and slightly crisp edges.
- Batter Resting: Allowing the batter to rest lets the flour absorb the liquid more fully (hydration) and gives the baking powder a head start, creating a slightly thicker, more stable batter filled with tiny bubbles ready to expand upon heating.
Understanding these simple scientific principles helps you troubleshoot and consistently achieve pancake perfection.
Estimated Nutrition Facts
Please note that these values are approximate and can vary based on the specific ingredients used (e.g., type of milk, using oil vs. butter, size of pancakes).
- Servings: This recipe makes approximately 8-10 medium-sized pancakes.
- Calories per Serving (Approx. 2 pancakes): Roughly 250-300 kcal (depending heavily on toppings).
- Protein: Provides a moderate amount, primarily from the egg and milk, contributing to satiety. (Approx. 8-10g per serving).
- Carbohydrates: The main energy source, primarily from the flour and sugar. (Approx. 35-40g per serving).
- Fat: Contributes richness and flavour, coming from the butter/oil, egg yolk, and milk fat. (Approx. 8-12g per serving, varies with fat content of milk/use of oil).
- Sodium: Comes mainly from the salt and baking powder, important for flavour balance. (Approx. 400-500mg per serving).
Disclaimer: These are estimates calculated using standard nutritional databases. For precise information, use a nutrition calculator with your specific ingredients.
Quick and Easy: Preparation Time
These fluffy vegetarian pancakes are wonderfully quick to prepare, making them ideal for busy mornings or impromptu cravings.
- Preparation Time: Approximately 10 minutes (measuring ingredients, mixing the batter).
- Resting Time (Optional): 5-10 minutes.
- Cooking Time: Approximately 15-20 minutes (cooking in batches, about 4-5 minutes per batch).
- Total Time: Around 30-40 minutes from start to finish.
This minimal time investment yields maximum breakfast satisfaction!
How to Serve Your Masterpiece: Toppings and Pairings Galore
Serving these fluffy vegetarian pancakes is half the fun! Here’s how to elevate your pancake experience from simple breakfast to a memorable feast:
- Classic Sweet Toppings:
- Maple Syrup: The quintessential pancake companion. Use pure maple syrup for the best flavour.
- Butter: A pat of melting butter (salted or unsalted) on a warm stack is pure comfort.
- Powdered Sugar: A simple dusting adds elegance and a touch of sweetness.
- Honey or Agave Nectar: Natural alternatives to maple syrup.
- Whipped Cream: Light, airy, and decadent. Make your own or use store-bought.
- Fruity Delights:
- Fresh Berries: Strawberries, blueberries, raspberries, blackberries – add colour, freshness, and vitamins.
- Sliced Bananas: A classic pairing, often combined with nuts or chocolate.
- Cooked Fruit Compote: Gently simmered berries, apples, peaches, or cherries make a warm, delicious sauce.
- Sliced Peaches or Nectarines: Especially lovely in the summer.
- Lemon Curd: Adds a bright, tart counterpoint to the sweetness.
- Decadent & Indulgent Options:
- Chocolate Chips: Sprinkle mini or regular chips onto the batter right after pouring it onto the griddle, or serve with chocolate sauce/ganache.
- Nutella or Chocolate-Hazelnut Spread: A drizzle (or generous smear!) is always a crowd-pleaser.
- Peanut Butter or Almond Butter: Adds protein and nutty flavour. Warm it slightly for easier drizzling.
- Chopped Nuts: Toasted pecans, walnuts, or almonds add crunch and flavour.
- Caramel Sauce: For a truly decadent treat.
- Ice Cream: A scoop of vanilla or your favourite flavour turns pancakes into dessert!
- Toasted Coconut Flakes: Adds texture and tropical flavour.
- Savory Twists (Yes, Really!):
- Cheese: A sprinkle of sharp cheddar or Gruyère onto the cooking pancake can be surprisingly delicious, especially paired with a fried egg.
- Vegetarian Bacon or Sausage: Serve alongside for a classic diner experience.
- Fried Egg: A perfectly cooked runny yolk creates its own sauce.
- Avocado: Sliced or mashed avocado with a sprinkle of salt and pepper.
- Serving Presentation:
- Stack ’em High: The classic presentation. Aim for stacks of 2-4 pancakes per person.
- Arrange Artfully: Fan them out slightly on the plate to showcase toppings.
- Keep Warm: If serving a crowd, keep cooked pancakes on a wire rack set over a baking sheet in a warm oven (around 200°F/90°C) until ready to serve. Avoid stacking them directly on a plate in the oven, as they can steam and become soggy.
- Perfect Pairings (Drinks & Sides):
- Coffee or Tea: Essential for many breakfast rituals.
- Fresh Orange Juice or Milk: Classic breakfast beverages.
- Fruit Salad: A light and refreshing side.
- Yogurt: Plain or flavoured yogurt adds tang and creaminess.
- Smoothies: A nutritious and complementary drink.
Pro Tips for Pancake Success: Additional Tips
Unlock pancake mastery with these extra tips and tricks:
- Master Pan Temperature: Finding the sweet spot for your stovetop is crucial. Medium heat is usually best. Test with a small drop of batter; it should sizzle gently and start puffing up within about 30 seconds. Adjust heat as needed between batches – pans tend to get hotter over time.
- Don’t Overcrowd the Pan: Give your pancakes space! Cooking too many at once lowers the pan temperature and makes flipping difficult. Aim for 2-3 medium pancakes at a time, depending on your pan size. This ensures even cooking and browning.
- Perfect the Flip: Wait for the signs: bubbles forming and popping across the surface, and the edges looking set. Slide your spatula underneath confidently and flip quickly and decisively. Only flip once! Flipping multiple times can deflate the pancake.
- Measure Flour Correctly: How you measure flour significantly impacts the batter consistency. Use the “spoon and level” method: Fluff the flour in its container, gently spoon it into your measuring cup until overflowing, then level off the excess with the back of a knife. Scooping directly packs too much flour, leading to dense pancakes.
- Check Your Baking Powder’s Freshness: Baking powder loses its potency over time. To test it, stir half a teaspoon into a cup of hot water. If it fizzes vigorously, it’s still good. If not, it’s time for a new container – this is non-negotiable for fluffy results!
- Use Room Temperature Ingredients: Cold milk and eggs don’t incorporate as smoothly into the dry ingredients and can slightly solidify the melted butter, creating lumps. Letting them sit out for about 30 minutes before you start makes a difference in batter texture.
- Resist Pressing Down: Never, ever press down on the pancakes with your spatula after flipping. This squeezes out all those lovely air bubbles you worked so hard to create, resulting in flat, dense pancakes. Let them cook undisturbed on the second side.
- Customize the Sweetness: This recipe uses a modest amount of sugar. Feel free to adjust it slightly (e.g., reduce to 2 teaspoons or increase to 2 tablespoons) depending on your preference and the sweetness of your planned toppings. Remember, maple syrup adds significant sweetness later!
Troubleshooting Common Pancake Pitfalls
Even seasoned cooks encounter pancake problems sometimes. Here’s how to fix common issues:
- Problem:Pancakes are flat and dense.
- Causes: Expired baking powder; overmixing the batter; batter is too thin.
- Solutions: Test your baking powder (Tip #5); mix only until combined (lumps are okay!); ensure accurate flour measurement (Tip #4). If the batter seems excessively thin, add another tablespoon of flour.
- Problem:Pancakes are burnt on the outside but raw inside.
- Cause: Pan heat is too high.
- Solution: Lower the heat to medium or medium-low. Allow the pan to cool slightly before the next batch. Cook them a bit longer on lower heat to ensure the inside cooks through before the outside burns.
- Problem:Pancakes are tough or rubbery.
- Cause: Overmixing the batter, developing too much gluten.
- Solution: Mix less! Stop as soon as the dry ingredients are moistened. A lumpy batter is a sign of correctly mixed pancake batter.
- Problem:Pancakes are sticking to the pan.
- Causes: Pan isn’t adequately preheated; not enough oil/butter; pan surface is damaged (if using non-stick).
- Solutions: Ensure the pan is properly preheated (water drop test); use a small amount of oil or butter for each batch, wiping away excess; consider using a well-seasoned cast-iron skillet or a newer non-stick pan.
- Problem:First pancake is always a dud.
- Cause: This is common! It often happens because the pan temperature isn’t quite right yet, or the oil distribution isn’t even.
- Solution: Consider the first pancake a test pancake. Use it to gauge the heat and adjust accordingly for the rest of the batch. Don’t be discouraged!
Customizing Your Pancakes: Fun Variations
This basic recipe is a fantastic canvas for creativity. Try these variations:
- Vegan Fluffy Pancakes:
- Egg Replacement: Use a “flax egg” (1 tablespoon ground flaxseed mixed with 3 tablespoons water, let sit for 5 minutes) or a commercial egg replacer.
- Milk Replacement: Substitute the dairy milk with an equal amount of unsweetened plant-based milk (almond, soy, oat, cashew all work well).
- Fat Replacement: Use melted coconut oil or another neutral vegetable oil instead of butter. Ensure your sugar is vegan-certified if necessary.
- Gluten-Free Fluffy Pancakes:
- Flour Replacement: Substitute the all-purpose flour with a good quality gluten-free all-purpose flour blend that contains xanthan gum. Check the blend’s recommendations; some may require slightly more liquid. Results can vary between blends. Buckwheat flour can also be used (alone or in combination) for a nuttier flavour, though texture might be slightly denser.
- Adding Mix-Ins:
- Blueberry Pancakes: Gently fold in ¾ cup of fresh or frozen (don’t thaw) blueberries into the batter just before cooking, or sprinkle them onto each pancake after pouring the batter onto the griddle.
- Chocolate Chip Pancakes: Fold in ½ to ¾ cup of chocolate chips (mini or regular) or sprinkle onto the cooking pancakes.
- Banana Pancakes: Fold in ½ cup of mashed ripe banana into the wet ingredients or add thin banana slices onto the cooking pancakes. Reduce milk slightly if adding mashed banana.
- Spiced Pancakes: Add ½ teaspoon of cinnamon and ¼ teaspoon of nutmeg or pumpkin pie spice to the dry ingredients.
- Whole Wheat Pancakes: Replace up to half of the all-purpose flour with whole wheat flour for added fibre and a nuttier taste (they may be slightly denser).
Storing, Freezing, and Reheating Leftovers
While pancakes are best enjoyed fresh, leftovers can still be delicious if stored and reheated properly.
- Storing:
- Allow leftover pancakes to cool completely to room temperature. This prevents condensation, which makes them soggy.
- Store cooled pancakes in an airtight container or resealable plastic bag in the refrigerator for up to 2-3 days. You can place sheets of parchment paper between layers to prevent sticking.
- Freezing:
- For longer storage, freezing is ideal. Let pancakes cool completely.
- Arrange cooled pancakes in a single layer on a baking sheet lined with parchment paper. Freeze until solid (about 1-2 hours).
- Once frozen solid, transfer the pancakes to a freezer-safe airtight container or heavy-duty freezer bag, placing parchment paper between layers if desired.
- Frozen pancakes are best used within 1-2 months for optimal quality.
- Reheating:
- Toaster or Toaster Oven (Recommended): This is the best method for retaining crisp edges. Place individual pancakes directly into toaster slots or onto the rack of a toaster oven and heat on a medium setting until warmed through and slightly crisped.
- Oven: Preheat oven to 350°F (175°C). Place pancakes in a single layer on a baking sheet (you can cover loosely with foil to prevent drying out too much). Heat for 5-10 minutes, or until warmed through.
- Microwave: Place pancakes on a microwave-safe plate. Heat in 20-30 second intervals until warm. Note: Microwaving can make pancakes softer and sometimes slightly chewy, so it’s not the preferred method for texture, but it’s fast. Avoid overheating.
Frequently Asked Questions (FAQ)
1. Can I make this pancake batter ahead of time?
It’s best to cook the batter relatively soon after mixing, especially once the wet and dry ingredients are combined, as the baking powder starts activating immediately. However, you can mix the dry ingredients and store them in an airtight container at room temperature for weeks. You can also mix the wet ingredients (milk, egg) and store them covered in the fridge overnight. Combine wet, dry, and melted butter just before cooking. Letting the fully mixed batter sit for more than 20-30 minutes can result in less fluffy pancakes as the leavening power diminishes.
2. Why are my pancakes not getting golden brown?
This is usually due to the pan temperature being too low or not using enough fat (butter/oil) in the pan. Ensure your pan is properly preheated to medium heat and use a small amount of fat for each batch. Sugar content also contributes to browning, so ensure you’ve added the tablespoon called for.
3. Can I use buttermilk instead of regular milk?
Yes! Buttermilk adds a lovely tang and can make pancakes even more tender due to its acidity reacting with the baking powder. If you use buttermilk, you might consider slightly reducing the baking powder (e.g., to 3 teaspoons) or adding ½ teaspoon of baking soda alongside 2 teaspoons of baking powder, as buttermilk is acidic and reacts well with baking soda. However, the original recipe with 3.5 tsp baking powder should still work fine with buttermilk.
4. My batter seems too thick/too thin. What should I do?
Pancake batter should be thick but pourable. If it seems way too thick (like paste), whisk in a tiny bit more milk, one tablespoon at a time, until it reaches the right consistency. If it seems very thin and watery, whisk in a bit more flour, one tablespoon at a time. Remember that a few lumps are good, and batter thickens slightly as it rests. Different flours absorb liquid differently, so slight variations can occur.
5. Are these pancakes healthy?
“Healthy” is relative! These pancakes are a source of carbohydrates for energy, protein, and some vitamins/minerals from the milk and egg. They are a treat, especially when loaded with sweet toppings. To make them healthier, consider using whole wheat flour (partially or fully), reducing the sugar, using plant-based milk, opting for oil over butter, and topping with fresh fruit, yogurt, and nuts instead of syrup and whipped cream.
6. Can I double this recipe?
Absolutely! This recipe doubles easily. Simply multiply all ingredient quantities by two. Ensure you use bowls large enough to accommodate the increased volume, especially when mixing. You’ll likely need to cook in more batches.
7. What’s the difference between baking powder and baking soda in pancakes?
Baking powder is a complete leavening agent containing both an acid and a base. It creates bubbles on its own when wet and heated. Baking soda is only a base and requires an acidic ingredient (like buttermilk, yogurt, or brown sugar) in the batter to react and produce carbon dioxide. This recipe relies primarily on baking powder for its lift.
8. How do I know when the pancake is really cooked through?
Besides the visual cues (golden brown on both sides, set edges, bubbles forming and popping on the first side), the pancake should feel slightly springy to a gentle touch in the center. It shouldn’t look wet or doughy in the middle when you cut into one (sacrifice the first or second one if unsure!). Cooking over medium heat (not too high) helps ensure they cook through evenly.

Fluffy Vegetarian Pancakes
Ingredients
- 1 ½ cups (190g) All-Purpose Flour: The structural foundation of our pancakes. Provides substance and holds everything together. Spoon and level the flour for accurate measurement; don’t scoop directly from the bag.
- 3 ½ teaspoons Baking Powder: The powerhouse leavening agent. Creates carbon dioxide bubbles when mixed with liquid, causing the batter to rise significantly during cooking, resulting in incredibly fluffy pancakes. Ensure it’s not expired!
- 1 teaspoon Salt: Enhances all the other flavours and balances the sweetness. Don’t skip it!
- 1 tablespoon Granulated Sugar (or Coconut Sugar): Adds a touch of sweetness and helps with browning (caramelization) for that beautiful golden colour. You can adjust slightly based on preference.
- 1 ¼ cups (300ml) Milk: Provides moisture and richness. Whole milk offers the richest flavour, but low-fat, skim, or unsweetened plant-based milks (like almond, soy, or oat milk) work beautifully too for a dairy-free option. Ensure it’s at room temperature for better incorporation.
- 1 Large Egg: Acts as a binder, adds richness, flavour, and contributes to the structure and lift. Ensure it’s at room temperature.
- 3 tablespoons Unsalted Butter, melted (or Neutral Oil): Adds richness, flavour, and tenderness. Melting it ensures it incorporates evenly. You can substitute with a neutral-flavoured oil like vegetable, canola, or melted coconut oil if preferred or for a dairy-free version. Allow it to cool slightly before adding.
Instructions
Making these fluffy vegetarian pancakes is a straightforward process. Follow these steps carefully, paying attention to the techniques, especially regarding mixing, for the best results.
- Combine Dry Ingredients: In a large bowl, whisk together the all-purpose flour, baking powder, salt, and granulated sugar. Whisking thoroughly ensures the baking powder and salt are evenly distributed, which is crucial for consistent rising and flavour. Break up any clumps in the flour.
- Prepare Wet Ingredients: In a separate medium bowl, whisk together the milk and the large egg until just combined. Make sure the egg is fully incorporated into the milk. Using room temperature milk and egg helps the batter come together more smoothly.
- Melt the Butter: Melt the unsalted butter either in a small saucepan over low heat or in a microwave-safe bowl in short bursts (checking frequently to prevent splattering). Set it aside to cool slightly for a minute or two. You don’t want it to be piping hot when adding it to the wet ingredients, as it could potentially cook the egg.
- Combine Wet and Dry (Gently!): Pour the milk and egg mixture into the bowl containing the dry ingredients. Add the slightly cooled melted butter (or oil) as well.
- Mix Until Just Combined: Using a whisk or a fork, mix the wet and dry ingredients until they are just combined. It is crucial not to overmix the batter. A few lumps are perfectly okay – in fact, they are desirable! Overmixing develops the gluten in the flour, which will result in tough, dense pancakes instead of light and fluffy ones. Stop mixing as soon as you no longer see large streaks of dry flour.
- Rest the Batter (Optional but Recommended): Let the batter rest for 5-10 minutes at room temperature. This allows the flour to fully hydrate and gives the baking powder time to start working its magic, creating even more bubbles for extra fluffiness. You might notice the batter thickening slightly and becoming more bubbly during this time.
- Preheat the Pan/Griddle: While the batter rests, heat a lightly oiled griddle or non-stick frying pan over medium heat. The pan is ready when a drop of water flicked onto the surface sizzles and evaporates immediately. Proper heat is key: too low and the pancakes won’t brown or rise well; too high and they’ll burn on the outside before cooking through. You might need to adjust the heat slightly as you cook subsequent batches. Use a small amount of butter or neutral oil to grease the pan, wiping away any excess with a paper towel – you want a thin, even coating.
- Cook the Pancakes: Pour or scoop the batter onto the preheated griddle, using approximately ¼ cup of batter per pancake. Cook for about 2-3 minutes on the first side, or until bubbles start to form and pop on the surface and the edges look set and slightly dry.
- Flip and Cook: Carefully flip the pancakes using a thin spatula. Cook on the second side for another 1-2 minutes, or until golden brown and cooked through. The second side usually cooks faster than the first. Resist the urge to press down on the pancakes with your spatula, as this will deflate them.
- Serve Immediately: Transfer the cooked pancakes to a plate. Keep them warm in a low oven (around 200°F or 90°C) on an oven-safe plate or wire rack if making a large batch.
- Repeat: Repeat the process with the remaining batter, adding a tiny bit more oil or butter to the pan between batches if needed.
Nutrition
- Serving Size: one normal portion
- Calories: 300
- Sodium: 500mg
- Fat: 12g
- Carbohydrates: 40g
- Protein: 10g