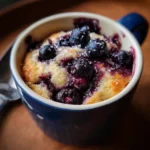
")


Of all the recipes that have become staples in our household, this one holds a special place in my heart, born from a sweltering summer afternoon and a chorus of “I’m hungry!” from the kids. I was determined to find a snack that was cool, refreshing, and didn’t come loaded with sugar and unpronounceable ingredients from a store-bought box. That’s when the magic of Frozen Strawberry Yogurt Bites was discovered. The first time I made them, I wasn’t sure what to expect. But when my youngest, usually a skeptic of anything remotely “healthy,” popped one in his mouth, his eyes widened. “It’s like tiny strawberry ice cream!” he declared. From that moment on, these little pink gems became our go-to treat. They are incredibly simple to make, a perfect activity to involve the kids in, and the result is a guilt-free snack that satisfies cravings for both sweet and cold. They are the perfect antidote to a hot day, a fantastic post-dinner treat, or even a quick, protein-packed bite after a workout. This recipe isn’t just about food; it’s about creating simple, joyful moments and nourishing your family with something made with love.
Ingredients
Here is the simple, wholesome list of ingredients you’ll need to create these delightful frozen treats. The key is to use high-quality ingredients, as their flavors will shine through in the final product.
- 2 cups Fresh Strawberries: Ripe, in-season strawberries will provide the best natural sweetness and most vibrant color. You’ll want them washed, hulled, and roughly chopped.
- 2 cups Full-Fat Greek Yogurt: This is the star of the show for creaminess. Full-fat Greek yogurt has less water content than regular or low-fat yogurt, which is crucial for preventing an icy texture and ensuring a smooth, rich bite. Its high protein content also makes the snack more satisfying.
- ¼ cup Honey or Maple Syrup: This is for added sweetness and can be adjusted to your personal taste and the ripeness of your strawberries. For a vegan option, maple syrup is a perfect substitute.
- 1 teaspoon Vanilla Extract: A small amount of pure vanilla extract enhances the other flavors, adding a wonderful warmth and depth that complements the fruity tang of the strawberries and yogurt.
- 1 tablespoon Fresh Lemon Juice: This might seem like an odd addition, but it’s a secret weapon. A little squeeze of lemon juice brightens the strawberry flavor, making it pop, and helps preserve the beautiful pink color.
Instructions
Follow these step-by-step instructions for perfect Frozen Strawberry Yogurt Bites every time. The process is straightforward and forgiving, making it a great recipe for beginners and for little kitchen helpers.
- Prepare Your Pan: Before you begin mixing, prepare your freezing surface. Line a large baking sheet, tray, or even a large plate with parchment paper or a silicone baking mat. This is the most important step to prevent the bites from sticking, ensuring they release easily once frozen. Make sure the baking sheet will fit flat in your freezer.
- Purée the Strawberries: Place your washed, hulled, and chopped fresh strawberries into the canister of a high-speed blender or a food processor. Add the fresh lemon juice. Blend the strawberries on high for about 30-60 seconds, or until you have a completely smooth, liquid purée with no remaining chunks. Scrape down the sides of the blender as needed to ensure everything is incorporated.
- Combine the Ingredients: To the strawberry purée in the blender, add the full-fat Greek yogurt, your choice of sweetener (honey or maple syrup), and the vanilla extract.
- Blend to Perfection: Place the lid back on the blender and blend again for another 30 seconds, or until the mixture is uniformly smooth, creamy, and a consistent, beautiful shade of pink. There should be no white streaks of yogurt remaining.
- Taste and Adjust: This is a crucial step for achieving your perfect flavor profile. Dip a spoon into the mixture and taste it. Is it sweet enough for you? If your strawberries were a bit tart, you might want to add another tablespoon of honey or maple syrup. Blend for a few more seconds to incorporate any additions. Remember that flavors become slightly less sweet when frozen, so aiming for a touch sweeter than you’d normally prefer is a good idea.
- Portion the Bites: Now it’s time to form your bites. You have two main options:
- Using a Spoon: Use two small spoons or a cookie scoop to drop small, quarter-sized dollops of the yogurt mixture onto your prepared parchment-lined baking sheet. Try to keep them relatively uniform in size for even freezing.
- Using a Piping Bag: For more uniform, nicely shaped bites, transfer the yogurt mixture to a piping bag or a large ziplock bag. If using a ziplock bag, simply snip off one of the bottom corners. Pipe small, circular mounds onto the prepared baking sheet. This method is often faster and less messy.
- Freeze Solid: Carefully place the baking sheet flat in the freezer. Let the bites freeze completely, which will take a minimum of 2-4 hours, but can be left overnight for best results. They should be hard to the touch and easily lift off the parchment paper.
- Store for Later: Once the bites are frozen solid, you can transfer them from the baking sheet into a freezer-safe airtight container or a reusable freezer bag. This will prevent them from absorbing any freezer odors and protect them from freezer burn. They are now ready to be enjoyed whenever a craving strikes!
Nutrition Facts
These Frozen Strawberry Yogurt Bites are more than just a tasty treat; they’re a snack you can feel good about eating. The nutritional information can vary slightly based on the specific yogurt and amount of sweetener used.
- Servings: This recipe makes approximately 60-70 small bites.
- Calories per serving (approx. 5 bites): 75-90 kcal
- Protein (Approx. 5g per serving): The Greek yogurt provides a significant protein boost, which is essential for muscle repair, and helps to keep you feeling full and satisfied for longer, curbing further cravings.
- Vitamin C (Approx. 25% of DV per serving): Strawberries are an excellent source of Vitamin C, a powerful antioxidant that supports your immune system and promotes healthy skin.
- Calcium (Approx. 8% of DV per serving): Yogurt is a great source of calcium, which is vital for maintaining strong bones and teeth.
- Probiotics: Greek yogurt contains live and active cultures (probiotics) that are beneficial for gut health, aiding in digestion and supporting a healthy microbiome.
- Low in Added Sugar: By controlling the amount of honey or maple syrup, you can keep the added sugar content much lower than commercially produced frozen desserts, making it a healthier choice for the whole family.
Preparation Time
This recipe is prized for its minimal active preparation time, with most of the duration being hands-off freezing time.
- Active Preparation Time: 10-15 minutes. This includes washing and preparing the strawberries, blending the ingredients, and portioning the bites onto the baking sheet.
- Freezing Time: 2-4 hours. This is the inactive time where the magic happens in the freezer. For the firmest, most satisfying texture, freezing for at least 4 hours or overnight is recommended.
How to Serve
These versatile little bites can be enjoyed in many more ways than just straight out of the freezer. Here are some creative and delicious ideas for serving your Frozen Strawberry Yogurt Bites:
- The Perfect Afternoon Snack:
- Serve a small bowl of them on their own for a quick, cooling, and healthy snack on a hot day.
- Pack them in a small insulated container in a lunchbox for a special school treat (they will thaw to a yogurt-pudding consistency by lunchtime).
- A Healthy Dessert Alternative:
- Arrange them on a chilled platter for a beautiful and light dessert option at parties or family gatherings.
- Use them as a substitute for ice cream for kids (and adults!), offering a portion-controlled treat.
- Create a “yogurt bite sundae” by placing a handful in a bowl and topping with fresh berries, a sprinkle of granola, or mini chocolate chips.
- Breakfast and Smoothie Boosters:
- Drop a few frozen bites into a bowl of hot oatmeal or porridge. They will melt slightly, creating creamy, fruity swirls.
- Toss 5-6 bites directly into your morning smoothie instead of ice cubes and regular yogurt. They add creaminess, flavor, and a frosty chill all in one.
- Top a bowl of granola or muesli with a few bites for a refreshing and protein-rich start to your day.
- Post-Workout Fuel:
- Enjoy a small handful after a workout. The combination of protein from the yogurt and natural sugars from the fruit helps with muscle recovery and replenishing energy stores.
Additional Tips
To ensure your Frozen Strawberry Yogurt Bites are a roaring success every single time, here are eight expert tips to elevate your recipe and customize it to your liking.
- The Creaminess Secret is Fat: Do not substitute low-fat or fat-free yogurt if you can avoid it. The fat content in full-fat Greek yogurt is the number one defense against icy, hard-as-a-rock bites. It results in a much smoother, creamier, and more satisfying mouthfeel that truly mimics a high-quality frozen dessert.
- Embrace Fruit Variations: Don’t stop at strawberries! This recipe is a fantastic base for all sorts of fruit combinations. Try using raspberries, blueberries, mango, peaches, or even a mixed berry blend. Just ensure you adjust the sweetener level, as some fruits are naturally sweeter than others.
- Master the “Flash Freeze”: To prevent all your beautifully portioned bites from freezing into one giant clump in your storage container, use the “flash freeze” method. After the initial 2-4 hour freeze on the baking sheet, transfer the hardened bites into your freezer bag or container. Because they are already individually frozen, they won’t stick together.
- Get Creative with Add-ins: After blending the yogurt mixture, you can gently fold in some extra texture and flavor. Try adding mini chocolate chips, finely shredded coconut, a swirl of peanut butter, or a sprinkle of finely chopped nuts or granola for a delightful crunch.
- Piping for Perfection: While a spoon works just fine, using a piping bag (or a ziplock bag with the corner snipped off) gives you more control. It allows you to create uniform, professional-looking bites quickly and with less mess. You can even use a star-tipped nozzle to create fun, fluted shapes.
- Don’t Skip the Parchment Paper: This cannot be stressed enough. Yogurt mixtures will freeze solid to a bare metal or plastic tray. Lining your baking sheet with parchment paper or a silicone mat is the non-negotiable step that guarantees your bites will pop right off without breaking or leaving a mess behind.
- Making Them Dairy-Free/Vegan: This recipe is easily adaptable. Simply substitute the Greek yogurt with a thick, full-fat plant-based yogurt, such as one made from coconut or cashews, as these tend to be the creamiest. Use maple syrup or agave nectar as your sweetener instead of honey.
- Taste, Taste, Taste!: The sweetness of your fruit can vary dramatically depending on the season and ripeness. Always taste the blended mixture before you freeze it. It’s your last chance to adjust the flavor. Remember that freezing dulls sweetness, so make the mixture slightly sweeter than you think it needs to be.
FAQ Section
Here are answers to some of the most frequently asked questions about making Frozen Strawberry Yogurt Bites.
1. Can I use frozen strawberries instead of fresh?
Absolutely! Frozen strawberries work very well in this recipe and are a great option when fresh berries are out of season. You may not even need to thaw them completely; just let them sit at room temperature for about 10-15 minutes to soften slightly before blending. Using frozen fruit can even help the mixture thicken up faster.
2. How long will these frozen yogurt bites last in the freezer?
When stored correctly in an airtight, freezer-safe container or bag, your Frozen Strawberry Yogurt Bites will maintain their best quality for up to 1 month. While they are safe to eat for up to 3 months, they may begin to develop ice crystals or lose some of their vibrant flavor after the first month.
3. My yogurt bites turned out very icy. What did I do wrong?
The most common cause of icy bites is using low-fat or regular yogurt instead of full-fat Greek yogurt. Regular yogurt has a higher water content, which turns into ice crystals upon freezing. Ensure you are using a thick, high-fat yogurt. Over-blending can also incorporate too much air, so blend just until smooth.
4. Are these frozen yogurt bites healthy for toddlers and kids?
Yes, they are an excellent healthy snack for toddlers and kids! They are packed with protein, calcium, and vitamins. You have complete control over the ingredients, so you can make them with no added sugar by relying on the natural sweetness of very ripe fruit. Their small size also makes them perfect for little hands and helps with portion control.
5. I don’t have a high-speed blender. What else can I use?
While a high-speed blender is ideal for a super-smooth texture, you can still make this recipe. A standard blender, a food processor, or even an immersion (stick) blender will work. You may just need to blend for a little longer and scrape down the sides more frequently to ensure there are no fruit chunks left.
6. Can I make these without any added sweetener?
Yes, you can. If you are using very ripe, sweet, in-season strawberries, you may find that their natural sugar is enough. This is a great option for a completely sugar-free treat. Be sure to taste the mixture before freezing to see if it meets your desired sweetness level.
7. Why did my yogurt bites stick to the tray even with parchment paper?
This can happen if you try to remove them too early before they are frozen completely solid. Give them at least 2-4 hours to harden fully. Another possibility is that some of the yogurt mixture seeped under the parchment paper. Ensure the paper lays flat against the tray before you start portioning the bites. A silicone mat is often even more reliable than parchment paper.
8. Can I make a layered version of these bites?
Yes, and it looks beautiful! Prepare two separate batches of the yogurt mixture with different fruits (e.g., one strawberry, one mango). Pipe or spoon a layer of the first flavor onto the tray and freeze for 30-60 minutes until firm. Then, carefully add a second layer of the other flavor on top and return to the freezer to harden completely. This adds a fun, multi-flavored twist to the recipe.

Frozen Strawberry Yogurt Bites
Ingredients
Here is the simple, wholesome list of ingredients you’ll need to create these delightful frozen treats. The key is to use high-quality ingredients, as their flavors will shine through in the final product.
- 2 cups Fresh Strawberries: Ripe, in-season strawberries will provide the best natural sweetness and most vibrant color. You’ll want them washed, hulled, and roughly chopped.
- 2 cups Full-Fat Greek Yogurt: This is the star of the show for creaminess. Full-fat Greek yogurt has less water content than regular or low-fat yogurt, which is crucial for preventing an icy texture and ensuring a smooth, rich bite. Its high protein content also makes the snack more satisfying.
- ¼ cup Honey or Maple Syrup: This is for added sweetness and can be adjusted to your personal taste and the ripeness of your strawberries. For a vegan option, maple syrup is a perfect substitute.
- 1 teaspoon Vanilla Extract: A small amount of pure vanilla extract enhances the other flavors, adding a wonderful warmth and depth that complements the fruity tang of the strawberries and yogurt.
- 1 tablespoon Fresh Lemon Juice: This might seem like an odd addition, but it’s a secret weapon. A little squeeze of lemon juice brightens the strawberry flavor, making it pop, and helps preserve the beautiful pink color.
Instructions
Follow these step-by-step instructions for perfect Frozen Strawberry Yogurt Bites every time. The process is straightforward and forgiving, making it a great recipe for beginners and for little kitchen helpers.
- Prepare Your Pan: Before you begin mixing, prepare your freezing surface. Line a large baking sheet, tray, or even a large plate with parchment paper or a silicone baking mat. This is the most important step to prevent the bites from sticking, ensuring they release easily once frozen. Make sure the baking sheet will fit flat in your freezer.
- Purée the Strawberries: Place your washed, hulled, and chopped fresh strawberries into the canister of a high-speed blender or a food processor. Add the fresh lemon juice. Blend the strawberries on high for about 30-60 seconds, or until you have a completely smooth, liquid purée with no remaining chunks. Scrape down the sides of the blender as needed to ensure everything is incorporated.
- Combine the Ingredients: To the strawberry purée in the blender, add the full-fat Greek yogurt, your choice of sweetener (honey or maple syrup), and the vanilla extract.
- Blend to Perfection: Place the lid back on the blender and blend again for another 30 seconds, or until the mixture is uniformly smooth, creamy, and a consistent, beautiful shade of pink. There should be no white streaks of yogurt remaining.
- Taste and Adjust: This is a crucial step for achieving your perfect flavor profile. Dip a spoon into the mixture and taste it. Is it sweet enough for you? If your strawberries were a bit tart, you might want to add another tablespoon of honey or maple syrup. Blend for a few more seconds to incorporate any additions. Remember that flavors become slightly less sweet when frozen, so aiming for a touch sweeter than you’d normally prefer is a good idea.
- Portion the Bites: Now it’s time to form your bites. You have two main options:
- Using a Spoon: Use two small spoons or a cookie scoop to drop small, quarter-sized dollops of the yogurt mixture onto your prepared parchment-lined baking sheet. Try to keep them relatively uniform in size for even freezing.
- Using a Piping Bag: For more uniform, nicely shaped bites, transfer the yogurt mixture to a piping bag or a large ziplock bag. If using a ziplock bag, simply snip off one of the bottom corners. Pipe small, circular mounds onto the prepared baking sheet. This method is often faster and less messy.
- Freeze Solid: Carefully place the baking sheet flat in the freezer. Let the bites freeze completely, which will take a minimum of 2-4 hours, but can be left overnight for best results. They should be hard to the touch and easily lift off the parchment paper.
- Store for Later: Once the bites are frozen solid, you can transfer them from the baking sheet into a freezer-safe airtight container or a reusable freezer bag. This will prevent them from absorbing any freezer odors and protect them from freezer burn. They are now ready to be enjoyed whenever a craving strikes!
Nutrition
- Serving Size: one normal portion
- Calories: 90
- Protein: 5g