")


The crisp autumn air always brings with it a wave of nostalgia, a sensory reminder of childhoods spent eagerly scooping the stringy innards from a giant pumpkin. For my family, the ritual of carving jack-o’-lanterns was never complete without the grand finale: roasting the seeds. For years, we stuck to a simple salt and pepper mix, but one Halloween, I decided to experiment. I reached for the garlic powder, a touch of savory Worcestershire sauce, and a good quality olive oil. The aroma that filled our kitchen as they roasted was nothing short of intoxicating. When I pulled the baking sheet from the oven, revealing a glistening expanse of perfectly golden, fragrant seeds, I knew I had stumbled upon something special. My kids, who usually picked at the seeds, devoured the entire batch in minutes, their crunching a happy soundtrack to our evening. This Garlic Roasted Pumpkin Seeds recipe has since become our non-negotiable autumn tradition, the ultimate reward for our carving efforts and the perfect savory snack that disappears almost as fast as I can make it.
The Hidden Treasure: Why You Should Never Throw Away Pumpkin Seeds
Before we dive into the recipe itself, let’s take a moment to appreciate the star of the show. For centuries, pumpkin seeds, also known as pepitas, have been more than just a byproduct of pumpkin carving. They are tiny, nutritional powerhouses packed with flavor and health benefits. Often discarded along with the pumpkin’s fibrous strands, these seeds are a culinary treasure waiting to be discovered.
Historically, pumpkin seeds were valued by Native American tribes for both their dietary and medicinal properties. Today, we understand the science behind their benefits. They are an incredible source of essential minerals like magnesium, zinc, and iron, as well as healthy fats, protein, and fiber. Roasting them not only transforms their texture from chewy to irresistibly crunchy but also deepens their nutty flavor, making them a versatile ingredient that can elevate countless dishes. So, the next time you carve a pumpkin, remember that the best part might just be on the inside. By taking a few extra minutes to clean and roast the seeds, you’re reducing food waste and creating a delicious, healthy snack from scratch.
Choosing the Right Pumpkin for the Best Seeds
While you can certainly get fantastic seeds from any standard carving pumpkin (the large ‘Howden’ or ‘Connecticut Field’ varieties), it’s worth knowing that not all pumpkins are created equal when it comes to their seeds.
- Carving Pumpkins: These are your typical Halloween pumpkins. They are bred for size and have thinner flesh, making them easier to carve. Their seeds are large, white, and plentiful, with a thick outer hull. They are perfect for roasting whole, as the hull becomes delightfully crispy and provides a satisfying crunch. This recipe is designed specifically for these types of seeds.
- Sugar or Pie Pumpkins: These smaller, denser pumpkins have sweeter, thicker flesh, ideal for making pies, purées, and soups. Their seeds are often smaller and more tender than those from carving pumpkins. They can be roasted using the same method, but may require a slightly shorter cooking time, so keep a close eye on them.
- Heirloom Varieties: If you explore a local farm stand, you might find unique heirloom pumpkins like the ‘Styrian’ or ‘Oil Seed’ pumpkin. These are special because their seeds grow without a tough outer hull (they are “naked”). These are the green pepitas you typically buy in a store. You can roast them, but they will be much more delicate and will cook much faster.
For this Garlic Roasted Pumpkin Seeds recipe, a classic, large carving pumpkin will yield the best and most traditional results, giving you that iconic crunchy shell we all know and love.
The Crucial First Step: How to Clean and Prepare Pumpkin Seeds
The most labor-intensive part of this recipe is separating the seeds from the stringy, fibrous pulp. Don’t be discouraged! A little patience here pays off tenfold. A clean seed is a crispy seed.
- The Big Scoop: As you scoop the innards out of your pumpkin, place them into a large bowl. Use your hands to pull away the largest chunks of pumpkin flesh.
- The Water Method: Fill the bowl with cool water. This is the magic trick. The water helps to loosen the stubborn pulp from the seeds. Vigorously swish the seeds and pulp around with your hands. You’ll notice that the heavy seeds will sink to the bottom while the lighter pulp and stringy bits will float to the top.
- Skim and Separate: Use a slotted spoon or your hands to skim the floating pulp off the top and discard it. You may need to repeat this process a couple of times, draining and refilling the bowl with fresh water, until you are left with mostly clean seeds at the bottom.
- Final Rinse: Pour the seeds into a colander and give them a final, thorough rinse under running water, picking out any last stray bits of orange fiber.
- Drying is Key: This is arguably the most important step for achieving maximum crispiness. Spread the clean seeds in a single, even layer on a clean kitchen towel or a layer of paper towels. Pat them dry with another towel. For the absolute best results, let them air-dry for several hours, or even overnight. The drier the seeds are before you add the oil and seasonings, the better they will roast rather than steam, ensuring a perfectly crunchy, non-chewy texture.
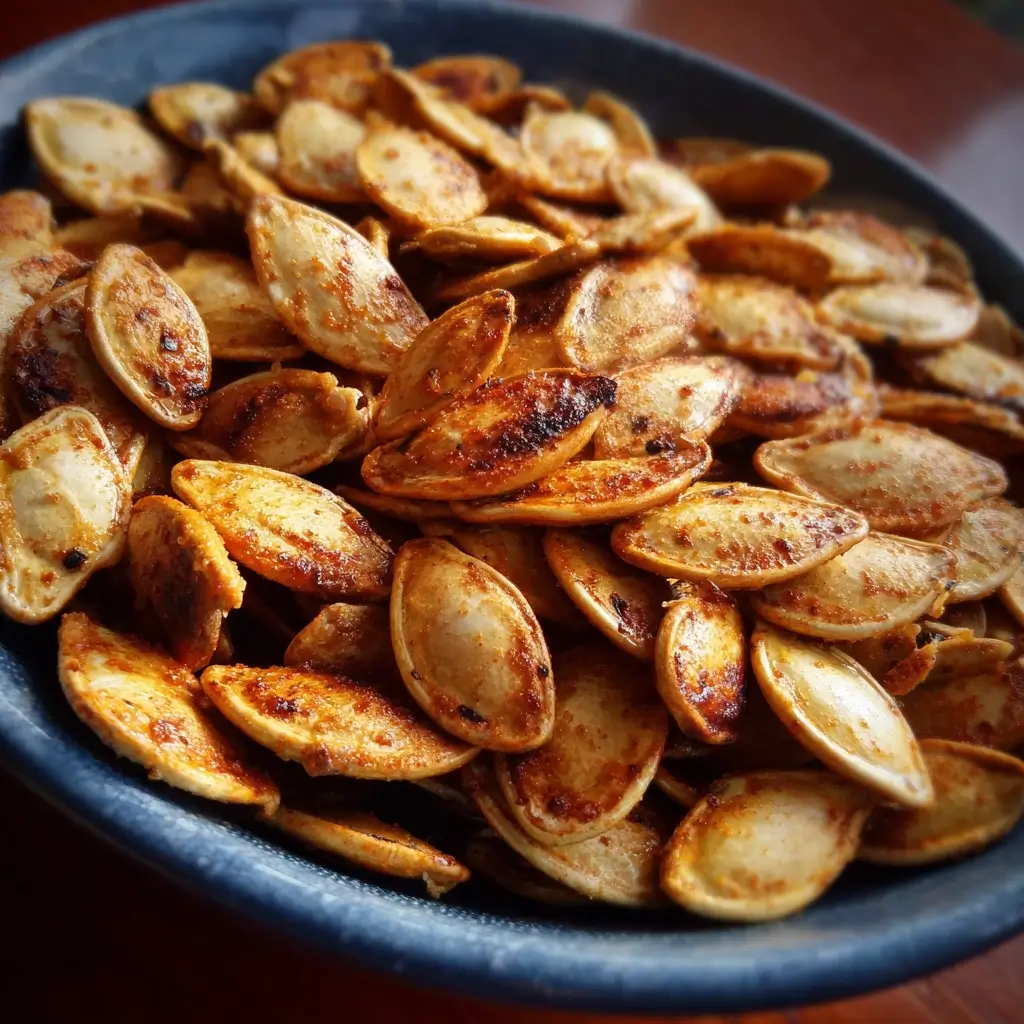
Garlic Roasted Pumpkin Seeds Recipe
Now that your seeds are clean, dry, and ready, it’s time to transform them into a golden, garlicky, and utterly addictive snack.
Ingredients
- 2 cups fresh pumpkin seeds: Cleaned, thoroughly dried, and from one medium-to-large carving pumpkin.
- 2 tablespoons olive oil: A good quality extra virgin olive oil adds flavor and helps the seeds crisp up beautifully.
- 1 ½ teaspoons garlic powder: The star of the show, providing a robust, savory, and aromatic flavor.
- 1 teaspoon onion powder: Adds a subtle sweetness and depth that complements the garlic perfectly.
- 1 teaspoon Worcestershire sauce: This secret ingredient provides a complex umami and savory kick that makes the seeds irresistible.
- ¾ teaspoon fine sea salt: Or more, to taste. Salt enhances all the other flavors.
- ½ teaspoon black pepper: Freshly cracked for the best, most pungent flavor.
Instructions
- Preheat Your Oven: Position a rack in the middle of your oven and preheat to 325°F (165°C). A lower, slower roast prevents the garlic from burning and ensures the seeds cook through evenly.
- Combine the Seasonings: In a medium-sized bowl, place your thoroughly dried pumpkin seeds. Drizzle them with the olive oil and Worcestershire sauce. Toss well with a spatula or your hands until every single seed is lightly coated.
- Add the Spices: Sprinkle the garlic powder, onion powder, sea salt, and black pepper over the oil-coated seeds. Toss everything together again, ensuring the spices are evenly distributed. Don’t be afraid to use your hands to really massage the seasonings onto the seeds.
- Prepare for Roasting: Spread the seasoned seeds in a single, even layer on a large, rimmed baking sheet. It is crucial not to overcrowd the pan. If the seeds are piled on top of each other, they will steam and become chewy instead of roasting to a crisp. Use two baking sheets if necessary.
- Roast to Perfection: Place the baking sheet in the preheated oven. Roast for 20-30 minutes, stirring the seeds every 10 minutes to promote even browning. The seeds are done when they are dry to the touch, golden brown, and you can hear them start to make little popping or crackling sounds.
- Cool Completely: Remove the baking sheet from the oven and let the pumpkin seeds cool completely on the pan. They will continue to crisp up as they cool. Do not be tempted to taste them straight from the oven (they will be hot and won’t have reached their full crunchy potential yet).
- Store or Serve: Once completely cool, serve immediately or store in an airtight container at room temperature.
Nutrition Facts
- Servings: 8 (¼ cup per serving)
- Calories per serving: Approximately 110 kcal
- Magnesium: An excellent source of magnesium, which is crucial for bone health, muscle function, and regulating blood pressure.
- Zinc: Packed with zinc, an essential mineral for immune system function, wound healing, and cell growth.
- Healthy Fats: Contains a good amount of monounsaturated and polyunsaturated fats, which are beneficial for heart health.
- Fiber: A good source of dietary fiber, which aids in digestion and helps you feel full and satisfied.
- Protein: Provides a decent amount of plant-based protein, making it a great addition to a balanced diet.
Preparation Time
- Active Time: 20 minutes (includes cleaning and seasoning the seeds)
- Drying Time: 1-8 hours (for best results)
- Cook Time: 20-30 minutes
- Total Time: Approximately 45 minutes (excluding drying time)
How to Serve
While these garlic roasted pumpkin seeds are fantastic on their own as a snack, their versatility is one of their best qualities. Here are some creative ways to enjoy them:
- The Ultimate Topping:
- Sprinkle them over a creamy butternut squash or tomato soup for a delightful crunch.
- Toss them into a fall harvest salad with mixed greens, apples, and a vinaigrette dressing.
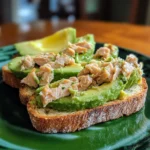
- Use them as a crunchy topping for your morning avocado toast or oatmeal.
- In Main Dishes:
- Mix them into grain bowls with quinoa, roasted vegetables, and your favorite protein.
- Crush them slightly and use them as a “crust” for baked chicken or fish.
- Fold them into the batter for savory muffins or breads for a surprising texture.
- As a Garnish:
- Garnish your favorite pasta dishes, especially those with a creamy or pesto sauce.
- Sprinkle over roasted vegetable side dishes like Brussels sprouts or broccoli.
- Add them to a charcuterie or cheese board for a nutty, savory element.
Additional Tips for Perfect Roasted Pumpkin Seeds
- Don’t Skip the Drying Step: I cannot emphasize this enough. Wet seeds will steam in the oven. The drier your seeds are before they hit the heat, the crunchier the final product will be. Air drying for a few hours is the gold standard.
- The Boiling Debate (Optional Pro-Tip): For an extra-crispy, cracker-like shell, some chefs swear by boiling the clean seeds in salted water for 10 minutes before drying and roasting. The salt water seasons the seed from the inside out, and the boiling process helps break down some of the fibers in the hull, leading to a superior crunch.
- Low and Slow is the Way to Go: Roasting at a high temperature might seem faster, but it’s a recipe for disaster. The delicate seeds and garlic powder can burn quickly on the outside before the inside of the seed is fully cooked and dried out. A moderate temperature of 325°F (165°C) is the sweet spot.
- Don’t Crowd the Pan: Give your seeds space to breathe on the baking sheet. Spreading them in a single, even layer ensures that hot air can circulate around each individual seed, roasting it to golden-brown perfection. Use two pans if you have a large batch.
- Listen for the “Pop”: Your ears are a great tool for telling when the seeds are done. As they finish roasting, you’ll hear faint popping or crackling sounds. This is a sign that the moisture inside the seed has evaporated and they are becoming perfectly crisp.
- Let Them Cool Completely on the Pan: The cooling process is the final stage of cooking. As the seeds cool, they release their remaining steam and firm up, achieving their maximum crunch factor. Resist the urge to transfer them to a bowl immediately.
- Explore Flavor Variations: This garlic recipe is a fantastic base, but feel free to experiment!
- Spicy: Add ¼ to ½ teaspoon of cayenne pepper or smoked paprika.
- Sweet: Omit the garlic/onion/Worcestershire and use melted butter, cinnamon, and a sprinkle of brown sugar.
- Herby: Add 1 teaspoon of dried rosemary or thyme along with the garlic.
- Proper Storage is Key: To maintain their crunch, store the cooled seeds in a completely airtight container (like a glass jar or sealed plastic container) at room temperature. Stored properly, they can stay fresh and crispy for up to two weeks, though it’s highly unlikely they’ll last that long!
Frequently Asked Questions (FAQ)
1. Why did my pumpkin seeds turn out chewy instead of crunchy?
This is the most common issue and it almost always comes down to one of two things: moisture or overcrowding. First, ensure your seeds were completely dry before you added the oil and seasonings. Any residual water will cause them to steam. Second, make sure you spread them in a single layer on the baking sheet. If they are piled up, the ones on the bottom won’t get direct heat and will steam, resulting in a chewy texture.
2. Can I use pre-shelled pumpkin seeds (pepitas) for this recipe?
Yes, you can, but the result will be different. Green, pre-shelled pepitas lack the white outer hull. They are more delicate and will cook much faster. If using pepitas, reduce the oven temperature to 300°F (150°C) and start checking them for doneness after just 10-15 minutes. They burn easily, so watch them closely.
3. Do I really have to boil the seeds first?
No, you don’t have to. The recipe as written produces wonderfully crispy and flavorful seeds without boiling. Boiling is an optional, extra step for those who want to achieve the absolute maximum level of crunchiness. It’s a great technique to try if you find your seeds are often a bit chewy, as it helps to cook the seed more evenly.
4. How long will these roasted pumpkin seeds last?
When stored correctly in a sealed, airtight container at room temperature, your garlic roasted pumpkin seeds will stay fresh and crunchy for 1 to 2 weeks. Avoid storing them in the refrigerator, as the cool, moist air can make them lose their crispness.
5. Are roasted pumpkin seeds actually healthy?
Absolutely! They are a fantastic healthy snack. They are packed with minerals like magnesium, zinc, and iron, and are a great source of plant-based protein, healthy fats, and dietary fiber. This recipe uses heart-healthy olive oil and roasts them, which is a much healthier preparation method than frying.
6. Can I make these in an air fryer?
Yes, an air fryer is a great tool for roasting pumpkin seeds! Prepare the seeds exactly as described in the recipe. Preheat your air fryer to 300°F (150°C). Place the seeds in the air fryer basket in a single layer (you may need to work in batches). Air fry for 10-15 minutes, shaking the basket every 5 minutes, until they are golden and crispy.
7. My seeds burned! What went wrong?
Burning is usually caused by an oven temperature that is too high. All ovens are slightly different, and yours might run hotter than the temperature it’s set to. Next time, try reducing the temperature by 25°F (about 15°C). Also, ensure your seeds are on the middle rack, not too close to the top heating element. Finally, don’t forget to stir them during roasting to prevent the bottom from browning too quickly.
8. Can I use seeds from other types of squash, like butternut or acorn?
Yes, you can! The seeds from most winter squashes are edible and delicious when roasted. Simply clean and prepare them using the same method. Be aware that seeds from different squashes will vary in size and thickness, so you may need to adjust the roasting time accordingly. Smaller seeds will cook faster, so keep a close eye on them.

Garlic Roasted Pumpkin Seeds Recipe
Ingredients
- 2 cups fresh pumpkin seeds: Cleaned, thoroughly dried, and from one medium-to-large carving pumpkin.
- 2 tablespoons olive oil: A good quality extra virgin olive oil adds flavor and helps the seeds crisp up beautifully.
- 1 ½ teaspoons garlic powder: The star of the show, providing a robust, savory, and aromatic flavor.
- 1 teaspoon onion powder: Adds a subtle sweetness and depth that complements the garlic perfectly.
- 1 teaspoon Worcestershire sauce: This secret ingredient provides a complex umami and savory kick that makes the seeds irresistible.
- ¾ teaspoon fine sea salt: Or more, to taste. Salt enhances all the other flavors.
- ½ teaspoon black pepper: Freshly cracked for the best, most pungent flavor.
Instructions
- Preheat Your Oven: Position a rack in the middle of your oven and preheat to 325°F (165°C). A lower, slower roast prevents the garlic from burning and ensures the seeds cook through evenly.
- Combine the Seasonings: In a medium-sized bowl, place your thoroughly dried pumpkin seeds. Drizzle them with the olive oil and Worcestershire sauce. Toss well with a spatula or your hands until every single seed is lightly coated.
- Add the Spices: Sprinkle the garlic powder, onion powder, sea salt, and black pepper over the oil-coated seeds. Toss everything together again, ensuring the spices are evenly distributed. Don’t be afraid to use your hands to really massage the seasonings onto the seeds.
- Prepare for Roasting: Spread the seasoned seeds in a single, even layer on a large, rimmed baking sheet. It is crucial not to overcrowd the pan. If the seeds are piled on top of each other, they will steam and become chewy instead of roasting to a crisp. Use two baking sheets if necessary.
- Roast to Perfection: Place the baking sheet in the preheated oven. Roast for 20-30 minutes, stirring the seeds every 10 minutes to promote even browning. The seeds are done when they are dry to the touch, golden brown, and you can hear them start to make little popping or crackling sounds.
- Cool Completely: Remove the baking sheet from the oven and let the pumpkin seeds cool completely on the pan. They will continue to crisp up as they cool. Do not be tempted to taste them straight from the oven (they will be hot and won’t have reached their full crunchy potential yet).
- Store or Serve: Once completely cool, serve immediately or store in an airtight container at room temperature.
Nutrition
- Serving Size: one normal portion
- Calories: 110