")


Of all the recipes that have become staples in my kitchen, this one holds a special place. I first developed these Herbed Chickpea and Quinoa Bites on a whim, needing a healthy, protein-packed appetizer for a family get-together. I was looking for something that could satisfy everyone—from my health-conscious sister to my notoriously picky nephew. I’ll be honest, when I told the kids we were having “chickpea and quinoa bites,” I was met with more than a few skeptical looks. But the moment they came out of the oven—golden-brown, fragrant with fresh herbs, and served with a creamy yogurt dip—the mood shifted. The first bite was a revelation. The crispy exterior gave way to a soft, flavorful interior, bursting with the fresh taste of parsley and cilantro, a subtle warmth from the spices, and the satisfying, nutty texture of quinoa. They were gone in minutes. Since that day, these versatile little bites have become our go-to for everything. They’re a lifesaver for busy weeknight dinners, a star player in my meal-prep routine, and the first thing I volunteer to bring to potlucks. They’ve proven to be endlessly adaptable, delicious served hot or cold, and a genuinely wholesome food that I feel great about serving my family. This recipe isn’t just about food; it’s about creating something simple, nourishing, and universally loved.
Ingredients
Here is the simple, wholesome list of ingredients you’ll need to create these delicious bites. Each component plays a crucial role in building the perfect texture and flavor profile.
- 1 cup dry quinoa, rinsed: This ancient grain is the backbone of our bites. Rinsing it before cooking removes its natural saponin coating, which can taste bitter. It provides a wonderful, slightly nutty flavor and a complete protein source.
- 2 cups vegetable broth or water: For cooking the quinoa. Using vegetable broth instead of water is a simple trick to infuse the quinoa with a deeper, more savory flavor from the very start.
- 2 (15-ounce) cans chickpeas, rinsed and drained: Also known as garbanzo beans, these are our second protein powerhouse. They provide a creamy, sturdy base that helps bind the patties together. Make sure to rinse and drain them well to remove excess sodium and starchy liquid.
- 1 cup Panko breadcrumbs (or gluten-free breadcrumbs): Panko breadcrumbs are lighter and flakier than traditional breadcrumbs, which helps create an exceptionally crispy exterior. For a gluten-free version, simply use your favorite GF-certified breadcrumbs or oat flour.
- ½ cup finely chopped fresh parsley: This brings a bright, clean, and slightly peppery flavor that cuts through the earthiness of the chickpeas and quinoa. Don’t be shy with it; its freshness is a key element.
- ½ cup finely chopped fresh cilantro: For those who love it, cilantro adds a unique, zesty, and almost citrusy note that pairs beautifully with the other ingredients. If you’re not a fan, you can substitute it with more parsley or fresh dill.
- ¼ cup finely sliced chives: Chives provide a delicate, mild onion flavor that is much less overpowering than regular onions, adding a layer of aromatic complexity.
- 2 cloves garlic, minced: A fundamental aromatic that provides a pungent, savory depth. Mince it finely to ensure it’s evenly distributed throughout the mixture.
- 1 large lemon, juiced and zested: The zest provides an incredible floral, citrusy aroma without too much sourness, while the juice adds a necessary kick of acidity that brightens and balances all the flavors.
- 2 tablespoons flaxseed meal + 5 tablespoons water (to make a “flax egg”): This is our vegan binder. When mixed with water, flaxseed meal forms a gel-like consistency similar to an egg, helping to hold the bites together effectively.
- 1 teaspoon ground cumin: Cumin brings a warm, earthy, and slightly smoky flavor that is a classic pairing with chickpeas.
- 1 teaspoon ground coriander: Coriander offers a slightly sweet, floral, and citrusy spice note that complements the cumin perfectly.
- ½ teaspoon smoked paprika: This adds a beautiful, subtle smokiness and a lovely color to the bites, elevating them beyond basic seasoning.
- ½ teaspoon sea salt, or to taste: Essential for enhancing and bringing together all the other flavors.
- ¼ teaspoon black pepper, or to taste: For a touch of gentle heat and spice.
- 4 tablespoons olive oil or avocado oil, for pan-frying: A good quality oil is needed to achieve that perfect golden-brown, crispy crust. Avocado oil is great for its high smoke point, while olive oil adds a touch of fruity flavor.
Instructions
Follow these detailed steps to ensure your Herbed Chickpea and Quinoa Bites come out perfectly every time. The key to success lies in the preparation and chilling of the mixture.
- Cook the Quinoa: In a medium saucepan, combine the 1 cup of rinsed quinoa with 2 cups of vegetable broth or water. Bring to a boil, then reduce the heat to a low simmer, cover, and cook for 15 minutes, or until all the liquid has been absorbed. Remove from heat and let it stand, covered, for 5 more minutes. Fluff the quinoa with a fork and spread it out on a baking sheet to cool completely. This step is crucial; warm quinoa can make the mixture too wet and cause the bites to fall apart.
- Prepare the Flax Egg: In a small bowl, whisk together the 2 tablespoons of flaxseed meal and 5 tablespoons of water. Set it aside for 10-15 minutes to thicken into a gel. This will act as our primary binder.
- Mash the Chickpeas: While the quinoa cools and the flax egg sets, place the rinsed and drained chickpeas in a large mixing bowl. Using a potato masher or the back of a fork, mash the chickpeas until they are partially broken down. You want a coarse, rustic texture—not a completely smooth puree. A few whole or half chickpeas remaining is perfectly fine and adds to the texture.
- Combine the Ingredients: To the bowl with the mashed chickpeas, add the completely cooled quinoa, Panko breadcrumbs, finely chopped parsley, cilantro, chives, minced garlic, lemon zest, and lemon juice. Sprinkle in the ground cumin, ground coriander, smoked paprika, sea salt, and black pepper.
- Mix Everything Together: Pour the thickened flax egg into the bowl. Using your hands or a sturdy spoon, mix all the ingredients together until they are thoroughly combined. Don’t be afraid to get your hands in there; it’s the best way to ensure everything is evenly distributed. The mixture should be firm and hold its shape when you squeeze a small amount in your palm.
- Chill the Mixture (The Most Important Step!): Cover the bowl with plastic wrap and refrigerate for at least 30 minutes, or up to 2 hours. This step is non-negotiable! Chilling allows the breadcrumbs and flax egg to absorb moisture and firm up, which is the secret to preventing the bites from crumbling during cooking.
- Shape the Bites: After chilling, remove the mixture from the refrigerator. Scoop out about 2 tablespoons of the mixture and roll it into a ball, then gently flatten it into a small patty, about 1.5 inches in diameter and ½ inch thick. Place the formed patty on a parchment-lined baking sheet and repeat with the remaining mixture. You should get about 20-24 bites.
- Cook the Bites: You have two excellent options for cooking.
- For Pan-Frying (Crispiest results): Heat the olive or avocado oil in a large skillet or frying pan over medium-high heat. Once the oil is shimmering, carefully place the bites in the pan, ensuring not to overcrowd it (cook in batches if necessary). Fry for 3-4 minutes per side, until they are a deep golden brown and wonderfully crispy. Transfer the cooked bites to a plate lined with a paper towel to absorb any excess oil.
- For Baking (Lower-fat option): Preheat your oven to 400°F (200°C). Arrange the bites on a parchment-lined baking sheet. Lightly spray or brush the tops with a little olive oil to help them brown. Bake for 20-25 minutes, flipping them halfway through, until they are golden and firm to the touch. They won’t be as crispy as the pan-fried version but are still incredibly delicious.
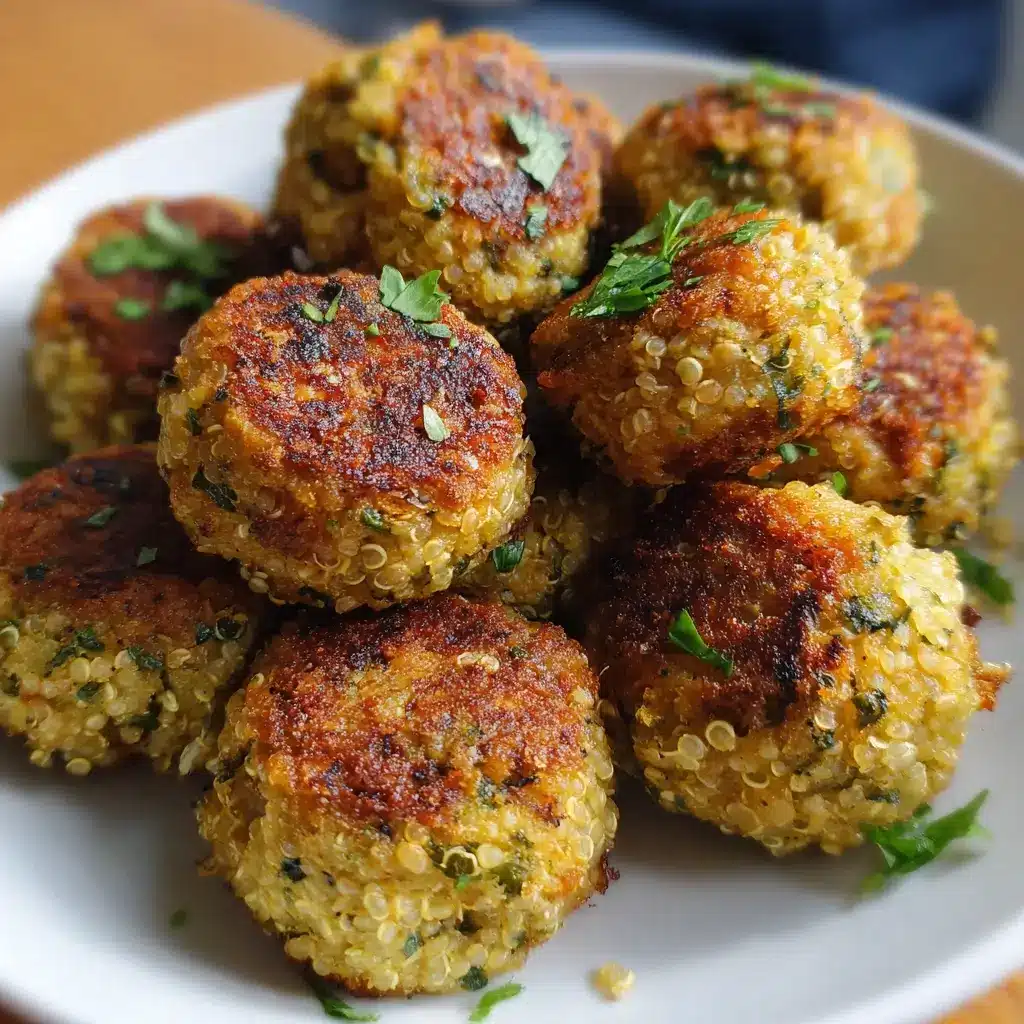
- Serve and Enjoy: Serve your Herbed Chickpea and Quinoa Bites warm, garnished with a little extra fresh parsley and a side of your favorite dipping sauce.
Nutrition Facts
These bites are not only delicious but also packed with nutrients. The nutritional information is an estimate.
- Servings: This recipe makes approximately 22 bites.
- Calories Per Serving: Approximately 55-65 calories per bite (when pan-fried).
- Plant-Based Protein (Approx. 2.5g per bite): The combination of quinoa (a complete protein) and chickpeas provides a substantial amount of protein, crucial for muscle repair, energy, and keeping you feeling full and satisfied.
- Dietary Fiber (Approx. 2g per bite): Rich in fiber from the chickpeas, quinoa, and flaxseed, these bites support healthy digestion, aid in blood sugar regulation, and contribute to long-lasting satiety.
- Complex Carbohydrates: The quinoa provides high-quality complex carbohydrates that offer sustained energy release, making these bites a fantastic choice for a pre-workout snack or a mid-day energy boost without the crash.
- Healthy Fats: When cooked with olive or avocado oil, these bites contain monounsaturated fats, which are beneficial for heart health and reducing inflammation.
- Rich in Minerals: These bites are a good source of essential minerals like iron and magnesium from the chickpeas and quinoa, which are vital for energy production and muscle function.
Preparation Time
- Prep Time: 20 minutes (for chopping herbs and mixing)
- Cook Time (for quinoa): 20 minutes
- Chill Time: 30 minutes (minimum)
- Cook Time (for bites): 15-25 minutes
- Total Time: Approximately 1 hour 30 minutes
While the total time may seem long, much of it is passive time (cooking quinoa, chilling the mixture). You can easily cook the quinoa a day or two in advance to significantly speed up the process on the day you plan to serve them.
How to Serve
These Herbed Chickpea and Quinoa Bites are incredibly versatile. Here are some of our favorite ways to enjoy them:
- As a Perfect Appetizer:
- Arrange them on a platter with a selection of delicious dipping sauces.
- Creamy Tzatziki: The cool cucumber and tangy yogurt is a classic and refreshing pairing.
- Spicy Sriracha Mayo: A simple mix of mayonnaise (or vegan mayo) and sriracha for a creamy, spicy kick.
- Classic Hummus: Double down on the chickpea goodness by serving them with a smooth, flavorful hummus.
- Whipped Feta Dip: A salty, tangy, and creamy dip that beautifully complements the earthy bites.
- As a Satisfying Main Course:
- In a Pita Pocket: Stuff a few warm bites into a soft pita with shredded lettuce, diced tomatoes, cucumbers, and a drizzle of tahini sauce for a fantastic vegetarian sandwich.
- On a Nourish Bowl: Serve them over a bed of mixed greens, roasted vegetables, and a grain like brown rice or farro. Drizzle with a lemon-tahini dressing to tie it all together.
- As a Burger Alternative: Make larger patties and serve them on a brioche or whole wheat bun with all your favorite burger toppings.
- For Meal Prep and Lunchboxes:
- These bites are delicious even when cold or at room temperature, making them perfect for packed lunches.
- Pack them with some cherry tomatoes, cucumber slices, and a small container of hummus for a balanced and easy lunch.
- For Entertaining:
- Skewer them with a cherry tomato and a small cube of feta cheese for an easy-to-eat party snack.
- Serve them as part of a larger Mediterranean-inspired mezze platter alongside olives, marinated artichoke hearts, and dolmades.
Additional Tips
Here are 8 pro tips to help you perfect this recipe and customize it to your liking.
- The Secret to Non-Crumbly Bites: The number one issue with homemade patties is that they fall apart. To prevent this, ensure your cooked quinoa is completely cooled and relatively dry. Spreading it on a baking sheet accelerates cooling and helps excess moisture evaporate. Also, do not skip the 30-minute chilling step!
- Achieve the Ultimate Crispy Crust: For the crispiest pan-fried bites, make sure your pan and oil are sufficiently hot before adding the patties. You should hear a gentle sizzle. Don’t overcrowd the pan, as this will lower the temperature and cause them to steam rather than fry.
- Experiment with Flavor Profiles: This recipe is a fantastic base for customization. Try adding a teaspoon of curry powder for an Indian-inspired twist, or swap the parsley and cilantro for fresh dill and mint for a more pronounced Greek flavor. A pinch of red pepper flakes can also add a welcome bit of heat.
- How to Make Them Fully Vegan: This recipe is already designed to be easily vegan. Simply ensure you are using a certified vegan brand of Panko breadcrumbs, as some can contain dairy. The flax egg works perfectly as a plant-based binder.
- How to Make Them Gluten-Free: To make these bites gluten-free, substitute the Panko breadcrumbs with certified gluten-free breadcrumbs. Alternatively, you can use 1 cup of almond flour or ¾ cup of quick-cooking gluten-free oats or oat flour.
- Master Your Meal Prep: To save time during the week, you can cook the quinoa and chop all the herbs and garlic up to 2 days in advance. Store them in separate airtight containers in the refrigerator. When you’re ready to make the bites, the assembly process will take less than 10 minutes.
- Freezing for Future Meals: These bites freeze beautifully. You can freeze them either cooked or uncooked.
- Uncooked: Form the patties and place them on a parchment-lined baking sheet. Freeze until solid, then transfer them to a freezer-safe bag. You can cook them directly from frozen, adding a few extra minutes to the cooking time.
- Cooked: Let the cooked bites cool completely. Freeze them in a single layer on a baking sheet, then transfer to a freezer bag. Reheat in the oven or an air fryer at 375°F (190°C) for 10-15 minutes until hot and re-crisped.
- Sneak in Extra Veggies: These bites are a great vehicle for hiding extra vegetables for picky eaters. Try adding up to ½ cup of finely grated and squeezed-dry zucchini or carrot to the mixture. The flavor is easily masked by the herbs and spices, and it adds an extra boost of nutrients.
FAQ Section
Here are answers to some of the most common questions about making Herbed Chickpea and Quinoa Bites.
1. Can I make these chickpea and quinoa bites in an air fryer?
Absolutely! The air fryer is a fantastic method for cooking these. Preheat your air fryer to 375°F (190°C). Place the bites in a single layer in the basket (you may need to work in batches). Spray them lightly with cooking spray and cook for 12-15 minutes, flipping halfway through, until they are golden brown and crispy.
2. Why are my quinoa bites falling apart?
This is the most common challenge, and it usually comes down to one of three things: too much moisture, not enough binder, or skipping the chilling time. To fix this, make sure your cooked quinoa is completely cool and dry. Ensure you’ve added the flax egg and breadcrumbs as directed. Most importantly, do not skip the 30-minute refrigeration step, as this is what solidifies the mixture.
3. Are these quinoa bites actually healthy?
Yes, they are exceptionally healthy. They are packed with plant-based protein and fiber, which aid in satiety and digestion. They use whole-food ingredients and are rich in complex carbs for sustained energy. When baked or air-fried, they are also relatively low in fat, making them a nutrient-dense choice for a meal or snack.
4. Can I use leftover cooked quinoa for this recipe?
Yes, using leftover quinoa is a perfect shortcut for this recipe! It’s an excellent way to use it up. Just make sure the quinoa is cold from the refrigerator before you mix it with the other ingredients. You’ll need about 3 cups of cooked quinoa to equal the 1 cup of dry quinoa called for in the recipe.
5. What can I use as a substitute for Panko breadcrumbs?
If you don’t have Panko, you can use regular breadcrumbs, though the texture might be slightly denser. For a gluten-free and healthier alternative, you can process ¾ cup of rolled oats in a blender to make oat flour. Almond flour also works well for a low-carb, gluten-free option. Crushed crackers or crisp cereals can also work in a pinch.
6. How long do these chickpea and quinoa bites last in the refrigerator?
Once cooked, the bites can be stored in an airtight container in the refrigerator for up to 5 days. They are great for meal prep as they can be eaten cold, at room temperature, or easily reheated in a pan, oven, or microwave.
7. Are these bites suitable for toddlers and kids?
They are fantastic for kids! The texture is soft on the inside, making them easy to chew, and they are packed with nutrients like protein and iron. They are a great finger food for toddlers. For younger children, you can omit the smoked paprika or any spicy elements and ensure the salt content is low.
8. What is the best dipping sauce to serve with these bites?
The best sauce depends on your preference! For a cool and refreshing option, a creamy cucumber tzatziki is perfect. For something zesty and savory, try a lemon-tahini dressing. For a crowd-pleasing, slightly spicy option, a simple Sriracha mayo is always a hit. You really can’t go wrong with any creamy, tangy, or spicy dip.

Herbed Chickpea and Quinoa Bites
Ingredients
Here is the simple, wholesome list of ingredients you’ll need to create these delicious bites. Each component plays a crucial role in building the perfect texture and flavor profile.
- 1 cup dry quinoa, rinsed: This ancient grain is the backbone of our bites. Rinsing it before cooking removes its natural saponin coating, which can taste bitter. It provides a wonderful, slightly nutty flavor and a complete protein source.
- 2 cups vegetable broth or water: For cooking the quinoa. Using vegetable broth instead of water is a simple trick to infuse the quinoa with a deeper, more savory flavor from the very start.
- 2 (15-ounce) cans chickpeas, rinsed and drained: Also known as garbanzo beans, these are our second protein powerhouse. They provide a creamy, sturdy base that helps bind the patties together. Make sure to rinse and drain them well to remove excess sodium and starchy liquid.
- 1 cup Panko breadcrumbs (or gluten-free breadcrumbs): Panko breadcrumbs are lighter and flakier than traditional breadcrumbs, which helps create an exceptionally crispy exterior. For a gluten-free version, simply use your favorite GF-certified breadcrumbs or oat flour.
- ½ cup finely chopped fresh parsley: This brings a bright, clean, and slightly peppery flavor that cuts through the earthiness of the chickpeas and quinoa. Don’t be shy with it; its freshness is a key element.
- ½ cup finely chopped fresh cilantro: For those who love it, cilantro adds a unique, zesty, and almost citrusy note that pairs beautifully with the other ingredients. If you’re not a fan, you can substitute it with more parsley or fresh dill.
- ¼ cup finely sliced chives: Chives provide a delicate, mild onion flavor that is much less overpowering than regular onions, adding a layer of aromatic complexity.
- 2 cloves garlic, minced: A fundamental aromatic that provides a pungent, savory depth. Mince it finely to ensure it’s evenly distributed throughout the mixture.
- 1 large lemon, juiced and zested: The zest provides an incredible floral, citrusy aroma without too much sourness, while the juice adds a necessary kick of acidity that brightens and balances all the flavors.
- 2 tablespoons flaxseed meal + 5 tablespoons water (to make a “flax egg”): This is our vegan binder. When mixed with water, flaxseed meal forms a gel-like consistency similar to an egg, helping to hold the bites together effectively.
- 1 teaspoon ground cumin: Cumin brings a warm, earthy, and slightly smoky flavor that is a classic pairing with chickpeas.
- 1 teaspoon ground coriander: Coriander offers a slightly sweet, floral, and citrusy spice note that complements the cumin perfectly.
- ½ teaspoon smoked paprika: This adds a beautiful, subtle smokiness and a lovely color to the bites, elevating them beyond basic seasoning.
- ½ teaspoon sea salt, or to taste: Essential for enhancing and bringing together all the other flavors.
- ¼ teaspoon black pepper, or to taste: For a touch of gentle heat and spice.
- 4 tablespoons olive oil or avocado oil, for pan-frying: A good quality oil is needed to achieve that perfect golden-brown, crispy crust. Avocado oil is great for its high smoke point, while olive oil adds a touch of fruity flavor.
Instructions
Follow these detailed steps to ensure your Herbed Chickpea and Quinoa Bites come out perfectly every time. The key to success lies in the preparation and chilling of the mixture.
- Cook the Quinoa: In a medium saucepan, combine the 1 cup of rinsed quinoa with 2 cups of vegetable broth or water. Bring to a boil, then reduce the heat to a low simmer, cover, and cook for 15 minutes, or until all the liquid has been absorbed. Remove from heat and let it stand, covered, for 5 more minutes. Fluff the quinoa with a fork and spread it out on a baking sheet to cool completely. This step is crucial; warm quinoa can make the mixture too wet and cause the bites to fall apart.
- Prepare the Flax Egg: In a small bowl, whisk together the 2 tablespoons of flaxseed meal and 5 tablespoons of water. Set it aside for 10-15 minutes to thicken into a gel. This will act as our primary binder.
- Mash the Chickpeas: While the quinoa cools and the flax egg sets, place the rinsed and drained chickpeas in a large mixing bowl. Using a potato masher or the back of a fork, mash the chickpeas until they are partially broken down. You want a coarse, rustic texture—not a completely smooth puree. A few whole or half chickpeas remaining is perfectly fine and adds to the texture.
- Combine the Ingredients: To the bowl with the mashed chickpeas, add the completely cooled quinoa, Panko breadcrumbs, finely chopped parsley, cilantro, chives, minced garlic, lemon zest, and lemon juice. Sprinkle in the ground cumin, ground coriander, smoked paprika, sea salt, and black pepper.
- Mix Everything Together: Pour the thickened flax egg into the bowl. Using your hands or a sturdy spoon, mix all the ingredients together until they are thoroughly combined. Don’t be afraid to get your hands in there; it’s the best way to ensure everything is evenly distributed. The mixture should be firm and hold its shape when you squeeze a small amount in your palm.
- Chill the Mixture (The Most Important Step!): Cover the bowl with plastic wrap and refrigerate for at least 30 minutes, or up to 2 hours. This step is non-negotiable! Chilling allows the breadcrumbs and flax egg to absorb moisture and firm up, which is the secret to preventing the bites from crumbling during cooking.
- Shape the Bites: After chilling, remove the mixture from the refrigerator. Scoop out about 2 tablespoons of the mixture and roll it into a ball, then gently flatten it into a small patty, about 1.5 inches in diameter and ½ inch thick. Place the formed patty on a parchment-lined baking sheet and repeat with the remaining mixture. You should get about 20-24 bites.
- Cook the Bites: You have two excellent options for cooking.
- For Pan-Frying (Crispiest results): Heat the olive or avocado oil in a large skillet or frying pan over medium-high heat. Once the oil is shimmering, carefully place the bites in the pan, ensuring not to overcrowd it (cook in batches if necessary). Fry for 3-4 minutes per side, until they are a deep golden brown and wonderfully crispy. Transfer the cooked bites to a plate lined with a paper towel to absorb any excess oil.
- For Baking (Lower-fat option): Preheat your oven to 400°F (200°C). Arrange the bites on a parchment-lined baking sheet. Lightly spray or brush the tops with a little olive oil to help them brown. Bake for 20-25 minutes, flipping them halfway through, until they are golden and firm to the touch. They won’t be as crispy as the pan-fried version but are still incredibly delicious.
- Serve and Enjoy: Serve your Herbed Chickpea and Quinoa Bites warm, garnished with a little extra fresh parsley and a side of your favorite dipping sauce.
Nutrition
- Serving Size: one normal portion
- Calories: 65
- Fiber: 2g
- Protein: 2.5g