")


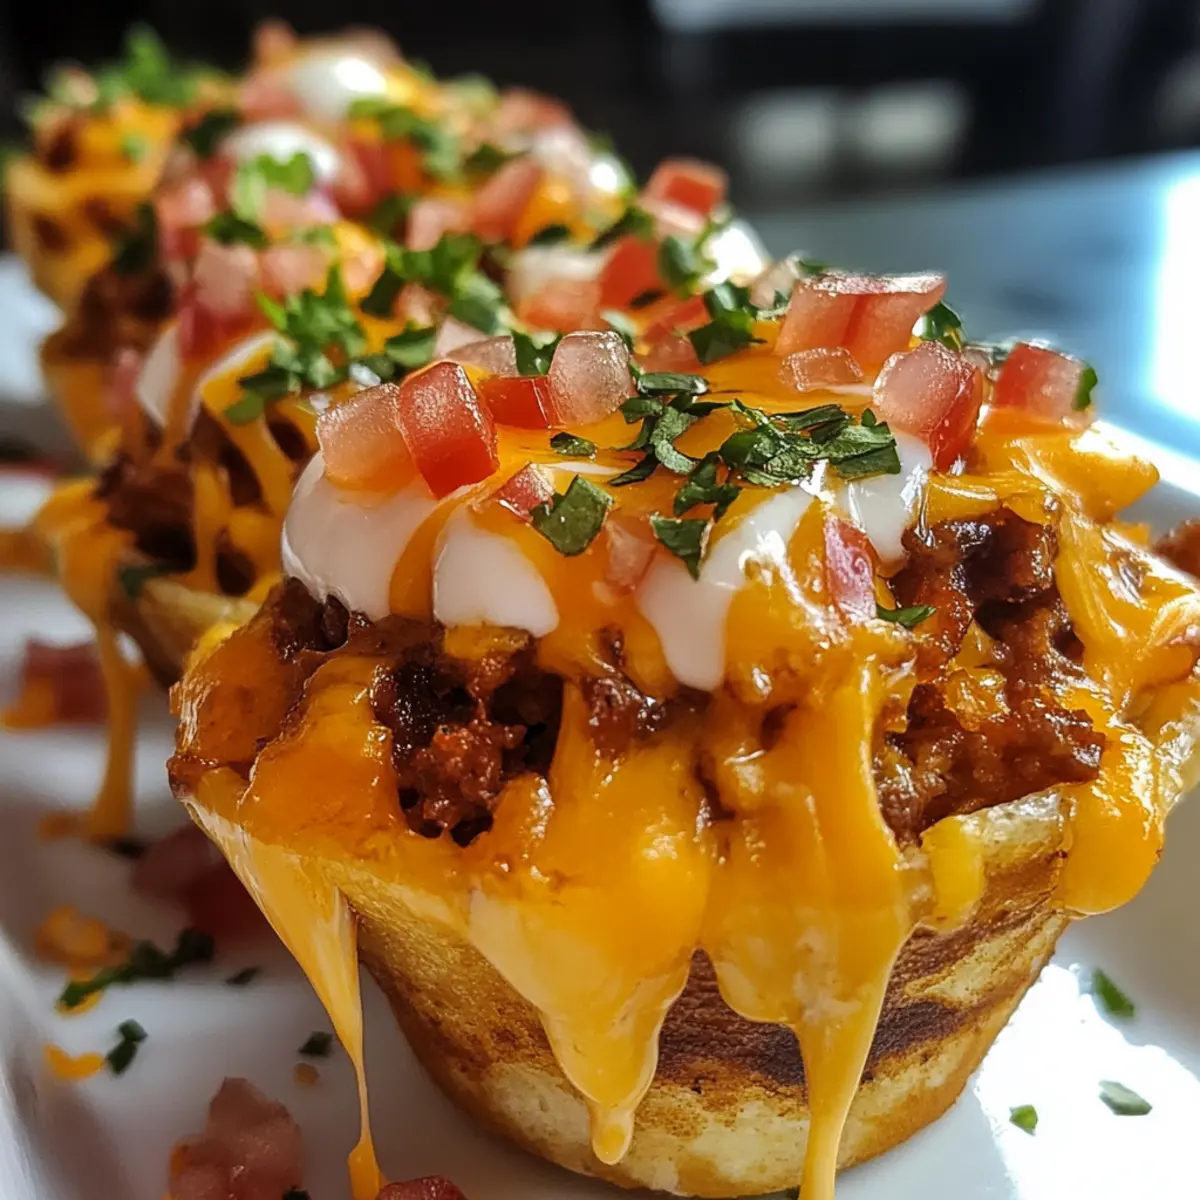
There’s something utterly irresistible about gooey cheese nestled inside a crispy cup, each bite bursting with bold flavors and a satisfying crunch. That’s exactly what these Loaded Nacho Cheese Cups bring to the table—an easy, crowd-pleasing snack perfect for whenever comfort food cravings strike. Whether you’re tired of the usual chip-and-dip routine or looking to impress guests with a fun twist on classic nachos, these cheesy delights hit all the right notes. The best part? They come together quickly, letting you enjoy that melty, savory goodness without the fuss. Trust me, once you try these, they’ll become your go-to for game days, parties, or simply indulging in homemade deliciousness.
Why try Loaded Nacho Cheese Cups today?
Loaded Nacho Cheese Cups combine crunchy, gooey, and savory into one bite-sized delight that’s impossible to resist. Quick and easy to make, they save you time without sacrificing flavor. Versatile and fun, they suit game days, parties, or any cozy night in. Bold flavors packed into crispy cups make snacking exciting again. Plus, they’re guaranteed to impress without the fast-food boredom!
Loaded Nacho Cheese Cups Ingredients
For the Cheese Cups
- Tortilla Chips – Use sturdy chips that can hold the cheese and toppings without breaking.
- Shredded Cheddar Cheese – Sharp cheddar melts perfectly to create the gooey base of the cheese cups.
- Monterey Jack Cheese – Adds a creamy melt and balances the sharpness of cheddar in the Loaded Nacho Cheese Cups.
For the Toppings
- Cooked Ground Beef – Seasoned with taco spices for a hearty, savory punch.
- Black Beans – Rinsed and drained to add both texture and protein.
- Diced Jalapeños – For a kick of heat that wakes up every bite without overpowering.
- Chopped Green Onions – Freshness and crunch to brighten the cup flavors.
- Sour Cream – A cool, creamy topping that balances the spicy elements perfectly.
- Fresh Cilantro – Optional but adds a burst of herbaceous aroma and color.
For Serving
- Salsa – A zesty dip or drizzle to amplify the bold, nacho-inspired taste.
- Guacamole – Creamy avocado goodness complements the cheesy, crunchy cups beautifully.
How to Make Loaded Nacho Cheese Cups
- Preheat oven – Preheat the oven to 375°F and spray a standard muffin tin with non-stick cooking spray. This ensures each tortilla chip cup crisps up perfectly, creating a sturdy base for the melty cheese.
- Form cups – Gently press two to three sturdy tortilla chips into each muffin tin cavity, overlapping slightly to shape even cups. Ensure the chips are snug to support the gooey cheese filling without collapse.
- Add cheese – Sprinkle a 50/50 blend of sharp cheddar and creamy Monterey Jack cheese into each tortilla cup, filling them about three-quarters full. This combo melts beautifully, creating a rich, golden base.
- Bake cups – Bake the cheese cups for 8–10 minutes, or until the cheese bubbles and edges turn lightly golden. Remove from oven and let cool slightly before adding toppings to keep cups intact.
For the Toppings:
- Warm mixture – Over medium heat, sauté cooked ground beef seasoned with taco spices and black beans for 3–4 minutes until warmed through. This hearty mixture adds protein and texture to each cup.
- Garnish cups – Spoon the warm beef-bean mix into each cheese cup, then top with diced jalapeños, chopped green onions, and a dollop of sour cream for cool creaminess.
- Finish and serve – Sprinkle fresh cilantro over each cup and serve immediately with salsa and guacamole on the side for dipping. The colorful presentation elevates flavor and visual appeal.
Optional: Try adding pickled red onions for tangy sweetness.
Exact quantities are listed in the recipe card below.
Make Ahead Options
These Loaded Nacho Cheese Cups are a fantastic choice for busy home cooks looking to save time without sacrificing flavor! You can prepare the cheese cups up to 24 hours in advance by forming them in the muffin tin and baking them, then allowing them to cool completely before refrigerating. For the toppings, sauté the ground beef and black beans, then refrigerate the mixture for up to 3 days. When you’re ready to serve, simply reheat the beef-bean mix while the cheese cups warm in the oven for a few minutes. This way, you maintain their crunch and gooeyness, ensuring they taste just as delightful as when freshly made!
Tips for the Best Loaded Nacho Cheese Cups
- Choose sturdy chips: Use thick, durable tortilla chips to prevent sogginess and keep your cheese cups intact during baking and filling.
- Balance your cheese: A blend of sharp cheddar and Monterey Jack ensures meltiness and flavor; avoid using only one cheese to prevent dryness or excess oil.
- Don’t overfill cups: Fill each cup about three-quarters full with cheese and toppings to avoid overflow and keep them crispy.
- Serve promptly: Loaded Nacho Cheese Cups are best enjoyed fresh out of the oven to retain their perfect crunch and gooey melt.
- Customize toppings wisely: Add jalapeños for heat and sour cream for cooling contrast—strike the right balance to enhance, not overpower, the main flavors.
- Preheat oven fully: Ensure your oven is at 375°F before baking for even cooking and perfectly crispy cheese cups every time.
What to Serve with Loaded Nacho Cheese Cups?
Elevate your snack experience with delicious sides and drinks that complement these cheesy delights perfectly.
-
Zesty Salsa: A tangy kick that enhances the cheesy flavor while adding freshness. You can never go wrong with a vibrant salsa on the side.
-
Guacamole: Creamy avocado goodness pairs beautifully, offering a cooling contrast to the spicy flavors of the cups. It’s the ultimate dip that everyone loves.
-
Crunchy Coleslaw: This crunchy and tangy side brings a refreshing bite, balancing the richness of the cheese and beef. It adds texture, making meals exciting.
-
Spicy Nacho Cheese Dip: For the ultimate cheese lover, serve this dip on the side for additional drizzling goodness over your Loaded Nacho Cheese Cups.
-
Mexican Street Corn Salad: Sweet corn, creamy dressing, and a hint of lime create a colorful, flavorful salad that complements the boldness of the cups.
-
Chilled Beer: A chilled lager or light beer makes for a perfect pairing, cutting through the richness while enhancing the fiesta atmosphere.
-
Fruit Salad: A refreshing fruit salad with citrus notes provides a light, sweet counterbalance to the savory flavors, perfect for cleansing the palate.
Storage Tips for Loaded Nacho Cheese Cups
Room Temperature: Store leftover Loaded Nacho Cheese Cups at room temperature for up to 2 hours. Beyond that, they may lose their crunch and flavor.
Fridge: Keep any uneaten cups in an airtight container in the fridge for up to 3 days. Reheat in the oven to regain crispy texture before serving.
Freezer: For longer storage, freeze assembled but unbaked Loaded Nacho Cheese Cups. Wrap tightly in plastic wrap and aluminum foil for up to 2 months. Bake directly from frozen, adding a few extra minutes to the cooking time.
Reheating: Reheat in a preheated oven at 350°F for about 10 minutes, until cheese is bubbly and cups are crispy again. Enjoy them fresh for the best taste!
Variations & Substitutions for Loaded Nacho Cheese Cups
Feel free to get creative with these Loaded Nacho Cheese Cups and make them your own with delicious twists and substitutions!
-
Spicy: Add sliced jalapeños or diced serrano peppers to the beef before spooning into the cups for an irresistible kick.
-
Vegetarian: Swap the ground beef for a mix of sautéed bell peppers, zucchini, and corn for a wholesome veggie option.
-
Gluten-Free: Use corn tortilla chips instead of regular ones to keep the crunch while making it gluten-free friendly.
-
Cheesy Twist: Incorporate pepper jack cheese into the mix for an extra layer of flavor and a spicy bite. The melty goodness will have everyone reaching for more!
-
BBQ Flair: Drizzle some barbecue sauce over the beef mixture for a tangy, smoky element that adds depth to every morsel.
-
Creamy Alternative: Substitute sour cream with Greek yogurt for a healthier, creamy topping that still tastes fantastic.
-
Herbaceous Boost: Top with fresh diced tomatoes and avocado to add brightness and a burst of freshness to each cup. This lively addition enhances both flavor and visual appeal!
-
Baked Black Beans: Replace regular black beans with refried beans or baked beans for a creamy texture that pairs perfectly with crunchy cups.
These variations will keep your Loaded Nacho Cheese Cups exciting and tailored to your family’s taste preferences!
Loaded Nacho Cheese Cups Recipe FAQs
What type of tortilla chips work best for Loaded Nacho Cheese Cups?
Use sturdy, thick tortilla chips that can hold their shape well during baking without breaking apart. Thinner chips may become soggy or collapse under the cheese and toppings.
How long can I store leftover Loaded Nacho Cheese Cups?
Store leftovers in an airtight container in the refrigerator for up to 3 days. To keep them crispy when reheating, warm them in a 350°F oven for about 10 minutes rather than using a microwave.
Can I freeze Loaded Nacho Cheese Cups, and how?
Absolutely! Freeze assembled but unbaked cups by wrapping the muffin tin tightly with plastic wrap and then aluminum foil. They keep well for up to 2 months. When ready to bake, place the frozen cups directly in a preheated 375°F oven and add 3–5 extra minutes to the baking time.
What can I do if my cheese cups aren’t holding together after baking?
If your cheese cups fall apart, it usually means the chips were too thin or the cheese-to-chip ratio was off. Try using sturdier chips and make sure to cover each cup evenly with cheese to create a solid, melted crust that binds everything.
Are Loaded Nacho Cheese Cups safe for pets or people with dietary restrictions?
These cups contain cheese and cooked beef, so they’re not suitable for pets, especially dogs or cats due to seasoning and ingredients that may be harmful. For allergen considerations, note the dairy and possible gluten in the chips; you can substitute with gluten-free chips and vegan cheese for special diets.

Irresistible Loaded Nacho Cheese Cups You’ll Crave Tonight
Ingredients
Equipment
Method
- Preheat the oven to 375°F and spray a standard muffin tin with non-stick cooking spray.
- Gently press two to three sturdy tortilla chips into each muffin tin cavity, overlapping slightly.
- Sprinkle a 50/50 blend of sharp cheddar and Monterey Jack cheese into each tortilla cup.
- Bake the cheese cups for 8–10 minutes, or until the cheese bubbles and edges turn lightly golden.
- Over medium heat, sauté cooked ground beef seasoned with taco spices and black beans for 3–4 minutes.
- Spoon the warm beef-bean mix into each cheese cup, then top with diced jalapeños and chopped green onions.
- Sprinkle fresh cilantro over each cup and serve immediately with salsa and guacamole on the side.