")


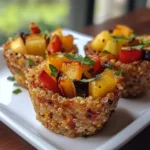
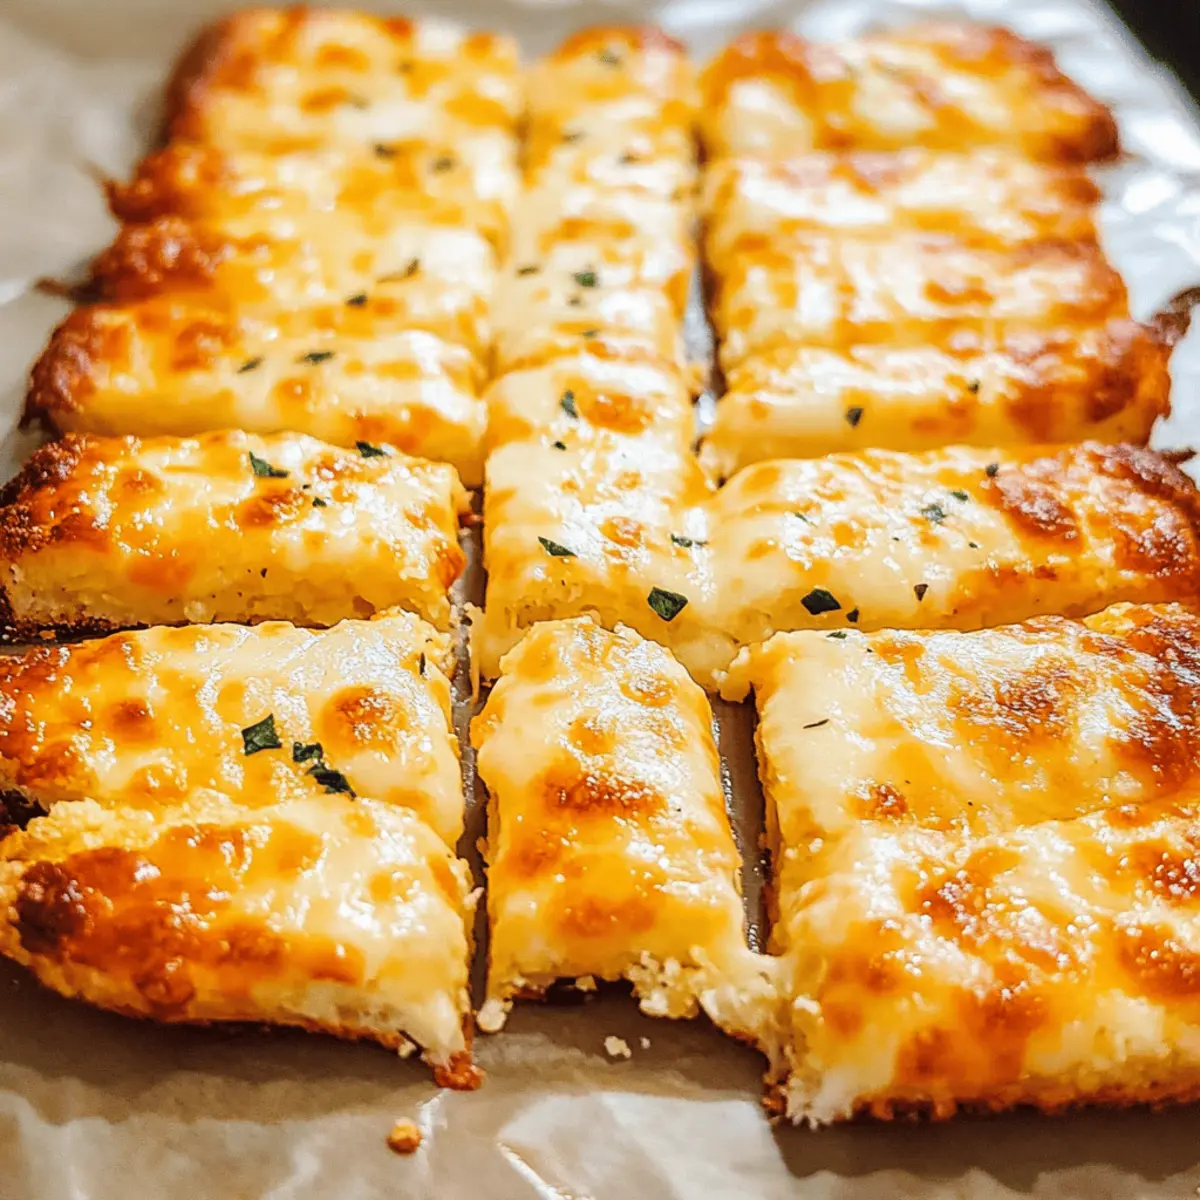
There’s something irresistibly comforting about warm, melty cheese pulled straight from the oven—and when it’s wrapped around crispy, golden cauliflower breadsticks? Pure magic. I stumbled upon this recipe on a lazy weekend when I wanted a snack that felt indulgent but was still packed with veggies. These Cheesy Cauliflower Breadsticks quickly became my go-to for game nights and casual dinners alike. They’re surprisingly easy to make, gluten-free, and satisfy that carb craving without weighing you down. Whether you’re feeding a crowd or treating yourself, these breadsticks bring all the cozy flavors with none of the fuss. Let me show you how to turn simple ingredients into a crowd-pleasing treat you’ll want to make again and again.
Why choose Cheesy Cauliflower Breadsticks?
Easy prep: This recipe uses simple ingredients and comes together quickly, perfect for busy evenings. Gluten-free comfort: Enjoy the cozy, cheesy breadstick experience without the gluten guilt. Veggie boost: Sneak in extra nutrition with cauliflower’s subtle flavor. Crowd favorite: Crispy edges and gooey cheese make these a guaranteed hit. Versatile snack: Ideal for game day, casual dinners, or anytime indulgence.
Cheesy Cauliflower Breadsticks Ingredients
For the Cauliflower Base
- Cauliflower florets – Use fresh or frozen, finely grated into rice-like texture for the perfect breadstick base.
- Eggs – Bind everything together while adding protein and structure.
- Mozzarella cheese – Melts beautifully and gives that signature gooey, cheesy pull.
- Parmesan cheese – Adds a sharp, savory depth that boosts the cheesy flavor.
- Almond flour – Keeps the breadsticks gluten-free while adding a subtle nutty taste and texture.
- Garlic powder – Infuses a gentle garlicky warmth without overpowering the other flavors.
- Italian seasoning – A fragrant blend of herbs that complements the cheese and cauliflower perfectly.
- Salt & pepper – Subtle seasoning to bring out all the fresh, cheesy goodness.
For the Topping
- Extra mozzarella cheese – Sprinkle generously for that irresistibly melty, golden crust.
- Fresh parsley – Adds a bright, herbal finish and a pop of color just before serving.
These Cheesy Cauliflower Breadsticks combine simple, wholesome ingredients to create a warm, homey snack with a healthy twist—perfect for anyone craving comfort food without the fuss.
How to Make Cheesy Cauliflower Breadsticks
- Preheat oven: Preheat oven to 425°F and line a baking sheet with parchment paper to ensure even heat and easy removal of your breadsticks.
- Process cauliflower: Pulse cauliflower florets in a food processor until rice-like, about 30 seconds. Rinse with cold water if it feels sticky.
- Dry rice: Transfer cauliflower rice to a microwavable bowl, cover, and microwave 4–5 minutes. Wrap in cheesecloth and squeeze out all excess moisture.
- Combine base: In a large bowl, mix dried cauliflower, eggs, mozzarella, parmesan, almond flour, garlic powder, Italian seasoning, salt, and pepper until well combined.
- Shape dough: Transfer mixture onto prepared sheet and press firmly into a 9×5-inch rectangle, about ½-inch thick, ensuring even thickness and sealed edges.
For the Topping:
- First bake: Bake the base in the preheated oven for 15–18 minutes, or until the edges turn golden brown and the center is set.
- Add cheese: Remove tray from oven and sprinkle extra mozzarella evenly over the warm base, making sure every inch has cheesy, melty coverage.
- Second bake: Return to oven and bake for an additional 3–5 minutes, or until cheese is bubbly and lightly golden on top.
- Garnish & serve: Sprinkle fresh parsley, allow breadsticks to cool 2–3 minutes for easier slicing, then cut into sticks and enjoy warm immediately.
Optional: Serve with marinara or garlic butter for extra flavor.
Exact quantities are listed in the recipe card below.
How to Store and Freeze Cheesy Cauliflower Breadsticks
Fridge: Store leftover cheesy cauliflower breadsticks in an airtight container for up to 3 days. This keeps them fresh while maintaining their cheesy goodness.
Freezer: For longer storage, wrap individual breadsticks tightly in plastic wrap and place them in a freezer-safe bag. They can last up to 2 months in the freezer.
Reheating: To enjoy your cheesy breadsticks again, reheat in a preheated oven at 350°F for about 10-15 minutes until heated through and crispy. For the best results, avoid the microwave to keep them from getting soggy.
Serving Tip: Serve your reheated cheesy cauliflower breadsticks with warm marinara or garlic butter for an extra indulgent treat.
What to Serve with Cheesy Cauliflower Breadsticks?
Elevate your dining experience with delightful companions that enhance every cheesy bite of these scrumptious breadsticks.
-
Marinara Sauce: A classic pairing that adds a zesty kick, perfect for dipping and balancing out the rich, cheesy flavors.
-
Garlic Butter: Rich, buttery goodness with a hint of garlic creates a mouthwatering dip that elevates your breadstick experience.
-
Crunchy Salad: A fresh, crisp salad with lemon vinaigrette brings brightness and acidity, perfectly contrasting the warm, cheesy texture.
Consider mixing together arugula, cherry tomatoes, and shaved parmesan for a sophisticated touch. The crunch will complement the softness of the breadsticks.
-
Stuffed Mushrooms: Hearty and flavorful, these make for an irresistible bite alongside the cheesy goodness. Their savory depth enhances the overall meal.
-
Veggie Platter: A colorful assortment of fresh vegetables with a creamy dip adds a refreshing crunch, balancing the indulgence of the breadsticks.
Pair with hummus or a tangy ranch dressing for a delightful palate experience.
-
Sparkling Water with Lemon: Refreshing and effervescent, this drink will cleanse your palate between bites and keep the meal feeling light.
-
Chocolate Chip Cookies: For a sweet finish, these soft cookies provide a comforting nostalgia that pairs beautifully with the savory breadsticks.
You can serve them warm for that extra gooeyness, creating a delightful end to your cheesy feast.
Cheesy Cauliflower Breadsticks Variations
Feel free to make these breadsticks your own by adding flavor twists and substitutions that excite your taste buds.
-
Dairy-Free: Swap the mozzarella and parmesan for vegan cheese alternatives to make a deliciously cheesy vegan version.
-
Spicy Kick: Add red pepper flakes or diced jalapeños to the dough for a little heat that elevates the flavors beautifully.
-
Herb Infusion: Incorporate fresh chopped herbs like basil or oregano into the mix for an aromatic touch that enhances the overall flavor.
-
Nut-Free: Substitute almond flour with oat flour or ground sunflower seeds for a nut-free option that still holds everything together.
-
Cheesy Variety: Replace mozzarella with your favorite cheese such as gouda or cheddar to vary the flavor profile while keeping it yummy.
-
Veggie Boost: Mix in finely chopped spinach or grated carrots for extra veggies, adding both nutrition and vibrant color to the breadsticks.
-
Garlic Lovers: Increase the garlic powder or add fresh minced garlic to the mix for a bold, savory flavor that cheese enthusiasts will adore.
-
Crispy Texture: For an extra crunch, sprinkle some crushed flaxseeds or pumpkin seeds on top before the second bake for added texture and nutrition.
Tips for the Best Cheesy Cauliflower Breadsticks
- Dry the cauliflower well: Excess moisture makes the breadsticks soggy. Squeeze the cooked cauliflower thoroughly using a cheesecloth or clean kitchen towel.
- Use fine cauliflower rice: Pulse just enough to get a rice-like texture; too coarse can affect the breadsticks’ structure and bite.
- Press firmly when shaping: Compacting the mixture evenly ensures the breadsticks hold together and crisp up beautifully.
- Avoid overbaking: Bake until golden and set, but watch carefully during the second bake to keep cheese melty without burning.
- Serve warm: These Cheesy Cauliflower Breadsticks taste best fresh from the oven—allow a short cool-down but enjoy their gooey charm right away.
Make Ahead Options
These Cheesy Cauliflower Breadsticks are perfect for meal prep enthusiasts! You can prepare the cauliflower base up to 24 hours in advance by following the first five steps of the recipe and refrigerating the uncooked dough in an airtight container. This method helps maintain the texture and flavor, keeping the cauliflower breadsticks just as delicious once baked. When you’re ready to enjoy, simply spread the mixture onto the prepared baking sheet and bake as directed. This makes it incredibly easy to whip up a comforting snack or side dish on busy weeknights! Plus, you can also freeze the baked breadsticks for up to 3 months; just reheat them in the oven before serving for that fresh-out-of-the-oven taste.
Cheesy Cauliflower Breadsticks Recipe FAQs
How do I know if my cauliflower is the right ripeness and quality for these breadsticks?
Choose fresh cauliflower heads that are firm, white, and without dark spots all over. The florets should snap easily and feel dense, not spongy or wilted. Freshness makes a big difference in texture and flavor!
Can I store leftover Cheesy Cauliflower Breadsticks in the fridge?
Absolutely! Place any leftovers in an airtight container and keep them refrigerated for up to 3 days. This helps maintain their cheesy flavor and crispiness, making them perfect for a quick snack the next day.
Is it possible to freeze these breadsticks for longer storage?
Very yes—you can freeze Cheesy Cauliflower Breadsticks! Wrap each breadstick tightly in plastic wrap, then place them in a freezer-safe bag. They’ll keep beautifully for up to 2 months. When ready, thaw them overnight in the fridge and reheat in the oven at 350°F for 10-15 minutes to bring back their crispy, melty charm.
What if my breadsticks turn out soggy or don’t hold together?
This often happens if the cauliflower isn’t dried thoroughly. I recommend wringing out the cooked cauliflower rice in cheesecloth or a clean kitchen towel until it’s almost dry. Also, press the mixture firmly onto your baking sheet—compactness is the secret to sturdy breadsticks.
Are Cheesy Cauliflower Breadsticks safe for pets or friendly to food allergies?
These breadsticks contain dairy and eggs, so they’re not suitable for dogs or cats. For people with common allergies, you might substitute almond flour with a nut-free gluten-free alternative and pick a dairy-free cheese. Always tailor ingredients to your dietary needs!
Irresistibly Cheesy Cauliflower Breadsticks You Can Make Tonight
Ingredients
Equipment
Method
- Preheat oven to 425°F and line a baking sheet with parchment paper.
- Pulse cauliflower florets in a food processor until rice-like, about 30 seconds.
- Transfer cauliflower rice to a microwavable bowl, cover, and microwave for 4–5 minutes.
- Wrap in cheesecloth and squeeze out all excess moisture.
- In a large bowl, mix dried cauliflower, eggs, mozzarella, parmesan, almond flour, garlic powder, Italian seasoning, salt, and pepper until well combined.
- Transfer mixture onto prepared sheet and press firmly into a 9×5-inch rectangle, about ½-inch thick.
- Bake the base in the preheated oven for 15–18 minutes, or until the edges turn golden brown and the center is set.
- Remove tray from oven and sprinkle extra mozzarella evenly over the warm base.
- Return to oven and bake for an additional 3–5 minutes, or until cheese is bubbly and lightly golden.
- Sprinkle fresh parsley, allow breadsticks to cool for 2–3 minutes, then cut into sticks and enjoy warm.