")


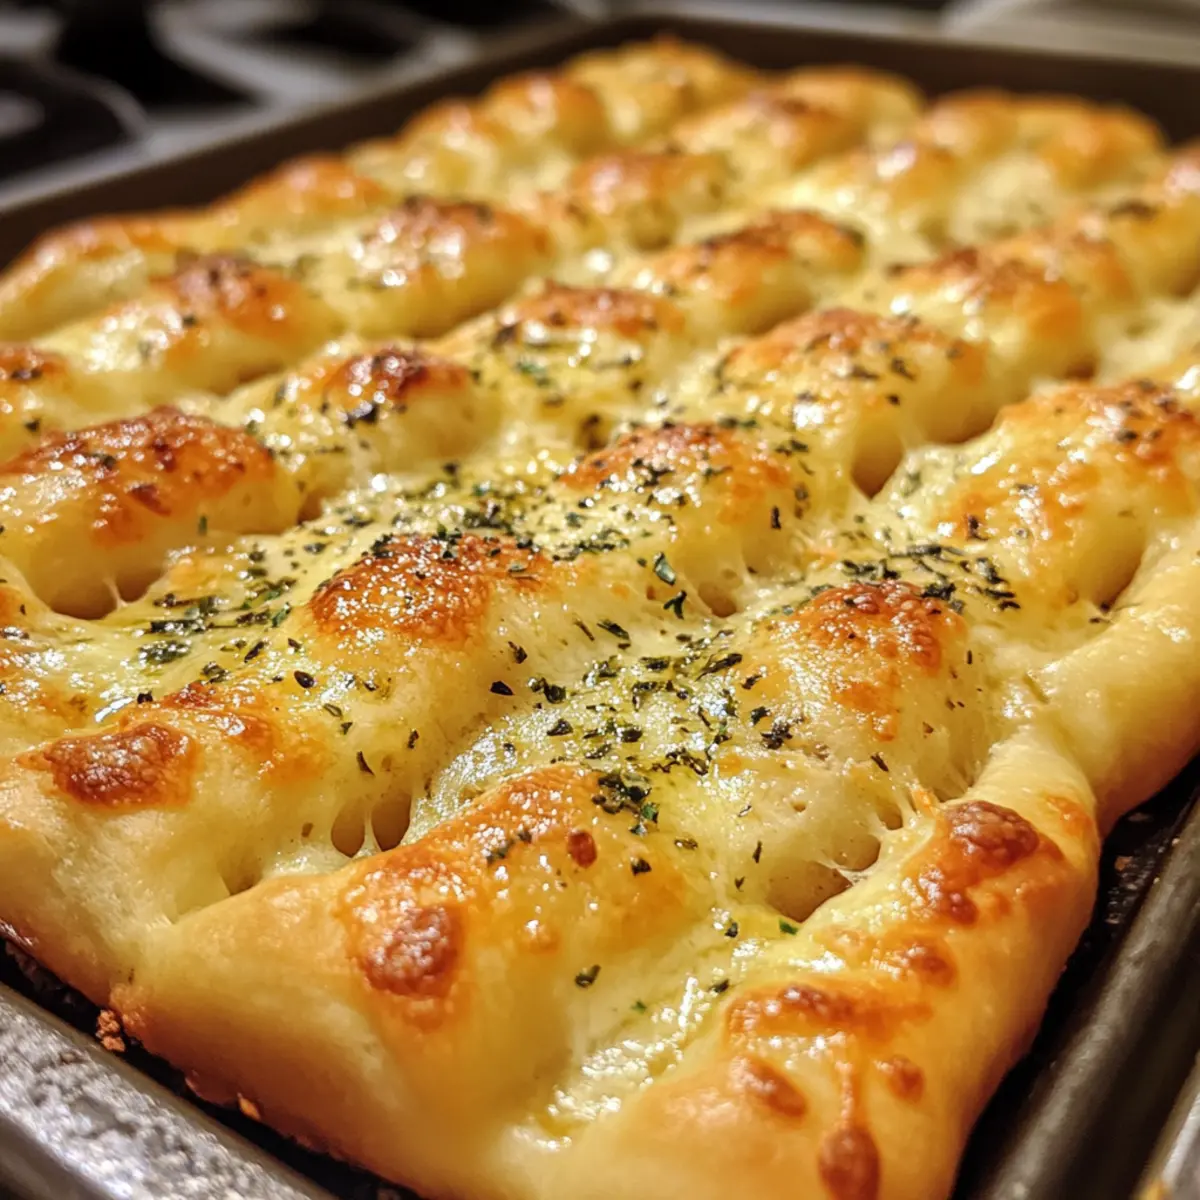
There’s something truly irresistible about the scent of garlic mingling with melting cheese fresh from the oven—like an invitation to pause and savor a moment. When I first whipped up these cheesy garlic breadsticks, I was craving comfort food that didn’t demand hours in the kitchen. What I discovered was a quick, foolproof recipe that turns simple ingredients into golden, gooey sticks of pure joy. Whether you’re entertaining guests or just looking to elevate weeknight dinners, these easy breadsticks deliver unbeatable flavor with minimal fuss. Trust me, once you try them, they’ll become your go-to side that everyone will be asking for again and again.
Why choose Cheesy Garlic Breadsticks Easy?
Simplicity meets flavor: This recipe turns basic pantry staples into golden, cheesy delights without complicated steps. Time-saving: Ready in under 30 minutes, it’s perfect for busy weeknights or last-minute guests. Crowd-pleaser guaranteed: Gooey cheese and fragrant garlic create a mouthwatering combo everyone loves. Versatile: Serve as a comforting side or a tasty snack on its own. Homemade charm: No preservatives, just pure, fresh goodness baked to perfection.
Cheesy Garlic Breadsticks Easy Ingredients
For the Dough
- All-purpose flour – the sturdy base for soft, tender breadsticks that rise beautifully.
- Active dry yeast – activates the perfect fluffy texture, bringing your breadsticks to life.
- Warm water – wakes up the yeast gently without cooking it, ensuring a light dough.
- Sugar – feeds the yeast for a good rise and a subtle touch of sweetness.
- Salt – balances flavor and enhances all other ingredients.
- Olive oil – adds richness and keeps the dough soft and easy to work with.
For the Garlic Cheese Topping
- Garlic cloves – freshly minced for that bold, irresistible aroma that defines cheesy garlic breadsticks easy.
- Butter – melts into a savory blanket, carrying garlic flavor deep into every bite.
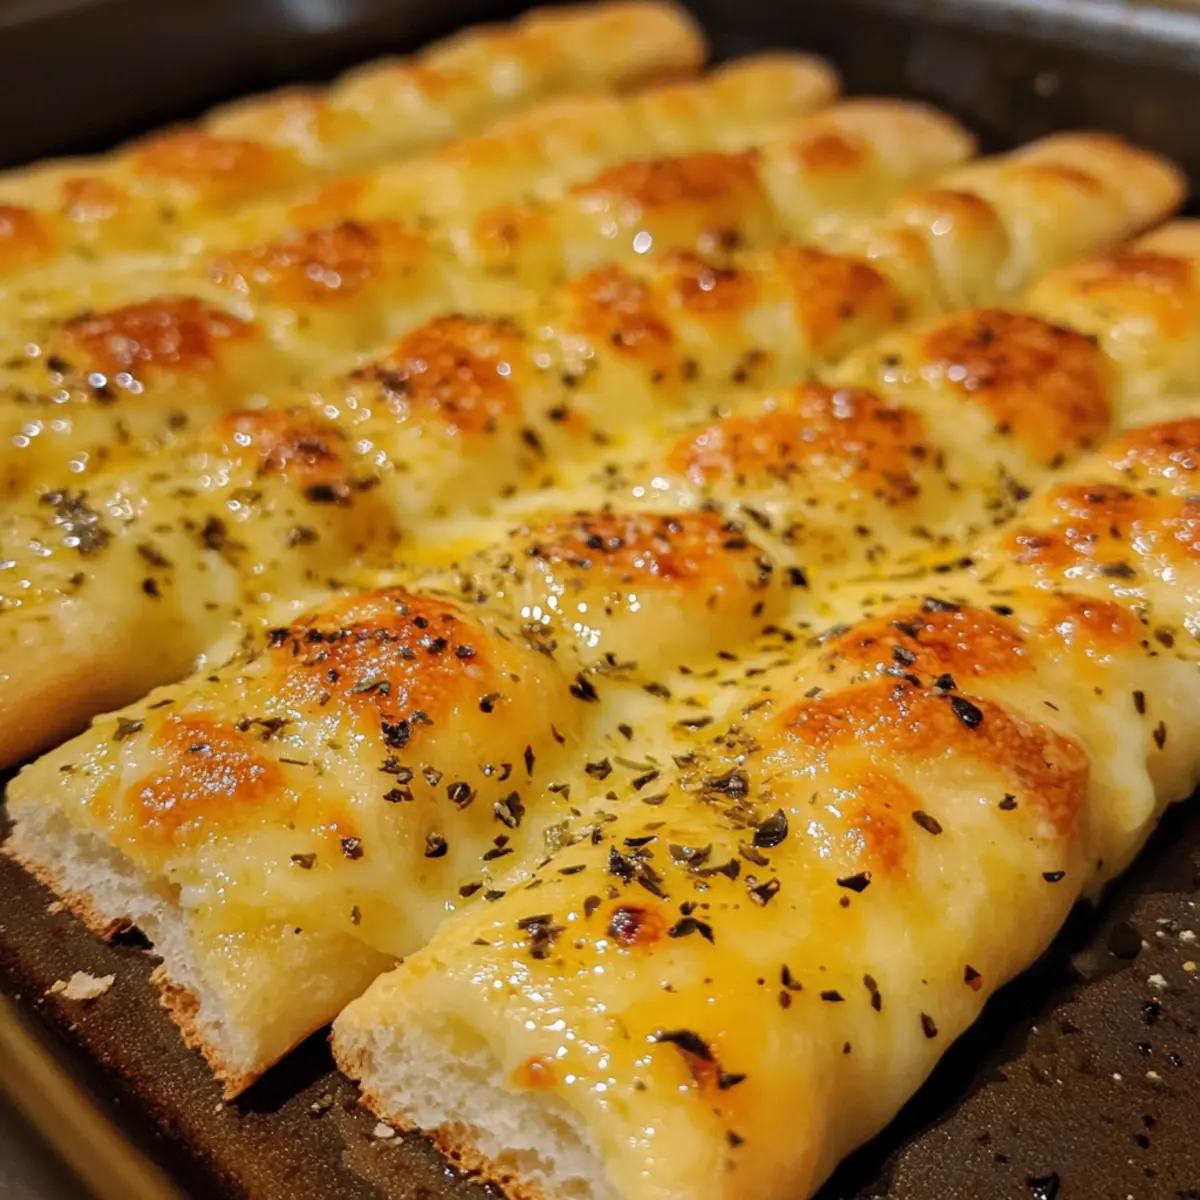
- Mozzarella cheese – melts into ooey-gooey goodness, giving you that classic cheesy pull everyone craves.
- Parmesan cheese – sprinkles a nutty, sharp contrast that elevates the overall flavor.
- Fresh parsley – adds a pop of color and fresh herbal notes to finish with flair.
How to Make Cheesy Garlic Breadsticks Easy
- Preheat Oven: Preheat to 425°F and lightly grease a baking sheet or line it with parchment paper for easy cleanup and golden bottom crust on your breadsticks.
- Activate Yeast: In a bowl, whisk 1 cup warm water (110°F), 1 tsp sugar, and yeast. Rest 5–10 minutes until frothy, signaling lively yeast ready to leaven perfectly.
- Mix Dough: Combine 2½ cups flour and 1 tsp salt in a bowl. Add olive oil and yeast mixture. Stir until shaggy, then knead on floured surface until smooth and elastic, about 5 minutes.
- Shape Sticks: Roll dough into a 12×8-inch rectangle on lightly floured surface. Trim edges, then slice lengthwise into 12 even strips. Space them 1 inch apart on your baking sheet.
- For the Garlic Butter: In a small saucepan, melt butter and stir in minced garlic. Cook 1 minute until fragrant but not browned. Remove from heat and stir in parsley.
- Brush & Top: Generously brush half the garlic butter over each breadstick. Then sprinkle shredded mozzarella and grated Parmesan evenly, pressing cheese lightly to adhere for that gooey, golden finish.
- Bake: Slide baking sheet into your preheated oven. Bake at 425°F for 12–15 minutes until edges are golden brown and cheese is bubbling with lightly toasted spots.
- Serve Warm: Remove breadsticks and immediately brush with remaining garlic butter for extra flavor. Garnish with chopped parsley. Serve on a platter and watch them vanish in minutes!
Optional: Serve with marinara for dipping.
Exact quantities are listed in the recipe card below.
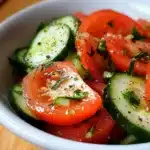
What to Serve with Cheesy Garlic Breadsticks Easy?
Looking to make your meal unforgettable? These irresistible breadsticks pair beautifully with a variety of dishes.
- Marinara Sauce: A classic pairing that adds a zesty kick, perfect for dipping each warm, cheesy bite.
- Fresh Garden Salad: Crisp greens and vibrant vegetables provide a refreshing contrast to the rich, cheesy flavor of the breadsticks.
- Spaghetti Aglio e Olio: The garlicky notes complement each other, creating a delicious symphony of flavors that’s hard to resist.
- Homemade Tomato Basil Soup: This comforting combo warms the soul, offering a heavenly experience with each dunk of breadstick.
For beverages, consider serving with a Chilled White Wine: Select a light, fruity wine to balance the garlic intensity and enhance the meal’s overall brightness. Alternatively, pair with a Sparkling Lemonade: Its bubbly freshness cuts through the richness, making every bite feel even more delightful.
How to Store and Freeze Cheesy Garlic Breadsticks Easy
Room Temperature: Store leftover breadsticks in an airtight container at room temperature for up to 2 days, keeping them soft and fresh.
Fridge: If you need them to last longer, refrigerate in a sealed container for up to 5 days. Reheat before serving for best flavor.
Freezer: For longer storage, freeze breadsticks in a single layer on a baking sheet, then transfer to a freezer bag. They can last up to 2 months.
Reheating: To enjoy your cheesy garlic breadsticks easy, reheat in a preheated oven at 350°F for about 10 minutes or until warmed through and crispy.
Make Ahead Options
These Cheesy Garlic Breadsticks Easy are perfect for meal prep enthusiasts! You can prepare the dough up to 24 hours in advance—just follow the recipe to the point of shaping the sticks. After slicing, place the breadsticks on a greased baking sheet and cover them tightly with plastic wrap, then refrigerate. When you’re ready to enjoy, simply remove the breadsticks from the fridge, let them rest for about 30 minutes, brush with garlic butter, top with cheese, and bake as directed. This way, you’ll have those warm, gooey, cheesy delights ready in no time, just as delicious as freshly made!
Expert Tips for Cheesy Garlic Breadsticks Easy
- Warm Water Temperature: Use water around 110°F to activate yeast without killing it, ensuring your breadsticks rise fluffy and light.
- Knead Just Right: Knead dough until smooth and elastic—over-kneading can make breadsticks tough, while under-kneading yields dense texture.
- Fresh Garlic Flavor: Mince garlic finely and cook briefly in butter to release aroma without bitterness for the perfect cheesy garlic breadsticks easy topping.
- Cheese Distribution: Sprinkle cheese evenly and press lightly to help it melt into the dough, creating that irresistible gooey texture.
- Bake Timing: Keep a close eye in the last minutes of baking to prevent burning; golden edges with bubbly cheese mean your breadsticks are ready!
- Serve Immediately: Brush with leftover garlic butter right after baking and serve warm for the ultimate melty, flavorful experience.
Cheesy Garlic Breadsticks Easy Variations
Feel free to experiment with these delightful twists that can make your cheesy garlic breadsticks easy even more extraordinary!
-
Herb-Infused: Add fresh or dried herbs like oregano or basil to the dough for an extra layer of flavor. The aromatic notes will elevate your breadsticks to a new level of indulgence.
-
Spicy Kick: Incorporate red pepper flakes into the garlic butter for a delightful heat. This creates a wonderfully balanced flavor that tantalizes your taste buds.
-
Cheese Medley: Mix in different cheeses, such as cheddar or gouda, with the mozzarella for a unique cheesy experience. Each bite will surprise you with new flavors that blend beautifully.
-
Creamy Garlic: Spread a layer of creamy garlic spread before adding the cheese for a richer taste. This adds an unforgettable layer of creaminess that’ll leave everyone coming back for more.
-
Whole Wheat Health: Swap half of the all-purpose flour with whole wheat flour for a healthier variation. These breadsticks will be heartier and offer a nuttier flavor, making them a bit more wholesome.
-
Stuffed Breadsticks: Roll cheese sticks or a spoonful of pizza sauce into the dough strips for a fun stuffed version. Pulling apart these breadsticks reveals incredible cheesy goo that everyone loves.
-
Garlic Butter Brushed: For even more flavor, consider brushing the breadsticks with garlic butter before baking and adding the toppings. This step will lock in a savory richness that enhances every bite.
-
Sweet Twist: For a dessert variation, sprinkle a mixture of cinnamon and sugar on the dough with a drizzle of icing afterwards. This turns your breadsticks into a delightful sweet treat perfect for any occasion.
Cheesy Garlic Breadsticks Easy Recipe FAQs
How do I know if my yeast is active and ready for the dough?
To test yeast, dissolve it in warm water (about 110°F) with a pinch of sugar. After 5 to 10 minutes, it should be frothy and bubbly. If it remains flat, your yeast may be old or the water too hot or cold, so try fresh yeast and adjust water temperature accordingly.
What’s the best way to store leftover cheesy garlic breadsticks?
Store breadsticks in an airtight container at room temperature for up to 2 days to keep them soft. For longer freshness, refrigerate for up to 5 days, making sure to reheat them in the oven to restore that just-baked texture before serving.
Can I freeze cheesy garlic breadsticks, and how should I do it?
Absolutely! Freeze them by first laying breadsticks in a single layer on a baking sheet. Once frozen solid (about 1–2 hours), transfer them to a freezer-safe bag or airtight container. They keep well up to 2 months. When ready, reheat from frozen in a 350°F oven for 10–12 minutes to regain crispness and melty cheese.
What should I do if my breadsticks come out dense or tough?
Dense breadsticks usually mean the dough wasn’t kneaded enough or the yeast didn’t activate properly. Make sure to knead until the dough is smooth and elastic—about 5 minutes—so gluten develops fully. Also, check that your yeast is fresh and water temperature is right to get a good rise.
Are cheesy garlic breadsticks safe for pets or people with allergies?
While delicious for humans, this recipe contains garlic and dairy, which are toxic to dogs and cats. For those with dairy allergies, try substituting vegan cheese and plant-based butter, though flavor and texture will differ slightly but remain tasty.
Can I use different cheeses or add herbs for variation?
Very! Feel free to swap mozzarella with provolone or cheddar for different melts and flavors. Adding herbs like oregano or basil alongside parsley enhances aroma and zest, making each batch uniquely yours. The more personal and fresh, the better!
Irresistibly Cheesy Garlic Breadsticks Easy to Homemade Perfection
Ingredients
Equipment
Method
- Preheat the oven to 425°F and lightly grease a baking sheet or line it with parchment paper.
- In a bowl, whisk together 1 cup warm water, 1 tsp sugar, and the yeast. Allow to rest for 5–10 minutes until frothy.
- Combine 2½ cups flour and 1 tsp salt in a bowl. Add olive oil and the yeast mixture. Stir until shaggy, then knead on a floured surface until smooth and elastic, about 5 minutes.
- Roll the dough into a 12x8 inch rectangle on a lightly floured surface. Trim edges, then slice lengthwise into 12 strips. Space them 1 inch apart on the baking sheet.
- In a small saucepan, melt butter and stir in minced garlic. Cook for 1 minute until fragrant, then remove from heat and stir in parsley.
- Generously brush half of the garlic butter over each breadstick. Sprinkle mozzarella and Parmesan cheese evenly, pressing lightly to adhere.
- Slide the baking sheet into the preheated oven. Bake at 425°F for 12–15 minutes until edges are golden brown and cheese is bubbling.
- Remove breadsticks and immediately brush with remaining garlic butter. Garnish with chopped parsley before serving.