")

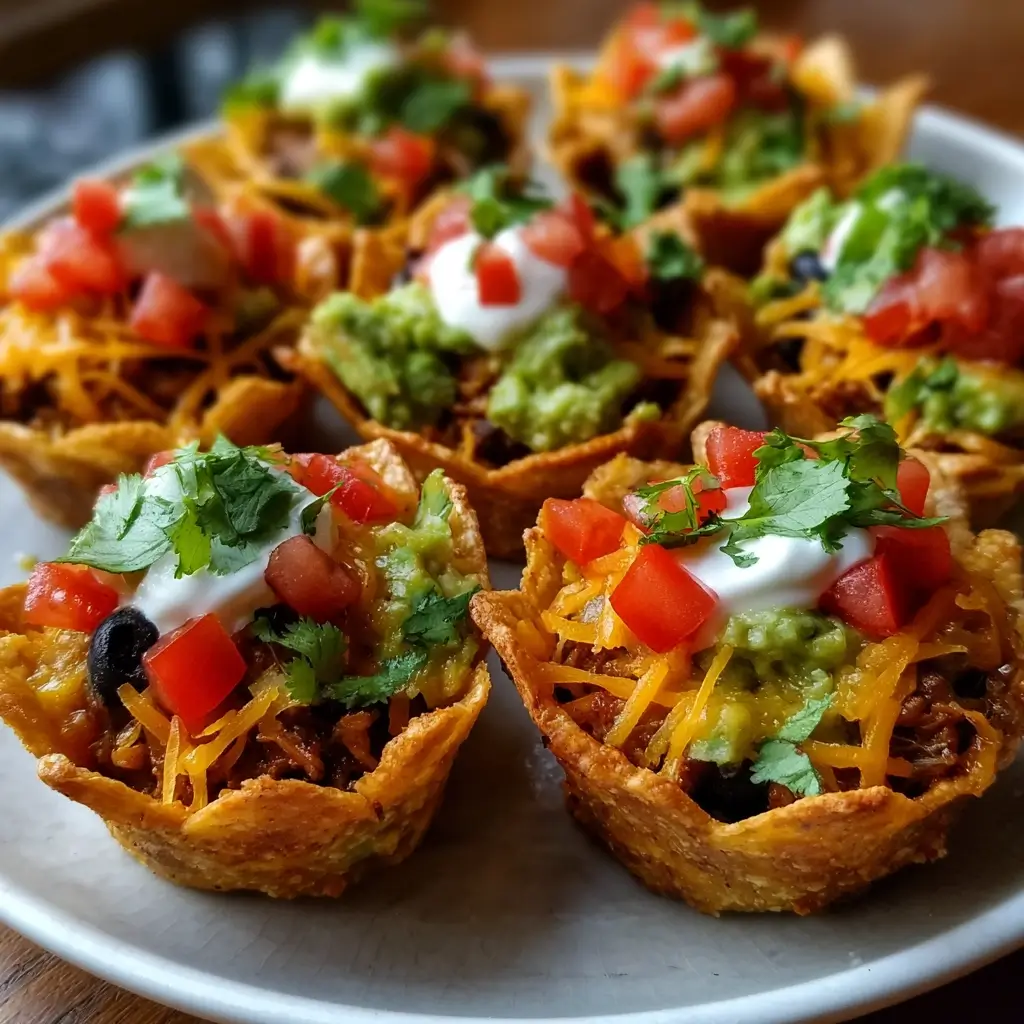

Of all the recipes that have become staples in our household, few disappear as quickly or are met with as much universal glee as these Loaded Veggie Nacho Cups. I first stumbled upon the idea when I was trying to solve the classic party food dilemma: how to serve nachos to a crowd without ending up with a soggy, picked-over platter where half the guests get only dry chips. I wanted something individual, something easy to grab, and something that felt a little more special than the usual pile. The solution came in the humble form of a muffin tin. The first time I made these for a family game night, the reaction was immediate. My kids, who can sometimes be skeptical of anything too heavy on the “veggie” front, devoured them. My husband, a nacho purist, declared them a genius invention. Each cup is a perfect, self-contained universe of nacho goodness—a sturdy, crunchy tortilla chip base holding a warm, savory filling of seasoned black beans, sweet corn, and colorful peppers, all blanketed under a glorious layer of melted, bubbly cheese. They are the ultimate appetizer: endlessly customizable, delightfully easy to make, and portion-controlled by design, ensuring everyone gets the perfect bite every single time. They’ve since become our go-to for everything from Super Bowl parties to casual weeknight dinners, and this detailed guide is my way of sharing that little piece of kitchen magic with you.
Ingredients
Crafting the perfect Loaded Veggie Nacho Cups is all about layering flavors and textures. Here is the curated list of ingredients designed to deliver a savory, satisfying, and vibrant bite every time.
For the Nacho Cups:
- 1 bag (10-13 oz) Restaurant-Style Tortilla Chips: Opt for a sturdier, rounder chip. These will form the base of your cups and need to be strong enough to hold the filling without breaking easily. Restaurant-style chips are typically thicker and hold up better to baking.
- 1 tablespoon Olive Oil: A light coating helps the chips crisp up beautifully in the oven and prevents them from sticking to the muffin tin.
- 1 (15-ounce) can Black Beans: Rinsed and thoroughly drained. This is the hearty, protein-packed core of our veggie filling. Rinsing them removes excess sodium and starchy liquid.
- 1 cup Frozen or Canned Corn: Thawed if frozen, and drained if canned. Corn adds a wonderful sweetness and a pleasant textural pop that contrasts beautifully with the creamy beans.
- 1/2 cup Red Onion, finely diced: Provides a sharp, slightly sweet bite that cuts through the richness of the cheese and beans. Dicing it finely ensures it integrates well and doesn’t overpower the other flavors.
- 1/2 cup Red Bell Pepper, finely diced: Lends a sweet, fresh crunch and a vibrant splash of color to the filling.
- 1 packet (1 oz) Taco Seasoning: Use your favorite store-bought brand or a homemade blend. This is the flavor powerhouse, infusing the veggie mixture with classic chili powder, cumin, and garlic notes.
- 2 cups Shredded Mexican Cheese Blend: A pre-shredded blend of Monterey Jack, Cheddar, Asadero, and Queso Quesadilla is perfect as it melts beautifully and offers a complex, cheesy flavor. For the best melt, consider grating your own from a block.
- 1/4 cup Pickled Jalapeños, chopped (optional): For those who like a little heat. The briny, spicy kick is a fantastic counterpoint to the savory filling.
For Garnish and Serving (Optional but Recommended):
- 1/2 cup Sour Cream or Greek Yogurt: A dollop of cool, creamy sour cream on top of the warm nacho cup is a classic and delicious finishing touch.
- 1/2 cup Guacamole: Freshly made or store-bought, guacamole adds a rich, buttery flavor and more healthy fats.
- 1/2 cup Salsa or Pico de Gallo: Provides a fresh, acidic element that brightens up all the other flavors.
- 1/4 cup Fresh Cilantro, chopped: Adds a burst of fresh, herbaceous flavor that is essential to many Mexican-inspired dishes.
- 1 Lime, cut into wedges: A final squeeze of fresh lime juice over the cups right before serving wakes up all the flavors.
Instructions
Follow these detailed, step-by-step instructions to assemble and bake your Loaded Veggie Nacho Cups to perfection. The process is straightforward and designed for success, even for beginner cooks.
Step 1: Preheat and Prepare Your Pan
First things first, preheat your oven to 375°F (190°C). This ensures the oven is at the perfect temperature to quickly toast the chips and melt the cheese without overcooking the filling. Generously grease a standard 12-cup muffin tin with non-stick cooking spray or a light coating of olive oil. This is a crucial step to prevent the cheese and chips from sticking, making removal a breeze.
Step 2: Create the Tortilla Chip Base
This is the foundation of your nacho cups. Take 2-3 of your sturdy, round tortilla chips and place them into one of the muffin cups. You’ll want to gently press them down so they overlap and conform to the shape of the cup. The goal is to create a small bowl or nest with the chips, eliminating as many gaps as possible. Don’t worry if a few chips crack; just arrange them to form a solid base. Repeat this process for all 12 muffin cups.
Step 3: Toast the Chip Cups
Place the muffin tin with the chip bases into the preheated oven. Bake for 5-6 minutes. This initial toasting step is vital for two reasons: it makes the chip base extra crispy and helps it hold its shape, providing a much sturdier vessel for your filling and preventing sogginess. After 5-6 minutes, the chips should be lightly golden and fragrant. Remove the tin from the oven and set it aside.
Step 4: Mix the Savory Veggie Filling
While the chip cups are toasting, you can prepare the filling. In a medium-sized mixing bowl, combine the rinsed and drained black beans, the corn, the finely diced red onion, and the finely diced red bell pepper. Sprinkle the entire packet of taco seasoning over the vegetable mixture. Stir everything together gently with a spoon or spatula until all the vegetables are evenly coated in the seasoning. This mixture should be colorful, fragrant, and ready to become the delicious heart of your nacho cups.
Step 5: Assemble the Nacho Cups
Now for the fun part: assembly! Carefully spoon about 2 tablespoons of the veggie filling into each of the pre-toasted tortilla chip cups. Be mindful not to overfill them; you want to leave enough room on top for a generous layer of cheese. Distribute the filling evenly among all 12 cups.
Step 6: Add the Cheese (and Jalapeños)
Sprinkle a generous amount of the shredded Mexican cheese blend over the filling in each cup. This is not the time to be shy with the cheese! A good, thick layer will melt down into a gooey, delicious blanket that holds everything together. If you’re using them, now is the time to scatter the chopped pickled jalapeños over the top of the cheese for that extra kick of heat.
Step 7: The Final Bake
Carefully return the filled muffin tin to the 375°F (190°C) oven. Bake for another 8-10 minutes. You’re looking for two key visual cues: the cheese should be completely melted, bubbly, and just beginning to turn golden brown in spots, and the edges of the tortilla chips should be a lovely golden-brown color. The aroma filling your kitchen will be absolutely irresistible.
Step 8: Cool and Serve
Once baked to perfection, carefully remove the muffin tin from the oven. Let the nacho cups cool in the tin for at least 5 minutes. This is a critical step! It allows the melted cheese to set up slightly, which helps the cups hold their shape when you remove them. After they’ve cooled for a few minutes, use a small offset spatula or a butter knife to gently loosen the edges of each cup and lift them out. Arrange them on a platter, add your favorite garnishes, and serve immediately while they’re warm and the cheese is still gooey.
Nutrition Facts
While these are an indulgent treat, the veggie-packed filling provides some solid nutritional benefits. The values below are an approximation and can vary based on the specific brands of ingredients used.
- Servings: 12 Cups
- Calories Per Serving (1 Cup): Approximately 110-140 kcal
- Protein (Approx. 5g): A good portion of the protein comes from the black beans and cheese, making these cups surprisingly satisfying and helping to keep you feeling full longer.
- Fiber (Approx. 3g): Thanks to the hearty combination of black beans, corn, and bell peppers, each cup provides a decent amount of dietary fiber, which is essential for digestive health.
- Sodium (Approx. 300mg): The majority of the sodium comes from the tortilla chips, cheese, and taco seasoning. To reduce this, you can opt for low-sodium chips, rinse your beans thoroughly, and use a low-sodium or homemade taco seasoning.
- Fat (Approx. 7g): The fat content is primarily from the cheese and olive oil. Using a reduced-fat cheese can lower this number if desired.
- Carbohydrates (Approx. 10g): The carbohydrates are mainly from the tortilla chips and corn, providing the energy that makes this such a satisfying snack.
Preparation Time
This recipe is designed to be quick and efficient, making it perfect for last-minute party planning or a speedy weeknight snack.
- Prep Time: 15 minutes. This includes dicing the vegetables, rinsing the beans, and assembling the nacho cups in the muffin tin.
- Cook Time: 13-16 minutes. This is the total time the nacho cups spend in the oven (5-6 minutes for the initial toasting and 8-10 minutes for the final bake).
- Total Time: Approximately 30 minutes. From start to finish, you can have these delicious, crowd-pleasing appetizers on the table in about half an hour.
How to Serve
The beauty of these Loaded Veggie Nacho Cups lies in their versatility. They can be dressed up or down for any occasion. Here are some of the best ways to serve them:
- The Classic Appetizer Platter:
- Arrange the warm nacho cups on a large serving platter or wooden board.
- In the center of the platter, place small bowls of classic nacho toppings: sour cream, guacamole, and your favorite salsa or pico de gallo.
- Garnish the entire platter with a generous sprinkle of freshly chopped cilantro and place a few lime wedges around the edge for squeezing.
- Create a “Nacho Bar”:
- This is a fantastic and interactive option for parties. Place the plain, freshly-baked nacho cups on a platter.
- Set up a “toppings bar” with a wide array of options in separate bowls, allowing guests to customize their own cups. Great additions include:
- Sauces: Queso dip, chipotle aioli, cilantro-lime crema.
- Veggies: Diced tomatoes, sliced black olives, shredded lettuce, fresh jalapeños.
- Herbs: Chopped scallions, fresh cilantro.
- Creams: Sour cream, Mexican crema, plain Greek yogurt.
- As a Light Meal or Side Dish:
- Don’t relegate these just to appetizer status! Serve 3-4 nacho cups alongside a fresh, crisp side salad with a zesty vinaigrette for a fun and satisfying lunch or light dinner.
- They also make an excellent side dish for a larger Mexican-inspired feast, served alongside tacos, enchiladas, or a hearty bowl of chili.
- Game Day Perfection:
- For sporting events or movie nights, serve them on a casual tray that can be easily passed around.
- Their individual-serving nature means no messy hands and no one has to huddle over a single plate, making them the ideal mess-free finger food.
Additional Tips
Unlock the full potential of your nacho cups and ensure they turn out perfectly every single time with these eight pro tips.
- Choose Your Chips Wisely: The structural integrity of your nacho cups depends entirely on the chips. Avoid thin, delicate, or overly salty chips. Look for “restaurant-style” or “cantina-style” chips that are thick, sturdy, and preferably round or scoop-shaped to better fit the muffin tin.
- Don’t Skip the Pre-Bake: It might seem like an unnecessary step, but pre-baking the chip bases for 5 minutes is the secret to preventing a soggy bottom. This step toasts and solidifies the chip structure, creating a crispy barrier against the moisture from the filling.
- Grate Your Own Cheese: While pre-shredded cheese is convenient, it’s often coated in anti-caking agents like potato starch, which can prevent it from melting as smoothly. For the ultimate gooey, melty cheese pull, buy a block of Monterey Jack or cheddar and grate it yourself. The difference is remarkable.
- Manage Moisture in Your Filling: Ensure your beans are well-drained and rinsed, and that any other canned or frozen vegetables (like corn) are also thoroughly drained. Excess liquid in the filling is the number one enemy of a crispy nacho cup.
- Add a Creamy Binder: For a filling that holds together even better, consider adding 2 ounces of softened cream cheese or a tablespoon of sour cream to the veggie mixture. This adds a subtle richness and helps bind the ingredients together as they bake.
- Customize Your Spice Level: The taco seasoning and optional jalapeños provide a base level of heat. You can easily adjust this to your preference. For more heat, add a pinch of cayenne pepper or a few dashes of hot sauce to the filling. For a milder version, use a mild taco seasoning and omit the jalapeños entirely.
- For a Meaty Addition: If you’re not strictly vegetarian, this recipe is a fantastic base for adding protein. Brown a half-pound of ground beef or chorizo, drain the fat, and mix it in with the vegetable filling for a heartier, more substantial nacho cup.
- Finish Under the Broiler: For extra-crispy edges and beautifully browned, bubbly cheese, switch your oven to the broil setting for the last 30-60 seconds of cooking. Watch them very carefully, as they can go from perfect to burnt in a matter of seconds.
FAQ Section
Here are answers to some of the most common questions about making Loaded Veggie Nacho Cups.
1. Can I make these nacho cups ahead of time?
Yes, you can do most of the prep work in advance to save time. You can dice all the vegetables and mix the filling up to 24 hours ahead; just store it in an airtight container in the refrigerator. You can also pre-bake the tortilla chip bases and let them cool completely. However, for the best results, you should assemble and do the final bake just before you plan to serve them to ensure they are warm, crispy, and the cheese is perfectly melted.
2. How do I store and reheat leftovers?
Leftover nacho cups can be stored in an airtight container in the refrigerator for up to 3 days. Be aware that the chips will soften over time. The best way to reheat them and bring back some of the crispiness is in an oven or toaster oven set to 350°F (175°C) for 5-7 minutes, or until warmed through. Microwaving is not recommended as it will make the chips very soft and soggy.
3. Are these Loaded Veggie Nacho Cups gluten-free?
Yes, they can easily be made gluten-free! The key is to use certified gluten-free corn tortilla chips and to check that your taco seasoning packet is also certified gluten-free, as some brands use flour as a thickener. All other ingredients—vegetables, beans, and cheese—are naturally gluten-free.
4. What are some other filling variations I can try?
This recipe is incredibly versatile! You can swap or add ingredients based on your preference. Some great ideas include:
- Protein Boost: Add cooked lentils, quinoa, or plant-based ground “meat” crumbles to the veggie mix. For meat-eaters, seasoned ground beef or shredded chicken are excellent additions.
- Different Beans: Try pinto beans or a mix of three beans instead of just black beans.
- More Veggies: Sautéed mushrooms, diced zucchini, or chopped spinach (be sure to squeeze out all excess water) would all be delicious.
5. How do I prevent the nacho cups from getting soggy?
The two most important steps to prevent sogginess are: 1) Pre-baking the tortilla chip base to create a crispy, moisture-resistant layer, and 2) Ensuring your filling is as dry as possible by thoroughly draining all canned ingredients. Also, serving them immediately after they come out of the oven is key to enjoying them at their crispiest.
6. Can I make these in a mini muffin tin?
Absolutely! A mini muffin tin is perfect for creating bite-sized versions, which are ideal for parties with lots of other finger foods. Use smaller, scoop-style tortilla chips (one per cup is usually enough) and reduce the filling amount to about 1 tablespoon per cup. The baking time will also be slightly shorter, so keep a close eye on them; they will likely only need 5-7 minutes for the final bake.
7. What’s the best type of cheese to use for nachos?
The best cheeses are ones that melt well without becoming too greasy or stringy. A Mexican blend is ideal because it combines several great melting cheeses. If you’re building your own blend, excellent choices include Monterey Jack (for supreme meltiness), low-moisture mozzarella, sharp cheddar (for flavor), and Asadero or Oaxaca cheese. Avoid aged, hard cheeses like Parmesan or dry, pre-crumbled cheeses like cotija for the main melted layer, though they can be great as a garnish.
8. Are these nacho cups considered healthy?
“Healthy” is subjective, but these are certainly a healthier alternative to traditional, deep-fried restaurant nachos. They are baked, not fried, and loaded with fiber and nutrients from the beans and vegetables. They are portion-controlled by design, which helps with mindful eating. You can increase the health factor by using low-sodium ingredients, loading up on extra veggies, and opting for Greek yogurt instead of sour cream as a topping.

Loaded Veggie Nacho Cups
Ingredients
Crafting the perfect Loaded Veggie Nacho Cups is all about layering flavors and textures. Here is the curated list of ingredients designed to deliver a savory, satisfying, and vibrant bite every time.
For the Nacho Cups:
- 1 bag (10-13 oz) Restaurant-Style Tortilla Chips: Opt for a sturdier, rounder chip. These will form the base of your cups and need to be strong enough to hold the filling without breaking easily. Restaurant-style chips are typically thicker and hold up better to baking.
- 1 tablespoon Olive Oil: A light coating helps the chips crisp up beautifully in the oven and prevents them from sticking to the muffin tin.
- 1 (15-ounce) can Black Beans: Rinsed and thoroughly drained. This is the hearty, protein-packed core of our veggie filling. Rinsing them removes excess sodium and starchy liquid.
- 1 cup Frozen or Canned Corn: Thawed if frozen, and drained if canned. Corn adds a wonderful sweetness and a pleasant textural pop that contrasts beautifully with the creamy beans.
- 1/2 cup Red Onion, finely diced: Provides a sharp, slightly sweet bite that cuts through the richness of the cheese and beans. Dicing it finely ensures it integrates well and doesn’t overpower the other flavors.
- 1/2 cup Red Bell Pepper, finely diced: Lends a sweet, fresh crunch and a vibrant splash of color to the filling.
- 1 packet (1 oz) Taco Seasoning: Use your favorite store-bought brand or a homemade blend. This is the flavor powerhouse, infusing the veggie mixture with classic chili powder, cumin, and garlic notes.
- 2 cups Shredded Mexican Cheese Blend: A pre-shredded blend of Monterey Jack, Cheddar, Asadero, and Queso Quesadilla is perfect as it melts beautifully and offers a complex, cheesy flavor. For the best melt, consider grating your own from a block.
- 1/4 cup Pickled Jalapeños, chopped (optional): For those who like a little heat. The briny, spicy kick is a fantastic counterpoint to the savory filling.
For Garnish and Serving (Optional but Recommended):
- 1/2 cup Sour Cream or Greek Yogurt: A dollop of cool, creamy sour cream on top of the warm nacho cup is a classic and delicious finishing touch.
- 1/2 cup Guacamole: Freshly made or store-bought, guacamole adds a rich, buttery flavor and more healthy fats.
- 1/2 cup Salsa or Pico de Gallo: Provides a fresh, acidic element that brightens up all the other flavors.
- 1/4 cup Fresh Cilantro, chopped: Adds a burst of fresh, herbaceous flavor that is essential to many Mexican-inspired dishes.
- 1 Lime, cut into wedges: A final squeeze of fresh lime juice over the cups right before serving wakes up all the flavors.
Instructions
Follow these detailed, step-by-step instructions to assemble and bake your Loaded Veggie Nacho Cups to perfection. The process is straightforward and designed for success, even for beginner cooks.
Step 1: Preheat and Prepare Your Pan
First things first, preheat your oven to 375°F (190°C). This ensures the oven is at the perfect temperature to quickly toast the chips and melt the cheese without overcooking the filling. Generously grease a standard 12-cup muffin tin with non-stick cooking spray or a light coating of olive oil. This is a crucial step to prevent the cheese and chips from sticking, making removal a breeze.
Step 2: Create the Tortilla Chip Base
This is the foundation of your nacho cups. Take 2-3 of your sturdy, round tortilla chips and place them into one of the muffin cups. You’ll want to gently press them down so they overlap and conform to the shape of the cup. The goal is to create a small bowl or nest with the chips, eliminating as many gaps as possible. Don’t worry if a few chips crack; just arrange them to form a solid base. Repeat this process for all 12 muffin cups.
Step 3: Toast the Chip Cups
Place the muffin tin with the chip bases into the preheated oven. Bake for 5-6 minutes. This initial toasting step is vital for two reasons: it makes the chip base extra crispy and helps it hold its shape, providing a much sturdier vessel for your filling and preventing sogginess. After 5-6 minutes, the chips should be lightly golden and fragrant. Remove the tin from the oven and set it aside.
Step 4: Mix the Savory Veggie Filling
While the chip cups are toasting, you can prepare the filling. In a medium-sized mixing bowl, combine the rinsed and drained black beans, the corn, the finely diced red onion, and the finely diced red bell pepper. Sprinkle the entire packet of taco seasoning over the vegetable mixture. Stir everything together gently with a spoon or spatula until all the vegetables are evenly coated in the seasoning. This mixture should be colorful, fragrant, and ready to become the delicious heart of your nacho cups.
Step 5: Assemble the Nacho Cups
Now for the fun part: assembly! Carefully spoon about 2 tablespoons of the veggie filling into each of the pre-toasted tortilla chip cups. Be mindful not to overfill them; you want to leave enough room on top for a generous layer of cheese. Distribute the filling evenly among all 12 cups.
Step 6: Add the Cheese (and Jalapeños)
Sprinkle a generous amount of the shredded Mexican cheese blend over the filling in each cup. This is not the time to be shy with the cheese! A good, thick layer will melt down into a gooey, delicious blanket that holds everything together. If you’re using them, now is the time to scatter the chopped pickled jalapeños over the top of the cheese for that extra kick of heat.
Step 7: The Final Bake
Carefully return the filled muffin tin to the 375°F (190°C) oven. Bake for another 8-10 minutes. You’re looking for two key visual cues: the cheese should be completely melted, bubbly, and just beginning to turn golden brown in spots, and the edges of the tortilla chips should be a lovely golden-brown color. The aroma filling your kitchen will be absolutely irresistible.
Step 8: Cool and Serve
Once baked to perfection, carefully remove the muffin tin from the oven. Let the nacho cups cool in the tin for at least 5 minutes. This is a critical step! It allows the melted cheese to set up slightly, which helps the cups hold their shape when you remove them. After they’ve cooled for a few minutes, use a small offset spatula or a butter knife to gently loosen the edges of each cup and lift them out. Arrange them on a platter, add your favorite garnishes, and serve immediately while they’re warm and the cheese is still gooey.
Nutrition
- Serving Size: one normal portion
- Calories: 140
- Fat: 7g
- Carbohydrates: 10g
- Fiber: 3g
- Protein: 5g