")

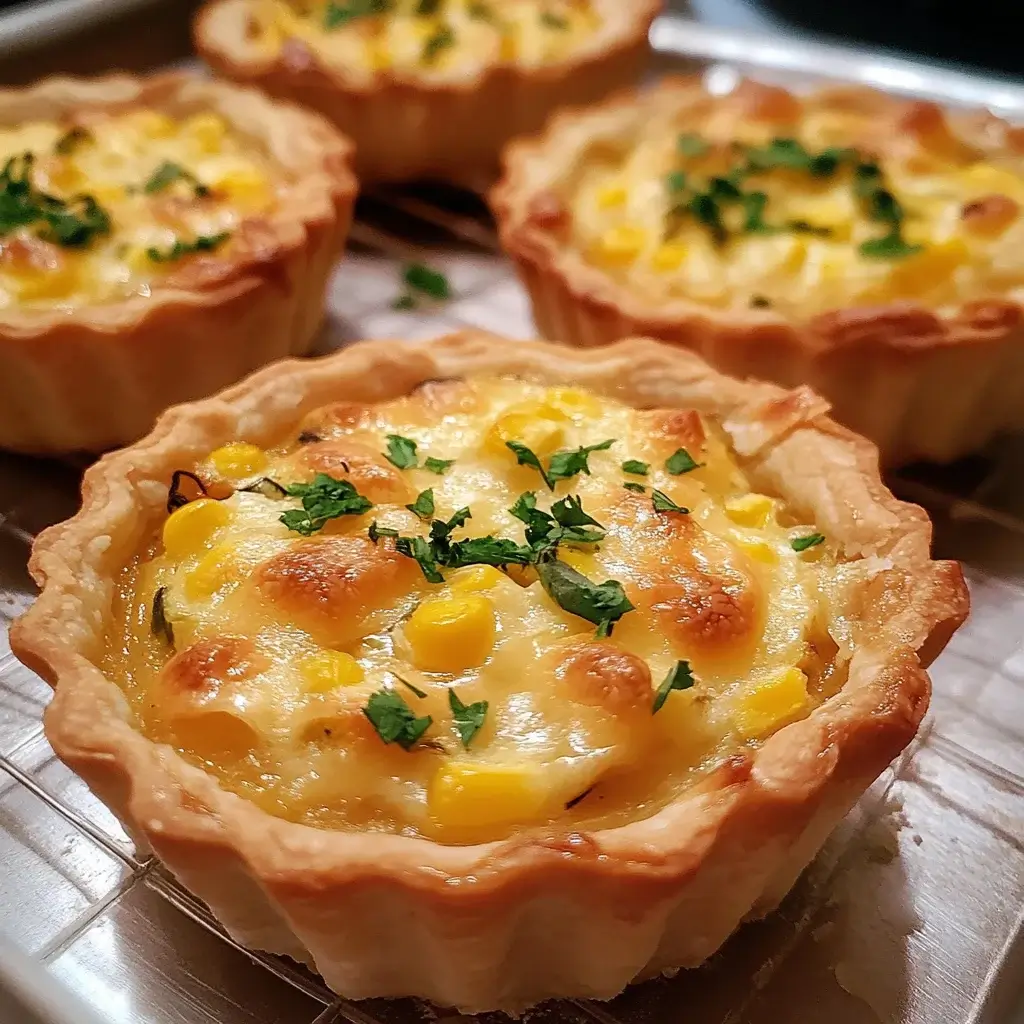

Ah, these Mini Cheese and Corn Tarts! Let me tell you, they have become an absolute sensation in my household and a go-to for pretty much any occasion. I first whipped them up for a casual family get-together, thinking they’d be a nice little nibble before the main meal. Little did I know they’d steal the show! The aroma wafting from the oven as they baked – that glorious combination of buttery pastry, melting cheese, and sweet corn – had everyone migrating to the kitchen, noses twitching. My kids, who can sometimes be a bit picky, devoured them. My husband, a man of few words but strong opinions on food, simply nodded with a very satisfied grin and reached for a third one. Since then, they’ve made appearances at birthday parties (perfect bite-sized treats), potlucks (they disappear in minutes, I swear!), and even as a comforting snack on a rainy afternoon. The beauty of these tarts lies in their simplicity and the incredible flavour payoff. The crust is perfectly flaky, the filling is creamy, cheesy, and studded with sweet corn kernels that pop with flavour. They look elegant enough for a fancy do, yet they’re so easy to make, you’ll find yourself baking them on a whim. Trust me, once you try this recipe, you’ll be looking for excuses to make them again and again!
Ingredients
Here’s what you’ll need to create these delightful mini tarts:
For the Savory Shortcrust Pastry:
- 2 ½ cups (approx. 300g) All-Purpose Flour: The structural base for our flaky, tender crust.
- 1 teaspoon Salt: Enhances the flavour of the pastry and balances the richness.
- 1 cup (226g) Unsalted Butter, cold and cubed: Crucial for creating those desirable flaky layers. Keep it very cold!
- ½ cup (120ml) Ice Water: Helps bind the dough together without developing too much gluten, ensuring tenderness. You might need a tablespoon more or less.
For the Cheesy Corn Filling:
- 1 tablespoon Olive Oil: For sautéing the aromatics, adding a touch of fruity richness.
- 1 small Onion, finely chopped (approx. ½ cup): Provides a sweet, aromatic base for the filling.
- 2 cloves Garlic, minced: Adds a pungent, savory depth.
- 1 ½ cups (approx. 225g) Sweet Corn Kernels: You can use fresh (cut from about 3 cobs), frozen (thawed and patted dry), or canned (well-drained). This is the star, bringing sweetness and texture.
- 4 oz (113g) Cream Cheese, softened: Lends a wonderful creamy texture and tangy flavour to the filling.
- 1 cup (approx. 100g) Sharp Cheddar Cheese, grated: Provides a robust, cheesy flavour. Feel free to use a good quality aged cheddar.
- ½ cup (approx. 50g) Monterey Jack Cheese, grated: Melts beautifully and adds a mild, buttery flavour. Mozzarella or Gouda can also work.
- ¼ cup (approx. 25g) Parmesan Cheese, grated: Adds a salty, umami kick that elevates the other cheeses.
- 1 large Egg, lightly beaten: Acts as a binder for the filling, helping it set during baking.
- 2 tablespoons Fresh Chives or Parsley, finely chopped: Brings a touch of freshness and colour.
- ½ teaspoon Smoked Paprika (optional): Adds a subtle smoky depth and lovely colour.
- ¼ teaspoon Black Pepper, freshly ground: For a hint of spice.
- Salt to taste: Adjust according to the saltiness of your cheeses.
Instructions
Follow these steps carefully for perfectly baked Mini Cheese and Corn Tarts:
Part 1: Preparing the Savory Shortcrust Pastry
- Combine Dry Ingredients: In a large mixing bowl, whisk together the all-purpose flour and salt.
- Cut in the Butter: Add the cold, cubed butter to the flour mixture. Using a pastry blender, your fingertips, or a food processor (on pulse mode), cut the butter into the flour until the mixture resembles coarse breadcrumbs with some pea-sized pieces of butter remaining. This is key for flakiness.
- Add Ice Water: Gradually drizzle in the ice water, one tablespoon at a time, mixing lightly with a fork after each addition, just until the dough starts to come together. Be careful not to add too much water or overmix, as this can make the pastry tough.
- Form and Chill Dough: Turn the dough out onto a lightly floured surface and gently bring it together into a ball. Divide the dough in half, flatten each half into a disc, wrap tightly in plastic wrap, and refrigerate for at least 1 hour (or up to 2 days). Chilling is essential for relaxing the gluten and firming up the butter, making the dough easier to roll and ensuring a tender, flaky crust.
Part 2: Making the Cheesy Corn Filling
- Sauté Aromatics: Heat the olive oil in a medium skillet over medium heat. Add the finely chopped onion and sauté for 4-5 minutes until softened and translucent. Add the minced garlic and cook for another minute until fragrant, being careful not to burn it.
- Cook Corn: Add the sweet corn kernels to the skillet. Cook for 5-7 minutes, stirring occasionally, until the corn is tender and slightly golden. If using frozen corn, ensure it’s thawed and patted dry to remove excess moisture. If using canned, ensure it’s thoroughly drained.
- Combine Cheeses and Egg: In a separate medium bowl, combine the softened cream cheese, grated sharp cheddar cheese, grated Monterey Jack cheese, and grated Parmesan cheese. Mix until well combined. Stir in the lightly beaten egg, chopped fresh chives (or parsley), smoked paprika (if using), black pepper, and salt to taste. Remember cheeses are salty, so taste before adding too much salt.
- Mix Filling: Add the cooked corn and onion mixture to the cheese mixture. Stir well until everything is evenly incorporated. Set aside while you prepare the pastry shells.
Part 3: Assembling and Baking the Tarts
- Preheat Oven & Prepare Muffin Tin: Preheat your oven to 375°F (190°C). Lightly grease a standard 12-cup muffin tin (or two, depending on the size of your tart circles, this recipe should yield about 20-24 mini tarts).
- Roll Out Dough: On a lightly floured surface, take one disc of chilled dough (keep the other refrigerated). Roll it out to about ⅛-inch thickness.
- Cut Pastry Circles: Using a round cookie cutter (approximately 3-4 inches in diameter, depending on your muffin tin size – it should be large enough to line the cup and come up the sides slightly), cut out circles from the dough. Re-roll scraps as needed, but try to handle the dough as little as possible.
- Line Muffin Cups: Gently press each pastry circle into a muffin cup, ensuring it fits snugly against the bottom and sides. If the dough tears, you can patch it with a small piece of excess dough. Repeat with the second disc of dough until all muffin cups are lined or you run out of dough.
- Fill the Tarts: Spoon the cheesy corn filling evenly into each pastry-lined muffin cup, filling them almost to the top. Don’t overfill, as the filling might puff up slightly.
- Bake: Place the muffin tin(s) in the preheated oven. Bake for 20-25 minutes, or until the pastry is golden brown and the filling is set and lightly bubbly. The exact baking time will depend on your oven.
- Cool and Serve: Once baked, remove the muffin tin from the oven and let the tarts cool in the tin for about 5-10 minutes. This helps them firm up and makes them easier to remove. Carefully run a thin knife around the edge of each tart if needed, then gently lift them out and transfer them to a wire rack to cool further or serve warm.
Nutrition Facts
- Servings: This recipe yields approximately 20-24 mini tarts.
- Calories per serving (per tart): Approximately 150-180 kcal (this is an estimate and can vary based on exact ingredient brands and quantities).
- Protein: Around 5-7g per tart. Primarily from the cheeses and egg, protein is essential for building and repairing tissues and keeping you feeling full.
- Fat: Around 9-12g per tart. Mostly from the butter in the pastry and the cheeses in the filling. Fats are a concentrated source of energy and help with nutrient absorption.
- Carbohydrates: Around 10-13g per tart. Mainly from the flour in the pastry and the natural sugars in the corn. Carbohydrates are the body’s primary source of energy.
- Calcium: A good source from the variety of cheeses used, crucial for bone health and muscle function.
- Fiber: Contributed by the corn and whole wheat (if used), aiding digestion and promoting satiety.
(Nutritional information is an estimate and will vary based on specific ingredients and portion sizes.)
Preparation Time
- Active Preparation Time: Approximately 45-60 minutes. This includes making the pastry dough, preparing the filling, and assembling the tarts.
- Dough Chilling Time: At least 1 hour (can be made up to 2 days ahead). This is crucial for a flaky crust.
- Baking Time: 20-25 minutes.
- Total Time (including chilling): Approximately 2 hours 5 minutes to 2 hours 25 minutes.
This breakdown shows that while the hands-on time isn’t excessive, planning for the dough chilling is important for the best results.
How to Serve
These Mini Cheese and Corn Tarts are incredibly versatile! Here are some delightful ways to serve them:
- As Appetizers or Canapés:
- Arrange them artfully on a platter for parties, gatherings, or holiday events.
- Garnish with a tiny sprig of fresh dill, chives, or a sprinkle of paprika for an elegant touch.
- Serve warm or at room temperature – they hold up well either way.
- For Brunch or a Light Lunch:
- Pair two or three tarts with a fresh green salad dressed with a light vinaigrette.
- Serve alongside a cup of tomato soup for a comforting and satisfying meal.
- Include them as part of a larger brunch spread with other savory and sweet items.
- As a Savory Snack:
- Perfect for an afternoon pick-me-up or a satisfying bite between meals.
- Great for packing in lunchboxes (once cooled).
- With Dips and Sauces (Optional):
- A dollop of sour cream or plain Greek yogurt on the side can add a cool, tangy contrast.
- A mild salsa or a sweet chili sauce can also complement the cheesy corn flavour.
- Party Food Star:
- Ideal for game day spreads, potlucks, or any casual get-together where finger foods are appreciated.
- Their individual portion size makes them easy for guests to grab and enjoy.
- Temperature Considerations:
- Warm: Fresh from the oven (after a brief cooling period) is when they are at their cheesiest and most aromatic.
- Room Temperature: They are still delicious and maintain their texture well, making them perfect for make-ahead situations.
No matter how you choose to serve them, these tarts are sure to be a hit!
Additional Tips
To ensure your Mini Cheese and Corn Tarts are a resounding success every time, consider these extra pointers:
- Cold is Key for Pastry: For the flakiest pastry, ensure your butter is very cold, and your water is ice-cold. Handle the dough as little as possible to prevent the butter from melting and to avoid developing too much gluten, which can make the crust tough. If your kitchen is warm, chill the dough periodically while working with it.
- Cheese Variations: Don’t be afraid to experiment with the cheeses! Gruyère would add a nutty depth, Pepper Jack could introduce a spicy kick, or even a good quality smoked Gouda for an extra layer of smokiness. Just ensure they are good melting cheeses.
- Herb Power: While chives and parsley are classic, consider adding other fresh herbs like finely chopped dill for a fresh, zesty note, or a tiny bit of fresh thyme for an earthy aroma. Dried herbs can be used in a pinch (use about 1/3 of the amount of fresh).
- Spice it Up: For those who like a bit of heat, add a pinch of cayenne pepper to the filling, or finely chop a small jalapeño (seeds removed for less heat) and sauté it with the onions. A dash of hot sauce in the filling can also work wonders.
- Make-Ahead Magic:
- Pastry Dough: Can be made up to 2 days in advance and stored, well-wrapped, in the refrigerator. It can also be frozen for up to 3 months.
- Filling: The cheese and corn filling can be prepared a day ahead and stored in an airtight container in the refrigerator.
- Unbaked Tarts: You can assemble the tarts in the muffin tin, cover with plastic wrap, and refrigerate for a few hours before baking. You might need to add a few extra minutes to the baking time.
- Freezing for Later: Baked and cooled tarts can be frozen. Place them on a baking sheet in a single layer until solid, then transfer to a freezer-safe bag or container for up to 1-2 months. Reheat from frozen in a 350°F (175°C) oven for 10-15 minutes, or until heated through and crisp.
- No Muffin Tin? No Problem! If you don’t have a standard muffin tin, you can make slightly larger individual tarts using ramekins or even a large tart pan for one big family-style tart (adjust baking time accordingly, likely 35-45 minutes for a large tart). For free-form mini tarts, you can cut squares of pastry, place a dollop of filling in the center, and fold up the edges (galette-style), then bake on a baking sheet.
- Avoid Soggy Bottoms: Ensure your corn is well-drained if using canned, or patted dry if using frozen, to minimize excess moisture in the filling. Pre-baking (blind baking) the pastry shells for 10 minutes before adding the filling can also create an extra-crisp crust, though it’s an optional step for these mini tarts.
FAQ Section
Here are answers to some frequently asked questions about making Mini Cheese and Corn Tarts:
Q1: Can I use store-bought pie crust for these tarts?
A1: Absolutely! If you’re short on time or don’t feel like making pastry from scratch, good quality store-bought refrigerated or frozen pie crust (shortcrust pastry) will work perfectly. Simply thaw it if frozen, unroll, cut your circles, and proceed with lining the muffin tins and filling them.
Q2: How do I prevent my pastry from shrinking during baking?
A2: Pastry shrinkage is often due to overworked dough or dough that hasn’t been chilled sufficiently. Ensure you chill the dough for at least an hour before rolling, and again, chill the lined muffin cups for 15-20 minutes in the refrigerator before filling and baking. Also, don’t stretch the dough when lining the muffin cups; let it settle in naturally.
Q3: Can I make these tarts gluten-free?
A3: Yes, you can adapt this recipe to be gluten-free. Use a good quality gluten-free all-purpose flour blend (one that contains xanthan gum, or add it according to package directions) for the pastry. Ensure all other ingredients, like your cheeses and any flavorings, are also certified gluten-free. The filling is naturally gluten-free.
Q4: How should I store leftover Mini Cheese and Corn Tarts?
A4: Once completely cooled, store leftover tarts in an airtight container in the refrigerator for up to 3-4 days. They can be enjoyed cold, at room temperature, or reheated.
Q5: What’s the best way to reheat these tarts?
A5: To retain their crispness, the best way to reheat is in an oven or toaster oven. Preheat to 350°F (175°C) and bake for 5-10 minutes, or until warmed through and the pastry is crisp again. Microwaving can make the pastry a bit soft, but it’s quick if you’re in a hurry.
Q6: Can I add other vegetables or proteins to the filling?
A6: Definitely! This recipe is quite adaptable. You could add finely diced and sautéed bell peppers (red, yellow, or orange for color), cooked and crumbled bacon for a smoky, meaty flavour, or even some shredded cooked chicken. Just ensure any additions are pre-cooked and not too watery to avoid a soggy filling.
Q7: Are these tarts suitable for children?
A7: Yes, these tarts are generally very kid-friendly! The creamy, cheesy filling and sweet corn are usually appealing to younger palates. You might want to omit any spicy elements like cayenne pepper if serving to very young children or those sensitive to spice. Their mini size also makes them perfect for little hands.
Q8: My filling seems a bit too runny before baking. What should I do?
A8: If your filling appears overly wet (perhaps from not draining canned corn well enough or very moist cream cheese), you can stir in a tablespoon of all-purpose flour or cornstarch into the filling mixture before spooning it into the pastry shells. This will help absorb some of the excess moisture and ensure the filling sets up nicely during baking. Also, ensure your egg is well incorporated as it acts as a binder.

Mini Cheese and Corn Tarts
Ingredients
Here’s what you’ll need to create these delightful mini tarts:
For the Savory Shortcrust Pastry:
- 2 ½ cups (approx. 300g) All-Purpose Flour: The structural base for our flaky, tender crust.
- 1 teaspoon Salt: Enhances the flavour of the pastry and balances the richness.
- 1 cup (226g) Unsalted Butter, cold and cubed: Crucial for creating those desirable flaky layers. Keep it very cold!
- ½ cup (120ml) Ice Water: Helps bind the dough together without developing too much gluten, ensuring tenderness. You might need a tablespoon more or less.
For the Cheesy Corn Filling:
- 1 tablespoon Olive Oil: For sautéing the aromatics, adding a touch of fruity richness.
- 1 small Onion, finely chopped (approx. ½ cup): Provides a sweet, aromatic base for the filling.
- 2 cloves Garlic, minced: Adds a pungent, savory depth.
- 1 ½ cups (approx. 225g) Sweet Corn Kernels: You can use fresh (cut from about 3 cobs), frozen (thawed and patted dry), or canned (well-drained). This is the star, bringing sweetness and texture.
- 4 oz (113g) Cream Cheese, softened: Lends a wonderful creamy texture and tangy flavour to the filling.
- 1 cup (approx. 100g) Sharp Cheddar Cheese, grated: Provides a robust, cheesy flavour. Feel free to use a good quality aged cheddar.
- ½ cup (approx. 50g) Monterey Jack Cheese, grated: Melts beautifully and adds a mild, buttery flavour. Mozzarella or Gouda can also work.
- ¼ cup (approx. 25g) Parmesan Cheese, grated: Adds a salty, umami kick that elevates the other cheeses.
- 1 large Egg, lightly beaten: Acts as a binder for the filling, helping it set during baking.
- 2 tablespoons Fresh Chives or Parsley, finely chopped: Brings a touch of freshness and colour.
- ½ teaspoon Smoked Paprika (optional): Adds a subtle smoky depth and lovely colour.
- ¼ teaspoon Black Pepper, freshly ground: For a hint of spice.
- Salt to taste: Adjust according to the saltiness of your cheeses.
Instructions
Follow these steps carefully for perfectly baked Mini Cheese and Corn Tarts:
Part 1: Preparing the Savory Shortcrust Pastry
- Combine Dry Ingredients: In a large mixing bowl, whisk together the all-purpose flour and salt.
- Cut in the Butter: Add the cold, cubed butter to the flour mixture. Using a pastry blender, your fingertips, or a food processor (on pulse mode), cut the butter into the flour until the mixture resembles coarse breadcrumbs with some pea-sized pieces of butter remaining. This is key for flakiness.
- Add Ice Water: Gradually drizzle in the ice water, one tablespoon at a time, mixing lightly with a fork after each addition, just until the dough starts to come together. Be careful not to add too much water or overmix, as this can make the pastry tough.
- Form and Chill Dough: Turn the dough out onto a lightly floured surface and gently bring it together into a ball. Divide the dough in half, flatten each half into a disc, wrap tightly in plastic wrap, and refrigerate for at least 1 hour (or up to 2 days). Chilling is essential for relaxing the gluten and firming up the butter, making the dough easier to roll and ensuring a tender, flaky crust.
Part 2: Making the Cheesy Corn Filling
- Sauté Aromatics: Heat the olive oil in a medium skillet over medium heat. Add the finely chopped onion and sauté for 4-5 minutes until softened and translucent. Add the minced garlic and cook for another minute until fragrant, being careful not to burn it.
- Cook Corn: Add the sweet corn kernels to the skillet. Cook for 5-7 minutes, stirring occasionally, until the corn is tender and slightly golden. If using frozen corn, ensure it’s thawed and patted dry to remove excess moisture. If using canned, ensure it’s thoroughly drained.
- Combine Cheeses and Egg: In a separate medium bowl, combine the softened cream cheese, grated sharp cheddar cheese, grated Monterey Jack cheese, and grated Parmesan cheese. Mix until well combined. Stir in the lightly beaten egg, chopped fresh chives (or parsley), smoked paprika (if using), black pepper, and salt to taste. Remember cheeses are salty, so taste before adding too much salt.
- Mix Filling: Add the cooked corn and onion mixture to the cheese mixture. Stir well until everything is evenly incorporated. Set aside while you prepare the pastry shells.
Part 3: Assembling and Baking the Tarts
- Preheat Oven & Prepare Muffin Tin: Preheat your oven to 375°F (190°C). Lightly grease a standard 12-cup muffin tin (or two, depending on the size of your tart circles, this recipe should yield about 20-24 mini tarts).
- Roll Out Dough: On a lightly floured surface, take one disc of chilled dough (keep the other refrigerated). Roll it out to about ⅛-inch thickness.
- Cut Pastry Circles: Using a round cookie cutter (approximately 3-4 inches in diameter, depending on your muffin tin size – it should be large enough to line the cup and come up the sides slightly), cut out circles from the dough. Re-roll scraps as needed, but try to handle the dough as little as possible.
- Line Muffin Cups: Gently press each pastry circle into a muffin cup, ensuring it fits snugly against the bottom and sides. If the dough tears, you can patch it with a small piece of excess dough. Repeat with the second disc of dough until all muffin cups are lined or you run out of dough.
- Fill the Tarts: Spoon the cheesy corn filling evenly into each pastry-lined muffin cup, filling them almost to the top. Don’t overfill, as the filling might puff up slightly.
- Bake: Place the muffin tin(s) in the preheated oven. Bake for 20-25 minutes, or until the pastry is golden brown and the filling is set and lightly bubbly. The exact baking time will depend on your oven.
- Cool and Serve: Once baked, remove the muffin tin from the oven and let the tarts cool in the tin for about 5-10 minutes. This helps them firm up and makes them easier to remove. Carefully run a thin knife around the edge of each tart if needed, then gently lift them out and transfer them to a wire rack to cool further or serve warm.
Nutrition
- Serving Size: one normal portion
- Calories: 180
- Fat: 12g
- Carbohydrates: 13g
- Protein: 7g