")

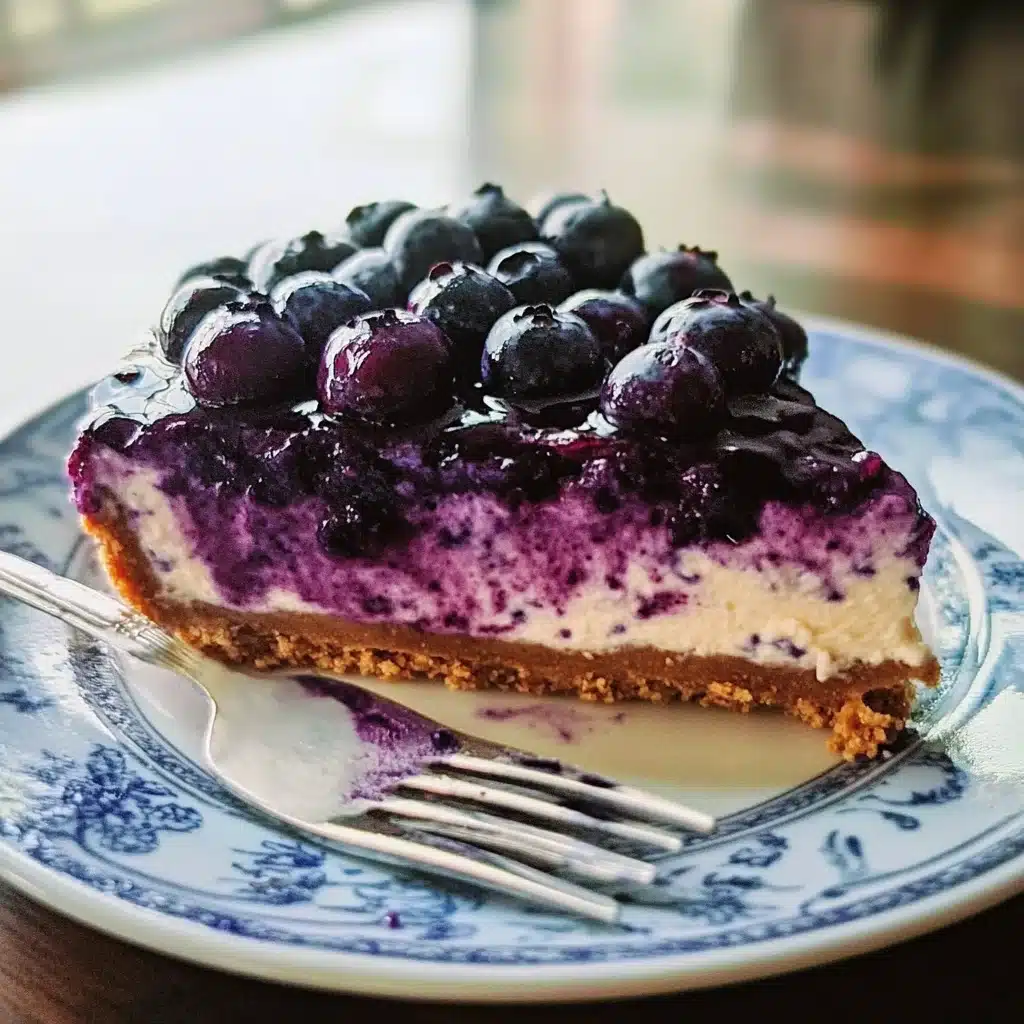

It’s no secret in our house that I have a bit of a sweet tooth, okay, maybe more than a bit! And when summer rolls around, and the blueberries are bursting with flavor, I’m always on the lookout for no-bake desserts. Honestly, who wants to turn on the oven when it’s sweltering outside? This No-Bake Blueberry Cheesecake has become an absolute staple. From the first creamy, tangy bite to the satisfying crunch of the graham cracker crust, it’s pure dessert heaven. Even my pickiest eater, my son, who usually shies away from anything “fruity,” devours this cheesecake. It’s the perfect balance of sweet and tart, rich and refreshing, and the vibrant blueberry topping just makes it look so inviting. Whether it’s a casual weekend BBQ or a slightly more dressed-up summer dinner party, this cheesecake is always a hit and disappears in minutes. Plus, the fact that it’s no-bake means less stress for me and more time enjoying the sunshine – it’s a win-win in my book! Trust me, if you’re looking for a crowd-pleasing, easy-to-make dessert that screams summer, look no further.
Ingredients for No-Bake Blueberry Cheesecake
- Graham Crackers: (1 ½ cups of crumbs) These form the base of our delicious crust, providing a slightly sweet and crumbly texture.
- Unsalted Butter: (6 tablespoons, melted) This binds the graham cracker crumbs together, creating a firm and flavorful crust.
- Granulated Sugar: (¼ cup, for the crust) Adds a touch of sweetness to the crust, complementing the cheesecake filling.
- Cream Cheese: (3 (8-ounce) packages, softened) The star of the cheesecake filling, providing the rich, creamy, and tangy base we all love. Make sure it’s softened for a smooth texture.
- Powdered Sugar: (1 ½ cups) Sweetens and stabilizes the cheesecake filling, ensuring a perfectly smooth and creamy consistency.
- Heavy Cream: (1 ½ cups) Adds richness and lightness to the cheesecake filling when whipped, creating a beautifully airy texture.
- Vanilla Extract: (1 teaspoon) Enhances the overall flavor profile of the cheesecake, adding a warm and aromatic note.
- Lemon Juice: (2 tablespoons, freshly squeezed) Provides a touch of acidity that balances the sweetness and enhances the blueberry flavor.
- Blueberry Pie Filling: (2 (21-ounce) cans) The vibrant and fruity topping that completes our cheesecake, offering a burst of blueberry goodness. You can use store-bought for convenience or homemade for extra flavor.
How to Make No-Bake Blueberry Cheesecake: Step-by-Step Instructions
Step 1: Prepare the Graham Cracker Crust
First, we’ll create the foundation of our cheesecake – the graham cracker crust. Begin by ensuring your graham crackers are finely crushed. You can achieve this by placing them in a zip-top bag and using a rolling pin to crush them into fine crumbs. Alternatively, a food processor makes quick work of this task. Once you have your graham cracker crumbs, place them in a medium-sized mixing bowl.
Melt the unsalted butter in a microwave-safe bowl or in a saucepan over low heat. Pour the melted butter over the graham cracker crumbs in the bowl. Add the granulated sugar to the bowl as well.
Using a fork or your hands, thoroughly combine the graham cracker crumbs, melted butter, and sugar until the mixture is evenly moistened and resembles damp sand. This ensures the crust will hold together properly.
Step 2: Press the Crust into the Pan
Now it’s time to press the graham cracker mixture into your springform pan. A 9-inch springform pan is ideal for this recipe, as it allows for easy removal of the finished cheesecake. Pour the graham cracker crumb mixture into the bottom of the springform pan.
Using the bottom of a measuring cup or your fingers, firmly press the crumb mixture evenly across the bottom of the pan. Make sure to press it firmly and consistently to create a compact and stable crust. You can also bring the crust slightly up the sides of the pan if desired, creating a small lip.
Once the crust is pressed, place the springform pan in the refrigerator to chill while you prepare the cheesecake filling. This chilling step is crucial as it allows the butter to solidify, firming up the crust and preventing it from crumbling when you add the filling. Let it chill for at least 30 minutes, or even longer if you have time.
Step 3: Prepare the Cheesecake Filling
While the crust is chilling, we’ll move on to the luscious cheesecake filling. In a large mixing bowl, add the softened cream cheese and powdered sugar. It is absolutely essential that your cream cheese is properly softened to room temperature. This will ensure a smooth, lump-free filling. If the cream cheese is still cold, it will be difficult to blend and may result in a grainy texture.
Using an electric mixer (either a stand mixer or a hand mixer), beat the cream cheese and powdered sugar together on medium speed until the mixture is completely smooth, creamy, and well combined. Scrape down the sides of the bowl as needed to ensure everything is incorporated. This step might take a few minutes, so be patient and continue beating until you achieve a perfectly smooth consistency.
Step 4: Whip the Heavy Cream
In a separate clean mixing bowl, pour in the heavy cream. Using the electric mixer with the whisk attachment (or clean beaters), beat the heavy cream on medium-high speed until stiff peaks form. This means that when you lift the beaters, the whipped cream should hold its shape and stand up in peaks. Be careful not to over-whip the cream, as this can result in a grainy or buttery texture. Stiffly whipped cream is essential for creating a light and airy cheesecake filling.
Step 5: Combine the Filling Ingredients
Once the heavy cream is whipped to stiff peaks, gently fold it into the cream cheese mixture. Folding is a crucial technique here to maintain the airiness of the whipped cream. Use a rubber spatula and gently fold the whipped cream into the cream cheese mixture in a figure-eight motion. Continue folding until just combined, being careful not to deflate the whipped cream. Overmixing at this stage can result in a dense cheesecake.
Next, add the vanilla extract and lemon juice to the cheesecake filling. Gently fold these ingredients in until they are evenly distributed throughout the mixture. The vanilla extract enhances the overall flavor, while the lemon juice adds a touch of brightness that balances the richness of the cheesecake and complements the blueberries.
Step 6: Assemble the Cheesecake
Remove the chilled graham cracker crust from the refrigerator. Pour the prepared cheesecake filling evenly over the chilled crust in the springform pan. Use a spatula or the back of a spoon to smooth the top of the filling, ensuring it is level and even.
Step 7: Chill the Cheesecake
Now comes the most crucial step for a no-bake cheesecake – chilling! Cover the springform pan tightly with plastic wrap. Place the cheesecake in the refrigerator and let it chill for at least 6 hours, or preferably overnight. This extended chilling time is necessary for the cheesecake to set completely and become firm enough to slice and serve. Patience is key here!
Step 8: Add the Blueberry Topping and Serve
Once the cheesecake is thoroughly chilled and firm, it’s time to add the final touch – the blueberry topping. Carefully remove the cheesecake from the refrigerator. Open the cans of blueberry pie filling. If you desire a more refined look, you can gently spoon the blueberry pie filling over the top of the cheesecake, distributing it evenly. Alternatively, for a more rustic and abundant topping, you can pour the blueberry pie filling over the cheesecake.
Before serving, carefully remove the sides of the springform pan. To do this smoothly, you can run a thin knife or spatula around the inside edge of the pan before releasing the latch. This will help loosen the cheesecake from the sides and ensure a clean release.
Slice the No-Bake Blueberry Cheesecake into wedges and serve chilled. Garnish with fresh blueberries, a sprig of mint, or a dollop of whipped cream, if desired, for an extra touch of elegance. Enjoy your delicious and effortless No-Bake Blueberry Cheesecake!
Nutrition Facts for No-Bake Blueberry Cheesecake
(Please note: Nutritional information is an estimate and can vary based on specific ingredients and brands used. Values are approximate per serving, based on a recipe divided into 12 servings.)
- Servings: 12
- Calories per Serving: Approximately 450-500 kcal
- Total Fat: 30-35g
Preparation Time for No-Bake Blueberry Cheesecake
- Prep Time: 30-40 minutes (This includes time for making the crust, preparing the filling, and assembling the cheesecake).
- Chill Time: Minimum 6 hours, preferably overnight (This is crucial for the cheesecake to set properly).
- Total Time: Approximately 6 hours 30 minutes (including chilling time, but mostly inactive time).
How to Serve No-Bake Blueberry Cheesecake
This No-Bake Blueberry Cheesecake is incredibly versatile and can be served in numerous delightful ways. Here are some ideas to elevate your serving presentation and enhance the overall experience:
- Classic Slice: The simplest and most satisfying way to serve it is as a classic slice, straight from the fridge. The chilled cheesecake is perfectly refreshing and the textures are at their best.
- Garnished with Fresh Blueberries: For a burst of fresh flavor and visual appeal, top each slice with a generous handful of fresh blueberries. The vibrant blue of the fresh berries complements the blueberry pie filling beautifully.
- Whipped Cream Dollop: A dollop of freshly whipped cream adds an extra layer of creamy indulgence. You can use sweetened or unsweetened whipped cream depending on your preference.
- Mint Sprig: A small sprig of fresh mint not only adds a touch of elegance to the presentation but also provides a subtle refreshing aroma that complements the sweetness of the cheesecake.
- Lemon Zest: A sprinkle of finely grated lemon zest over the top adds a bright citrusy note that enhances the lemon juice in the filling and adds a pop of color.
- Berry Coulis: For a more sophisticated presentation, drizzle a homemade or store-bought berry coulis (a thin fruit sauce) over the cheesecake slice. Raspberry or strawberry coulis would pair wonderfully with blueberry.
- Chocolate Shavings: For a richer dessert, add some dark or white chocolate shavings. The slight bitterness of dark chocolate or the sweetness of white chocolate provides a delicious contrast to the fruity cheesecake.
- Alongside Coffee or Tea: No-Bake Blueberry Cheesecake pairs perfectly with a cup of hot coffee or a refreshing glass of iced tea. The sweetness of the cheesecake is balanced nicely by the slight bitterness of coffee or the coolness of tea.
- For Special Occasions: For birthdays or celebrations, decorate the cheesecake further with candles, edible flowers, or a personalized message written in frosting.
Additional Tips for the Best No-Bake Blueberry Cheesecake
To ensure your No-Bake Blueberry Cheesecake is a resounding success every time, here are some helpful tips and tricks:
- Use Full-Fat Cream Cheese: For the richest and creamiest texture, always use full-fat cream cheese. Reduced-fat or fat-free cream cheese may result in a less stable and less flavorful cheesecake.
- Soften Cream Cheese Properly: As mentioned earlier, softened cream cheese is crucial. Take the cream cheese out of the refrigerator at least an hour before you plan to start baking, or even two hours in cooler environments. It should be soft to the touch but not melted.
- Don’t Overmix the Filling: Once you add the whipped cream to the cream cheese mixture, fold it in gently until just combined. Overmixing can deflate the whipped cream and result in a denser cheesecake.
- Chill for the Right Amount of Time: Resist the temptation to rush the chilling process. A minimum of 6 hours, and preferably overnight, is necessary for the cheesecake to set firmly. This chilling time allows the gelatin in the cream cheese to work its magic.
- Use a Springform Pan: A springform pan is highly recommended for cheesecakes, especially no-bake versions. The removable sides make it incredibly easy to release the cheesecake without damaging it.
- Line the Pan (Optional): For extra insurance against sticking, you can line the bottom of the springform pan with parchment paper before pressing in the graham cracker crust. This makes removing the cheesecake even easier.
- Customize Your Crust: While graham crackers are classic, you can experiment with other crust options. Try using Oreo cookies (without the cream filling), digestive biscuits, or even gingersnap cookies for a different flavor profile.
- Make it Ahead of Time: No-Bake Blueberry Cheesecake is a fantastic make-ahead dessert. You can prepare it up to 2-3 days in advance and store it in the refrigerator, covered tightly. This makes it perfect for parties and gatherings.
Frequently Asked Questions (FAQ) about No-Bake Blueberry Cheesecake
Q1: Can I use a different type of crust for this cheesecake?
A: Absolutely! While graham cracker crust is traditional, you can easily substitute it with other cookie crumbs like Oreo cookies (cremefilling removed), digestive biscuits, or gingersnap cookies. You can even use a shortbread cookie crust for a buttery flavor. Just ensure the crumbs are finely ground and mixed with melted butter and sugar as per the recipe instructions.
Q2: Can I make this cheesecake ahead of time?
A: Yes, No-Bake Blueberry Cheesecake is an excellent make-ahead dessert! In fact, it’s recommended to make it at least 6 hours in advance to allow it to set properly. You can prepare it up to 2-3 days ahead of time. Store it covered tightly in the refrigerator. It’s a perfect dessert for busy schedules or when entertaining guests.
Q3: Can I freeze No-Bake Blueberry Cheesecake?
A: While technically you can freeze no-bake cheesecake, it’s not highly recommended as the texture can sometimes change slightly upon thawing. The cream cheese can become a bit grainy. However, if you need to freeze it, do so without the blueberry topping. Wrap it tightly in plastic wrap and then in foil. Thaw it in the refrigerator overnight and then add the blueberry topping before serving.
Q4: My cheesecake filling is not setting, what did I do wrong?
A: The most common reason for a no-bake cheesecake not setting is insufficient chilling time. Ensure you chill it for at least 6 hours, preferably overnight. Another factor could be using reduced-fat or fat-free cream cheese, which may not set as firmly as full-fat cream cheese. Also, make sure you whipped the heavy cream to stiff peaks, as this provides structure to the filling.
Q5: Can I make this cheesecake less sweet?
A: Yes, you can adjust the sweetness. Reduce the amount of powdered sugar in the filling slightly, starting with ¼ cup less. You can also use unsweetened blueberry pie filling or make your own blueberry compote with less sugar. For the crust, you can also reduce the sugar or omit it entirely if you prefer a less sweet base.
Q6: Can I use fresh blueberries instead of blueberry pie filling?
A: Yes, you can use fresh blueberries! To use fresh blueberries as a topping, you can make a simple blueberry compote. Simmer fresh blueberries with a little sugar, lemon juice, and a touch of cornstarch to thicken. Let it cool completely before spooning it over the chilled cheesecake. This will give you a fresher, less intensely sweet blueberry flavor.
Q7: How do I prevent the crust from crumbling when slicing?
A: Ensuring the crust is firmly pressed into the pan is key to preventing crumbling. Also, chilling the crust before adding the filling helps it solidify. When slicing, use a sharp knife and dip it in warm water between slices for clean cuts. Wiping the knife clean after each slice also helps.
Q8: Can I make mini individual cheesecakes using this recipe?
A: Yes, you can easily adapt this recipe to make mini individual cheesecakes! Use muffin tins lined with cupcake liners. Press a small amount of the graham cracker crust mixture into the bottom of each liner and then top with the cheesecake filling. Chill as directed, and then top with blueberry pie filling before serving. Mini cheesecakes are perfect for parties and individual desserts.
Print
No Bake Blueberry Cheesecake
Ingredients
- Graham Crackers: (1 ½ cups of crumbs) These form the base of our delicious crust, providing a slightly sweet and crumbly texture.
- Unsalted Butter: (6 tablespoons, melted) This binds the graham cracker crumbs together, creating a firm and flavorful crust.
- Granulated Sugar: (¼ cup, for the crust) Adds a touch of sweetness to the crust, complementing the cheesecake filling.
- Cream Cheese: (3 (8-ounce) packages, softened) The star of the cheesecake filling, providing the rich, creamy, and tangy base we all love. Make sure it’s softened for a smooth texture.
- Powdered Sugar: (1 ½ cups) Sweetens and stabilizes the cheesecake filling, ensuring a perfectly smooth and creamy consistency.
- Heavy Cream: (1 ½ cups) Adds richness and lightness to the cheesecake filling when whipped, creating a beautifully airy texture.
- Vanilla Extract: (1 teaspoon) Enhances the overall flavor profile of the cheesecake, adding a warm and aromatic note.
- Lemon Juice: (2 tablespoons, freshly squeezed) Provides a touch of acidity that balances the sweetness and enhances the blueberry flavor.
- Blueberry Pie Filling: (2 (21-ounce) cans) The vibrant and fruity topping that completes our cheesecake, offering a burst of blueberry goodness. You can use store-bought for convenience or homemade for extra flavor.
Instructions
Step 1: Prepare the Graham Cracker Crust
First, we’ll create the foundation of our cheesecake – the graham cracker crust. Begin by ensuring your graham crackers are finely crushed. You can achieve this by placing them in a zip-top bag and using a rolling pin to crush them into fine crumbs. Alternatively, a food processor makes quick work of this task. Once you have your graham cracker crumbs, place them in a medium-sized mixing bowl.
Melt the unsalted butter in a microwave-safe bowl or in a saucepan over low heat. Pour the melted butter over the graham cracker crumbs in the bowl. Add the granulated sugar to the bowl as well.
Using a fork or your hands, thoroughly combine the graham cracker crumbs, melted butter, and sugar until the mixture is evenly moistened and resembles damp sand. This ensures the crust will hold together properly.
Step 2: Press the Crust into the Pan
Now it’s time to press the graham cracker mixture into your springform pan. A 9-inch springform pan is ideal for this recipe, as it allows for easy removal of the finished cheesecake. Pour the graham cracker crumb mixture into the bottom of the springform pan.
Using the bottom of a measuring cup or your fingers, firmly press the crumb mixture evenly across the bottom of the pan. Make sure to press it firmly and consistently to create a compact and stable crust. You can also bring the crust slightly up the sides of the pan if desired, creating a small lip.
Once the crust is pressed, place the springform pan in the refrigerator to chill while you prepare the cheesecake filling. This chilling step is crucial as it allows the butter to solidify, firming up the crust and preventing it from crumbling when you add the filling. Let it chill for at least 30 minutes, or even longer if you have time.
Step 3: Prepare the Cheesecake Filling
While the crust is chilling, we’ll move on to the luscious cheesecake filling. In a large mixing bowl, add the softened cream cheese and powdered sugar. It is absolutely essential that your cream cheese is properly softened to room temperature. This will ensure a smooth, lump-free filling. If the cream cheese is still cold, it will be difficult to blend and may result in a grainy texture.
Using an electric mixer (either a stand mixer or a hand mixer), beat the cream cheese and powdered sugar together on medium speed until the mixture is completely smooth, creamy, and well combined. Scrape down the sides of the bowl as needed to ensure everything is incorporated. This step might take a few minutes, so be patient and continue beating until you achieve a perfectly smooth consistency.
Step 4: Whip the Heavy Cream
In a separate clean mixing bowl, pour in the heavy cream. Using the electric mixer with the whisk attachment (or clean beaters), beat the heavy cream on medium-high speed until stiff peaks form. This means that when you lift the beaters, the whipped cream should hold its shape and stand up in peaks. Be careful not to over-whip the cream, as this can result in a grainy or buttery texture. Stiffly whipped cream is essential for creating a light and airy cheesecake filling.
Step 5: Combine the Filling Ingredients
Once the heavy cream is whipped to stiff peaks, gently fold it into the cream cheese mixture. Folding is a crucial technique here to maintain the airiness of the whipped cream. Use a rubber spatula and gently fold the whipped cream into the cream cheese mixture in a figure-eight motion. Continue folding until just combined, being careful not to deflate the whipped cream. Overmixing at this stage can result in a dense cheesecake.
Next, add the vanilla extract and lemon juice to the cheesecake filling. Gently fold these ingredients in until they are evenly distributed throughout the mixture. The vanilla extract enhances the overall flavor, while the lemon juice adds a touch of brightness that balances the richness of the cheesecake and complements the blueberries.
Step 6: Assemble the Cheesecake
Remove the chilled graham cracker crust from the refrigerator. Pour the prepared cheesecake filling evenly over the chilled crust in the springform pan. Use a spatula or the back of a spoon to smooth the top of the filling, ensuring it is level and even.
Step 7: Chill the Cheesecake
Now comes the most crucial step for a no-bake cheesecake – chilling! Cover the springform pan tightly with plastic wrap. Place the cheesecake in the refrigerator and let it chill for at least 6 hours, or preferably overnight. This extended chilling time is necessary for the cheesecake to set completely and become firm enough to slice and serve. Patience is key here!
Step 8: Add the Blueberry Topping and Serve
Once the cheesecake is thoroughly chilled and firm, it’s time to add the final touch – the blueberry topping. Carefully remove the cheesecake from the refrigerator. Open the cans of blueberry pie filling. If you desire a more refined look, you can gently spoon the blueberry pie filling over the top of the cheesecake, distributing it evenly. Alternatively, for a more rustic and abundant topping, you can pour the blueberry pie filling over the cheesecake.
Before serving, carefully remove the sides of the springform pan. To do this smoothly, you can run a thin knife or spatula around the inside edge of the pan before releasing the latch. This will help loosen the cheesecake from the sides and ensure a clean release.
Slice the No-Bake Blueberry Cheesecake into wedges and serve chilled. Garnish with fresh blueberries, a sprig of mint, or a dollop of whipped cream, if desired, for an extra touch of elegance. Enjoy your delicious and effortless No-Bake Blueberry Cheesecake!
Nutrition
- Serving Size: one normal portion
- Calories: 500
- Fat: 35g