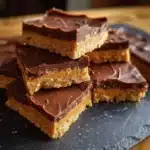
Ingredients
Here is the simple list of ingredients you’ll need to create these incredibly decadent and easy dessert bars. The magic of this recipe lies in using common pantry staples to create something truly special.
- 1 cup (2 sticks or 226g) Unsalted Butter, melted: This is the foundation of the peanut butter layer, providing richness and helping the bars set firmly. Using unsalted butter allows you to control the final saltiness of the dish.
- 2 cups (240g) Graham Cracker Crumbs: This provides the structure and a subtle, honey-kissed flavor to the base. You can buy pre-crushed crumbs or make your own by pulsing about 15-16 full graham cracker sheets in a food processor.
- 2 cups (240g) Powdered Sugar (Confectioner’s Sugar): This ingredient dissolves completely, giving the peanut butter layer a smooth, fudgy, and melt-in-your-mouth texture without any grittiness.
- 1 cup (256g) Creamy Peanut Butter: The star of the show! A standard commercial creamy peanut butter (like Jif or Skippy) works best, as its stabilizers help the bars set properly.
- 1 ½ cups (255g) Semi-Sweet Chocolate Chips: These create the perfect chocolate topping, offering a rich chocolate flavor that beautifully balances the sweetness of the peanut butter base.
- 1 tablespoon (16g) Creamy Peanut Butter: A small amount is mixed into the melted chocolate. This is a secret trick that not only enhances the peanut butter flavor but also makes the chocolate layer slightly softer and much easier to cut without cracking.
Instructions
Follow these step-by-step instructions carefully to ensure your no-bake bars come out perfectly every time. The process is straightforward and requires no baking, just a bit of mixing and chilling.
Step 1: Prepare the Pan
Before you begin mixing, prepare your baking dish. Take a 9×13 inch baking pan and line it with parchment paper. The best way to do this is to leave a few inches of “overhang” on the two long sides. These parchment paper handles will make it incredibly easy to lift the entire chilled block of bars out of the pan for clean, perfect cutting. If you don’t have parchment paper, you can grease the pan thoroughly with butter or non-stick spray, but the lifting method is highly recommended for best results.
Step 2: Create the Peanut Butter Base Mixture
In a large mixing bowl, you’ll create the heart of this dessert. Pour in the 2 cups of graham cracker crumbs and the 2 cups of powdered sugar. Give them a quick whisk to combine and break up any lumps in the sugar. Now, pour in the 1 cup of melted unsalted butter and add the 1 cup of creamy peanut butter. Using a sturdy spatula or a wooden spoon, begin to mix everything together. At first, it might seem dry, but keep stirring. The butter and peanut butter will work their way into the dry ingredients, eventually forming a thick, slightly crumbly, but cohesive dough. Ensure there are no dry pockets of powdered sugar or graham cracker crumbs remaining.
Step 3: Press the Base into the Pan
Transfer the entire peanut butter mixture from the mixing bowl into your prepared 9×13 inch pan. Dump it into the center and then begin to press it outwards towards the edges. The goal is to create an even, flat, and densely packed layer. You can use the back of your spatula for this, but the best tool is the bottom of a flat-bottomed measuring cup or drinking glass. Press down firmly across the entire surface. This compaction is crucial; it ensures your base is solid and won’t crumble apart when you serve the bars. Make sure to get into the corners and create a level surface for the chocolate topping.
Step 4: Prepare the Chocolate Topping
Now it’s time for the glorious chocolate layer. In a medium-sized, microwave-safe bowl, combine the 1 ½ cups of semi-sweet chocolate chips and the final 1 tablespoon of creamy peanut butter. Place the bowl in the microwave and heat it on high in 30-second intervals. It is vital to stir well after each interval. Chocolate can hold its shape even when melted, so stirring is key to prevent it from scorching. Continue this process until the chocolate is about 90% melted, with just a few small lumps remaining. Remove it from the microwave and just keep stirring; the residual heat from the bowl and the melted chocolate will melt the remaining bits, leaving you with a perfectly smooth, glossy chocolate sauce. This gentle melting method prevents the chocolate from seizing or becoming grainy.
Step 5: Assemble and Spread the Topping
Immediately pour the warm, melted chocolate mixture over the prepared peanut butter base in the pan. Start by pouring it in the center and then, using an offset spatula or the back of a spoon, gently spread it into an even layer, all the way to the edges. The tablespoon of peanut butter you added will make the chocolate more pliable and easier to spread. Work relatively quickly before the chocolate begins to set. Tilt the pan slightly to help it level out into a beautiful, uniform topping.
Step 6: Chill for Firmness
This is the final and most important step: patience. Place the pan, uncovered, into the refrigerator. Let the bars chill for at least 2 hours. This time allows both the peanut butter base and the chocolate topping to firm up completely. If you’re in a hurry, you can place them in the freezer for about 45-60 minutes, but the refrigerator often yields a slightly better texture. The bars are ready when the chocolate is hard to the touch and the base is very firm.
Step 7: Cut and Serve
Once the bars are fully chilled, use the parchment paper handles to lift the entire block out of the pan and onto a cutting board. For the cleanest cuts, use a large, sharp knife. Run the knife under hot water for a few seconds, wipe it dry, and then make a cut. The heat from the knife will slice through the chocolate layer without cracking it. Repeat this process, wiping the knife clean between each cut, to create perfectly neat squares. You can cut them into any size you desire, from small, bite-sized treats to large, generous dessert portions.
Nutrition
- Serving Size: one normal portion
- Calories: 280