Ingredients
This simple yet satisfying dessert requires just a handful of readily available ingredients. Here’s what you’ll need to create your own batch of delightful No-Bake Coffee Jelly:
- Instant Coffee: The star of the show! Use your favorite brand of instant coffee. The quality of the coffee will directly impact the flavor of your jelly, so choose one you enjoy. Instant coffee dissolves easily and provides that concentrated coffee kick we’re looking for.
- Granulated Sugar: For sweetness and balance. Granulated sugar dissolves smoothly and provides a clean sweetness that complements the coffee flavor perfectly. You can adjust the amount to your preference, but this recipe provides a balanced sweetness.
- Unflavored Gelatin Powder: The magic ingredient that gives the jelly its signature wobble. Unflavored gelatin powder is essential for setting the coffee mixture into a jelly. It’s tasteless and odorless, ensuring that the coffee flavor shines through.
- Cold Water: Used to bloom the gelatin and dissolve the sugar and coffee. Cold water is important for blooming the gelatin properly. It also helps in dissolving the dry ingredients evenly.
- Hot Water: To fully dissolve the coffee, sugar, and bloomed gelatin. Hot water ensures that all the ingredients are fully dissolved, resulting in a smooth and clear coffee jelly.
- Evaporated Milk or Creamer (Optional, for serving): Adds richness and creaminess. While the coffee jelly is delicious on its own, a drizzle of evaporated milk or creamer elevates it to another level, adding a luscious creamy element that complements the coffee flavor. You can use sweetened condensed milk for extra sweetness, or regular milk or even plant-based milk alternatives if preferred.
Instructions
Making No-Bake Coffee Jelly is incredibly straightforward. Follow these simple steps and you’ll be enjoying your own jiggly coffee treat in no time!
Step 1: Bloom the Gelatin
In a medium-sized mixing bowl, sprinkle the unflavored gelatin powder evenly over the cold water. It’s important to sprinkle it and not dump it in a clump, as this helps the gelatin hydrate properly and prevents lumps. Let it sit for about 5-7 minutes. This process is called “blooming” the gelatin. During this time, the gelatin granules will absorb the water and soften, becoming a slightly thickened, cloudy mixture. Blooming is crucial as it ensures the gelatin dissolves smoothly and evenly later on, resulting in a perfect jelly texture. If you skip this step, you risk having undissolved gelatin granules in your final product, which can lead to a grainy or uneven texture.
Step 2: Dissolve Coffee and Sugar
While the gelatin is blooming, in a separate heatproof bowl or saucepan, combine the instant coffee and granulated sugar. Pour the hot water over the coffee and sugar mixture. Stir continuously until both the coffee and sugar are completely dissolved. Make sure there are no granules of sugar or coffee visible at the bottom of the bowl. This step ensures a smooth and uniform coffee flavor throughout the jelly. The hot water helps to quickly dissolve both ingredients, creating a flavorful coffee base for our jelly.
Step 3: Combine Gelatin and Coffee Mixture
Once the gelatin has bloomed and the coffee mixture is ready, gently pour the hot coffee mixture into the bowl with the bloomed gelatin. Stir continuously until the bloomed gelatin is completely dissolved into the hot coffee mixture. Continue stirring for a minute or two to ensure everything is thoroughly combined and the gelatin is fully incorporated. The heat from the coffee mixture will help to dissolve the bloomed gelatin. Stirring ensures that the gelatin is evenly distributed throughout the coffee liquid, which is vital for achieving a consistent jelly texture.
Step 4: Cool and Refrigerate
Allow the coffee mixture to cool slightly at room temperature for about 15-20 minutes. This step is important because pouring hot liquid directly into your serving dishes or molds can cause condensation and affect the final texture of the jelly. Cooling it down slightly also prevents thermal shock to glass containers. Once slightly cooled, carefully pour the coffee mixture into your desired serving dishes or molds. You can use individual glasses, ramekins, or a larger container to make a big batch. If you want to unmold the jelly later, lightly grease your molds with a neutral oil or cooking spray to prevent sticking.
Cover the dishes or molds with plastic wrap or lids to prevent a skin from forming on the surface of the jelly and to prevent it from absorbing any odors from the refrigerator. Refrigerate for at least 4-6 hours, or preferably overnight, until the coffee jelly is fully set and firm. The refrigeration time is crucial for the gelatin to work its magic and transform the liquid mixture into a solid, jiggly jelly. The longer it chills, the firmer it will become.
Step 5: Serve and Enjoy!
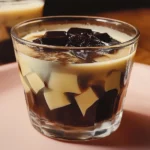
Once the coffee jelly is fully set, it’s ready to be served! You can enjoy it straight from the refrigerator as is, or enhance it with a drizzle of evaporated milk, creamer, or sweetened condensed milk for added richness and sweetness. If you used a large container and want to serve it in individual portions, you can gently loosen the edges of the jelly with a knife and cut it into squares or cubes. If you used molds, you can unmold the jelly by briefly dipping the bottom of the mold in warm water (be careful not to let the water touch the jelly) and then inverting it onto a serving plate. Garnish with a sprinkle of cocoa powder, coffee grounds, or a sprig of mint if desired, for an extra touch of elegance. Serve chilled and enjoy the refreshing and delightful taste of your homemade No-Bake Coffee Jelly!
Nutrition
- Serving Size: one normal portion
- Calories: 120
- Sugar: 20g