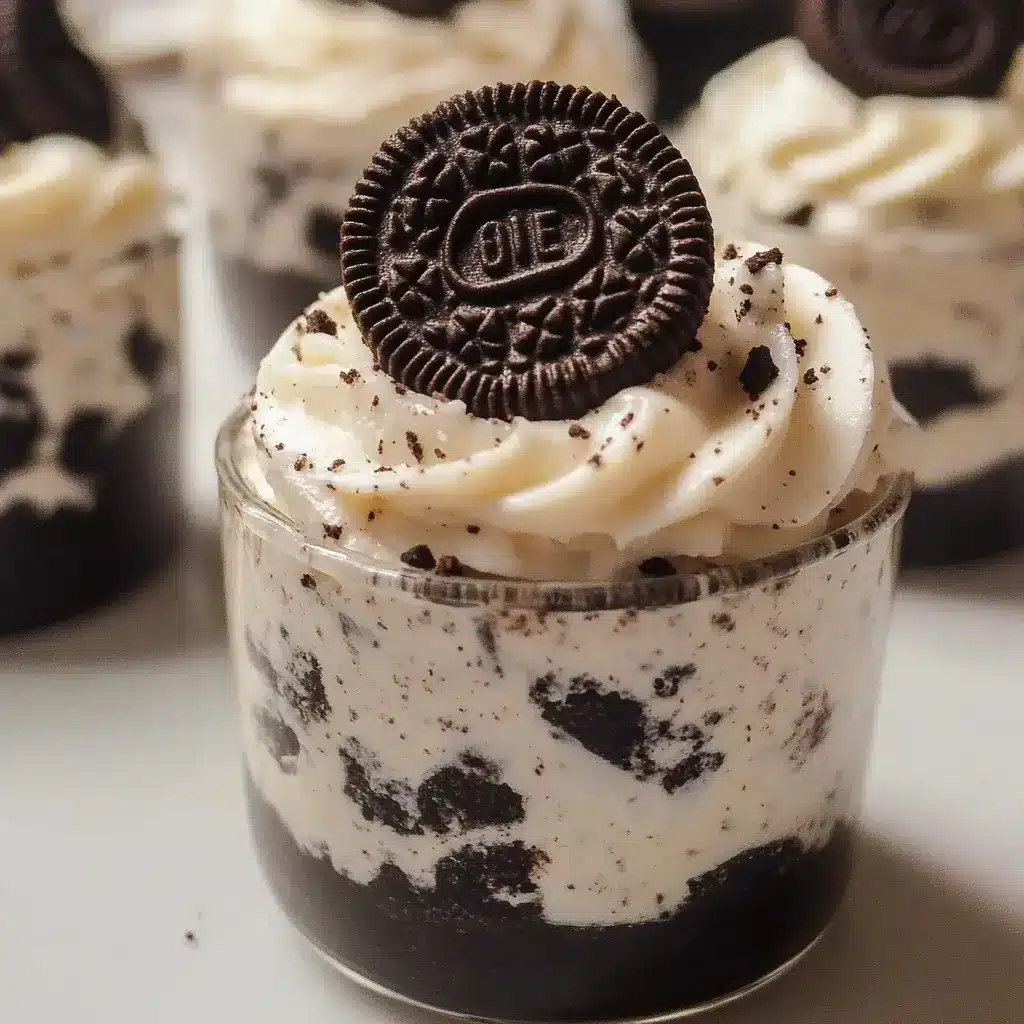
Oh my goodness, let me tell you about these No-Bake Oreo Cheesecake Cups! Last weekend, I was in a dessert dilemma. We were having friends over for a casual barbecue, and I wanted to make something sweet and impressive, but honestly, the thought of turning on the oven in the summer heat was just…no. Enter these glorious little cups of creamy, Oreo-studded heaven. Seriously, they were a total hit! From the kids to the adults, everyone raved about them. They are incredibly easy to whip up, require absolutely no baking (hallelujah!), and are perfectly portioned for individual servings. Plus, who can resist the classic combination of Oreos and cheesecake? If you’re looking for a dessert that is guaranteed to impress with minimal effort, look no further. These No-Bake Oreo Cheesecake Cups are about to become your new go-to for parties, potlucks, or just a simple sweet treat any day of the week. Trust me, you’ll thank me later!
Ingredients
- Oreos: 36 regular Oreos, divided (about 1 package). These iconic cookies form the base and the delicious crumble topping.
- Cream Cheese: 8 ounces, full-fat, softened. The foundation of our creamy cheesecake filling, providing that rich and tangy flavor.
- Powdered Sugar: ½ cup. Sweetens the cheesecake filling and adds a delicate texture.
- Heavy Whipping Cream: 1 cup, cold. Whipped to stiff peaks, it creates a light and airy cheesecake texture.
- Vanilla Extract: 1 teaspoon. Enhances the overall flavor profile, adding a touch of warmth and sweetness.
- Unsalted Butter: 4 tablespoons, melted. Used to bind the Oreo crust together, creating a sturdy base.
Instructions
- Prepare the Oreo Crust: Begin by separating 24 of the Oreos. We want to keep the cream filling attached to one side of the cookie if possible, but don’t worry if some comes off – it will still work perfectly! Place the Oreo cookies (without the cream filling side if you managed to separate them neatly, otherwise just the whole cookies) into a food processor. Pulse until you have fine crumbs. If you don’t have a food processor, you can place the Oreos in a resealable plastic bag and crush them with a rolling pin or the bottom of a heavy glass.
- Combine Crust Ingredients: Pour the melted unsalted butter over the Oreo crumbs in a medium bowl. Mix well with a fork or spatula until all the crumbs are evenly moistened and resemble wet sand. This buttery mixture will hold the crust together beautifully.
- Press Crust into Cups: Get your muffin tin ready! Line a standard 12-cup muffin tin with paper liners or silicone liners for easy removal and serving. Divide the Oreo crumb mixture evenly among the 12 muffin cups, using about 2 tablespoons per cup. Use the back of a spoon or your fingers to firmly press the crumbs into the bottom of each cup, creating a compact and even crust. This firm base is important to support the cheesecake filling.
- Prepare the Cheesecake Filling: In a large bowl, add the softened cream cheese and powdered sugar. Using an electric mixer (hand mixer or stand mixer), beat on medium speed until the mixture is smooth, creamy, and completely combined. Make sure there are no lumps of cream cheese remaining. Scraping down the sides of the bowl as needed helps ensure everything is evenly mixed.
- Add Vanilla and Remaining Oreos: Stir in the vanilla extract to the cream cheese mixture and mix until incorporated. Now, for the remaining 12 Oreos, roughly chop them into chunks. You can do this by hand with a knife or by pulsing them briefly in the food processor (be careful not to over-process them into crumbs!). Gently fold the chopped Oreos into the cheesecake filling using a spatula. We want to distribute the Oreo pieces throughout the filling without overmixing.
- Whip the Heavy Cream: In a separate clean and cold bowl, pour in the cold heavy whipping cream. Using the electric mixer with the whisk attachment (or clean beaters), beat on medium-high speed until stiff peaks form. This means when you lift the beaters, the whipped cream holds its shape and stands up in peaks. Be careful not to overwhip, or you’ll end up with butter!
- Fold in Whipped Cream: Gently fold the whipped cream into the cream cheese mixture in two additions. Use a spatula and fold in a figure-eight motion to maintain the airiness of the whipped cream. This step is crucial for achieving a light and fluffy cheesecake texture.
- Fill the Muffin Cups: Spoon the cheesecake filling evenly over the prepared Oreo crusts in the muffin cups. Fill each cup almost to the top, leaving a little space for the topping if desired. You can use a spoon or a piping bag (if you want a neater look) to fill the cups.
- Chill to Set: Cover the muffin tin with plastic wrap or foil and refrigerate for at least 4 hours, or preferably overnight, to allow the cheesecake cups to set completely. Chilling time is essential for the cheesecake to firm up and for the flavors to meld together beautifully. Overnight chilling is highly recommended for the best texture and taste.
- Garnish and Serve: Once the cheesecake cups are fully chilled and set, gently remove them from the muffin tin. If using paper liners, simply peel them away. If using silicone liners, they should pop out easily. Decorate the tops of the cheesecake cups as desired. You can use the remaining Oreo crumbs (from the leftover Oreos or you can crush a few more), whipped cream, chocolate shavings, or a drizzle of chocolate syrup. Serve immediately and enjoy these delightful No-Bake Oreo Cheesecake Cups!
Nutrition Facts (per serving)
- Serving Size: 1 Cheesecake Cup
- Servings Per Recipe: 12
- Calories: Approximately 320 kcal
- Total Fat: 22g
(Note: Nutritional information is an estimate and may vary based on specific ingredients and brands used.)
Preparation Time
- Prep Time: 20 minutes
- Chill Time: 4 hours (minimum, overnight recommended)
- Total Time: 4 hours 20 minutes (minimum, overnight recommended for best results)
These No-Bake Oreo Cheesecake Cups are incredibly quick to assemble. The majority of the time is hands-off chilling time, making them perfect for preparing in advance for parties or gatherings. You can easily whip these up the day before and have a stunning dessert ready to go!
How to Serve
- Chilled Perfection: The best way to enjoy these cheesecake cups is straight from the refrigerator. The coldness enhances the creamy texture and refreshing flavor, especially on a warm day.
- Garnish Galore: Get creative with toppings!
- Oreo Crumbs: Sprinkle extra Oreo crumbs on top for added texture and visual appeal.
- Whipped Cream: A dollop of freshly whipped cream or a swirl of store-bought whipped topping adds extra creaminess and sweetness.
- Chocolate Syrup: Drizzle chocolate syrup or hot fudge over the cups for a richer chocolate experience.
- Caramel Sauce: A drizzle of caramel sauce complements the Oreo and cheesecake flavors beautifully.
- Fresh Berries: Add a pop of color and freshness with sliced strawberries, raspberries, or blueberries.
- Mint Sprigs: A sprig of fresh mint adds a touch of elegance and a refreshing aroma.
- Chocolate Shavings: Garnish with dark, milk, or white chocolate shavings for a sophisticated touch.
- Party Platter: Arrange the cheesecake cups on a pretty platter or cake stand for an impressive dessert presentation at parties and gatherings.
- Individual Dessert: Serve them as individual desserts for a simple weeknight treat or a special occasion.
- With Coffee or Milk: Pair these cheesecake cups with a cup of hot coffee or a glass of cold milk for a perfect dessert pairing.
- Summer Treat: Ideal for summer barbecues, picnics, and potlucks as they are no-bake and refreshing.
- Make-Ahead Dessert: Prepare them a day or two in advance, making them a stress-free dessert option for busy schedules.
Additional Tips for Perfect No-Bake Oreo Cheesecake Cups
- Use Full-Fat Cream Cheese: For the richest and creamiest cheesecake filling, always use full-fat cream cheese. Reduced-fat cream cheese may result in a less stable and less flavorful cheesecake.
- Soften Cream Cheese Properly: Ensure your cream cheese is properly softened to room temperature before mixing. This will prevent lumps in your filling and ensure a smooth and creamy texture. You can leave it out at room temperature for about 30-60 minutes, or gently microwave it in short intervals, being careful not to melt it.
- Cold Heavy Whipping Cream is Key: Make sure your heavy whipping cream is very cold before whipping. Cold cream whips up much better and faster, resulting in stable stiff peaks. Chilling your bowl and beaters beforehand can also help.
- Don’t Overmix the Filling: Once you’ve added the whipped cream, fold it in gently until just combined. Overmixing can deflate the whipped cream, resulting in a denser cheesecake.
- Chill for Sufficient Time: Resist the urge to rush the chilling process. At least 4 hours of chilling is necessary for the cheesecake to set properly. Overnight chilling is even better for optimal texture and flavor development.
- Customize Your Oreos: While classic Oreos are fantastic, feel free to experiment with different Oreo flavors! Golden Oreos, Mint Oreos, or Peanut Butter Oreos would all be delicious variations. You can even use Double Stuffed Oreos for an extra creamy base.
- Make Mini Cheesecakes: For even smaller, bite-sized treats, use a mini muffin tin instead of a standard one. Adjust the crust and filling amounts accordingly, and reduce the chilling time slightly.
- Freezing for Later: These No-Bake Oreo Cheesecake Cups freeze beautifully! Once set, you can freeze them in an airtight container for up to 2-3 months. Thaw them in the refrigerator for a few hours before serving. This makes them a great make-ahead dessert option for future cravings or events.
Frequently Asked Questions (FAQ)
Q1: Can I make these cheesecake cups ahead of time?
A: Absolutely! In fact, these No-Bake Oreo Cheesecake Cups are perfect for making ahead. They need at least 4 hours to chill and set, and they can be made up to 2-3 days in advance and stored in the refrigerator. This makes them a fantastic stress-free dessert for parties or gatherings.
Q2: Can I use a different type of cookie for the crust?
A: Yes, you can definitely experiment with other cookies! Graham crackers, chocolate wafers, or even other types of sandwich cookies would work well. Just make sure the cookies are crisp and crush easily to form a crumbly base. Adjust the amount of butter as needed depending on the dryness of the cookie.
Q3: Can I double the recipe?
A: Yes, this recipe can easily be doubled or even tripled to serve a larger crowd. Simply double or triple all the ingredient quantities and use a larger muffin tin or multiple muffin tins. The chilling time will remain the same.
Q4: What if I don’t have a food processor?
A: No food processor? No problem! You can crush the Oreos by placing them in a resealable plastic bag and using a rolling pin or the bottom of a heavy glass to crush them into fine crumbs. It might take a little more elbow grease, but it works just as well.
Q5: Can I use low-fat cream cheese?
A: While you can use low-fat cream cheese, it’s recommended to use full-fat cream cheese for the best flavor and texture in no-bake cheesecakes. Low-fat cream cheese may result in a less stable and less creamy filling. If you do use low-fat, ensure it’s very well softened and mix it thoroughly.
Q6: How do I store leftover cheesecake cups?
A: Store any leftover No-Bake Oreo Cheesecake Cups in an airtight container in the refrigerator for up to 3-4 days. They are best enjoyed within the first few days for optimal freshness and texture.
Q7: Can I make one large cheesecake instead of cups?
A: Yes, you can adapt this recipe to make one larger no-bake cheesecake. Press the Oreo crust into the bottom of a 9-inch springform pan. Prepare the filling as directed and pour it over the crust. Chill for at least 6 hours or overnight. You may need to increase the chilling time slightly for a larger cheesecake to set completely.
Q8: Can I add other flavors to the cheesecake filling?
A: Absolutely! Feel free to get creative and add other flavors to the cheesecake filling. You could add a tablespoon of lemon juice for a tangy twist, a teaspoon of almond extract instead of vanilla, or incorporate melted chocolate for a chocolate cheesecake version. You can also swirl in some caramel sauce or fruit preserves before chilling for added flavor complexity. The possibilities are endless!

No-Bake Oreo Cheesecake Cups
Ingredients
- Oreos: 36 regular Oreos, divided (about 1 package). These iconic cookies form the base and the delicious crumble topping.
- Cream Cheese: 8 ounces, full-fat, softened. The foundation of our creamy cheesecake filling, providing that rich and tangy flavor.
- Powdered Sugar: ½ cup. Sweetens the cheesecake filling and adds a delicate texture.
- Heavy Whipping Cream: 1 cup, cold. Whipped to stiff peaks, it creates a light and airy cheesecake texture.
- Vanilla Extract: 1 teaspoon. Enhances the overall flavor profile, adding a touch of warmth and sweetness.
- Unsalted Butter: 4 tablespoons, melted. Used to bind the Oreo crust together, creating a sturdy base.
Instructions
- Prepare the Oreo Crust: Begin by separating 24 of the Oreos. We want to keep the cream filling attached to one side of the cookie if possible, but don’t worry if some comes off – it will still work perfectly! Place the Oreo cookies (without the cream filling side if you managed to separate them neatly, otherwise just the whole cookies) into a food processor. Pulse until you have fine crumbs. If you don’t have a food processor, you can place the Oreos in a resealable plastic bag and crush them with a rolling pin or the bottom of a heavy glass.
- Combine Crust Ingredients: Pour the melted unsalted butter over the Oreo crumbs in a medium bowl. Mix well with a fork or spatula until all the crumbs are evenly moistened and resemble wet sand. This buttery mixture will hold the crust together beautifully.
- Press Crust into Cups: Get your muffin tin ready! Line a standard 12-cup muffin tin with paper liners or silicone liners for easy removal and serving. Divide the Oreo crumb mixture evenly among the 12 muffin cups, using about 2 tablespoons per cup. Use the back of a spoon or your fingers to firmly press the crumbs into the bottom of each cup, creating a compact and even crust. This firm base is important to support the cheesecake filling.
- Prepare the Cheesecake Filling: In a large bowl, add the softened cream cheese and powdered sugar. Using an electric mixer (hand mixer or stand mixer), beat on medium speed until the mixture is smooth, creamy, and completely combined. Make sure there are no lumps of cream cheese remaining. Scraping down the sides of the bowl as needed helps ensure everything is evenly mixed.
- Add Vanilla and Remaining Oreos: Stir in the vanilla extract to the cream cheese mixture and mix until incorporated. Now, for the remaining 12 Oreos, roughly chop them into chunks. You can do this by hand with a knife or by pulsing them briefly in the food processor (be careful not to over-process them into crumbs!). Gently fold the chopped Oreos into the cheesecake filling using a spatula. We want to distribute the Oreo pieces throughout the filling without overmixing.
- Whip the Heavy Cream: In a separate clean and cold bowl, pour in the cold heavy whipping cream. Using the electric mixer with the whisk attachment (or clean beaters), beat on medium-high speed until stiff peaks form. This means when you lift the beaters, the whipped cream holds its shape and stands up in peaks. Be careful not to overwhip, or you’ll end up with butter!
- Fold in Whipped Cream: Gently fold the whipped cream into the cream cheese mixture in two additions. Use a spatula and fold in a figure-eight motion to maintain the airiness of the whipped cream. This step is crucial for achieving a light and fluffy cheesecake texture.
- Fill the Muffin Cups: Spoon the cheesecake filling evenly over the prepared Oreo crusts in the muffin cups. Fill each cup almost to the top, leaving a little space for the topping if desired. You can use a spoon or a piping bag (if you want a neater look) to fill the cups.
- Chill to Set: Cover the muffin tin with plastic wrap or foil and refrigerate for at least 4 hours, or preferably overnight, to allow the cheesecake cups to set completely. Chilling time is essential for the cheesecake to firm up and for the flavors to meld together beautifully. Overnight chilling is highly recommended for the best texture and taste.
- Garnish and Serve: Once the cheesecake cups are fully chilled and set, gently remove them from the muffin tin. If using paper liners, simply peel them away. If using silicone liners, they should pop out easily. Decorate the tops of the cheesecake cups as desired. You can use the remaining Oreo crumbs (from the leftover Oreos or you can crush a few more), whipped cream, chocolate shavings, or a drizzle of chocolate syrup. Serve immediately and enjoy these delightful No-Bake Oreo Cheesecake Cups!
Nutrition
- Serving Size: one normal portion
- Calories: 320
- Fat: 22g


