")


There are some recipes that just instantly become family legends, the ones requested week after week, the ones that bring genuine smiles to everyone’s faces. For us, this Quick Pudding Parfait recipe is exactly that. I remember the first time I whipped these up – it was a frantic Tuesday evening, homework was dragging on, dinner was a bit rushed, and I needed a guaranteed win for dessert without spending hours in the kitchen. I grabbed a box of instant pudding, some leftover cookies, and the tub of whipped topping hiding in the fridge. Honestly, my expectations were modest. Yet, watching my kids’ eyes light up as they saw the pretty layers in the glasses, and then hearing the contented silence followed by demands for seconds, I knew I’d stumbled onto something special. It wasn’t just the kids; my husband, who usually prefers more complex desserts, raved about the simple, satisfying combination of creamy pudding, crunchy cookie bits, and light whipped cream. Since then, these parfaits have become our go-to for everything from easy weeknight treats to potluck contributions and even casual dinner party desserts. They look incredibly impressive for the minimal effort involved, and the sheer speed at which they come together feels like a magic trick. This recipe isn’t just about dessert; it’s about creating little moments of joy, quickly and effortlessly.
Ingredients
Here’s what you’ll need to assemble these delightful and speedy pudding parfaits. The beauty lies in the simplicity and flexibility of these components:
- Instant Vanilla Pudding Mix – 1 (3.4 oz / 96g) package: This is the heart of our parfait, providing a sweet, creamy base. Vanilla is classic, but feel free to substitute with chocolate, butterscotch, cheesecake, or any flavor your heart desires! Ensure it’s instant pudding for true speed.
- Cold Milk – 2 cups (480ml): Essential for activating the instant pudding mix. Whole milk yields the richest result, but 2%, 1%, or even skim milk will work. Ensure it’s very cold for the best set.
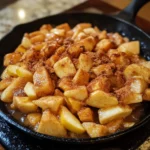
- Crushed Cookies – 1 to 1.5 cups (approx. 10-15 cookies, depending on size): This adds the crucial textural contrast. Classic choices include Oreos (cream removed or left in), vanilla wafers, shortbread cookies, graham crackers, or even chocolate chip cookies. Crush them to your desired consistency – chunky for more texture, fine for a sand-like layer.
- Whipped Topping – 8 oz (225g) container, thawed: Provides a light, airy counterpoint to the denser pudding. You can use store-bought frozen whipped topping (like Cool Whip), stabilized whipped cream from a can, or whip your own heavy cream with a touch of sugar and vanilla until stiff peaks form.
- Optional Garnishes: Fresh berries (strawberries, raspberries, blueberries), mini chocolate chips, chocolate shavings, sprinkles, a drizzle of caramel or chocolate sauce, a single whole cookie, or a sprig of mint. These add visual appeal and an extra flavor dimension.
Instructions
Follow these simple steps to create your delicious Quick Pudding Parfaits in minutes. The process is straightforward and perfect for involving kids in the kitchen!
- Prepare the Pudding: In a medium-sized bowl, combine the instant pudding mix and the cold milk. Whisk vigorously for about 2 minutes, or until the mixture begins to thicken noticeably. Ensure there are no dry lumps remaining. The pudding should be smooth and starting to set. Let it stand for about 5 minutes to thicken further – this short rest makes a surprising difference in the final texture.
- Prepare the Cookie Crumbs: While the pudding is setting, place your chosen cookies in a sturdy zip-top bag. Seal the bag, removing most of the air. Using a rolling pin, mallet, or even the bottom of a heavy glass, crush the cookies into coarse crumbs. Aim for a mix of finer pieces and slightly larger chunks for optimal texture. Alternatively, you can pulse them a few times in a food processor, being careful not to turn them into dust. Set aside.
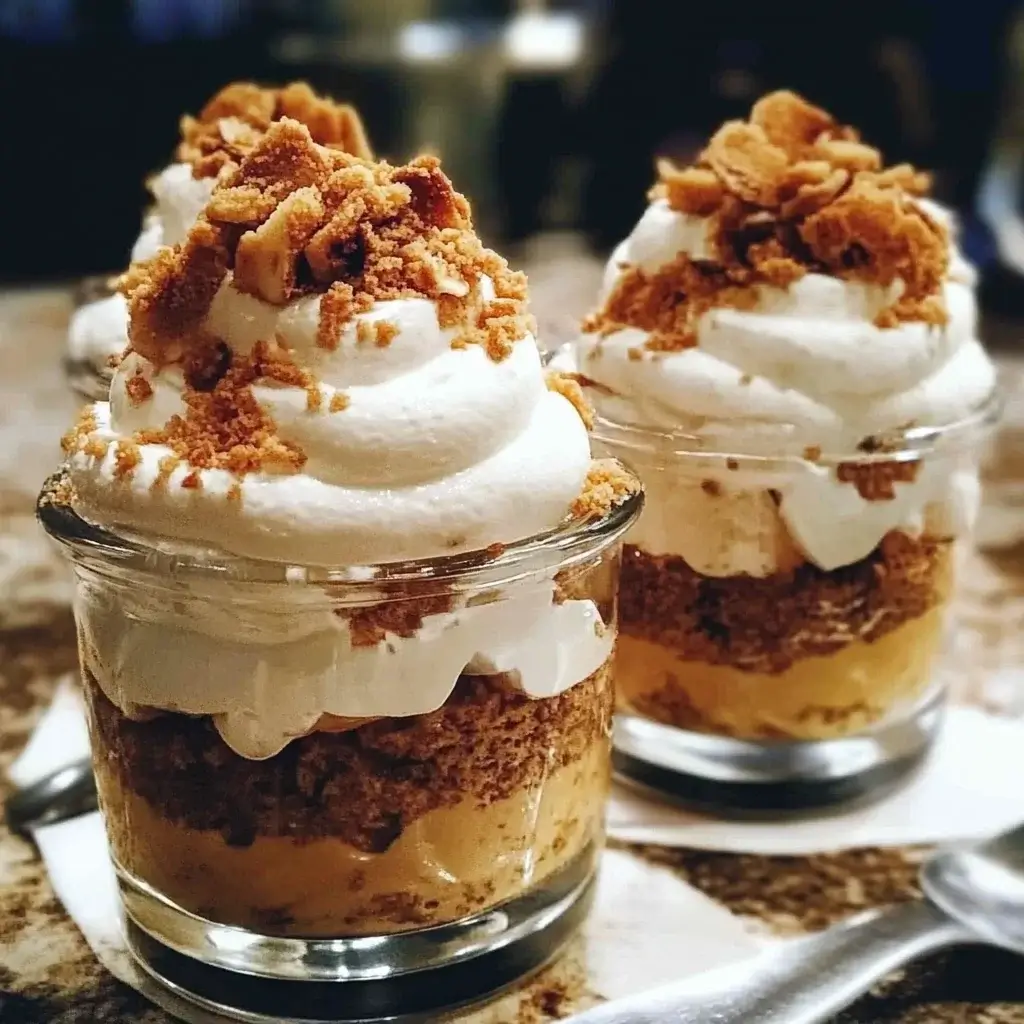
- Choose Your Serving Vessels: Select 4-6 individual serving glasses, small bowls, or jars. Clear glass works best to showcase the attractive layers, but any individual serving dish will do. Short, wide glasses or stemless wine glasses are excellent choices.
- Begin Layering – First Cookie Layer: Spoon about 1-2 tablespoons of the crushed cookie crumbs into the bottom of each glass. Gently spread them out to create an even base layer. This foundation provides that delightful crunch right from the first spoonful.
- Add the First Pudding Layer: Carefully spoon a layer of the prepared pudding over the cookie crumbs in each glass. Aim for roughly ¼ to ⅓ of the pudding mixture per glass for this layer, depending on how many layers you plan. Try to spoon it gently against the side of the glass first and then fill inwards to maintain neat layers and avoid disturbing the crumbs too much.
- Add the First Whipped Topping Layer: Dollop or pipe a layer of thawed whipped topping over the pudding. Be gentle as you spread it to keep the layers distinct. Use slightly less whipped topping than pudding for a balanced flavor profile.
- Repeat the Layers: Continue layering in the same order – crushed cookies, pudding, whipped topping – until you reach near the top of the glasses or run out of ingredients. Typically, two full sets of layers (cookie-pudding-topping) work well for standard-sized glasses. Ensure you finish with a layer of whipped topping for the best presentation.
- Garnish (Optional but Recommended): Once layering is complete, add your desired garnish. A sprinkle of leftover cookie crumbs, a few fresh berries, some chocolate shavings, or a dollop of extra whipped topping with a single perfect berry on top can elevate the look significantly.
- Chill (Optional but Enhances Flavor): While these parfaits can be served immediately (living up to their “quick” name!), chilling them in the refrigerator for at least 30 minutes allows the flavors to meld beautifully and the pudding to set fully. If time permits, an hour is even better.
- Serve and Enjoy: Serve the parfaits chilled. Provide long spoons so guests can easily reach all the delicious layers.
Nutrition Facts
- Servings: 4-6 individual parfaits (depending on glass size and layer thickness)
- Calories per serving: Approximately 350-500 kcal (This is a wide estimate and highly dependent on the specific type of cookies, milk fat percentage, and whether homemade or store-bought whipped topping is used.)
Here are estimates for a few key nutritional components per serving:
- Fat: Contains moderate to high fat content, primarily from the milk (if whole), cookies, and whipped topping. Can be reduced by using lower-fat milk and lighter whipped topping options.
- Saturated Fat: A significant portion of the fat content may be saturated, especially if using whole milk, butter-rich cookies, or traditional whipped topping.
- Carbohydrates: High in carbohydrates, mainly from the sugar in the pudding mix, cookies, and whipped topping, as well as the starches in the pudding and cookies.
- Sugar: These parfaits are typically high in sugar, contributing significantly to the calorie count. Using sugar-free pudding mix and less sweet cookies can help reduce this.
- Protein: Offers a small amount of protein, primarily from the milk used to make the pudding.
(Disclaimer: Nutritional information is an estimate only and will vary based on the exact ingredients, brands, and quantities used. For precise information, calculate based on your specific components.)
Preparation Time
These Quick Pudding Parfaits truly live up to their name!
- Active Preparation Time: 10-15 minutes. This includes whisking the pudding, crushing the cookies, and assembling the layers.
- Setting/Chilling Time (Optional but Recommended): 30 minutes to 1 hour. While edible immediately, chilling significantly improves the texture and allows flavors to meld.
Total time from start to serving can be as little as 15 minutes if served immediately, or around 45-75 minutes if chilled. This makes it one of the fastest layered desserts you can prepare!
How to Serve
Serving these Quick Pudding Parfaits is all about presentation and enhancing the enjoyment of the distinct layers. Here are some ideas:
- Glassware Choice:
- Individual Glasses: The classic choice. Use clear glasses (like stemless wine glasses, highball glasses, small tumblers, or even mason jars) to showcase the beautiful layers.
- Martini or Coupe Glasses: For a more elegant, sophisticated presentation suitable for dinner parties.
- Small Bowls: If you don’t have suitable glasses, small dessert bowls work perfectly well.
- Trifle Bowl: For serving a crowd, you can assemble one large parfait in a trifle bowl. Provide a large serving spoon.
- Temperature:
- Chilled is Best: Serve these parfaits cold, directly from the refrigerator. The chill enhances the creamy texture of the pudding and the refreshing quality of the whipped topping.
- Garnishes (The Finishing Touch):
- Cookie Dust or Crumbs: A sprinkle of extra crushed cookies on top reinforces the flavor profile.
- Fresh Fruit: Bright berries like strawberries (sliced or whole), raspberries, blueberries, or even sliced bananas add freshness and color.
- Chocolate: Mini chocolate chips, grated chocolate shavings (dark, milk, or white), or a drizzle of chocolate syrup add decadence.
- Caramel or Butterscotch Sauce: A drizzle adds another layer of sweet complexity, especially good with vanilla or butterscotch pudding.
- Nuts: Toasted chopped nuts (like almonds, pecans, or walnuts) can add a sophisticated crunch if desired (ensure no allergies!).
- Sprinkles: Fun for kids’ parties or festive occasions.
- Mint Sprig: A single sprig of fresh mint adds a touch of green and elegance.
- Whole Mini Cookie: Placing a small whole cookie (like a mini Oreo or Nilla wafer) on top or tucked into the whipped cream looks charming.
- Occasions:
- Weeknight Treat: Perfect for a quick and easy dessert after dinner.
- Kids’ Parties: Always a hit with children – easy to eat and customizable with fun toppings.
- Potlucks and Barbecues: Simple to transport (assemble just before leaving or at the venue if possible) and serve in individual portions.
- Casual Dinner Parties: Looks impressive with minimal effort, freeing you up to focus on the main course.
- DIY Parfait Bar: Set out bowls of pudding, whipped topping, various crushed cookies, fruits, and other toppings, and let guests assemble their own parfaits!
- Utensils:
- Long Spoons: Essential for reaching the bottom layers easily, especially in taller glasses. Iced tea spoons or parfait spoons are ideal.
Additional Tips
Unlock the full potential of your Quick Pudding Parfaits with these handy tips and tricks:
- Flavor Fusion Fun: Don’t stick to just vanilla! Explore different instant pudding flavors like chocolate, butterscotch, cheesecake, lemon, or pistachio. Pair them with complementary cookies: chocolate pudding with peanut butter cookies, lemon pudding with shortbread, cheesecake pudding with graham crackers. Mix and match to create endless variations. You can even layer different pudding flavors in one parfait!
- Master the Make-Ahead: While best assembled close to serving time to prevent soggy cookies, you can prep components ahead. Make the pudding and store it covered in the fridge (press plastic wrap directly onto the surface to prevent a skin). Crush the cookies and store them in an airtight container. Keep whipped topping chilled. Assemble up to 2-4 hours before serving for optimal results; any longer and the cookie layers might soften considerably.
- Texture Triumph: Introduce more textures! Consider adding a layer of chopped fresh fruit (like diced strawberries or bananas) between the pudding and whipped topping. A sprinkle of mini chocolate chips or toasted chopped nuts within the layers (not just on top) can add surprising crunch. A thin layer of fruit jam or preserves can also add moisture and flavor complexity.
- Soggy Layer Solutions: The enemy of a good parfait is a soggy cookie layer. To minimize this:
- Use chunkier cookie crumbs rather than fine dust.
- Assemble just before serving or only a couple of hours ahead.
- Consider using cookies that hold up better to moisture, like shortbread or biscotti crumbs (crushed finely).
- Create a slight barrier: ensure the pudding or whipped topping layer fully covers the cookie layer below it.
- Presentation Perfection: Neat layers make a big difference. Use a piping bag (or a zip-top bag with the corner snipped off) to pipe the pudding and whipped topping layers for cleaner lines, especially against the glass. Wipe the inside rim of the glass with a paper towel if any smudges occur during layering.
- Kid-Friendly Factor: Get children involved! They can help crush cookies (in a sealed bag, it’s great fun), layer the ingredients (embrace the mess!), and choose their favorite garnishes. It makes the dessert even more special for them. Use sturdy, non-breakable cups or jars if younger kids are handling them.
- Dietary Diversions: Adapt the recipe to suit dietary needs. Use dairy-free milk (like almond, soy, or oat milk – ensure it works well with your chosen instant pudding brand, some set better than others) and a dairy-free whipped topping (coconut-based or almond-based toppings work well). Opt for gluten-free cookies for a GF version. Use sugar-free instant pudding mix and low-sugar cookies for a lower-sugar option, though taste and texture might vary slightly.
- Beyond Cookies: Think outside the cookie box! Use crumbled brownies, leftover cake pieces (pound cake or angel food cake work well), or even layers of granola instead of crushed cookies for a different twist on the texture and flavor profile. This is a fantastic way to use up leftover baked goods.
FAQ Section
Here are answers to some frequently asked questions about making Quick Pudding Parfaits:
- Q: Can I use cook-and-serve pudding mix instead of instant?
A: While you can, it defeats the “quick” aspect of this recipe. Cook-and-serve pudding requires cooking on the stovetop and significant cooling time (at least an hour or two) before it’s thick enough to layer. If you have the time and prefer the taste/texture of cooked pudding, it’s definitely an option, but instant pudding is key for speed. - Q: How long will these pudding parfaits last in the refrigerator?
A: Ideally, these parfaits are best enjoyed within a few hours of assembly, or up to 24 hours maximum if refrigerated. The main issue is that the cookie layers will absorb moisture from the pudding and whipped topping over time, becoming soft and losing their crunch. While still edible after a day, the texture won’t be optimal. - Q: Can I freeze pudding parfaits?
A: Freezing is generally not recommended. Instant pudding can become watery or have an altered texture upon thawing. Whipped topping (especially store-bought) might separate, and the cookie layers will become very soggy. It’s best to enjoy them fresh. - Q: What are the best types of cookies to use for the crumb layer?
A: This depends on preference! Popular choices include:- Oreos: Classic chocolate flavor, great texture (use with or without cream).
- Nilla Wafers: Mild vanilla flavor, creates a softer crumb layer.
- Graham Crackers: Classic cheesecake base flavor, pairs well with many puddings.
- Shortbread Cookies: Buttery flavor, holds up relatively well to moisture.
- Chocolate Chip Cookies: Adds extra chocolatey bits (crush well).
- Biscoff Cookies: Distinct caramelized spice flavor.
Experiment to find your favorite!
- Q: How do I prevent the layers from becoming messy or mixing together?
A: Be gentle during assembly! Spoon or pipe ingredients carefully, especially near the edges of the glass. Letting the pudding set for the initial 5 minutes helps it hold its shape better. Chilling the parfaits also helps the layers firm up and stay distinct. Avoid overly liquidy additions. - Q: How can I make these pudding parfaits a bit healthier?
A: You can make several swaps:- Use sugar-free or reduced-sugar instant pudding mix.
- Use skim or low-fat milk.
- Choose lower-sugar cookies or use less of them.
- Use light or fat-free whipped topping.
- Incorporate layers of fresh fruit for natural sweetness and nutrients.
- Consider using Greek yogurt (plain or vanilla) instead of or mixed with the whipped topping for added protein and less fat/sugar.
Keep in mind significant changes will alter the final taste and texture.
- Q: Can I make this recipe dairy-free or vegan?
A: Yes! Use a plant-based milk (almond, soy, oat – check pudding package compatibility) for the instant pudding. Ensure the instant pudding mix itself is vegan (many are accidentally vegan, but check ingredients). Use dairy-free/vegan cookies and a vegan whipped topping (readily available in most supermarkets, often coconut or almond-based). - Q: Can I make one large parfait in a trifle bowl instead of individual servings?
A: Absolutely! A trifle bowl is perfect for serving a crowd. Simply double or triple the recipe ingredients based on the size of your bowl. Layer the ingredients in the same order (cookie crumbs, pudding, whipped topping, repeat) in the large bowl. This makes a stunning centerpiece dessert. Ensure you have a large serving spoon available.
Quick Pudding Parfaits Recipe
Ingredients
Here’s what you’ll need to assemble these delightful and speedy pudding parfaits. The beauty lies in the simplicity and flexibility of these components:
- Instant Vanilla Pudding Mix – 1 (3.4 oz / 96g) package: This is the heart of our parfait, providing a sweet, creamy base. Vanilla is classic, but feel free to substitute with chocolate, butterscotch, cheesecake, or any flavor your heart desires! Ensure it’s instant pudding for true speed.
- Cold Milk – 2 cups (480ml): Essential for activating the instant pudding mix. Whole milk yields the richest result, but 2%, 1%, or even skim milk will work. Ensure it’s very cold for the best set.
- Crushed Cookies – 1 to 1.5 cups (approx. 10-15 cookies, depending on size): This adds the crucial textural contrast. Classic choices include Oreos (cream removed or left in), vanilla wafers, shortbread cookies, graham crackers, or even chocolate chip cookies. Crush them to your desired consistency – chunky for more texture, fine for a sand-like layer.
- Whipped Topping – 8 oz (225g) container, thawed: Provides a light, airy counterpoint to the denser pudding. You can use store-bought frozen whipped topping (like Cool Whip), stabilized whipped cream from a can, or whip your own heavy cream with a touch of sugar and vanilla until stiff peaks form.
- Optional Garnishes: Fresh berries (strawberries, raspberries, blueberries), mini chocolate chips, chocolate shavings, sprinkles, a drizzle of caramel or chocolate sauce, a single whole cookie, or a sprig of mint. These add visual appeal and an extra flavor dimension.
Instructions
Follow these simple steps to create your delicious Quick Pudding Parfaits in minutes. The process is straightforward and perfect for involving kids in the kitchen!
- Prepare the Pudding: In a medium-sized bowl, combine the instant pudding mix and the cold milk. Whisk vigorously for about 2 minutes, or until the mixture begins to thicken noticeably. Ensure there are no dry lumps remaining. The pudding should be smooth and starting to set. Let it stand for about 5 minutes to thicken further – this short rest makes a surprising difference in the final texture.
- Prepare the Cookie Crumbs: While the pudding is setting, place your chosen cookies in a sturdy zip-top bag. Seal the bag, removing most of the air. Using a rolling pin, mallet, or even the bottom of a heavy glass, crush the cookies into coarse crumbs. Aim for a mix of finer pieces and slightly larger chunks for optimal texture. Alternatively, you can pulse them a few times in a food processor, being careful not to turn them into dust. Set aside.
- Choose Your Serving Vessels: Select 4-6 individual serving glasses, small bowls, or jars. Clear glass works best to showcase the attractive layers, but any individual serving dish will do. Short, wide glasses or stemless wine glasses are excellent choices.
- Begin Layering – First Cookie Layer: Spoon about 1-2 tablespoons of the crushed cookie crumbs into the bottom of each glass. Gently spread them out to create an even base layer. This foundation provides that delightful crunch right from the first spoonful.
- Add the First Pudding Layer: Carefully spoon a layer of the prepared pudding over the cookie crumbs in each glass. Aim for roughly ¼ to ⅓ of the pudding mixture per glass for this layer, depending on how many layers you plan. Try to spoon it gently against the side of the glass first and then fill inwards to maintain neat layers and avoid disturbing the crumbs too much.
- Add the First Whipped Topping Layer: Dollop or pipe a layer of thawed whipped topping over the pudding. Be gentle as you spread it to keep the layers distinct. Use slightly less whipped topping than pudding for a balanced flavor profile.
- Repeat the Layers: Continue layering in the same order – crushed cookies, pudding, whipped topping – until you reach near the top of the glasses or run out of ingredients. Typically, two full sets of layers (cookie-pudding-topping) work well for standard-sized glasses. Ensure you finish with a layer of whipped topping for the best presentation.
- Garnish (Optional but Recommended): Once layering is complete, add your desired garnish. A sprinkle of leftover cookie crumbs, a few fresh berries, some chocolate shavings, or a dollop of extra whipped topping with a single perfect berry on top can elevate the look significantly.
- Chill (Optional but Enhances Flavor): While these parfaits can be served immediately (living up to their “quick” name!), chilling them in the refrigerator for at least 30 minutes allows the flavors to meld beautifully and the pudding to set fully. If time permits, an hour is even better.
- Serve and Enjoy: Serve the parfaits chilled. Provide long spoons so guests can easily reach all the delicious layers.
Nutrition
- Serving Size: one normal portion
- Calories: 500