")

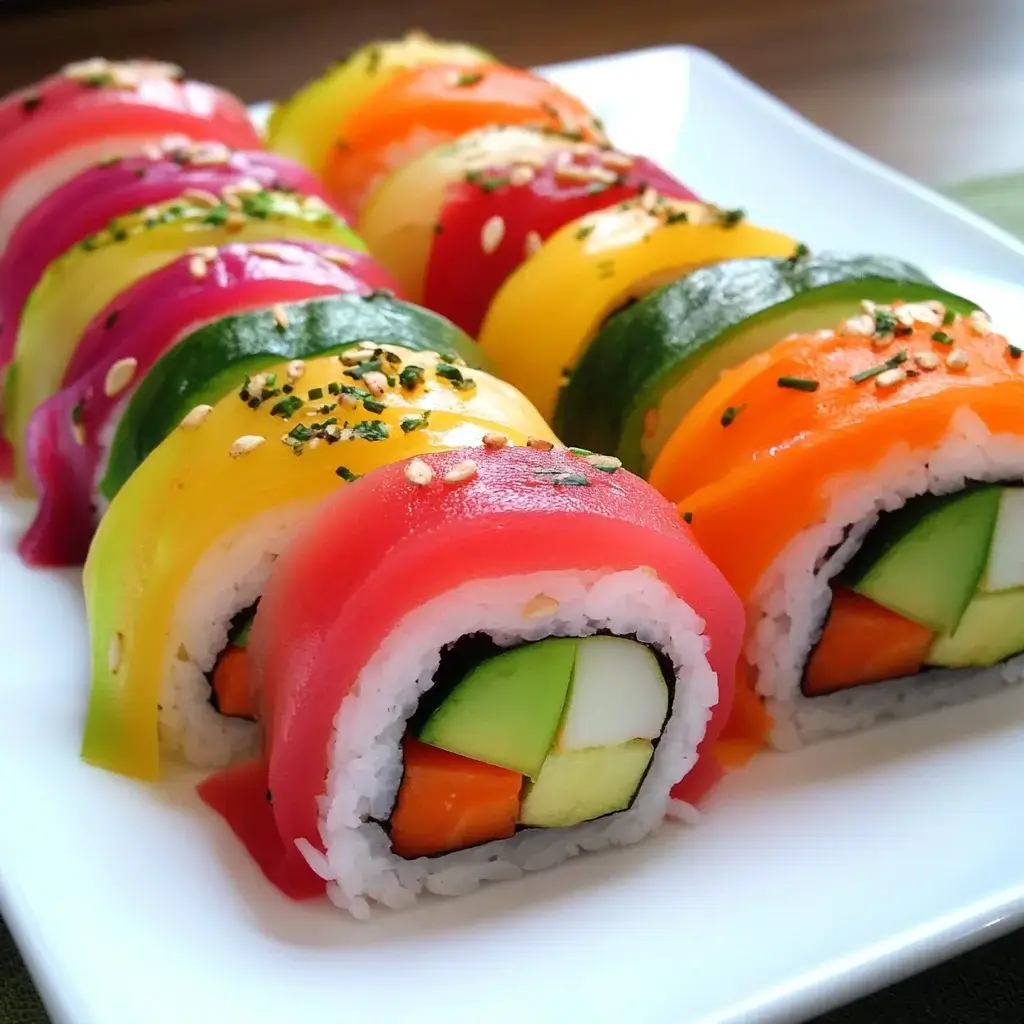

It’s no secret in our house that weeknight dinners can sometimes feel a little… lackluster. But last week, I decided to shake things up and introduce a dish that was not only healthy and vibrant but also a whole lot of fun to make and eat: Rainbow Veggie Sushi Rolls! Honestly, I wasn’t sure how the family would react. Sushi at home? With vegetables? Turns out, it was a resounding success! Even my pickiest eater, who usually shies away from anything green, was captivated by the colorful presentation and the surprisingly delicious combination of flavors and textures. From the satisfying chew of the sushi rice to the crisp freshness of the rainbow of veggies, every bite was a delight. The best part? It was a wonderfully interactive meal. We all gathered around the kitchen island, rolling our own sushi, experimenting with different veggie combinations, and laughing as we inevitably made a few (perfectly imperfect) rolls. This recipe has officially become a family favorite, proving that healthy eating can be exciting, engaging, and absolutely bursting with flavor. If you’re looking for a fun, healthy, and visually stunning meal, you absolutely have to try these Rainbow Veggie Sushi Rolls. Get ready to roll!
Ingredients for Rainbow Veggie Sushi Rolls
Here’s everything you’ll need to create your own vibrant and delicious Rainbow Veggie Sushi Rolls:
- Sushi Rice: 2 cups of uncooked sushi rice. This short-grain rice is essential for achieving the sticky texture needed for sushi rolls.
- Rice Vinegar: 1/4 cup rice vinegar. Used to season the cooked sushi rice, adding a tangy and slightly sweet flavor that’s characteristic of sushi.
- Sugar: 2 tablespoons granulated sugar. Balances the acidity of the rice vinegar and adds a subtle sweetness to the sushi rice.
- Salt: 1 teaspoon salt. Enhances the flavors and seasons the sushi rice.
- Nori Sheets: 5-7 sheets of nori seaweed. These dried seaweed sheets are the wrappers for your sushi rolls, providing a slightly salty and umami flavor.
- Carrots: 1 large carrot, julienned. Adds a vibrant orange color and a sweet, crunchy texture.
- Cucumber: 1 cucumber, julienned and seeded. Provides a refreshing coolness and crispness to the rolls.
- Red Bell Pepper: 1 red bell pepper, julienned and seeded. Contributes a sweet, slightly fruity flavor and a bright red color.
- Yellow Bell Pepper: 1 yellow bell pepper, julienned and seeded. Offers a milder, slightly tangy flavor and a sunny yellow hue.
- Avocado: 2 ripe avocados, thinly sliced. Adds a creamy, buttery texture and a rich, mild flavor.
- Purple Cabbage: 1/4 head of purple cabbage, thinly shredded. Provides a beautiful purple color and a slightly peppery, crunchy texture.
- Edamame (shelled): 1 cup shelled edamame, cooked or steamed. Adds a vibrant green color, a slightly nutty flavor, and a boost of protein.
- Optional Fillings: Consider adding other colorful veggies like yellow squash, zucchini, sprouts, or pickled radish (daikon).
- Soy Sauce, Wasabi, and Ginger (for serving): Classic sushi accompaniments for dipping and palate cleansing.
- Sesame Seeds (optional garnish): Toasted white or black sesame seeds for a nutty flavor and visual appeal.
- Spicy Mayo or Sriracha Mayo (optional): For adding a creamy and spicy kick.
Instructions for Making Rainbow Veggie Sushi Rolls
Follow these step-by-step instructions to create your own beautiful and delicious Rainbow Veggie Sushi Rolls:
1. Prepare the Sushi Rice:
- Rinse the Rice: Place the sushi rice in a fine-mesh sieve and rinse under cold running water until the water runs clear. This removes excess starch and helps achieve the desired sticky texture.
- Cook the Rice: Combine the rinsed rice with 2 cups of water in a medium saucepan. Bring to a boil over high heat, then reduce heat to low, cover, and simmer for 18-20 minutes, or until all the water is absorbed and the rice is cooked through. Do not lift the lid during cooking.
- Season the Rice: While the rice is cooking, prepare the sushi vinegar mixture. In a small saucepan, combine the rice vinegar, sugar, and salt. Heat over low heat, stirring until the sugar and salt are dissolved. Do not boil.
- Cool and Mix: Once the rice is cooked, remove it from the heat and let it stand, covered, for 10 minutes. Gently transfer the rice to a large, non-metallic bowl (wooden or glass is ideal). Pour the warm sushi vinegar mixture over the rice and gently fold it in using a rice paddle or spatula, being careful not to mash the rice. Fan the rice while mixing to help it cool down quickly to lukewarm temperature. This cooling process is important for achieving the right texture for sushi.
2. Prepare the Vegetables:
- Wash and Prep Veggies: Wash and thoroughly dry all your chosen vegetables.
- Julienne or Slice: Cut the carrots, cucumber, red bell pepper, and yellow bell pepper into thin, even julienne strips. Thinly slice the avocado and shred the purple cabbage. If using edamame, ensure it’s cooked and shelled. Having all vegetables prepped and ready before you start rolling will make the process much smoother.
3. Set Up Your Sushi Rolling Station:
- Gather Supplies: You’ll need a bamboo sushi rolling mat (makisu), plastic wrap, a small bowl of water (for wetting your fingers), the prepared sushi rice, nori sheets, and your prepped vegetables.
- Wrap the Mat: Place the bamboo sushi rolling mat on a clean surface and cover it with plastic wrap. This prevents the rice from sticking to the mat and makes cleanup easier.
4. Assemble the Sushi Rolls:
- Place Nori: Place a sheet of nori on the plastic-wrapped sushi mat, shiny side down.
- Add Rice: Take a handful of seasoned sushi rice (about ¾ cup) and gently spread it evenly over the nori sheet, leaving about an inch of space at the top edge of the nori furthest from you. Wet your fingers with water to prevent the rice from sticking to your hands. The rice layer should be thin and even.
- Create a Well: Using your fingers, make a shallow horizontal indentation across the center of the rice, closer to you. This well will help hold the fillings in place.
- Add Fillings: Arrange your rainbow vegetables in neat rows within the well you created in the rice. Get creative with your color combinations! Don’t overfill, as it will make rolling difficult. Aim for a balanced mix of textures and flavors in each roll.
- Roll the Sushi: Lift the edge of the sushi mat closest to you and begin to roll tightly, tucking the edge of the nori under the fillings. Continue rolling forward, using the mat to shape and compress the roll. Once rolled, firmly press the mat around the sushi roll to tighten and shape it into a cylinder.
- Seal the Roll: At the top edge of the nori (the un-riced edge), dampen it slightly with a little water. Continue rolling to seal the edge.
- Repeat: Repeat the process with the remaining nori sheets, rice, and vegetables.
5. Slice and Serve:
- Slice the Rolls: Using a very sharp, wet knife, cut each sushi roll into 6-8 even pieces. Wipe the knife with a damp cloth between slices to prevent rice from sticking.
- Arrange and Garnish: Arrange the sushi rolls on a serving platter. Garnish with sesame seeds if desired.
- Serve Immediately: Serve immediately with soy sauce, wasabi, pickled ginger, and your choice of dipping sauces like spicy mayo. Enjoy your beautiful and delicious Rainbow Veggie Sushi Rolls!
Nutrition Facts for Rainbow Veggie Sushi Rolls (per serving – approx. 2 rolls)
- Serving Size: Approximately 2 sushi rolls
- Calories: 250-350 kcal (estimated, varies based on fillings and rice amount)
- Protein: 5-7g
Please note: Nutritional information is an estimate and can vary based on specific ingredients and portion sizes.
Preparation Time for Rainbow Veggie Sushi Rolls
- Prep Time: 45 minutes (includes vegetable prep and rice seasoning)
- Cook Time: 20 minutes (for sushi rice)
- Total Time: Approximately 1 hour and 5 minutes
This includes active preparation time for chopping vegetables, cooking and seasoning the rice, and assembling the sushi rolls. Allow for a little extra time if it’s your first time making sushi. The rice cooking time is mostly hands-off simmering.
How to Serve Rainbow Veggie Sushi Rolls
Here are some delicious and appealing ways to serve your Rainbow Veggie Sushi Rolls:
- Classic Sushi Platter: Arrange the sushi rolls on a beautiful platter. Garnish with extra julienned vegetables, edamame, and sesame seeds for a visually stunning presentation.
- Dipping Sauces: Serve with traditional soy sauce, wasabi, and pickled ginger. Offer a variety of dipping sauces like spicy mayo, sriracha mayo, teriyaki sauce, or ponzu sauce to cater to different tastes.
- Miso Soup: Pair your sushi rolls with a warm bowl of miso soup for a complete and satisfying Japanese-inspired meal.
- Edamame Side: Serve a side of steamed or roasted edamame sprinkled with sea salt as a healthy and flavorful accompaniment.
- Seaweed Salad: A refreshing seaweed salad complements the sushi rolls perfectly, adding a tangy and slightly salty element.
- Party Appetizer: Rainbow Veggie Sushi Rolls are ideal as a vibrant and healthy appetizer for parties or gatherings. Arrange them attractively on a platter for guests to enjoy.
- Bento Box Lunch: Pack sushi rolls into a bento box for a fun and nutritious lunch. Include other sides like fruit, edamame, or a small salad.
- DIY Sushi Bar: Set up a DIY sushi bar with all the ingredients laid out and let everyone roll their own sushi for an interactive and fun meal experience.
Additional Tips for Perfect Rainbow Veggie Sushi Rolls
Here are 8 helpful tips to ensure your Rainbow Veggie Sushi Rolls are a success:
- Use Sushi Rice (Short-Grain): Don’t substitute with long-grain rice. Sushi rice is specifically designed to be sticky, which is crucial for holding the rolls together.
- Rinse Rice Thoroughly: Rinsing the rice until the water runs clear removes excess starch, preventing the rice from becoming too gummy and improving its texture.
- Don’t Overcook or Undercook the Rice: Follow the cooking instructions carefully for perfectly cooked, slightly sticky rice. Overcooked rice will be mushy, and undercooked rice will be too hard.
- Cool Rice Properly: Allowing the rice to cool to lukewarm after seasoning is essential. Warm rice will make the nori soggy and difficult to handle. Fanning helps speed up the cooling process.
- Wet Your Hands: Keep a small bowl of water nearby and wet your fingers frequently while handling the sushi rice. This prevents the rice from sticking to your hands and makes it easier to work with.
- Don’t Overfill the Rolls: Resist the urge to overstuff your sushi rolls. Too many fillings will make them difficult to roll and can cause them to break apart. A moderate amount of filling ensures a well-formed roll.
- Roll Tightly and Evenly: Use the bamboo mat to roll the sushi tightly and evenly. This creates a compact roll that is easier to slice and eat. Apply gentle pressure while rolling to shape the roll.
- Use a Sharp, Wet Knife for Slicing: A sharp, wet knife is key to slicing sushi rolls cleanly without tearing or squashing them. Wet the knife before each cut and wipe it clean as needed.
Frequently Asked Questions (FAQ) about Rainbow Veggie Sushi Rolls
Here are 8 frequently asked questions about making Rainbow Veggie Sushi Rolls:
Q1: Can I make these sushi rolls ahead of time?
A: Sushi is best enjoyed fresh. However, you can prepare the sushi rice and vegetables ahead of time. Assemble the rolls no more than a couple of hours before serving to maintain the best texture and prevent the nori from becoming soggy. Store assembled rolls in the refrigerator, covered with damp paper towels to prevent drying out.
Q2: What if I don’t have a bamboo sushi rolling mat?
A: While a bamboo mat makes rolling easier, you can still make sushi without one. Use a sheet of parchment paper or plastic wrap instead. Place the nori and rice on the paper/wrap, add fillings, and then carefully roll it tightly, using the paper/wrap to shape the roll.
Q3: Can I use different vegetables?
A: Absolutely! Feel free to customize your veggie sushi rolls with your favorite vegetables. Other great options include yellow squash, zucchini, asparagus spears (blanched), sweet potato (roasted), sprouts, and pickled daikon radish. Get creative and experiment with different colors and textures!
Q4: Is sushi rice the same as regular rice?
A: No, sushi rice is a specific type of short-grain rice that has a higher starch content. This starch is what gives sushi rice its characteristic sticky texture when cooked, which is essential for making sushi rolls that hold together. Regular long-grain rice will not work as well.
Q5: Can I make these rolls vegan?
A: Yes, this recipe is naturally vegan! Ensure your soy sauce is also vegan (some may contain honey or other non-vegan ingredients). All the listed ingredients are plant-based.
Q6: How do I prevent the rice from sticking to everything?
A: Wet your hands frequently with water while handling the sushi rice. This is the most effective way to prevent the rice from sticking to your hands and the rolling mat. You can also lightly dampen the rice paddle or spatula you use for mixing the rice.
Q7: What are some good dipping sauce alternatives to soy sauce?
A: If you are looking for soy sauce alternatives, try tamari (a gluten-free soy sauce), coconut aminos (soy-free and lower in sodium), or ponzu sauce (a citrus-based soy sauce). Spicy mayo, sriracha mayo, and teriyaki sauce are also delicious dipping options.
Q8: How long will leftover sushi rolls last?
A: Leftover sushi rolls are best consumed within 24 hours. Store them in an airtight container in the refrigerator. The quality and texture will degrade over time, as the rice can dry out and the nori can become soggy. It’s always best to enjoy sushi fresh for optimal taste and texture.

Rainbow Veggie Sushi Rolls
Ingredients
Here’s everything you’ll need to create your own vibrant and delicious Rainbow Veggie Sushi Rolls:
- Sushi Rice: 2 cups of uncooked sushi rice. This short-grain rice is essential for achieving the sticky texture needed for sushi rolls.
- Rice Vinegar: 1/4 cup rice vinegar. Used to season the cooked sushi rice, adding a tangy and slightly sweet flavor that’s characteristic of sushi.
- Sugar: 2 tablespoons granulated sugar. Balances the acidity of the rice vinegar and adds a subtle sweetness to the sushi rice.
- Salt: 1 teaspoon salt. Enhances the flavors and seasons the sushi rice.
- Nori Sheets: 5-7 sheets of nori seaweed. These dried seaweed sheets are the wrappers for your sushi rolls, providing a slightly salty and umami flavor.
- Carrots: 1 large carrot, julienned. Adds a vibrant orange color and a sweet, crunchy texture.
- Cucumber: 1 cucumber, julienned and seeded. Provides a refreshing coolness and crispness to the rolls.
- Red Bell Pepper: 1 red bell pepper, julienned and seeded. Contributes a sweet, slightly fruity flavor and a bright red color.
- Yellow Bell Pepper: 1 yellow bell pepper, julienned and seeded. Offers a milder, slightly tangy flavor and a sunny yellow hue.
- Avocado: 2 ripe avocados, thinly sliced. Adds a creamy, buttery texture and a rich, mild flavor.
- Purple Cabbage: 1/4 head of purple cabbage, thinly shredded. Provides a beautiful purple color and a slightly peppery, crunchy texture.
- Edamame (shelled): 1 cup shelled edamame, cooked or steamed. Adds a vibrant green color, a slightly nutty flavor, and a boost of protein.
- Optional Fillings: Consider adding other colorful veggies like yellow squash, zucchini, sprouts, or pickled radish (daikon).
- Soy Sauce, Wasabi, and Ginger (for serving): Classic sushi accompaniments for dipping and palate cleansing.
- Sesame Seeds (optional garnish): Toasted white or black sesame seeds for a nutty flavor and visual appeal.
- Spicy Mayo or Sriracha Mayo (optional): For adding a creamy and spicy kick.
Instructions
Follow these step-by-step instructions to create your own beautiful and delicious Rainbow Veggie Sushi Rolls:
1. Prepare the Sushi Rice:
- Rinse the Rice: Place the sushi rice in a fine-mesh sieve and rinse under cold running water until the water runs clear. This removes excess starch and helps achieve the desired sticky texture.
- Cook the Rice: Combine the rinsed rice with 2 cups of water in a medium saucepan. Bring to a boil over high heat, then reduce heat to low, cover, and simmer for 18-20 minutes, or until all the water is absorbed and the rice is cooked through. Do not lift the lid during cooking.
- Season the Rice: While the rice is cooking, prepare the sushi vinegar mixture. In a small saucepan, combine the rice vinegar, sugar, and salt. Heat over low heat, stirring until the sugar and salt are dissolved. Do not boil.
- Cool and Mix: Once the rice is cooked, remove it from the heat and let it stand, covered, for 10 minutes. Gently transfer the rice to a large, non-metallic bowl (wooden or glass is ideal). Pour the warm sushi vinegar mixture over the rice and gently fold it in using a rice paddle or spatula, being careful not to mash the rice. Fan the rice while mixing to help it cool down quickly to lukewarm temperature. This cooling process is important for achieving the right texture for sushi.
2. Prepare the Vegetables:
- Wash and Prep Veggies: Wash and thoroughly dry all your chosen vegetables.
- Julienne or Slice: Cut the carrots, cucumber, red bell pepper, and yellow bell pepper into thin, even julienne strips. Thinly slice the avocado and shred the purple cabbage. If using edamame, ensure it’s cooked and shelled. Having all vegetables prepped and ready before you start rolling will make the process much smoother.
3. Set Up Your Sushi Rolling Station:
- Gather Supplies: You’ll need a bamboo sushi rolling mat (makisu), plastic wrap, a small bowl of water (for wetting your fingers), the prepared sushi rice, nori sheets, and your prepped vegetables.
- Wrap the Mat: Place the bamboo sushi rolling mat on a clean surface and cover it with plastic wrap. This prevents the rice from sticking to the mat and makes cleanup easier.
4. Assemble the Sushi Rolls:
- Place Nori: Place a sheet of nori on the plastic-wrapped sushi mat, shiny side down.
- Add Rice: Take a handful of seasoned sushi rice (about ¾ cup) and gently spread it evenly over the nori sheet, leaving about an inch of space at the top edge of the nori furthest from you. Wet your fingers with water to prevent the rice from sticking to your hands. The rice layer should be thin and even.
- Create a Well: Using your fingers, make a shallow horizontal indentation across the center of the rice, closer to you. This well will help hold the fillings in place.
- Add Fillings: Arrange your rainbow vegetables in neat rows within the well you created in the rice. Get creative with your color combinations! Don’t overfill, as it will make rolling difficult. Aim for a balanced mix of textures and flavors in each roll.
- Roll the Sushi: Lift the edge of the sushi mat closest to you and begin to roll tightly, tucking the edge of the nori under the fillings. Continue rolling forward, using the mat to shape and compress the roll. Once rolled, firmly press the mat around the sushi roll to tighten and shape it into a cylinder.
- Seal the Roll: At the top edge of the nori (the un-riced edge), dampen it slightly with a little water. Continue rolling to seal the edge.
- Repeat: Repeat the process with the remaining nori sheets, rice, and vegetables.
5. Slice and Serve:
- Slice the Rolls: Using a very sharp, wet knife, cut each sushi roll into 6-8 even pieces. Wipe the knife with a damp cloth between slices to prevent rice from sticking.
- Arrange and Garnish: Arrange the sushi rolls on a serving platter. Garnish with sesame seeds if desired.
- Serve Immediately: Serve immediately with soy sauce, wasabi, pickled ginger, and your choice of dipping sauces like spicy mayo. Enjoy your beautiful and delicious Rainbow Veggie Sushi Rolls!
Nutrition
- Serving Size: one normal portion
- Calories: 350
- Protein: 7g