")

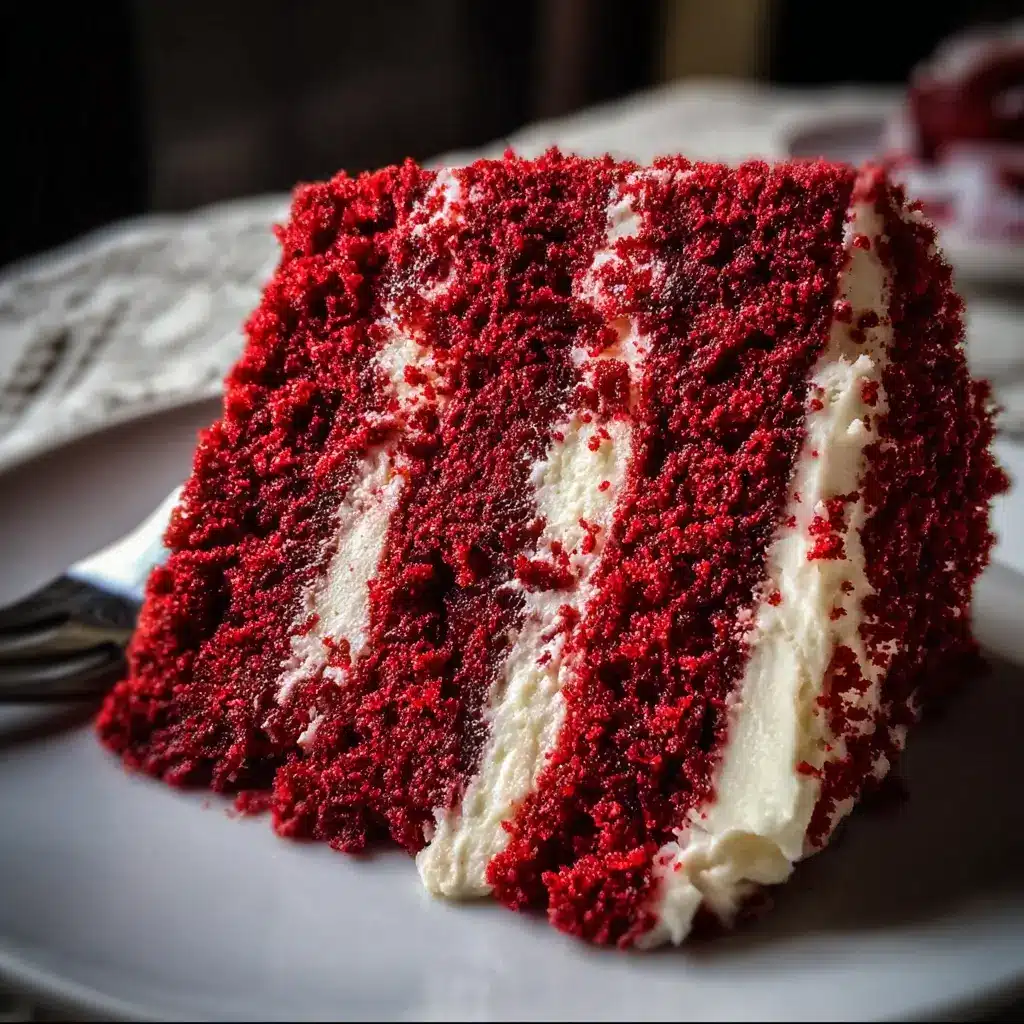

There are few desserts that command attention quite like a Red Velvet Cake. I remember the first time I decided to tackle this recipe from scratch. It was for my daughter’s birthday, and the pressure was on. I’d always been intimidated by its reputation for being finicky, but I was determined to create that iconic, dramatic crimson cake with its stark white, tangy cream cheese frosting. As I measured, sifted, and mixed, the kitchen filled with the gentle aroma of vanilla and cocoa. The moment of truth came when I swirled the red food coloring into the batter, watching it transform into a vibrant, velvety scarlet. The final cake was a showstopper. When we sliced into it, the crumb was impossibly soft and moist, and the flavor was a perfect symphony—not quite chocolate, not quite vanilla, but something uniquely delicious with a subtle, pleasant tang. My family devoured it, and the chorus of “This is the best cake I’ve ever had!” was the ultimate reward. This isn’t just a recipe; it’s a celebration in a cake pan, and I’m thrilled to share the exact steps that will make you the hero of your next special occasion.
Ingredients
This recipe is divided into two essential components: the tender cake and the luscious frosting. Using high-quality, room-temperature ingredients is crucial for achieving the perfect texture and flavor.
For the Ultimate Red Velvet Cake
- 2 ½ cups (300g) all-purpose flour: The structural foundation of our cake. Sifting is key to a light and airy crumb.
- 1 ½ cups (300g) granulated sugar: Provides sweetness and helps create a tender texture by creaming it with the butter.
- 2 tablespoons (15g) unsweetened natural cocoa powder: This adds the subtle, signature chocolatey note that defines red velvet flavor. Do not use Dutch-processed cocoa, as it will react differently with the leavening agents.
- 1 ½ teaspoons baking soda: The primary leavening agent that reacts with the acidic ingredients to give the cake its beautiful lift.
- 1 teaspoon salt: Balances the sweetness and enhances all the other flavors in the cake.
- 2 large eggs, at room temperature: Binds the ingredients together and adds richness. Room temperature eggs incorporate more easily into the batter.
- 1 ½ cups (360ml) vegetable oil: The secret to an incredibly moist and tender cake that stays fresh for days. Canola or other neutral oils work well too.
- 1 cup (240ml) buttermilk, at room temperature: This is non-negotiable for authentic red velvet. Its acidity tenderizes the gluten and activates the baking soda, creating a soft crumb and adding a characteristic tang.
- 1 tablespoon (15ml) white distilled vinegar: An extra boost of acidity to ensure the baking soda is fully activated, resulting in a light and fluffy cake.
- 2 teaspoons (10ml) pure vanilla extract: Adds a warm, aromatic depth of flavor that complements the cocoa and buttermilk.
- 1 to 2 tablespoons (15-30ml) liquid or gel red food coloring: The source of the cake’s iconic, dramatic color. Gel food coloring provides a more vibrant hue with less liquid.
For the Classic Cream Cheese Frosting
- 16 ounces (452g) full-fat block cream cheese, cold: The star of the frosting. Use cold, full-fat block cream cheese for the thickest, tangiest, and most stable frosting. Avoid the whipped or tub-style varieties.
- 1 cup (226g) unsalted butter, softened but still cool: Provides a rich, buttery flavor and smooth structure. It should be soft enough to indent with a finger but not greasy or melted.
- 4 cups (480g) powdered sugar, sifted: Sweetens and thickens the frosting. Sifting is essential to remove any lumps and ensure a silky-smooth consistency.
- 2 teaspoons (10ml) pure vanilla extract: Enhances the flavor of the cream cheese and butter, rounding out the frosting’s profile.
- Pinch of salt: A tiny amount is all you need to cut through the sweetness and make the flavors pop.
Instructions
Follow these detailed steps carefully for a flawless Red Velvet Cake. The process is straightforward, but attention to detail, especially regarding ingredient temperatures and mixing techniques, will yield the best results.
Making the Red Velvet Cake Layers
- Prepare for Baking: Preheat your oven to 350°F (175°C). Grease and flour two 9-inch round cake pans. For extra insurance against sticking, trace the bottom of the pans onto parchment paper, cut out the circles, and place them in the bottom of the greased pans. Grease the parchment paper as well.
- Sift the Dry Ingredients: In a large bowl, whisk or sift together the all-purpose flour, granulated sugar, unsweetened cocoa powder, baking soda, and salt. Sifting aerates the ingredients and removes any lumps, which is the first step towards a light, tender cake. Set this bowl aside.
- Combine the Wet Ingredients: In a separate medium bowl, whisk together the room temperature eggs, vegetable oil, room temperature buttermilk, white vinegar, and pure vanilla extract until fully combined and smooth.
- Add the Food Coloring: Whisk the red food coloring into the wet ingredient mixture. Start with 1 tablespoon and add more until you reach your desired vibrant red color. Remember that the color will deepen slightly as it bakes but will be lightened by the brown of the cocoa powder.
- Create the Batter: Pour the wet ingredients into the bowl of dry ingredients. Using a whisk or a rubber spatula, mix until just combined. Be careful not to overmix; a few small lumps are perfectly fine. Overmixing develops the gluten in the flour, which can lead to a tough or dense cake.
- Bake the Layers: Evenly divide the batter between your two prepared cake pans. Smooth the tops with a spatula. Bake on the center rack of your preheated oven for 30-35 minutes. To check for doneness, insert a toothpick into the center of each cake. It should come out clean or with a few moist crumbs attached.
- Cool the Cakes: Once baked, remove the cakes from the oven and let them cool in their pans on a wire rack for about 15 minutes. After 15 minutes, carefully invert the cakes onto the wire rack, remove the pans and parchment paper, and let them cool completely to room temperature. This step is crucial; attempting to frost a warm cake will result in a melted, soupy mess.
Whipping Up the Cream Cheese Frosting
- Beat the Butter and Cream Cheese: In the bowl of a stand mixer fitted with the paddle attachment, or in a large bowl with a hand mixer, beat the cold cream cheese and softened butter on medium-high speed for about 2-3 minutes, until the mixture is completely smooth, creamy, and free of lumps. Scrape down the sides and bottom of the bowl as needed.
- Incorporate the Sugar: With the mixer on low speed, gradually add the sifted powdered sugar, one cup at a time. Wait until each cup is mostly incorporated before adding the next. This prevents a sugar cloud from covering your kitchen.
- Finish the Frosting: Once all the sugar is added, add the vanilla extract and a pinch of salt. Increase the mixer speed to medium-high and beat for another 2-3 minutes until the frosting is light, fluffy, and has a smooth, spreadable consistency. Do not overbeat, as it can cause the frosting to become too thin. If your frosting is too soft, you can chill it in the refrigerator for 20-30 minutes to firm up.
Assembling Your Masterpiece
- Level the Cakes (Optional but Recommended): If your cake layers have domed tops, use a large serrated knife to carefully slice off the tops to create flat, even surfaces. You can save these trimmings for decoration.
- Apply the First Layer: Place one of the cooled cake layers on your serving plate or cake stand. Scoop about 1 to 1 ½ cups of the cream cheese frosting onto the center of the layer and use an offset spatula to spread it evenly to the edges.
- Add the Second Layer: Carefully place the second cake layer on top of the frosted first layer, with the flat, cut-side down. Gently press down to secure it.
- Apply a Crumb Coat: Apply a thin, even layer of frosting over the top and sides of the entire cake. This is called a “crumb coat,” and its purpose is to trap any loose crumbs so they don’t mix into your final, beautiful layer of frosting.
- Chill the Cake: Place the crumb-coated cake in the refrigerator for at least 30 minutes. This allows the crumb coat to firm up, creating a perfect canvas for the final frosting.
- Frost and Decorate: Remove the chilled cake from the refrigerator. Apply the remaining frosting generously over the top and sides of the cake, using your offset spatula to create smooth surfaces or decorative swirls. For a classic look, crumble the reserved cake trimmings and gently press them around the base or sprinkle them over the top of the cake.
- Final Chill: For the cleanest slices, it’s best to chill the fully frosted cake for at least 30-60 minutes before serving. This allows the frosting to set completely.
Nutrition Facts
- Servings: 12-16 slices
- Calories per serving: Approximately 550-650 kcal (This is an estimate and can vary based on slice size and specific ingredients used.)
- Fat: A significant source of the cake’s richness and moistness, primarily from the oil, butter, and cream cheese.
- Carbohydrates: The main energy source, coming from the flour and sugars in both the cake and frosting.
- Sugar: Provides the cake’s sweetness. While this is a decadent dessert, the tang from the buttermilk and cream cheese helps balance the overall flavor profile.
- Protein: Contributes to the cake’s structure, primarily from the flour and eggs.
- Sodium: The salt in the recipe is essential for balancing and enhancing the sweet flavors.
Preparation Time
This stunning cake requires some time and patience, but the results are well worth the effort.
- Prep Time: 25 minutes
- Cook Time: 30-35 minutes
- Cooling & Assembly Time: Approximately 2 hours
- Total Time: Approximately 3 hours
How to Serve
Red Velvet Cake is a showstopper on its own, but a few simple touches can elevate the experience even further.
- The Classic Slice: Serve a generous slice chilled directly from the refrigerator. The cold temperature makes the cream cheese frosting firm and the cake easy to slice cleanly.
- Pair with a Beverage:
- A hot cup of black coffee or a simple Americano cuts through the richness beautifully.
- A glass of cold milk is a classic and comforting pairing.
- For an elegant touch, serve with a cup of black tea, like Earl Grey or English Breakfast.
- Garnish for Elegance:
- Sprinkle the top with the reserved red velvet cake crumbs for a traditional look.
- Add a few fresh raspberries or strawberries on top or alongside the slice for a pop of color and freshness.
- Fine chocolate shavings or a few fresh mint leaves can add a touch of sophistication.
- Perfect for Occasions: This cake is the quintessential dessert for celebratory events:
- Valentine’s Day
- Christmas and Holiday parties
- Birthdays and anniversaries
- Anytime you want to make an ordinary day feel special.
Additional Tips
Unlock the full potential of your Red Velvet Cake with these eight pro tips that ensure success every time.
- Room Temperature is a Rule, Not a Suggestion: For the cake batter, having your eggs and buttermilk at room temperature allows them to emulsify properly, creating a smooth, uniform batter that traps air for a light and fluffy cake.
- Do Not Overmix the Batter: Once you combine the wet and dry ingredients, mix only until the flour streaks disappear. Overmixing develops gluten, which is great for bread but results in a tough, chewy, and dense cake.
- The Sifting Secret: Sifting the dry ingredients (flour, cocoa powder, powdered sugar) is a small step with a big impact. It aerates the mixture and removes lumps, guaranteeing a silky-smooth cake crumb and frosting.
- Go for Gel Food Coloring: For the most vibrant and deep red color without adding excess liquid to your batter, opt for a high-quality gel food coloring. You’ll use less of it to achieve a much more dramatic result compared to liquid coloring.
- Embrace the Crumb Coat: Don’t skip the crumb coat step. This thin layer of frosting acts like a primer, trapping all the loose crumbs. After a short chill in the fridge, you can apply your final coat of frosting for a perfectly smooth, professional-looking finish.
- Perfect Frosting Consistency: If your cream cheese frosting seems too thin, it’s likely because your butter was too soft or your cream cheese wasn’t cold. Don’t add more sugar right away. Instead, place the bowl in the refrigerator for 20-30 minutes to firm up before giving it a final whip.
- Proper Storage is Key: To keep your cake moist, store it in an airtight cake container in the refrigerator for up to 5 days. The oil-based cake will stay tender even when cold. Let it sit at room temperature for about 20-30 minutes before serving for the best flavor and texture.
- Make-Ahead Magic: You can bake the cake layers ahead of time. Once they are completely cool, wrap them tightly in plastic wrap and then in foil. They can be stored at room temperature for a day or frozen for up to two months. Simply thaw them in the refrigerator overnight before frosting.
FAQ Section
Here are answers to some of the most common questions about making the perfect Red Velvet Cake.
1. What does red velvet cake actually taste like?
A true red velvet cake has a unique flavor profile. It’s not a rich chocolate cake. Instead, it has very mild cocoa notes, a prominent buttery vanilla flavor, and a subtle tangy finish from the buttermilk and vinegar. This is all perfectly complemented by the sweet and tangy cream cheese frosting.
2. Can I use a different oil instead of vegetable oil?
Yes, you can. Any neutral-flavored oil will work well. Canola oil, grapeseed oil, or even a light olive oil (not extra-virgin) are great substitutes. The goal is to provide moisture without interfering with the cake’s delicate flavor.
3. Why did my cake turn out dry or dense?
The most common culprits for a dry or dense cake are overmixing the batter, overbaking the layers, or measuring the flour incorrectly. Mix only until the ingredients are just combined, bake until a toothpick comes out with moist crumbs (not completely dry), and use the “spoon and level” method to measure your flour for accuracy.
4. Can I make this recipe into cupcakes?
Absolutely! This recipe works beautifully for cupcakes. Simply line a muffin tin with paper liners and fill them about ⅔ of the way full. Bake at 350°F (175°C) for about 18-22 minutes, or until a toothpick inserted into the center comes out clean. This recipe should yield about 24 cupcakes.
5. My cream cheese frosting is runny. How can I fix it?
Runny frosting is usually caused by using cream cheese from a tub (which has more water) or by having your butter and/or cream cheese be too warm. The best fix is to chill the frosting in the refrigerator for 30-60 minutes. This will firm it up significantly. If it’s still too thin, you can beat in a little more sifted powdered sugar, a ¼ cup at a time.
6. Do I have to use buttermilk? What are the substitutes?
For the most authentic taste and texture, buttermilk is highly recommended. However, if you’re in a pinch, you can make a substitute. For every 1 cup of buttermilk, use 1 cup of whole milk mixed with 1 tablespoon of white vinegar or lemon juice. Let the mixture sit for 5-10 minutes until it slightly curdles, then use it as directed.
7. What is the purpose of vinegar in red velvet cake?
The vinegar serves a dual purpose. Historically, its acidity reacted with the natural anthocyanins in cocoa powder to bring out a reddish hue. In modern recipes, it primarily provides an extra acidic boost to react with the baking soda, ensuring a very light, fluffy, and tender crumb.
8. Can I use a natural food coloring like beet juice?
You can, but be prepared for a different result. Beet juice or beet powder will give the cake a more natural, magenta or brownish-red color rather than the bright scarlet of artificial coloring. It may also impart a subtle earthy flavor to the cake. For the classic, vibrant red, a commercial food coloring is the most reliable option.
Red Velvet Cake Recipe
Ingredients
This recipe is divided into two essential components: the tender cake and the luscious frosting. Using high-quality, room-temperature ingredients is crucial for achieving the perfect texture and flavor.
For the Ultimate Red Velvet Cake
- 2 ½ cups (300g) all-purpose flour: The structural foundation of our cake. Sifting is key to a light and airy crumb.
- 1 ½ cups (300g) granulated sugar: Provides sweetness and helps create a tender texture by creaming it with the butter.
- 2 tablespoons (15g) unsweetened natural cocoa powder: This adds the subtle, signature chocolatey note that defines red velvet flavor. Do not use Dutch-processed cocoa, as it will react differently with the leavening agents.
- 1 ½ teaspoons baking soda: The primary leavening agent that reacts with the acidic ingredients to give the cake its beautiful lift.
- 1 teaspoon salt: Balances the sweetness and enhances all the other flavors in the cake.
- 2 large eggs, at room temperature: Binds the ingredients together and adds richness. Room temperature eggs incorporate more easily into the batter.
- 1 ½ cups (360ml) vegetable oil: The secret to an incredibly moist and tender cake that stays fresh for days. Canola or other neutral oils work well too.
- 1 cup (240ml) buttermilk, at room temperature: This is non-negotiable for authentic red velvet. Its acidity tenderizes the gluten and activates the baking soda, creating a soft crumb and adding a characteristic tang.
- 1 tablespoon (15ml) white distilled vinegar: An extra boost of acidity to ensure the baking soda is fully activated, resulting in a light and fluffy cake.
- 2 teaspoons (10ml) pure vanilla extract: Adds a warm, aromatic depth of flavor that complements the cocoa and buttermilk.
- 1 to 2 tablespoons (15-30ml) liquid or gel red food coloring: The source of the cake’s iconic, dramatic color. Gel food coloring provides a more vibrant hue with less liquid.
For the Classic Cream Cheese Frosting
- 16 ounces (452g) full-fat block cream cheese, cold: The star of the frosting. Use cold, full-fat block cream cheese for the thickest, tangiest, and most stable frosting. Avoid the whipped or tub-style varieties.
- 1 cup (226g) unsalted butter, softened but still cool: Provides a rich, buttery flavor and smooth structure. It should be soft enough to indent with a finger but not greasy or melted.
- 4 cups (480g) powdered sugar, sifted: Sweetens and thickens the frosting. Sifting is essential to remove any lumps and ensure a silky-smooth consistency.
- 2 teaspoons (10ml) pure vanilla extract: Enhances the flavor of the cream cheese and butter, rounding out the frosting’s profile.
- Pinch of salt: A tiny amount is all you need to cut through the sweetness and make the flavors pop.
Instructions
Follow these detailed steps carefully for a flawless Red Velvet Cake. The process is straightforward, but attention to detail, especially regarding ingredient temperatures and mixing techniques, will yield the best results.
Making the Red Velvet Cake Layers
- Prepare for Baking: Preheat your oven to 350°F (175°C). Grease and flour two 9-inch round cake pans. For extra insurance against sticking, trace the bottom of the pans onto parchment paper, cut out the circles, and place them in the bottom of the greased pans. Grease the parchment paper as well.
- Sift the Dry Ingredients: In a large bowl, whisk or sift together the all-purpose flour, granulated sugar, unsweetened cocoa powder, baking soda, and salt. Sifting aerates the ingredients and removes any lumps, which is the first step towards a light, tender cake. Set this bowl aside.
- Combine the Wet Ingredients: In a separate medium bowl, whisk together the room temperature eggs, vegetable oil, room temperature buttermilk, white vinegar, and pure vanilla extract until fully combined and smooth.
- Add the Food Coloring: Whisk the red food coloring into the wet ingredient mixture. Start with 1 tablespoon and add more until you reach your desired vibrant red color. Remember that the color will deepen slightly as it bakes but will be lightened by the brown of the cocoa powder.
- Create the Batter: Pour the wet ingredients into the bowl of dry ingredients. Using a whisk or a rubber spatula, mix until just combined. Be careful not to overmix; a few small lumps are perfectly fine. Overmixing develops the gluten in the flour, which can lead to a tough or dense cake.
- Bake the Layers: Evenly divide the batter between your two prepared cake pans. Smooth the tops with a spatula. Bake on the center rack of your preheated oven for 30-35 minutes. To check for doneness, insert a toothpick into the center of each cake. It should come out clean or with a few moist crumbs attached.
- Cool the Cakes: Once baked, remove the cakes from the oven and let them cool in their pans on a wire rack for about 15 minutes. After 15 minutes, carefully invert the cakes onto the wire rack, remove the pans and parchment paper, and let them cool completely to room temperature. This step is crucial; attempting to frost a warm cake will result in a melted, soupy mess.
Whipping Up the Cream Cheese Frosting
- Beat the Butter and Cream Cheese: In the bowl of a stand mixer fitted with the paddle attachment, or in a large bowl with a hand mixer, beat the cold cream cheese and softened butter on medium-high speed for about 2-3 minutes, until the mixture is completely smooth, creamy, and free of lumps. Scrape down the sides and bottom of the bowl as needed.
- Incorporate the Sugar: With the mixer on low speed, gradually add the sifted powdered sugar, one cup at a time. Wait until each cup is mostly incorporated before adding the next. This prevents a sugar cloud from covering your kitchen.
- Finish the Frosting: Once all the sugar is added, add the vanilla extract and a pinch of salt. Increase the mixer speed to medium-high and beat for another 2-3 minutes until the frosting is light, fluffy, and has a smooth, spreadable consistency. Do not overbeat, as it can cause the frosting to become too thin. If your frosting is too soft, you can chill it in the refrigerator for 20-30 minutes to firm up.
Assembling Your Masterpiece
- Level the Cakes (Optional but Recommended): If your cake layers have domed tops, use a large serrated knife to carefully slice off the tops to create flat, even surfaces. You can save these trimmings for decoration.
- Apply the First Layer: Place one of the cooled cake layers on your serving plate or cake stand. Scoop about 1 to 1 ½ cups of the cream cheese frosting onto the center of the layer and use an offset spatula to spread it evenly to the edges.
- Add the Second Layer: Carefully place the second cake layer on top of the frosted first layer, with the flat, cut-side down. Gently press down to secure it.
- Apply a Crumb Coat: Apply a thin, even layer of frosting over the top and sides of the entire cake. This is called a “crumb coat,” and its purpose is to trap any loose crumbs so they don’t mix into your final, beautiful layer of frosting.
- Chill the Cake: Place the crumb-coated cake in the refrigerator for at least 30 minutes. This allows the crumb coat to firm up, creating a perfect canvas for the final frosting.
- Frost and Decorate: Remove the chilled cake from the refrigerator. Apply the remaining frosting generously over the top and sides of the cake, using your offset spatula to create smooth surfaces or decorative swirls. For a classic look, crumble the reserved cake trimmings and gently press them around the base or sprinkle them over the top of the cake.
- Final Chill: For the cleanest slices, it’s best to chill the fully frosted cake for at least 30-60 minutes before serving. This allows the frosting to set completely.
Nutrition
- Serving Size: one normal portion
- Calories: 650