")


Roasted Garlic and Herb Chickpea Dip has become an absolute staple in our home, and let me tell you, it’s for good reason. From casual weeknight snacking to elegant weekend gatherings, this dip has effortlessly charmed its way onto our table – and into our hearts. The first time I whipped it up, I was aiming for a healthier alternative to our usual creamy dips, and honestly, I wasn’t expecting fireworks. But the aroma alone, as the garlic roasted to sweet perfection, was a promising start. Then came the taste – creamy, garlicky, herby, and utterly addictive. My family, usually staunch critics of anything remotely ‘healthy-sounding’, devoured it with surprising enthusiasm. Even my picky-eater nephew, who usually sticks to plain crackers, was happily scooping it up with carrot sticks! Since then, it’s become a requested dish whenever we have friends over, and I often find myself making a double batch just to ensure there are leftovers for lunch the next day. It’s just that good – a vibrant, flavorful, and surprisingly versatile dip that’s as wholesome as it is delicious.
Ingredients
- Chickpeas: The creamy base of our dip. Use canned chickpeas for convenience, or cook your own from dried for a more robust flavor. Make sure to drain and rinse them well.
- Garlic: The star flavor! Roasting garlic transforms its pungent bite into a sweet, mellow, and deeply aromatic delight. Use a whole head of garlic for maximum flavor.
- Fresh Herbs: A blend of fresh herbs elevates the dip with brightness and complexity. Parsley, cilantro, dill, and chives are excellent choices, or experiment with your favorites.
- Tahini: Sesame seed paste that adds richness, creaminess, and a slightly nutty flavor, essential for that authentic dip texture.
- Lemon Juice: Brightens the flavors and adds a zesty tang that balances the richness of the tahini and garlic. Freshly squeezed is always best.
- Olive Oil: Adds healthy fats and a smooth, luxurious texture. Use good quality extra virgin olive oil for the best flavor, especially for drizzling on top.
- Water: Used to adjust the consistency of the dip, making it perfectly smooth and creamy.
- Salt: Enhances all the flavors and brings everything together. Use sea salt or kosher salt for best results.
- Black Pepper: Adds a touch of spice and depth of flavor. Freshly ground black pepper is recommended.
- Optional Toppings: For extra flavor and visual appeal, consider toppings like paprika, extra herbs, pine nuts, or a drizzle of olive oil.
Instructions
- Roast the Garlic: Preheat your oven to 400°F (200°C). Take a whole head of garlic and slice off the very top, just enough to expose the cloves. Place the garlic head on a piece of aluminum foil. Drizzle about a tablespoon of olive oil over the exposed cloves and sprinkle with a pinch of salt and pepper. Wrap the foil tightly around the garlic head and roast in the preheated oven for 40-45 minutes, or until the garlic cloves are soft and fragrant. You’ll know it’s ready when the cloves are easily pierced with a fork and have a golden, caramelized appearance.
- Cool the Garlic: Once the garlic is roasted, carefully remove it from the oven and let it cool slightly until it’s cool enough to handle. Unwrap the foil and let the garlic cool further. You can squeeze the roasted garlic cloves out of their skins easily once they are cooled. Set aside.
- Prepare the Chickpeas: While the garlic is roasting (or after it has cooled), prepare your chickpeas. If using canned chickpeas, drain them thoroughly in a colander and rinse them under cold running water. Rinsing helps to remove excess sodium and also makes the chickpeas easier to digest, resulting in a smoother dip. If you’re starting with dried chickpeas, make sure to soak them overnight and cook them until tender before proceeding with the recipe.
- Combine Ingredients in a Food Processor: In the bowl of a food processor, add the drained and rinsed chickpeas, the squeezed roasted garlic cloves, tahini, lemon juice, a tablespoon of olive oil, and about ¼ cup of water. Add a generous pinch of salt and black pepper.
- Blend Until Smooth: Secure the lid of the food processor and blend the mixture until it is completely smooth and creamy. This may take a minute or two, and you might need to stop and scrape down the sides of the bowl a couple of times to ensure everything is evenly processed. If the dip is too thick, add water, one tablespoon at a time, while blending, until you reach your desired consistency. You want it to be creamy and easily scoopable, but not too runny.
- Add Fresh Herbs: Once the dip is smooth and creamy, add your chopped fresh herbs to the food processor. Pulse a few times to incorporate the herbs into the dip. You want to retain some texture from the herbs, so don’t over-process them. If you prefer a completely smooth dip with the herb flavor infused throughout, you can blend them for a bit longer, but pulsing is generally recommended for the best texture and visual appeal.
- Taste and Adjust Seasoning: Taste the dip and adjust the seasoning as needed. You might want to add more lemon juice for extra tang, more salt for flavor, or a pinch of black pepper for a bit more spice. Remember that flavors will meld and develop further as the dip sits, so it’s often best to slightly under-season initially and then adjust just before serving if necessary.
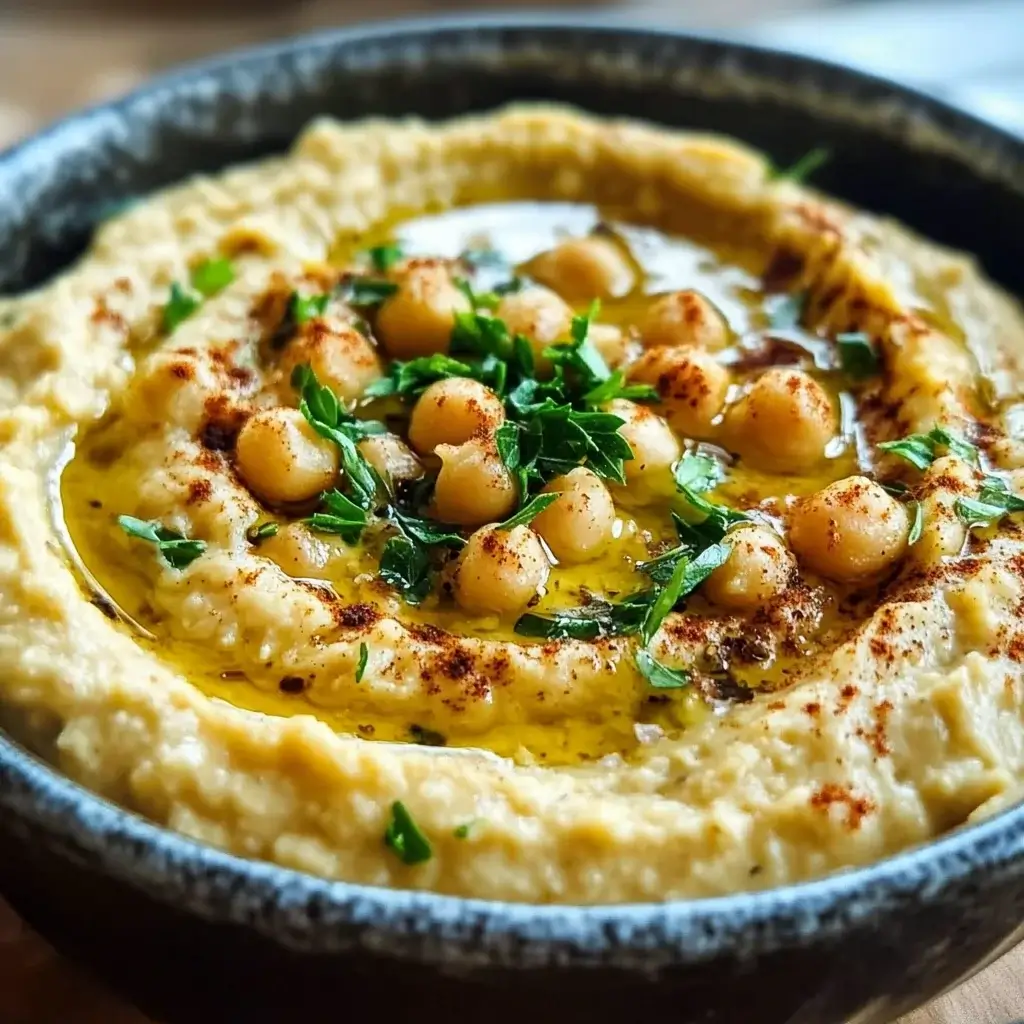
- Serve and Garnish: Transfer the Roasted Garlic and Herb Chickpea Dip to a serving bowl. Drizzle with a generous swirl of good quality extra virgin olive oil. Garnish with extra chopped fresh herbs, a sprinkle of paprika for color, or a few toasted pine nuts for added texture and flavor. Serve immediately or chill in the refrigerator until ready to serve. Chilling allows the flavors to meld even further.
Nutrition Facts
Serving Size: Approximately ¼ cup (about 4 tablespoons)
Servings Per Recipe: Approximately 12 servings (based on a recipe using 1 can of chickpeas)
(Note: Nutritional values are estimates and can vary based on specific ingredients and brands used.)
- Calories: Approximately 150 calories per serving
- Protein: 5 grams per serving
- Fat: 10 grams per serving
Preparation Time
Prep Time: 20 minutes (includes garlic roasting prep and ingredient gathering)
Cook Time: 45 minutes (garlic roasting time)
Total Time: 1 hour 5 minutes (from start to finish, including roasting and blending)
This Roasted Garlic and Herb Chickpea Dip requires a bit of oven time for roasting the garlic, but the active preparation is quite minimal. Most of the time is hands-off while the garlic roasts, allowing you to multitask or relax while the delicious aromas fill your kitchen. The blending process itself is very quick, making this a relatively speedy and straightforward recipe, especially considering the depth of flavor it delivers.
How to Serve
This Roasted Garlic and Herb Chickpea Dip is incredibly versatile and can be served in numerous ways, making it perfect for various occasions, from casual snacks to elegant appetizers. Here are some delicious serving suggestions:
- With Vegetables:
- Crudités Platter: Offer a colorful assortment of fresh, crisp vegetables for dipping. Carrot sticks, cucumber slices, bell pepper strips (red, yellow, orange), celery sticks, broccoli florets, and snap peas are all excellent choices.
- Roasted Vegetables: For a warmer option, serve the dip with roasted vegetables like asparagus spears, zucchini sticks, or roasted sweet potato wedges. The roasted vegetable’s sweetness pairs beautifully with the savory dip.
- Cherry Tomatoes: Simply serve alongside whole cherry tomatoes for a quick and healthy snack.
- With Breads and Crackers:
- Pita Bread: Warm pita bread, either cut into wedges or served whole for tearing and dipping, is a classic pairing.
- Tortilla Chips: Use sturdy tortilla chips for a more casual and satisfying snack. Consider baked tortilla chips for a healthier option.
- Crackers: Offer a variety of crackers, such as whole wheat crackers, seeded crackers, or gluten-free crackers, to cater to different preferences.
- Breadsticks: Crispy breadsticks provide a delightful crunch and are perfect for scooping up the dip.
- Toasted Baguette Slices: Thinly sliced baguette, lightly toasted or grilled, provides a sturdy and flavorful base for the dip.
- As a Sandwich or Wrap Spread:
- Spread on Sandwiches: Use the chickpea dip as a healthy and flavorful alternative to mayonnaise or other spreads in sandwiches. It pairs especially well with vegetarian or Mediterranean-inspired fillings.
- Wrap Filling: Spread the dip inside wraps with vegetables, falafel, or grilled chicken for a nutritious and delicious lunch or light dinner.
- As Part of a Mezze Platter:
- Mediterranean Feast: Include the Roasted Garlic and Herb Chickpea Dip as part of a larger mezze platter alongside olives, feta cheese, stuffed grape leaves, baba ghanoush, and other Mediterranean delicacies.
- As a Topping or Sauce:
- Baked Potatoes: Dollop a spoonful of the dip on top of baked potatoes instead of sour cream or butter for a healthier and more flavorful topping.
- Grain Bowls: Add a scoop of the dip to grain bowls with quinoa, brown rice, or farro, along with roasted vegetables and protein for a complete and balanced meal.
- Pasta Sauce Base: Thin out the dip with a little extra olive oil or water to create a creamy sauce for pasta dishes.
Additional Tips for Perfect Roasted Garlic and Herb Chickpea Dip
To ensure your Roasted Garlic and Herb Chickpea Dip is absolutely perfect every time, here are some helpful tips and tricks:
- Don’t Skip the Roasting: Roasting the garlic is absolutely crucial for the flavor of this dip. It transforms the pungent raw garlic into a sweet, mellow, and caramelized delight. Raw garlic would be too overpowering and harsh in this recipe. Take the time to roast it properly; it’s worth the wait.
- Use Good Quality Tahini: Tahini is a key ingredient that contributes to the creamy texture and nutty flavor of the dip. Opt for a good quality tahini that is smooth and pourable, not thick and dry. Stir the tahini well before measuring, as the oils can separate.
- Fresh Lemon Juice is Key: Freshly squeezed lemon juice provides a bright, zesty acidity that is essential for balancing the richness of the tahini and garlic. Bottled lemon juice can lack the same fresh flavor, so it’s always recommended to use fresh lemons.
- Control the Consistency: The amount of water you add will determine the final consistency of your dip. Start with a smaller amount of water and gradually add more, one tablespoon at a time, until you reach your desired creaminess. Remember that the dip will thicken slightly as it chills in the refrigerator.
- Herb Variations: Feel free to experiment with different combinations of fresh herbs to customize the flavor profile of your dip. Try adding rosemary, thyme, oregano, or even mint for unique twists. Consider using a single herb or a blend of 2-3 for a balanced flavor.
- Spice it Up: If you enjoy a bit of heat, add a pinch of red pepper flakes or a dash of cayenne pepper to the food processor along with the other ingredients. You can also drizzle a spicy chili oil over the finished dip for an extra kick.
- Make it Ahead: This chickpea dip is perfect for making ahead of time. In fact, the flavors often meld and deepen even more after it has been refrigerated for a few hours or overnight. Store it in an airtight container in the refrigerator for up to 3-4 days.
- Garnish for Presentation: A simple garnish can elevate the presentation of your dip. A drizzle of good quality extra virgin olive oil, a sprinkle of paprika, chopped fresh herbs, toasted pine nuts, or even a few whole chickpeas can make the dip look more appealing and inviting.
Frequently Asked Questions (FAQ)
Q1: Can I use dried chickpeas instead of canned?
A: Yes, absolutely! Using dried chickpeas will result in a slightly richer and more flavorful dip. You’ll need to soak the dried chickpeas overnight and then cook them until they are very tender before using them in the recipe. Ensure they are cooked until they are easily mashed with a fork for the smoothest dip.
Q2: I don’t have tahini, can I substitute anything else?
A: Tahini is a key ingredient for the authentic flavor and texture of chickpea dip. However, if you absolutely don’t have it, you can try substituting with a different nut or seed butter, such as almond butter or cashew butter. These will alter the flavor slightly, but can still provide some creaminess and richness. Sunflower seed butter is another option, especially if you have nut allergies.
Q3: How long does Roasted Garlic and Herb Chickpea Dip last in the refrigerator?
A: When stored in an airtight container in the refrigerator, this chickpea dip will typically last for 3-4 days. It’s always best to check for any signs of spoilage before consuming, such as a sour smell or significant change in texture.
Q4: Can I freeze chickpea dip?
A: While you can technically freeze chickpea dip, the texture may change slightly upon thawing, becoming a bit grainier. For best results, it’s generally recommended to enjoy it fresh or within a few days of making. If you do freeze it, thaw it slowly in the refrigerator overnight and stir well before serving to help restore some of the creaminess.
Q5: My dip is too thick, how can I thin it out?
A: If your dip is too thick, simply add a tablespoon or two of water or olive oil at a time and blend again until you reach your desired consistency. You can also add a little extra lemon juice for a brighter flavor while thinning it out.
Q6: Can I make this dip without roasting the garlic?
A: While you could make chickpea dip with raw garlic, it won’t be the same Roasted Garlic and Herb Chickpea Dip! Roasting the garlic is essential for the sweet, mellow flavor that defines this recipe. Raw garlic will be much more pungent and overpowering, and the dip will lack the depth and complexity that roasted garlic provides. It’s highly recommended to roast the garlic for the best results.
Q7: I’m allergic to sesame seeds, what can I use instead of tahini?
A: If you have a sesame allergy, sunflower seed butter can be a good substitute for tahini in this recipe. It has a similar creamy texture and slightly nutty flavor. You can also try using cashew butter or almond butter, but be aware that these will alter the flavor profile of the dip slightly. Always check ingredient labels to ensure any substitutes are safe for your allergies.
Q8: Can I add other vegetables to this dip?
A: Absolutely! You can customize this chickpea dip by adding other roasted vegetables to the food processor along with the chickpeas and garlic. Roasted red peppers, roasted eggplant, or roasted carrots would all be delicious additions. Just be mindful of the overall consistency and you may need to adjust the liquid accordingly. You can also add sun-dried tomatoes (oil-packed, drained) for a burst of intense flavor.
Print
Roasted Garlic and Herb Chickpea Dip
Ingredients
- Chickpeas: The creamy base of our dip. Use canned chickpeas for convenience, or cook your own from dried for a more robust flavor. Make sure to drain and rinse them well.
- Garlic: The star flavor! Roasting garlic transforms its pungent bite into a sweet, mellow, and deeply aromatic delight. Use a whole head of garlic for maximum flavor.
- Fresh Herbs: A blend of fresh herbs elevates the dip with brightness and complexity. Parsley, cilantro, dill, and chives are excellent choices, or experiment with your favorites.
- Tahini: Sesame seed paste that adds richness, creaminess, and a slightly nutty flavor, essential for that authentic dip texture.
- Lemon Juice: Brightens the flavors and adds a zesty tang that balances the richness of the tahini and garlic. Freshly squeezed is always best.
- Olive Oil: Adds healthy fats and a smooth, luxurious texture. Use good quality extra virgin olive oil for the best flavor, especially for drizzling on top.
- Water: Used to adjust the consistency of the dip, making it perfectly smooth and creamy.
- Salt: Enhances all the flavors and brings everything together. Use sea salt or kosher salt for best results.
- Black Pepper: Adds a touch of spice and depth of flavor. Freshly ground black pepper is recommended.
- Optional Toppings: For extra flavor and visual appeal, consider toppings like paprika, extra herbs, pine nuts, or a drizzle of olive oil.
Instructions
- Roast the Garlic: Preheat your oven to 400°F (200°C). Take a whole head of garlic and slice off the very top, just enough to expose the cloves. Place the garlic head on a piece of aluminum foil. Drizzle about a tablespoon of olive oil over the exposed cloves and sprinkle with a pinch of salt and pepper. Wrap the foil tightly around the garlic head and roast in the preheated oven for 40-45 minutes, or until the garlic cloves are soft and fragrant. You’ll know it’s ready when the cloves are easily pierced with a fork and have a golden, caramelized appearance.
- Cool the Garlic: Once the garlic is roasted, carefully remove it from the oven and let it cool slightly until it’s cool enough to handle. Unwrap the foil and let the garlic cool further. You can squeeze the roasted garlic cloves out of their skins easily once they are cooled. Set aside.
- Prepare the Chickpeas: While the garlic is roasting (or after it has cooled), prepare your chickpeas. If using canned chickpeas, drain them thoroughly in a colander and rinse them under cold running water. Rinsing helps to remove excess sodium and also makes the chickpeas easier to digest, resulting in a smoother dip. If you’re starting with dried chickpeas, make sure to soak them overnight and cook them until tender before proceeding with the recipe.
- Combine Ingredients in a Food Processor: In the bowl of a food processor, add the drained and rinsed chickpeas, the squeezed roasted garlic cloves, tahini, lemon juice, a tablespoon of olive oil, and about ¼ cup of water. Add a generous pinch of salt and black pepper.
- Blend Until Smooth: Secure the lid of the food processor and blend the mixture until it is completely smooth and creamy. This may take a minute or two, and you might need to stop and scrape down the sides of the bowl a couple of times to ensure everything is evenly processed. If the dip is too thick, add water, one tablespoon at a time, while blending, until you reach your desired consistency. You want it to be creamy and easily scoopable, but not too runny.
- Add Fresh Herbs: Once the dip is smooth and creamy, add your chopped fresh herbs to the food processor. Pulse a few times to incorporate the herbs into the dip. You want to retain some texture from the herbs, so don’t over-process them. If you prefer a completely smooth dip with the herb flavor infused throughout, you can blend them for a bit longer, but pulsing is generally recommended for the best texture and visual appeal.
- Taste and Adjust Seasoning: Taste the dip and adjust the seasoning as needed. You might want to add more lemon juice for extra tang, more salt for flavor, or a pinch of black pepper for a bit more spice. Remember that flavors will meld and develop further as the dip sits, so it’s often best to slightly under-season initially and then adjust just before serving if necessary.
- Serve and Garnish: Transfer the Roasted Garlic and Herb Chickpea Dip to a serving bowl. Drizzle with a generous swirl of good quality extra virgin olive oil. Garnish with extra chopped fresh herbs, a sprinkle of paprika for color, or a few toasted pine nuts for added texture and flavor. Serve immediately or chill in the refrigerator until ready to serve. Chilling allows the flavors to meld even further.
Nutrition
- Serving Size: one normal portion
- Calories: 150
- Fat: 10 grams
- Protein: 5 grams