")


Of all the aromas that can fill a kitchen, the scent of nuts toasting in the oven is one of my absolute favorites. It’s warm, comforting, and signals that something delicious is just minutes away. For years, I was content with store-bought candied nuts, but they often felt one-dimensional—either too sweet, too salty, or strangely artificial. That all changed the day I decided to tackle my own batch of Simple Honey Roasted Cashews. The first time I pulled that parchment-lined tray from the oven, the house filled with the most incredible smell of caramelized honey and rich, buttery cashews. My kids, usually glued to their screens, wandered into the kitchen, drawn by the scent. They hovered impatiently as the cashews cooled, their crunch becoming more pronounced with each passing minute. The final verdict? A resounding success. They were devoured within an hour, and I was immediately tasked with making a double batch for the upcoming family movie night. This recipe has since become a staple in our home. It’s my go-to for a quick party snack, a thoughtful homemade gift, or a simple, satisfying treat to have on hand. It’s a recipe that proves the most profound flavors often come from the simplest ingredients, transformed by a little heat and a little patience.
Ingredients
Here is the simple list of ingredients you’ll need to create this incredibly addictive snack. The magic lies in the quality of these components and how they come together in perfect harmony.
- 3 cups (about 1 pound or 450g) Raw, Unsalted Whole Cashews: Using raw cashews is essential as pre-roasted nuts will burn before the honey coating has a chance to caramelize properly. Unsalted gives you complete control over the final flavor balance.
- ¼ cup (84g) Honey: A good quality, runny honey works best for easily coating the nuts. Clover, wildflower, or orange blossom honey are all excellent choices, each imparting a subtle difference in flavor.
- 2 tablespoons Melted Coconut Oil (or other neutral oil): This helps the honey mixture coat the cashews smoothly and prevents them from sticking too much, while also promoting a beautiful, even browning.
- 1 ½ teaspoons Sea Salt or Kosher Salt: The coarse grain of sea salt or kosher salt provides a better texture and a more pleasant burst of saltiness compared to fine table salt. This is crucial for that classic sweet and salty profile.
- ½ teaspoon Ground Cinnamon (Optional): This adds a lovely warmth and depth of flavor that complements the honey and cashews beautifully, making them feel extra cozy and special.
- ¼ teaspoon Cayenne Pepper (Optional): For those who enjoy a little kick, a pinch of cayenne provides a gentle, surprising warmth on the finish that cuts through the sweetness.
Instructions
Follow these detailed steps carefully to ensure your cashews turn out perfectly crisp, beautifully glazed, and not at all sticky. The key is in the oven temperature and the stirring process.
- Preheat and Prepare: Begin by preheating your oven to 325°F (165°C). It’s important to use a moderate temperature; too high, and the honey will scorch before the cashews are fully roasted. Line a large, rimmed baking sheet with parchment paper. This step is non-negotiable! It is the secret to preventing a sticky, caked-on mess and ensures your cashews cool into individual, crunchy morsels.
- Make the Honey Glaze: In a large mixing bowl, combine the runny honey, melted coconut oil, sea salt, and the optional cinnamon and cayenne pepper if you’re using them. Whisk everything together until the salt is mostly dissolved and the mixture is smooth and emulsified. This ensures every single cashew will get an even coating of the glaze.
- Coat the Cashews: Add the raw cashews to the bowl with the honey glaze. Using a spatula, gently fold and stir the cashews until they are all thoroughly and evenly coated. Make sure to scrape the bottom of the bowl to incorporate all of that delicious glaze.
- Arrange for Roasting: Pour the coated cashews onto your prepared, parchment-lined baking sheet. Use the spatula to spread them out into a single, even layer. This is another critical step. If the cashews are piled on top of each other, they will steam rather than roast, resulting in a chewy, sticky texture instead of a crisp one.
- Roast and Stir: Place the baking sheet in the preheated oven on the middle rack. Roast for 15 to 20 minutes in total, but here’s the most important part: you must stir them every 5-7 minutes. Set a timer! Removing the pan and giving the cashews a good stir ensures they brown evenly on all sides and prevents the bottoms from burning where they have the most contact with the hot pan.
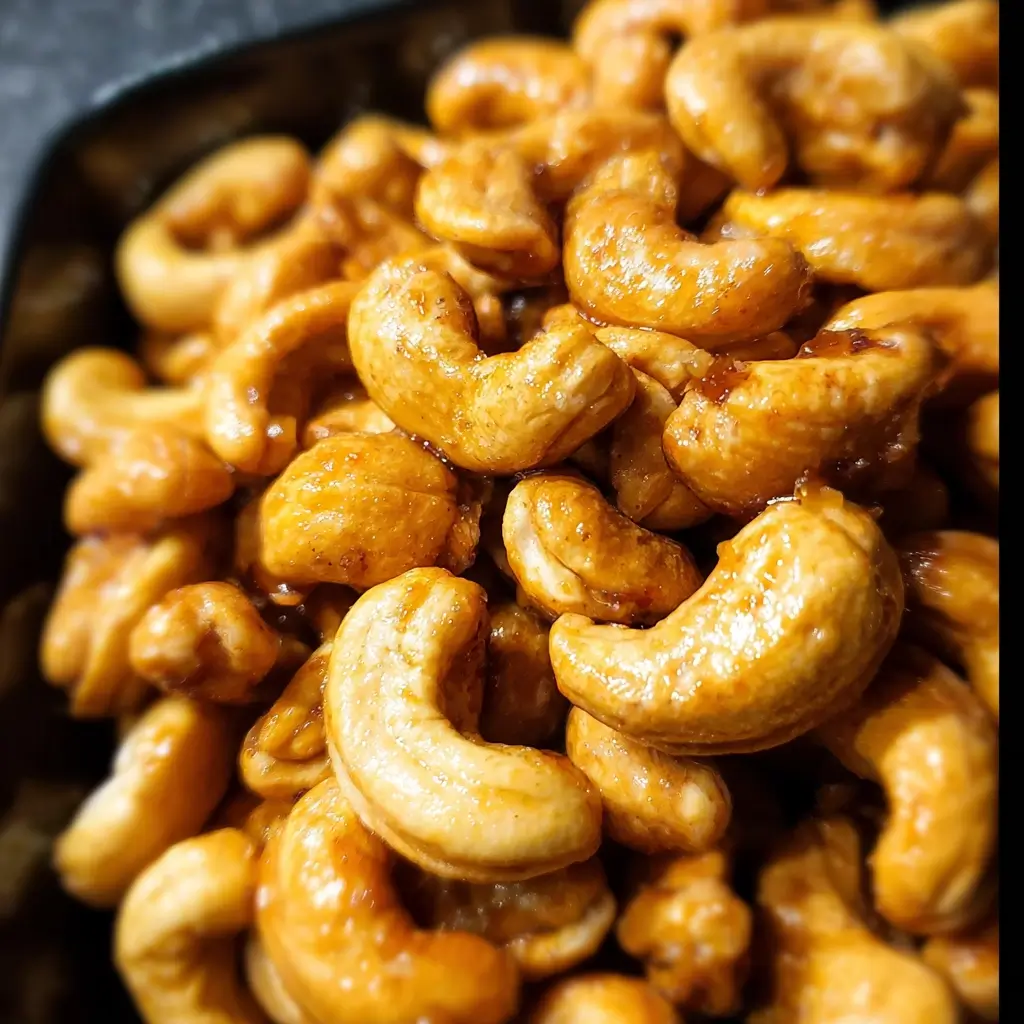
- Check for Doneness: The cashews are done when they are a deep golden-brown color and the glaze is bubbly and fragrant. They will still feel slightly soft and sticky when you take them out of the oven – do not be tempted to cook them longer! They will crisp up significantly as they cool.
- Cool Completely: Slide the entire sheet of parchment paper with the hot cashews onto a wire cooling rack. While they are still hot, you can use two forks to separate any large clumps. Now for the hardest part: let them cool completely, undisturbed, for at least 30-45 minutes. As the sugar from the honey cools and crystallizes, the cashews will transform from soft and sticky to incredibly crunchy and perfectly glazed.
- Store or Serve: Once completely cool and crisp, break apart any remaining clusters with your hands. They are now ready to be served or stored. Transfer them to an airtight container to maintain their freshness and crunch.
Nutrition Facts
While undeniably a treat, these homemade honey roasted cashews offer some nutritional benefits, especially when compared to commercially produced snacks. Here is an approximate breakdown.
- Servings: This recipe makes approximately 12 servings.
- Calories per Serving: Approximately 195 calories per ¼ cup serving.
- Healthy Fats (approx. 15g per serving): Cashews are a fantastic source of monounsaturated and polyunsaturated fats, including oleic acid, which is the same heart-healthy fat found in olive oil. These fats are essential for brain health and reducing bad cholesterol levels.
- Protein (approx. 5g per serving): With a solid dose of plant-based protein, these cashews can help keep you feeling full and satisfied, making them a smarter snacking choice to curb afternoon hunger pangs.
- Carbohydrates (approx. 11g per serving): The carbohydrates come primarily from the cashews themselves and the natural sugars in the honey, providing a quick source of energy.
- Sodium (approx. 290mg per serving): The sea salt provides that essential savory balance. This amount can be easily adjusted by reducing the salt in the recipe to meet your dietary needs.
- Dietary Fiber (approx. 1g per serving): Cashews contain dietary fiber, which is important for digestive health and helping to regulate blood sugar levels.
Disclaimer: These nutrition facts are an estimate and can vary based on the specific ingredients and quantities used.
Preparation Time
This recipe is wonderfully quick and requires minimal hands-on effort, making it perfect for a last-minute snack.
The entire process, from gathering your ingredients to having a cool, crunchy snack ready to eat, takes just under an hour. The active preparation time is only about 5-10 minutes. The cooking time is approximately 15-20 minutes, and the essential cooling time, which allows the cashews to become perfectly crisp, is about 30 minutes.
How to Serve
These honey roasted cashews are incredibly versatile. While they are phenomenal on their own, here are some creative and delicious ways to serve them:
- The Ultimate Snack Bowl:
- Game Day or Movie Night: Serve a large bowl in the center of the coffee table for a crowd-pleasing snack that’s a huge step up from plain chips.
- Cocktail Party Nibble: They pair beautifully with a wide range of drinks, from a crisp white wine to a dark, malty beer or a classic old-fashioned cocktail.
- Healthy-ish Desk Snack: Portion them into small containers for a satisfying and energizing mid-afternoon pick-me-up at the office.
- As a Gourmet Topping:
- Salad Enhancer: Crumble them over a spinach and strawberry salad or a kale and apple salad for a delightful crunch and a touch of sweetness that balances bitter greens.
- Yogurt or Oatmeal Upgrade: Sprinkle them over your morning Greek yogurt or a warm bowl of oatmeal for added texture, protein, and flavor.
- Ice Cream and Dessert Finisher: They are a phenomenal topping for vanilla or caramel ice cream, or even scattered over a chocolate avocado mousse.
- On a Charcuterie or Cheese Board:
- Their sweet and salty character makes them a perfect companion for a variety of cheeses. They are particularly wonderful with:
- Soft Cheeses: Creamy brie or tangy goat cheese.
- Hard Cheeses: Sharp cheddar or nutty Gruyère.
- Arrange them in a small bowl on the board alongside cured meats, fresh fruits like figs and grapes, and crackers.
- Their sweet and salty character makes them a perfect companion for a variety of cheeses. They are particularly wonderful with:
- As a Thoughtful Homemade Gift:
- Jarred for Giving: Pack the cooled cashews into a beautiful Mason jar or a decorative glass container. Tie a ribbon around the lid and add a custom tag for a personal touch.
- Holiday Tins: During the holidays, these make a fantastic addition to cookie tins and gift baskets.
- Party Favors: Place them in small cellophane bags tied with twine for a memorable and delicious party favor for weddings, showers, or dinner parties.
Additional Tips
Unlock the full potential of this recipe and ensure foolproof results every time with these eight expert tips.
- Don’t Skimp on the Parchment Paper: This might seem like a small detail, but it is the single most important tip for success. The honey glaze will become extremely sticky and hard as it bakes. Parchment paper creates a non-stick barrier that not only prevents the nuts from becoming permanently glued to your pan but also makes cleanup incredibly easy.
- The Single Layer Rule is Golden: For the ultimate crunch, the cashews need space. Spreading them in a single, even layer on the baking sheet allows hot air to circulate around each nut, roasting them evenly. If they are crowded or piled up, they will trap steam and become chewy instead of crisp.
- Watch Them Like a Hawk: Nuts, especially when coated in sugar like honey, can go from perfectly golden to burnt in a matter of seconds. Stay near the kitchen during the last 5-10 minutes of baking. Your eyes and nose are your best tools here—when they look deeply golden and smell fragrant and toasty, they are ready.
- Embrace the Cooling Process: It can be tempting to snack on the cashews straight from the oven, but patience is a virtue. They will be soft and seem underdone when hot. The magic happens as they cool. The sugars harden and crystallize, creating that signature addictive crunch. Allowing them to cool completely on the parchment paper is a non-negotiable step for the right texture.
- Experiment with Spices and Herbs: This basic recipe is a perfect canvas for customization. Try adding a teaspoon of finely chopped fresh rosemary for a sophisticated, savory twist. Smoked paprika can add a wonderful smoky dimension, while a pinch of cardamom can lend an exotic, chai-like flavor.
- The Double Salt Technique: For a true gourmet touch, use the specified amount of salt in the glaze, but reserve an extra pinch of flaky sea salt (like Maldon). As soon as you pull the cashews from the oven, sprinkle this flaky salt over the top. The large crystals will adhere to the hot glaze and provide a fantastic textural contrast and a final pop of bright salinity.
- Know Your Oven’s Hot Spots: Every oven has its quirks and hot spots. When you stir the cashews every 5-7 minutes, also rotate the pan 180 degrees. This ensures that the nuts in the back of the oven don’t brown faster than the ones in the front, leading to a much more evenly roasted batch.
- Proper Storage is a Must: To protect your hard work and keep these cashews crunchy for as long as possible, store them in a truly airtight container at room temperature. Humidity is the enemy of a crunchy nut. A glass jar with a tight-fitting lid or a high-quality food storage container is ideal. Avoid storing them in the refrigerator, as this can make them soft.
FAQ Section
Here are answers to some of the most common questions about making honey roasted cashews at home.
1. Why are my honey roasted cashews sticky and chewy instead of crunchy?
This is the most common issue and usually comes down to three things. First, you may not have let them cool completely. The cashews only become crunchy after the honey glaze has fully cooled and hardened, a process that takes at least 30 minutes. Second, you might have baked them in a pile instead of a single layer, which causes them to steam. Third, the oven temperature could have been too low, preventing the sugar from reaching the proper caramelization stage.
2. Can I use a different type of nut for this recipe?
Absolutely! This recipe works wonderfully with other nuts. Almonds, pecans, and walnuts are all fantastic substitutes. Keep in mind that different nuts have different sizes and densities, so you may need to adjust the roasting time slightly. Almonds might take a few minutes longer, while pecans might be done a bit sooner. Keep a close eye on them.
3. How long will these homemade honey roasted cashews last?
When stored correctly in a completely airtight container at room temperature, these cashews will maintain their freshness and crunch for up to two weeks. It’s important to keep them away from humidity, which will soften the glaze. Honestly, they are so delicious they rarely last that long!
4. Can I make this recipe in an air fryer?
Yes, you can! To adapt this recipe for an air fryer, preheat it to 300°F (150°C). Prepare the cashews as directed and place them in the air fryer basket in a single layer (you may need to work in batches). Air fry for 8-12 minutes, shaking the basket every 3-4 minutes to ensure they cook evenly. Remove and cool completely on parchment paper as you would with the oven method.
5. Can I make this recipe vegan?
Of course. To make a vegan version of these candied cashews, simply substitute the honey with an equal amount of pure maple syrup or agave nectar. Maple syrup will impart a distinctly warm, caramel-like flavor that is also absolutely delicious, especially when paired with pecans or walnuts.
6. My cashews clumped together into one big sheet. Is that normal?
Yes, it is completely normal for them to stick together as they cool. Don’t worry! Once they are fully cooled and hardened, you can easily break the sheet of cashews apart with your hands into smaller clusters or individual nuts. Some people actually prefer the chunky clusters.
7. Can I use pre-roasted or salted cashews for this recipe?
It’s highly recommended to use raw, unsalted cashews. Pre-roasted cashews are likely to burn before the honey glaze has a chance to set properly. If you only have salted cashews on hand, you can use them, but be sure to omit the salt from the glaze mixture to avoid them becoming overwhelmingly salty.
8. What’s the best way to clean the bowl I used for the glaze?
The honey glaze can become quite sticky and hard to clean. The easiest trick is to fill the bowl with the hottest tap water you have and let it sit in the sink for 10-15 minutes. The hot water will dissolve the hardened sugar and honey, making it easy to wipe clean with a sponge without any aggressive scrubbing.

Simple Honey Roasted Cashews
Ingredients
Here is the simple list of ingredients you’ll need to create this incredibly addictive snack. The magic lies in the quality of these components and how they come together in perfect harmony.
- 3 cups (about 1 pound or 450g) Raw, Unsalted Whole Cashews: Using raw cashews is essential as pre-roasted nuts will burn before the honey coating has a chance to caramelize properly. Unsalted gives you complete control over the final flavor balance.
- ¼ cup (84g) Honey: A good quality, runny honey works best for easily coating the nuts. Clover, wildflower, or orange blossom honey are all excellent choices, each imparting a subtle difference in flavor.
- 2 tablespoons Melted Coconut Oil (or other neutral oil): This helps the honey mixture coat the cashews smoothly and prevents them from sticking too much, while also promoting a beautiful, even browning.
- 1 ½ teaspoons Sea Salt or Kosher Salt: The coarse grain of sea salt or kosher salt provides a better texture and a more pleasant burst of saltiness compared to fine table salt. This is crucial for that classic sweet and salty profile.
- ½ teaspoon Ground Cinnamon (Optional): This adds a lovely warmth and depth of flavor that complements the honey and cashews beautifully, making them feel extra cozy and special.
- ¼ teaspoon Cayenne Pepper (Optional): For those who enjoy a little kick, a pinch of cayenne provides a gentle, surprising warmth on the finish that cuts through the sweetness.
Instructions
Follow these detailed steps carefully to ensure your cashews turn out perfectly crisp, beautifully glazed, and not at all sticky. The key is in the oven temperature and the stirring process.
- Preheat and Prepare: Begin by preheating your oven to 325°F (165°C). It’s important to use a moderate temperature; too high, and the honey will scorch before the cashews are fully roasted. Line a large, rimmed baking sheet with parchment paper. This step is non-negotiable! It is the secret to preventing a sticky, caked-on mess and ensures your cashews cool into individual, crunchy morsels.
- Make the Honey Glaze: In a large mixing bowl, combine the runny honey, melted coconut oil, sea salt, and the optional cinnamon and cayenne pepper if you’re using them. Whisk everything together until the salt is mostly dissolved and the mixture is smooth and emulsified. This ensures every single cashew will get an even coating of the glaze.
- Coat the Cashews: Add the raw cashews to the bowl with the honey glaze. Using a spatula, gently fold and stir the cashews until they are all thoroughly and evenly coated. Make sure to scrape the bottom of the bowl to incorporate all of that delicious glaze.
- Arrange for Roasting: Pour the coated cashews onto your prepared, parchment-lined baking sheet. Use the spatula to spread them out into a single, even layer. This is another critical step. If the cashews are piled on top of each other, they will steam rather than roast, resulting in a chewy, sticky texture instead of a crisp one.
- Roast and Stir: Place the baking sheet in the preheated oven on the middle rack. Roast for 15 to 20 minutes in total, but here’s the most important part: you must stir them every 5-7 minutes. Set a timer! Removing the pan and giving the cashews a good stir ensures they brown evenly on all sides and prevents the bottoms from burning where they have the most contact with the hot pan.
- Check for Doneness: The cashews are done when they are a deep golden-brown color and the glaze is bubbly and fragrant. They will still feel slightly soft and sticky when you take them out of the oven – do not be tempted to cook them longer! They will crisp up significantly as they cool.
- Cool Completely: Slide the entire sheet of parchment paper with the hot cashews onto a wire cooling rack. While they are still hot, you can use two forks to separate any large clumps. Now for the hardest part: let them cool completely, undisturbed, for at least 30-45 minutes. As the sugar from the honey cools and crystallizes, the cashews will transform from soft and sticky to incredibly crunchy and perfectly glazed.
- Store or Serve: Once completely cool and crisp, break apart any remaining clusters with your hands. They are now ready to be served or stored. Transfer them to an airtight container to maintain their freshness and crunch.
Nutrition
- Serving Size: one normal portion
- Calories: 195
- Sodium: 290mg
- Fat: 15g
- Carbohydrates: 11g
- Fiber: 1g
- Protein: 5g