")


Of all the recipes that have graced my family’s dinner table, few have achieved the legendary status of these Teriyaki Chicken Rice Bowls. The first time I made this, I knew it was a winner just from the aroma wafting from the kitchen—a sweet, savory, garlicky scent that had my kids poking their heads in every five minutes asking, “Is it ready yet?” When I finally served up the glistening, sauce-coated chicken over fluffy rice, the silence that fell over the table was the highest compliment a home cook can receive. My husband, a man of few words when it comes to food, looked up after his third bite and simply said, “This is better than takeout.” And he was right. This isn’t just a recipe; it’s an experience. It’s the perfect weeknight meal that feels like a weekend treat—unbelievably easy to whip up, yet it delivers a depth of flavor that tastes like it simmered for hours. It has become our go-to for busy evenings, for when we crave comfort food, and for when I want to feel like a culinary superstar without breaking a sweat. This dish is pure, unadulterated joy in a bowl.
Ingredients
Here is everything you will need to create this spectacular dish. Each component plays a vital role in building the layers of flavor that make these bowls so irresistible.
For the Teriyaki Chicken:
- 2 lbs boneless, skinless chicken thighs, cut into 1-inch pieces: Chicken thighs are the hero here, providing succulent, juicy bites that soak up the sauce beautifully. They are far more forgiving than chicken breast and stay tender even if slightly overcooked.
- 1 tablespoon sesame oil: This adds a nutty, aromatic depth to the chicken right from the start. A toasted sesame oil will provide the most potent and delicious flavor.
- 1 tablespoon avocado oil or other neutral high-heat oil: Used for searing the chicken, this oil has a high smoke point, ensuring you get a perfect golden-brown crust without smoking up your kitchen.
- 4 cloves garlic, minced: Freshly minced garlic is non-negotiable for a vibrant, pungent base note that cuts through the sweetness of the sauce.
- 1 tablespoon fresh ginger, grated: Grated fresh ginger provides a warm, zesty spice that perfectly complements the garlic and soy sauce.
- 1/4 cup chopped green onions, for garnish: These add a mild, fresh oniony bite and a pop of color that finishes the dish perfectly.
- 1 tablespoon toasted sesame seeds, for garnish: A final sprinkle adds a delightful texture and an extra layer of nutty flavor.
For the Homemade Teriyaki Sauce:
- 1 cup low-sodium soy sauce or tamari for a gluten-free option: This is the savory, umami-packed backbone of our sauce. Using low-sodium gives you better control over the final saltiness.
- 1/2 cup water: Used to balance the intensity of the other ingredients and create the right volume and consistency for the sauce.
- 1/2 cup mirin: This Japanese sweet rice wine is crucial for authentic flavor, adding a tangy sweetness and beautiful gloss to the sauce.
- 1/4 cup brown sugar, packed: Provides a deep, molasses-like sweetness that caramelizes beautifully as the sauce thickens.
- 2 tablespoons cornstarch: The magic thickener. When mixed with water to create a slurry, it transforms the liquid sauce into a rich, glossy glaze that clings to every piece of chicken.
- 2 tablespoons cold water: This is mixed with the cornstarch to create the slurry, ensuring it dissolves smoothly into the sauce without lumps.
For Assembling the Bowls:
- 4 cups cooked rice (sushi, jasmine, or brown rice): The fluffy, absorbent foundation of your bowl. Choose your favorite, but Japanese short-grain (sushi) rice is a classic and delicious choice.
- 2 cups steamed or blanched broccoli florets: Adds a vibrant green color, essential nutrients, and a satisfying crunch that contrasts wonderfully with the tender chicken.
- 1 large carrot, julienned or shredded: Provides a sweet, earthy flavor and a pop of bright orange color.
- 1 avocado, sliced: Lends a creamy, buttery texture that balances the savory sauce and adds healthy fats.
Instructions
Follow these step-by-step instructions carefully to achieve restaurant-quality results in your own kitchen. The process is broken down into three simple stages: preparing the sauce, cooking the chicken, and assembling the bowls.
Step 1: Prepare the Homemade Teriyaki Sauce
- In a medium-sized saucepan, combine the low-sodium soy sauce, 1/2 cup of water, mirin, and packed brown sugar.
- Whisk the ingredients together over medium heat. Continue whisking occasionally until the brown sugar has completely dissolved.
- Bring the mixture to a gentle simmer. Do not let it boil aggressively.
- While the sauce is heating, prepare the cornstarch slurry. In a small bowl, whisk together the 2 tablespoons of cornstarch and 2 tablespoons of cold water until no lumps remain. It should have a smooth, milky consistency.
- Once the sauce is simmering, slowly pour the cornstarch slurry into the saucepan while whisking continuously. This is the key to preventing lumps.
- Continue to cook, stirring frequently, for another 2-3 minutes. You will notice the sauce begin to thicken into a beautiful, glossy glaze. It should be thick enough to coat the back of a spoon.
- Once thickened, remove the sauce from the heat and set it aside. It will continue to thicken slightly as it cools.
Step 2: Cook the Chicken to Perfection
- Ensure your chicken thighs are patted dry with paper towels. This step is crucial for getting a good sear rather than just steaming the chicken.
- In a large skillet or wok, heat the avocado oil and sesame oil over medium-high heat. The pan is ready when the oil shimmers slightly.
- Carefully add the chicken pieces to the hot pan in a single layer. Do not overcrowd the pan; work in two batches if necessary. Overcrowding will lower the pan’s temperature and prevent the chicken from browning properly.
- Let the chicken cook, undisturbed, for 3-4 minutes per side. This allows a deep, golden-brown crust to form. Once seared, continue to cook, stirring occasionally, until the chicken is cooked through and no longer pink inside.
- Reduce the heat to low. Add the minced garlic and grated ginger to the skillet with the chicken. Sauté for about 60 seconds, stirring constantly until fragrant. Be very careful not to burn the garlic and ginger, as they can become bitter.
- Pour about half of your prepared teriyaki sauce over the chicken in the skillet. Stir gently to coat every piece of chicken evenly. Let it simmer in the sauce for 1-2 minutes, allowing the flavors to meld and the glaze to adhere to the chicken. Reserve the remaining sauce for drizzling over the bowls when serving.
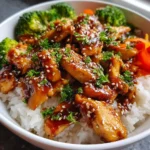
Step 3: Assemble Your Masterpiece Rice Bowls
- Divide the cooked rice evenly among four large bowls, creating a bed for the other ingredients.
- Arrange the steamed broccoli florets and julienned carrots on one side of the rice.
- Neatly place the sliced avocado on the other side.
- Spoon a generous portion of the saucy teriyaki chicken into the center of each bowl, right on top of the rice.
- Drizzle a little extra of the reserved teriyaki sauce over the chicken and vegetables for an extra burst of flavor and a beautiful glossy finish.
- Garnish generously with a sprinkle of toasted sesame seeds and freshly chopped green onions.
- Serve immediately while the chicken is hot and the flavors are at their peak.
Nutrition Facts
This recipe is designed to be a balanced and satisfying meal. The nutritional information is an estimate and can vary based on the specific ingredients used.
- Servings: 4 large bowls
- Calories per serving: Approximately 650-750 kcal
- Protein (Approx. 45g): Primarily from the chicken, this macronutrient is essential for muscle repair, immune function, and keeping you feeling full and satisfied long after your meal.
- Carbohydrates (Approx. 70g): The rice and vegetables provide complex carbohydrates, which are your body’s main source of energy. The sauce contributes some simple carbs from the sugar.
- Fat (Approx. 22g): A mix of healthy unsaturated fats from the avocado and sesame oil, along with saturated fat from the chicken thighs. Fats are crucial for hormone production and nutrient absorption.
- Sodium (Approx. 900mg): Even with low-sodium soy sauce, this dish has a notable sodium content. To reduce it further, you can use less sauce or rinse your rice thoroughly.
- Fiber (Approx. 8g): The broccoli, carrots, and avocado contribute dietary fiber, which is vital for digestive health and maintaining stable blood sugar levels.
Preparation Time
This recipe is designed for efficiency, making it perfect for a weeknight dinner without sacrificing flavor.
- Active Preparation Time: 20 minutes. This includes chopping the chicken, mincing the aromatics, preparing the vegetables, and mixing the sauce.
- Cooking Time: 15-20 minutes. This covers the time it takes to cook the chicken and thicken the sauce.
- Total Time: Approximately 35-40 minutes. From the moment you start prepping to the moment you serve, you can have this incredible meal on the table in under an hour, especially if you cook the rice simultaneously.
How to Serve
Serving these bowls is all about presentation and customization. Here are some ideas to make your Teriyaki Chicken Rice Bowls a true culinary event.
- The Classic Assembly:
- Base: Start with a generous scoop of perfectly cooked rice at the bottom of the bowl.
- Sections: Arrange your components in distinct sections around the bowl for a visually appealing, bento-box-like effect. Place the chicken in the middle, with piles of broccoli, carrots, and fanned-out avocado slices surrounding it.
- Sauce & Garnish: Drizzle with extra sauce and finish with a liberal sprinkle of sesame seeds and green onions.
- Create a “Bowl Bar” for the Family:
- Set up a toppings bar and let everyone build their own bowl. This is a fantastic way to get kids involved and cater to picky eaters.
- Protein: The teriyaki chicken.
- Base: Rice, or offer quinoa or mixed greens as an alternative.
- Veggies: Steamed broccoli, shredded carrots, edamame, sliced cucumber, bell pepper strips, sautéed mushrooms, or wilted spinach.
- Toppings: Avocado, green onions, sesame seeds, pickled ginger, crispy fried onions, a lime wedge for squeezing, or a drizzle of sriracha mayo for a creamy, spicy kick.
- Beyond the Bowl – Creative Serving Ideas:
- Lettuce Wraps: Spoon the teriyaki chicken into crisp butter or iceberg lettuce cups for a low-carb, handheld option.
- Teriyaki Tacos: Serve the chicken in warm tortillas with a crunchy Asian-inspired slaw.
- Stuffed Bell Peppers: Mix the teriyaki chicken with cooked rice and stuff it inside hollowed-out bell peppers, then bake until tender.
Additional Tips
Take your teriyaki bowls from great to unforgettable with these eight professional tips and tricks.
- Don’t Crowd the Pan: This is the golden rule of searing meat. Giving the chicken pieces space in the pan allows moisture to evaporate quickly, creating a delicious, browned crust. If you overcrowd the pan, the chicken will steam in its own juices and turn out pale and rubbery.
- The Marinade Advantage: For an even deeper flavor, marinate the chicken pieces in about 1/4 cup of the prepared (but not yet thickened) teriyaki sauce for at least 30 minutes, or up to 4 hours in the refrigerator. This allows the savory, sweet flavors to penetrate the meat.
- Master Your Sauce Consistency: The thickness of your sauce is personal. If you prefer a thinner sauce, use slightly less cornstarch slurry. If you want a super thick, sticky glaze, add a little more slurry (1/2 tsp cornstarch mixed with 1/2 tsp water at a time) until you reach your desired consistency.
- Toast Your Own Sesame Seeds: While you can buy toasted sesame seeds, toasting them yourself takes only 2-3 minutes and unlocks an incredible amount of nutty, fragrant flavor. Simply heat them in a dry skillet over medium-low heat, shaking the pan frequently, until they are golden brown and aromatic.
- Meal Prep Like a Pro: This recipe is a meal prep dream. Cook a large batch of the chicken and rice ahead of time. Store the chicken, rice, and fresh veggies in separate airtight containers in the fridge. When you’re ready to eat, just assemble and reheat the chicken and rice for a lightning-fast lunch or dinner.
- Don’t Burn the Aromatics: Garlic and ginger can go from fragrant to burnt and bitter in a matter of seconds. Always add them to the pan near the end of the chicken’s cooking time and reduce the heat to low. Sauté for just a minute until you can smell them, then immediately add your sauce to cool the pan down.
- Velveting for Ultra-Tender Chicken: For a restaurant-style, velvety texture (especially if using chicken breast), try this technique. Toss the raw chicken pieces with 1 tablespoon of cornstarch, 1 tablespoon of soy sauce, and 1 egg white. Let it sit for 15 minutes before pan-frying. The coating creates a protective layer that locks in moisture.
- Incorporate More Veggies: Feel free to stir-fry more vegetables directly with the chicken. Add heartier veggies like bell peppers, onions, or snap peas to the skillet a few minutes before the chicken is done cooking. This infuses them with the teriyaki flavor and makes for a more integrated one-pan meal.
FAQ Section
Here are answers to some of the most common questions about making Teriyaki Chicken Rice Bowls.
1. Can I use chicken breast instead of thighs?
Absolutely. Chicken breast is a leaner option that works well. To ensure it stays juicy, be careful not to overcook it. Cut the breast into uniform 1-inch cubes and consider using the velveting technique mentioned in the tips section for the most tender results.
2. How can I make this recipe gluten-free?
Making this dish gluten-free is very simple. The only ingredient containing gluten is typically the soy sauce. Substitute it with an equal amount of Tamari, which is a Japanese sauce made from fermented soybeans with little to no wheat, or use a specifically labeled gluten-free soy sauce.
3. Can I make the teriyaki sauce in advance?
Yes, the teriyaki sauce can be made up to a week in advance. Prepare the sauce as directed, let it cool completely, and store it in an airtight container or jar in the refrigerator. It may thicken further upon chilling, but it will loosen up again when reheated in the pan with the chicken.
4. What is the best way to store and reheat leftovers?
Store leftovers in an airtight container in the refrigerator for up to 4 days. For the best results when reheating, use a skillet over medium-low heat with a splash of water or chicken broth to keep the chicken and rice from drying out. You can also microwave it in 60-second intervals, stirring in between. It’s best to store fresh components like avocado separately and add them after reheating.
5. What if I don’t have mirin?
Mirin adds a unique sweet and tangy flavor, but if you don’t have it, you can substitute it. The best substitute is a dry sherry or a sweet marsala wine. If you avoid alcohol, you can use rice vinegar, but you will need to add an extra teaspoon of sugar per tablespoon of vinegar used to balance out the acidity.
6. My sauce didn’t thicken. What did I do wrong?
There are two common reasons for a thin sauce. First, ensure your sauce mixture came to a gentle simmer before you added the cornstarch slurry; the heat is necessary to activate the cornstarch’s thickening properties. Second, make sure your cornstarch slurry was made with cold water. Using warm water can cause the starch to clump before it’s incorporated. To fix a thin sauce, simply make another small slurry (1 tsp cornstarch + 1 tsp cold water) and whisk it into the simmering sauce.
7. Can I use a different protein for this recipe?
Definitely! This versatile teriyaki sauce is fantastic with a variety of proteins. Try it with thinly sliced beef (like flank or sirloin steak), shrimp (which will cook much faster), or firm tofu or tempeh for a delicious vegetarian or vegan option. Adjust cooking times accordingly for your chosen protein.
8. Is this recipe considered healthy?
“Healthy” is subjective, but this recipe can certainly be part of a balanced diet. It’s packed with protein and vegetables. To make it even healthier, you can use brown rice or quinoa for more fiber, load up on extra steamed vegetables, and use a light hand when adding the sauce to control the sugar and sodium content. Making it at home gives you complete control over the ingredients, making it a much healthier choice than most takeout versions.
Teriyaki Chicken Rice Bowls
Ingredients
Here is everything you will need to create this spectacular dish. Each component plays a vital role in building the layers of flavor that make these bowls so irresistible.
For the Teriyaki Chicken:
- 2 lbs boneless, skinless chicken thighs, cut into 1-inch pieces: Chicken thighs are the hero here, providing succulent, juicy bites that soak up the sauce beautifully. They are far more forgiving than chicken breast and stay tender even if slightly overcooked.
- 1 tablespoon sesame oil: This adds a nutty, aromatic depth to the chicken right from the start. A toasted sesame oil will provide the most potent and delicious flavor.
- 1 tablespoon avocado oil or other neutral high-heat oil: Used for searing the chicken, this oil has a high smoke point, ensuring you get a perfect golden-brown crust without smoking up your kitchen.
- 4 cloves garlic, minced: Freshly minced garlic is non-negotiable for a vibrant, pungent base note that cuts through the sweetness of the sauce.
- 1 tablespoon fresh ginger, grated: Grated fresh ginger provides a warm, zesty spice that perfectly complements the garlic and soy sauce.
- 1/4 cup chopped green onions, for garnish: These add a mild, fresh oniony bite and a pop of color that finishes the dish perfectly.
- 1 tablespoon toasted sesame seeds, for garnish: A final sprinkle adds a delightful texture and an extra layer of nutty flavor.
For the Homemade Teriyaki Sauce:
- 1 cup low-sodium soy sauce or tamari for a gluten-free option: This is the savory, umami-packed backbone of our sauce. Using low-sodium gives you better control over the final saltiness.
- 1/2 cup water: Used to balance the intensity of the other ingredients and create the right volume and consistency for the sauce.
- 1/2 cup mirin: This Japanese sweet rice wine is crucial for authentic flavor, adding a tangy sweetness and beautiful gloss to the sauce.
- 1/4 cup brown sugar, packed: Provides a deep, molasses-like sweetness that caramelizes beautifully as the sauce thickens.
- 2 tablespoons cornstarch: The magic thickener. When mixed with water to create a slurry, it transforms the liquid sauce into a rich, glossy glaze that clings to every piece of chicken.
- 2 tablespoons cold water: This is mixed with the cornstarch to create the slurry, ensuring it dissolves smoothly into the sauce without lumps.
For Assembling the Bowls:
- 4 cups cooked rice (sushi, jasmine, or brown rice): The fluffy, absorbent foundation of your bowl. Choose your favorite, but Japanese short-grain (sushi) rice is a classic and delicious choice.
- 2 cups steamed or blanched broccoli florets: Adds a vibrant green color, essential nutrients, and a satisfying crunch that contrasts wonderfully with the tender chicken.
- 1 large carrot, julienned or shredded: Provides a sweet, earthy flavor and a pop of bright orange color.
- 1 avocado, sliced: Lends a creamy, buttery texture that balances the savory sauce and adds healthy fats.
Instructions
Follow these step-by-step instructions carefully to achieve restaurant-quality results in your own kitchen. The process is broken down into three simple stages: preparing the sauce, cooking the chicken, and assembling the bowls.
Step 1: Prepare the Homemade Teriyaki Sauce
- In a medium-sized saucepan, combine the low-sodium soy sauce, 1/2 cup of water, mirin, and packed brown sugar.
- Whisk the ingredients together over medium heat. Continue whisking occasionally until the brown sugar has completely dissolved.
- Bring the mixture to a gentle simmer. Do not let it boil aggressively.
- While the sauce is heating, prepare the cornstarch slurry. In a small bowl, whisk together the 2 tablespoons of cornstarch and 2 tablespoons of cold water until no lumps remain. It should have a smooth, milky consistency.
- Once the sauce is simmering, slowly pour the cornstarch slurry into the saucepan while whisking continuously. This is the key to preventing lumps.
- Continue to cook, stirring frequently, for another 2-3 minutes. You will notice the sauce begin to thicken into a beautiful, glossy glaze. It should be thick enough to coat the back of a spoon.
- Once thickened, remove the sauce from the heat and set it aside. It will continue to thicken slightly as it cools.
Step 2: Cook the Chicken to Perfection
- Ensure your chicken thighs are patted dry with paper towels. This step is crucial for getting a good sear rather than just steaming the chicken.
- In a large skillet or wok, heat the avocado oil and sesame oil over medium-high heat. The pan is ready when the oil shimmers slightly.
- Carefully add the chicken pieces to the hot pan in a single layer. Do not overcrowd the pan; work in two batches if necessary. Overcrowding will lower the pan’s temperature and prevent the chicken from browning properly.
- Let the chicken cook, undisturbed, for 3-4 minutes per side. This allows a deep, golden-brown crust to form. Once seared, continue to cook, stirring occasionally, until the chicken is cooked through and no longer pink inside.
- Reduce the heat to low. Add the minced garlic and grated ginger to the skillet with the chicken. Sauté for about 60 seconds, stirring constantly until fragrant. Be very careful not to burn the garlic and ginger, as they can become bitter.
- Pour about half of your prepared teriyaki sauce over the chicken in the skillet. Stir gently to coat every piece of chicken evenly. Let it simmer in the sauce for 1-2 minutes, allowing the flavors to meld and the glaze to adhere to the chicken. Reserve the remaining sauce for drizzling over the bowls when serving.
Step 3: Assemble Your Masterpiece Rice Bowls
- Divide the cooked rice evenly among four large bowls, creating a bed for the other ingredients.
- Arrange the steamed broccoli florets and julienned carrots on one side of the rice.
- Neatly place the sliced avocado on the other side.
- Spoon a generous portion of the saucy teriyaki chicken into the center of each bowl, right on top of the rice.
- Drizzle a little extra of the reserved teriyaki sauce over the chicken and vegetables for an extra burst of flavor and a beautiful glossy finish.
- Garnish generously with a sprinkle of toasted sesame seeds and freshly chopped green onions.
- Serve immediately while the chicken is hot and the flavors are at their peak.
Nutrition
- Serving Size: one normal portion
- Calories: 750
- Sodium: 900mg
- Fat: 22g
- Carbohydrates: 70g
- Fiber: 8g
- Protein: 45g


