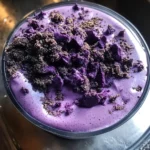
Ingredients
To create the magic of Velvety Ube Halaya Bliss, you’ll need a handful of key ingredients, each playing a vital role in achieving that perfect texture and flavor. Let’s break down what you’ll need:
- Fresh Ube (Purple Yam): The star of the show! Choose firm, heavy ube tubers. Fresh ube provides the most authentic flavor and vibrant color. This is the foundation of our Halaya, delivering its signature earthy sweetness and stunning purple hue.
- Evaporated Milk: Adds a creamy richness and subtle sweetness to the Halaya. Evaporated milk contributes to the velvety texture we aim for, making it luxuriously smooth.
- Sweetened Condensed Milk: Provides the primary sweetness and contributes to the thick, luscious consistency. Condensed milk is essential for achieving the desired sweetness and helps in creating the glossy, jam-like texture.
- Butter (Unsalted): Adds richness, flavor, and a beautiful sheen to the finished Halaya. Butter elevates the flavor profile, adding a touch of indulgence and that melt-in-your-mouth quality.
- Sugar (Granulated): Balances the sweetness and helps to achieve the perfect level of sweetness, especially if your ube isn’t naturally very sweet. Sugar ensures the Halaya has the right level of sweetness, complementing the natural flavors of the ube.
- Vanilla Extract (Pure): Enhances the overall flavor profile, adding warmth and depth. A touch of vanilla extract rounds out the flavors, adding a subtle aromatic note that complements the ube beautifully.
- Pinch of Salt: Balances the sweetness and enhances the other flavors. Salt is a flavor enhancer, preventing the dessert from being overly sweet and bringing out the best in all the other ingredients.
Instructions
Making Velvety Ube Halaya Bliss is a labor of love, but the reward is absolutely worth it. Follow these step-by-step instructions to create your own batch of this delectable Filipino dessert:
Step 1: Preparing the Ube – The Foundation of Flavor
- Wash and Peel the Ube: Thoroughly wash the fresh ube tubers under running water to remove any dirt or soil. Using a sharp vegetable peeler, carefully peel the skin off the ube. Ensuring the ube is clean and peeled is crucial for a smooth and pure-tasting Halaya.
- Grate or Dice the Ube: You have two options here. For a quicker cooking time and slightly smoother texture, grate the ube using a box grater. Alternatively, you can dice the ube into small, uniform cubes (about ½ inch). Grating or dicing helps the ube cook evenly and quickly.
- Steam or Boil the Ube: Place the grated or diced ube in a steamer basket over boiling water or in a pot covered with water. Steam or boil until the ube is fork-tender, which usually takes about 20-30 minutes for grated ube and 30-40 minutes for diced ube. Cooking the ube until tender is essential for creating a smooth and mashable consistency.
- Mash the Cooked Ube: Once the ube is tender, remove it from the heat and let it cool slightly. Using a fork or potato masher, mash the cooked ube until it is smooth and free of lumps. You can also use a food processor or blender for an ultra-smooth texture, but be careful not to over-process and make it gummy. Mashing creates a smooth base for the Halaya, ensuring a velvety texture in the final product.
Step 2: Creating the Halaya Base – Building Layers of Flavor
- Melt the Butter: In a large, heavy-bottomed pot or pan over medium heat, melt the unsalted butter. Melting the butter first creates a flavorful base for the Halaya and prevents scorching.
- Add Evaporated Milk and Sweetened Condensed Milk: Pour the evaporated milk and sweetened condensed milk into the pot with the melted butter. Stir to combine and heat gently. These milks form the creamy foundation of the Halaya, adding richness and sweetness.
- Incorporate the Mashed Ube: Gradually add the mashed ube to the milk mixture, stirring constantly with a wooden spoon or spatula. Adding the ube gradually and stirring constantly ensures it incorporates smoothly into the milk mixture without clumping.
Step 3: Cooking and Thickening – The Art of Patience
- Cook over Low to Medium Heat: Reduce the heat to low to medium-low and continue cooking, stirring constantly. This is the most crucial step and requires patience. Low and slow cooking is key to developing the rich flavor and thick, jam-like consistency of the Halaya without burning.
- Stir Continuously: Stir continuously and scrape the bottom and sides of the pot to prevent sticking and scorching. The mixture will gradually thicken as it cooks. Constant stirring is essential to prevent sticking and ensure even cooking, resulting in a smooth and lump-free Halaya.
- Add Sugar (if needed): Taste the mixture after about 30 minutes of cooking. If you prefer a sweeter Halaya, add granulated sugar gradually, stirring until dissolved. Remember that ube’s natural sweetness varies, so adjust sugar accordingly. Adjusting sweetness to your preference ensures the Halaya is perfectly balanced to your taste.
- Continue Cooking Until Thick and Glossy: Continue cooking and stirring for another 30-60 minutes, or until the Halaya is very thick, glossy, and pulls away from the sides of the pot. The consistency should be similar to a thick jam or custard. Cooking until the Halaya thickens to the right consistency is vital for its texture and ability to hold its shape when served.
- Stir in Vanilla Extract and Salt: Once the Halaya has reached the desired thickness, remove it from the heat and stir in the vanilla extract and a pinch of salt. Vanilla extract enhances the flavor, and salt balances the sweetness, adding the final touches to the flavor profile.
Step 4: Cooling and Setting – The Final Transformation
- Transfer to Serving Dishes: Pour the hot Halaya into greased serving dishes, such as small bowls, ramekins, or a shallow baking dish. You can also use a loaf pan for slicing later. Choosing your serving dishes allows you to customize the presentation of your Halaya.
- Smooth the Surface: Use a spatula to smooth the surface of the Halaya in the dishes. Smoothing the surface makes the Halaya visually appealing and ready for garnishing.
- Cool to Room Temperature: Allow the Halaya to cool to room temperature on the countertop. Cooling at room temperature allows the Halaya to start setting and firming up.
- Refrigerate to Set: Once cooled to room temperature, cover the dishes with plastic wrap or lids and refrigerate for at least 4-6 hours, or preferably overnight, to allow the Halaya to fully set and chill. Refrigeration is crucial for the Halaya to firm up to its desired consistency and for optimal flavor development.
Step 5: Garnishing (Optional but Recommended) – Adding the Finishing Touch
- Garnish Before Serving: Just before serving, you can garnish your Velvety Ube Halaya Bliss. Popular garnishes include:
- Latik: Toasted coconut curds, adding a crunchy and nutty contrast. Latik provides a textural and flavor contrast that elevates the Halaya.
- Grated Cheese (Cheddar or Queso de Bola): A classic Filipino pairing, offering a salty and savory element. Cheese adds a surprising but delightful salty and savory dimension.
- Toasted Coconut Flakes: Adds a delicate coconut flavor and texture. Toasted coconut flakes enhance the coconut notes in the dessert and add a subtle crunch.
- Ube Halaya Topping (Reserve some before chilling): Create a swirl or decorative pattern with a bit of reserved Halaya. Using reserved Halaya for garnish creates a visually appealing and consistent presentation.
Nutrition
- Serving Size: one normal portion
- Calories: 350
- Fat: 15g
- Saturated Fat: 9g