")

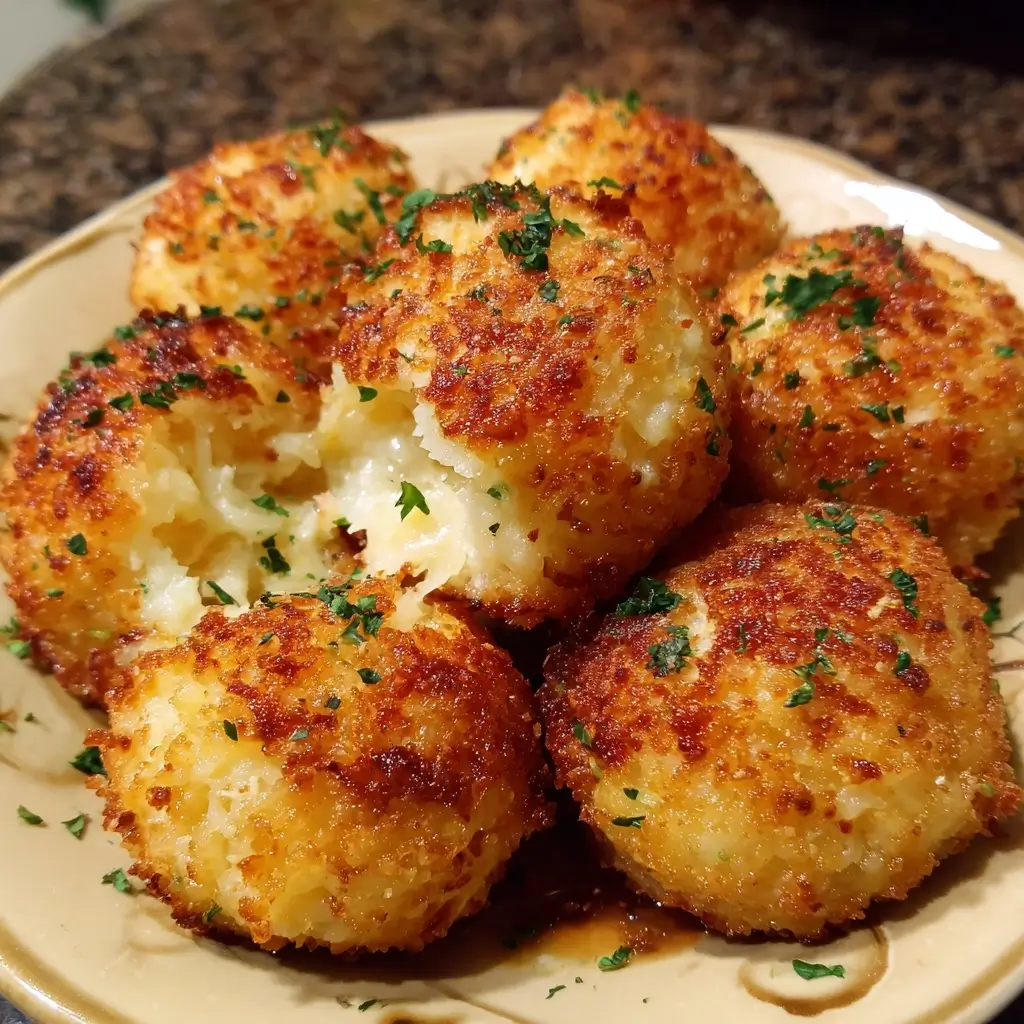

Of all the culinary challenges I’ve faced in my kitchen, finding a genuinely satisfying, crowd-pleasing snack that doesn’t derail our healthy eating goals has been the toughest. We’re a family of diverse palates—from picky kids who turn their noses up at most vegetables to adults craving comforting, savory flavors. For years, party platters and afternoon snacks were a balancing act between “healthy but boring” and “delicious but guilt-inducing.” That all changed the day I perfected these Cheesy Cauliflower Rice Balls. I still remember the first time I served them. I was hesitant, calling them “cheesy poppers” to avoid the dreaded “c-word” (cauliflower) with the kids. They were golden brown, perfectly round, and smelled incredible. The first bite was a revelation. A perfectly crisp, golden-brown crust gave way to a warm, tender, and incredibly cheesy interior, bursting with savory herbs. They had the comforting, satisfying texture of traditional arancini but felt so much lighter. The kids devoured them, my husband went back for thirds, and I felt a wave of triumph. These weren’t just a substitute; they were an upgrade. They have since become our go-to for movie nights, a star appetizer for gatherings, and even a sneaky side dish for weeknight dinners. This recipe is more than just food; it’s a solution—a delicious, gluten-free, low-carb miracle that proves healthy eating can be an absolute joy.
Ingredients
- 1 large head of cauliflower (about 2-2.5 lbs): This is the star of our recipe, serving as the low-carb, gluten-free base that magically mimics the texture of rice. Using a fresh head yields the best flavor and texture.
- 1 large egg, lightly beaten: The primary binder that holds our delicious balls together. It adds richness and structure, ensuring they don’t fall apart during baking.
- 1 ½ cups shredded sharp cheddar cheese: This cheese provides a bold, tangy flavor and a fantastic, gooey melt. A sharp variety stands up well to the other flavors in the dish.
- ½ cup grated Parmesan cheese: For a nutty, salty, and savory depth of flavor. Parmesan also helps to absorb moisture and contributes to a crispier exterior.
- ¼ cup finely chopped fresh chives: These add a mild, fresh oniony flavor that brightens up the entire mixture.
- 2 cloves garlic, minced: A fundamental aromatic that provides a pungent, savory backbone to the flavor profile.
- 1 teaspoon dried oregano: This classic herb adds a warm, peppery, and slightly sweet note that pairs beautifully with the cheese and cauliflower.
- ½ teaspoon salt (or to taste): Essential for enhancing all the other flavors in the recipe.
- ¼ teaspoon black pepper: Adds a touch of gentle heat and complexity.
- Optional for a meaty flavor: ½ cup finely diced cooked ham or crumbled cooked ground beef: If you want to add a protein boost and a savory, smoky dimension, these are excellent additions. Ensure they are cooked and finely chopped to incorporate seamlessly.
Instructions
- Prepare the Cauliflower Rice: Begin by washing and thoroughly drying the head of cauliflower. Remove the leaves and the tough core. Cut the cauliflower into large florets. Working in two or three batches to avoid overcrowding, place the florets into a food processor. Pulse in short 1-2 second bursts until the cauliflower is broken down into small, rice-like granules. Be careful not to over-process, or you will end up with cauliflower mush. If you don’t have a food processor, you can use the large holes of a box grater to grate the florets.
- Cook the Cauliflower: Transfer the riced cauliflower to a large, microwave-safe bowl. Cover the bowl (leaving a small vent for steam) and microwave on high for 6-8 minutes, or until it is tender and cooked through. Alternatively, you can steam the cauliflower rice on the stovetop for 5-7 minutes. The goal is to cook it until it’s soft, which makes the next step more effective.
- The Most Crucial Step – Squeeze Out the Moisture: This step is non-negotiable for achieving perfectly firm cauliflower balls that don’t fall apart. Allow the cooked cauliflower rice to cool for 10-15 minutes, until it’s safe to handle. Transfer the cooled cauliflower to the center of a clean kitchen towel, a cheesecloth, or a nut milk bag. Gather the ends of the towel and twist, squeezing as hard as you can over the sink. You will be amazed at how much water is released. Continue squeezing until you can get virtually no more liquid out. The resulting cauliflower should be very dry and crumbly.
- Combine the Ingredients: Preheat your oven to 400°F (200°C) and line a large baking sheet with parchment paper. In a large mixing bowl, combine the thoroughly squeezed cauliflower rice, the beaten egg, shredded cheddar cheese, grated Parmesan cheese, finely chopped chives, minced garlic, oregano, salt, and black pepper. If you are using cooked ham or ground beef, add it in at this stage.
- Mix Thoroughly: Using a spatula or your hands, mix all the ingredients together until they are completely combined. The mixture should feel slightly sticky and hold its shape when pressed together. This is a good time to taste a tiny amount and adjust the salt and pepper if needed.
- Form the Balls: Scoop out about 1.5 to 2 tablespoons of the mixture for each ball. Roll the mixture firmly between the palms of your hands to create a compact, round ball. The size should be similar to a golf ball. Place each ball onto the prepared parchment-lined baking sheet, leaving a little space between each one to allow for even air circulation and browning.
- Chill for Firmness: For the best results and to further ensure your cauliflower balls hold their shape, place the entire baking sheet with the formed balls into the refrigerator to chill for at least 30 minutes. This allows the ingredients, especially the cheeses and the egg binder, to set and firm up before baking.
- Bake to Golden Perfection: Transfer the baking sheet from the refrigerator directly into the preheated oven. Bake for 20-25 minutes, or until the balls are firm to the touch and a deep golden brown on the bottom. For even browning, you can carefully flip them halfway through the baking time. They should look crispy and be incredibly fragrant.
- Serve and Enjoy: Remove the Cheesy Cauliflower Rice Balls from the oven and let them cool on the baking sheet for a few minutes. This helps them firm up a bit more before serving. Serve them warm with your favorite dipping sauce.
Nutrition Facts
- Servings: This recipe yields approximately 20-24 balls. A serving size is considered 4 balls.
- Calories per serving: Approximately 220-250 calories.
- Low in Carbohydrates: Each serving contains only about 5-7 grams of net carbs, making these an excellent choice for those following a keto or low-carb lifestyle.
- High in Vitamin C: Cauliflower is a powerhouse of nutrients, and just one serving of these balls provides a significant portion of your daily recommended Vitamin C intake, which is crucial for immune function.
- Good Source of Protein: Thanks to the generous amount of cheese and the egg, each serving provides a satisfying 10-12 grams of protein, helping to keep you full and support muscle health.
- Naturally Gluten-Free: This recipe contains no wheat or gluten-containing ingredients, making it a safe and delicious option for individuals with celiac disease or gluten sensitivity.
- Rich in Fiber: Cauliflower provides dietary fiber, which is essential for digestive health and helps promote a feeling of fullness.
Preparation Time
This recipe requires a bit of prep, but the delicious results are well worth the effort. The total time is broken down as follows:
- Preparation Time: 20 minutes (for ricing the cauliflower, mixing ingredients, and forming the balls).
- Chilling Time: 30 minutes (an essential step for firming up the balls before baking).
- Cooking Time: 20-25 minutes.
- Total Time: Approximately 1 hour and 15 minutes from start to finish.
How to Serve
These versatile Cheesy Cauliflower Rice Balls can be served in a multitude of ways, making them perfect for any occasion. Here are some of our favorite ideas:
- As a Classic Appetizer:
- Arrange them on a platter with an array of dipping sauces in the center.
- Marinara Sauce: A classic pairing that gives a pizza-like vibe.
- Garlic Aioli: A creamy, pungent sauce that complements the cheesy flavor perfectly.
- Pesto: The fresh, herby flavor of basil pesto is a fantastic contrast to the rich cheese.
- Spicy Ranch: A cool and creamy dip with a kick of heat.
- As a Healthy Side Dish:
- Serve them alongside grilled chicken, steak, or a flaky white fish as a low-carb alternative to potatoes or rice.
- They pair wonderfully with a simple green salad dressed in a light vinaigrette.
- As a Light Main Course:
- Create a “bowl” by serving 5-6 cauliflower balls on a bed of arugula or mixed greens.
- Drizzle with extra virgin olive oil and a squeeze of lemon for a satisfying and complete vegetarian meal.
- For Kids and Lunchboxes:
- They are a fantastic addition to a bento box-style lunch, as they hold up well and are delicious even at room temperature.
- Serving them with a familiar dip like ketchup can make them even more kid-friendly.
- On a Party Platter:
- Combine them on a large board with other finger foods like olives, cheese cubes, cured meats (like ham or prosciutto), and fresh vegetable sticks for a beautiful and diverse party spread.
Additional Tips
- Moisture is the Ultimate Enemy: I cannot stress this enough. The success of this recipe hinges on removing as much water as possible from the cooked cauliflower. A wet mixture will lead to mushy balls that fall apart. If you think you’ve squeezed enough, squeeze it again!
- Cheese Variations are Welcome: While sharp cheddar and Parmesan are a classic combination, feel free to experiment! A mix of mozzarella and provolone will result in an extra-stretchy, “cheese-pull” center. A bit of Monterey Jack with jalapeños can add a spicy kick.
- Don’t Skip the Chilling Time: Chilling the formed balls in the refrigerator is a crucial step. It solidifies the fats in the cheese and allows the egg binder to set, which dramatically improves their structural integrity. This simple step is your best insurance against them flattening out or crumbling in the oven.
- Uniformity is Key: Try to make all the balls roughly the same size and shape. This ensures that they all cook evenly in the same amount of time. Using a small cookie scoop can help you portion out the mixture consistently.
- Get Creative with Herbs and Spices: This recipe is a fantastic canvas for your favorite flavors. Try adding a pinch of smoked paprika for a smoky depth, a dash of cayenne pepper for heat, or finely chopped fresh parsley or dill for a different herbaceous note.
- Air Fryer Instructions: These balls are spectacular when made in an air fryer! For an even crispier exterior, preheat your air fryer to 375°F (190°C). Place the balls in a single layer in the basket (you may need to work in batches). Air fry for 12-15 minutes, shaking the basket halfway through, until they are deep golden brown and crispy all over.
- Make-Ahead and Storage: You can prepare the mixture and form the balls up to 24 hours in advance. Store them on the baking sheet, covered with plastic wrap, in the refrigerator. You can then bake them straight from the fridge when you’re ready. Leftovers can be stored in an airtight container in the refrigerator for up to 4 days.
- For a Crispier Coating (Optional): If you want an extra-crunchy crust and don’t mind a few extra carbs (though still low), you can roll the chilled balls in a light coating before baking. A mixture of almond flour and more grated Parmesan works wonderfully for a keto-friendly option.
Frequently Asked Questions (FAQ)
1. Why did my Cheesy Cauliflower Rice Balls fall apart?
The most common reason is excess moisture in the cauliflower. If the cauliflower rice is not squeezed bone-dry, the mixture will be too wet to hold its shape. Another culprit could be skipping the chilling step, which is vital for firming up the balls before they hit the oven’s heat. Ensure you squeeze thoroughly and don’t skip the chill!
2. Can I make this recipe vegan?
Yes, you can adapt this recipe to be vegan. Use your favorite brand of shredded vegan cheddar and parmesan-style cheese. For the binder, you can use a “flax egg.” To make one, mix one tablespoon of ground flaxseed with three tablespoons of water, let it sit for 10-15 minutes to thicken, and then use it in place of the regular egg.
3. Is it possible to use frozen cauliflower rice?
Absolutely! Frozen cauliflower rice is a great time-saver. You’ll need to cook it according to the package directions first. The critical difference is that frozen cauliflower tends to release even more water than fresh. It is imperative that you let it cool and then squeeze it extremely well with a cheesecloth or kitchen towel to remove all the excess moisture before mixing it with the other ingredients.
4. How do I store and reheat leftovers?
Store any leftover cauliflower balls in an airtight container in the refrigerator for up to 4 days. While you can microwave them, they will lose their crispy texture. The best way to reheat them is in an oven or air fryer at 375°F (190°C) for 5-8 minutes, or until they are heated through and the exterior is crisp again.
5. Can I freeze these cauliflower balls?
Yes, they freeze beautifully! You can freeze them either before or after baking.
- To freeze unbaked: Place the formed balls on a baking sheet and “flash freeze” them for an hour until solid. Then, transfer them to a zip-top freezer bag. They can be baked directly from frozen; just add 10-15 minutes to the baking time.
- To freeze baked: Let the baked balls cool completely, then flash freeze them on a baking sheet before transferring them to a freezer bag. Reheat from frozen in the oven or air fryer until hot and crispy.
6. Are these Cheesy Cauliflower Rice Balls keto-friendly?
Yes, they are exceptionally keto-friendly. The primary ingredient is cauliflower, a low-carb vegetable. The other main ingredients—cheese and egg—are high in fat and protein with virtually no carbs. With only 5-7g of net carbs per generous serving, they fit perfectly into a ketogenic diet.
7. What other vegetables or additions can I mix in?
You can definitely get creative! Finely chopped spinach (be sure to cook it and squeeze out all the moisture, just like the cauliflower) or finely diced broccoli florets would be delicious. For a different flavor profile, you could add finely chopped sun-dried tomatoes or olives. Just be mindful that any additions are chopped finely so the balls still hold together.
8. What is the absolute best dipping sauce for these?
While “best” is subjective, a creamy garlic aioli is a top contender. The rich, pungent garlic flavor of the aioli perfectly complements the savory, cheesy notes of the cauliflower balls, creating a truly irresistible combination. If you prefer something fresher, a simple marinara sauce is a close second, offering a bright, acidic contrast.

Cheesy Cauliflower Rice Balls
Ingredients
- 1 large head of cauliflower (about 2–2.5 lbs): This is the star of our recipe, serving as the low-carb, gluten-free base that magically mimics the texture of rice. Using a fresh head yields the best flavor and texture.
- 1 large egg, lightly beaten: The primary binder that holds our delicious balls together. It adds richness and structure, ensuring they don’t fall apart during baking.
- 1 ½ cups shredded sharp cheddar cheese: This cheese provides a bold, tangy flavor and a fantastic, gooey melt. A sharp variety stands up well to the other flavors in the dish.
- ½ cup grated Parmesan cheese: For a nutty, salty, and savory depth of flavor. Parmesan also helps to absorb moisture and contributes to a crispier exterior.
- ¼ cup finely chopped fresh chives: These add a mild, fresh oniony flavor that brightens up the entire mixture.
- 2 cloves garlic, minced: A fundamental aromatic that provides a pungent, savory backbone to the flavor profile.
- 1 teaspoon dried oregano: This classic herb adds a warm, peppery, and slightly sweet note that pairs beautifully with the cheese and cauliflower.
- ½ teaspoon salt (or to taste): Essential for enhancing all the other flavors in the recipe.
- ¼ teaspoon black pepper: Adds a touch of gentle heat and complexity.
- Optional for a meaty flavor: ½ cup finely diced cooked ham or crumbled cooked ground beef: If you want to add a protein boost and a savory, smoky dimension, these are excellent additions. Ensure they are cooked and finely chopped to incorporate seamlessly.
Instructions
- Prepare the Cauliflower Rice: Begin by washing and thoroughly drying the head of cauliflower. Remove the leaves and the tough core. Cut the cauliflower into large florets. Working in two or three batches to avoid overcrowding, place the florets into a food processor. Pulse in short 1-2 second bursts until the cauliflower is broken down into small, rice-like granules. Be careful not to over-process, or you will end up with cauliflower mush. If you don’t have a food processor, you can use the large holes of a box grater to grate the florets.
- Cook the Cauliflower: Transfer the riced cauliflower to a large, microwave-safe bowl. Cover the bowl (leaving a small vent for steam) and microwave on high for 6-8 minutes, or until it is tender and cooked through. Alternatively, you can steam the cauliflower rice on the stovetop for 5-7 minutes. The goal is to cook it until it’s soft, which makes the next step more effective.
- The Most Crucial Step – Squeeze Out the Moisture: This step is non-negotiable for achieving perfectly firm cauliflower balls that don’t fall apart. Allow the cooked cauliflower rice to cool for 10-15 minutes, until it’s safe to handle. Transfer the cooled cauliflower to the center of a clean kitchen towel, a cheesecloth, or a nut milk bag. Gather the ends of the towel and twist, squeezing as hard as you can over the sink. You will be amazed at how much water is released. Continue squeezing until you can get virtually no more liquid out. The resulting cauliflower should be very dry and crumbly.
- Combine the Ingredients: Preheat your oven to 400°F (200°C) and line a large baking sheet with parchment paper. In a large mixing bowl, combine the thoroughly squeezed cauliflower rice, the beaten egg, shredded cheddar cheese, grated Parmesan cheese, finely chopped chives, minced garlic, oregano, salt, and black pepper. If you are using cooked ham or ground beef, add it in at this stage.
- Mix Thoroughly: Using a spatula or your hands, mix all the ingredients together until they are completely combined. The mixture should feel slightly sticky and hold its shape when pressed together. This is a good time to taste a tiny amount and adjust the salt and pepper if needed.
- Form the Balls: Scoop out about 1.5 to 2 tablespoons of the mixture for each ball. Roll the mixture firmly between the palms of your hands to create a compact, round ball. The size should be similar to a golf ball. Place each ball onto the prepared parchment-lined baking sheet, leaving a little space between each one to allow for even air circulation and browning.
- Chill for Firmness: For the best results and to further ensure your cauliflower balls hold their shape, place the entire baking sheet with the formed balls into the refrigerator to chill for at least 30 minutes. This allows the ingredients, especially the cheeses and the egg binder, to set and firm up before baking.
- Bake to Golden Perfection: Transfer the baking sheet from the refrigerator directly into the preheated oven. Bake for 20-25 minutes, or until the balls are firm to the touch and a deep golden brown on the bottom. For even browning, you can carefully flip them halfway through the baking time. They should look crispy and be incredibly fragrant.
- Serve and Enjoy: Remove the Cheesy Cauliflower Rice Balls from the oven and let them cool on the baking sheet for a few minutes. This helps them firm up a bit more before serving. Serve them warm with your favorite dipping sauce.
Nutrition
- Serving Size: one normal portion
- Calories: 250
- Carbohydrates: 7 grams
- Protein: 12 grams


