")


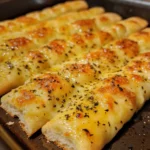
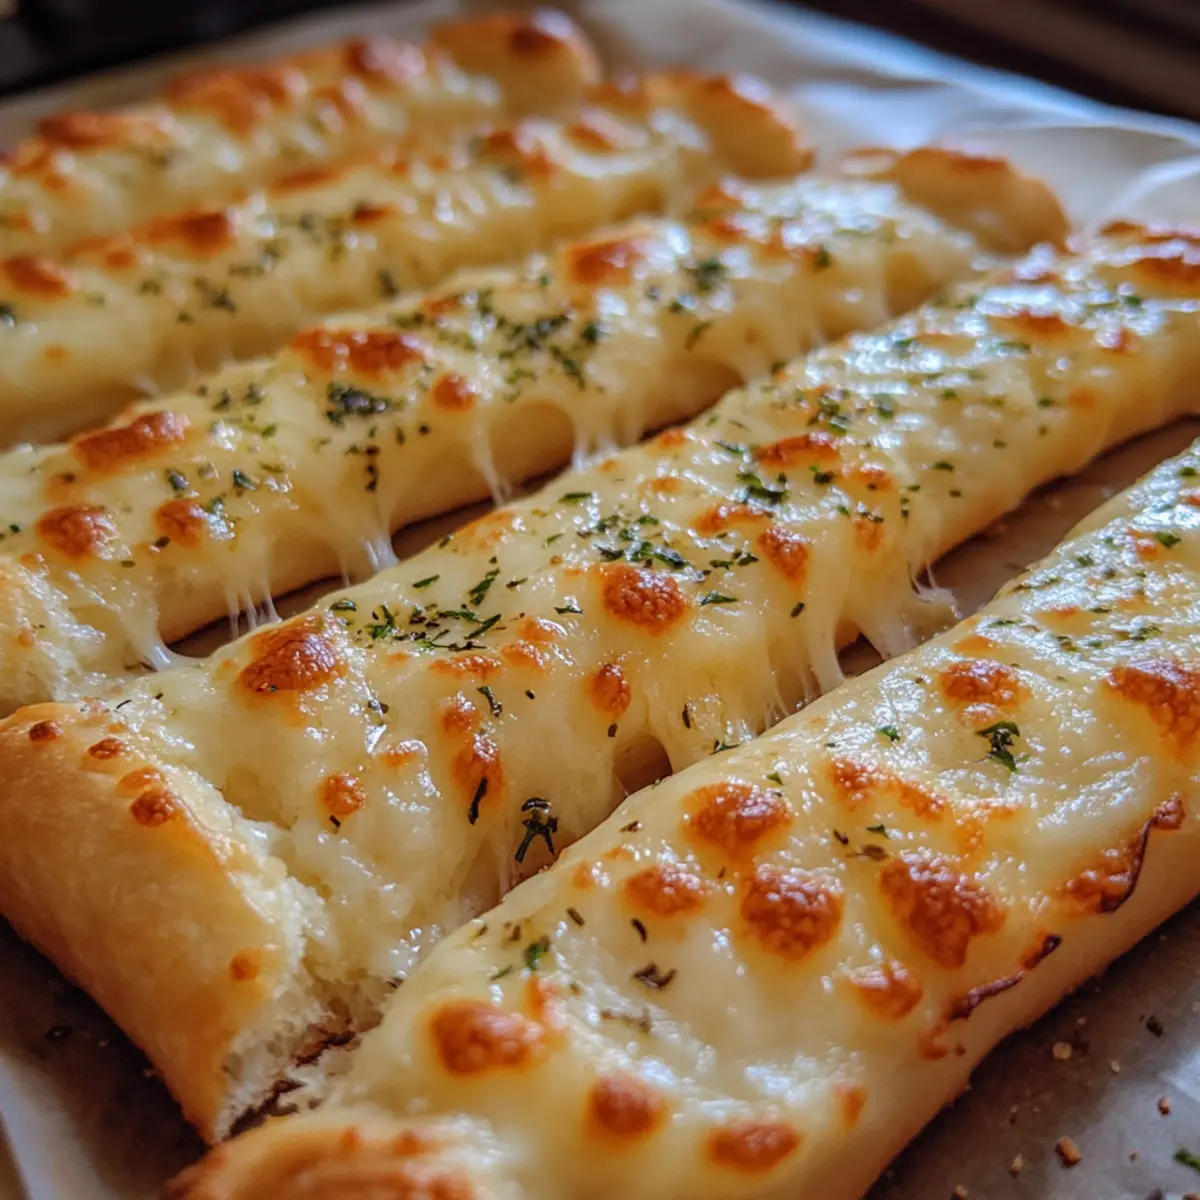
There’s something truly irresistible about the smell of garlic sizzling in butter, melting into a blanket of gooey cheese—this is exactly what makes these Cheesy Garlic Breadsticks easy to whip up and impossible to resist. After a long day, I often crave comfort food that doesn’t demand hours in the kitchen, and these breadsticks fit the bill perfectly. With just a handful of simple ingredients and a quick bake, they transform ordinary dinner into a warm, welcoming feast. Whether you’re sharing them at family night, adding them as a crowd-pleasing appetizer, or simply indulging your love for homemade goodness, these breadsticks are a deliciously simple way to bring joy to any table.
Why choose Cheesy Garlic Breadsticks Easy?
Simplicity shines here with a quick, fuss-free preparation that anyone can master. Flavor-packed garlic butter and melty cheese deliver comforting, irresistible richness. Versatility allows these breadsticks to complement pasta, soups, or stand alone as a snack. Time-saving means you enjoy fresh-baked goodness without the wait. Plus, their crowd-pleasing appeal makes them perfect for family dinners or parties!
Cheesy Garlic Breadsticks Easy Ingredients
For the Dough
- All-purpose flour – use fresh flour for soft, tender breadsticks every time.
- Active dry yeast – ensures your breadsticks puff up light and fluffy.
- Warm water – activates the yeast perfectly; not too hot to kill it!
- Sugar – feeds the yeast and adds a subtle touch of sweetness.
- Salt – balances the flavors and enhances the dough’s texture.
- Olive oil – keeps the dough moist and adds a hint of richness.
For the Garlic Butter Topping
- Unsalted butter – melted for that rich, gooey garlic flavor layer.
- Garlic cloves – fresh and minced to pack in bold, aromatic taste.
- Fresh parsley – chopped finely to brighten and freshen the buttery topping.
- Grated Parmesan cheese – adds a savory depth and a salty kick.
For the Cheesy Layer
- Mozzarella cheese – shredded and generously sprinkled for gooey, melty perfection.
- Cheddar cheese (optional) – mix in for an extra sharp, flavorful bite.
Each ingredient plays its part in crafting these irresistibly soft and flavor-loaded Cheesy Garlic Breadsticks Easy, turning simple pantry staples into pure comfort on a plate.
How to Make Cheesy Garlic Breadsticks Easy
- Activate Yeast: In a small bowl, whisk warm water (105–115°F) with sugar and yeast. Let stand 5–10 minutes until foamy and fragrant, indicating active yeast.
- Mix Dough: In a large bowl, combine flour and salt. Pour in yeast mixture and olive oil. Stir until a shaggy dough forms, ensuring no dry patches remain.
- Knead Dough: Turn dough onto a lightly floured surface and knead for 5–7 minutes until smooth, elastic, and slightly tacky. Add flour sparingly to prevent sticking.
- First Rise: Place dough in an oiled bowl, cover with plastic wrap, and rest in a warm spot for 15–20 minutes, until doubled in size and airy.
- Preheat Oven: While dough rises, preheat oven to 425°F. Line a baking sheet with parchment paper or lightly grease with olive oil to prevent sticking.
- Shape Sticks: Punch down dough and transfer to the prepared sheet. Roll into a 9×12-inch rectangle, then slice into 8–10 equal strips using a pizza cutter.
- Bake Breadsticks: Bake strips on middle rack for 10–12 minutes until edges turn golden brown and centers feel springy to the touch.
- For the Garlic Butter Topping: Melt butter with minced garlic and Italian herbs in a small saucepan over low heat until fragrant, then remove from heat.
- Brush Topping: Generously brush garlic butter over hot breadsticks, making sure each strip is coated for maximum flavor.
- For the Cheese Layer: Sprinkle shredded mozzarella (and optional cheddar) evenly over breadsticks, covering edges for gooey, golden cheese pockets.
- Melt Cheese: Return to oven for 3–5 minutes until cheese is bubbly and light golden brown; watch closely to avoid burning.
Optional: Serve with warm marinara sauce for dipping.
Exact quantities are listed in the recipe card below.
Expert Tips for Cheesy Garlic Breadsticks Easy
- Use warm water carefully: Ensure your water is between 105–115°F to activate the yeast without killing it, giving your breadsticks the perfect rise.
- Knead just right: Knead until the dough feels smooth and elastic but still slightly tacky; avoid adding too much flour to keep breadsticks soft.
- Brush while hot: Apply the garlic butter topping immediately after baking to let the flavors soak in and keep the breadsticks moist.
- Watch cheese melting: Keep a close eye when broiling cheese to prevent burning and achieve that perfect golden, bubbly finish.
- Slice evenly: Use a pizza cutter to cut breadsticks into equal strips for uniform baking and consistent texture throughout the batch.
- Serve fresh: Cheesy Garlic Breadsticks Easy taste best warm—serve promptly to enjoy soft centers and melty cheese at their peak.
How to Store and Freeze Cheesy Garlic Breadsticks Easy
Room Temperature: Store any leftover breadsticks in an airtight container for up to 2 days to keep them fresh and soft.
Fridge: If you want to extend shelf life, refrigerate breadsticks for up to 5 days in a sealed container, although they may lose some softness.
Freezer: For longer storage, freeze breadsticks individually wrapped in plastic wrap and then in a zip-top bag for up to 3 months.
Reheating: To reheat, bake from frozen at 350°F for 10–15 minutes until warmed through and cheesy, enjoying that fresh Cheesy Garlic Breadsticks Easy experience again!
What to Serve with Cheesy Garlic Breadsticks Easy?
Elevate your meal with delightful sides and pairings that complement the rich, savory goodness of these cheesy treats.
- Marinara Sauce: Perfect for dipping, this classic sauce balances the richness of cheese with its bright, tangy flavor. Every bite becomes a comforting experience.
- Caesar Salad: Crisp romaine lettuce, creamy dressing, and crunchy croutons add freshness, cutting through the heaviness of the breadsticks and creating a well-rounded meal.
- Tomato Basil Soup: A warm, flavorful soup enhances the comfort factor, offering a luscious tomato counterpoint to the savory garlic. Dip those breadsticks for the ultimate cozy combo!
- Stuffed Peppers: These hearty vegetable-filled gems provide a colorful and nutritious contrast. Their seasoned fillings nicely complement the flavors of garlic and cheese.
- Roasted Vegetables: A medley of seasonal veggies adds texture and healthy goodness, enhancing your plate while the natural sweetness contrasts beautifully with the garlic.
- Cheese Platter: Offer an assortment of cheeses that mirror the richness of your breadsticks, inviting friends and family to graze and enjoy every last bite together.
- Crisp White Wine: Pair with a chilled glass to refresh your palate; the acidity cuts through the cheese, creating a delightful harmony with every sip.
- Chocolate Chip Cookies: Finish with these warm, gooey cookies for a comforting dessert that rounds out your meal on a sweet note, ensuring everyone leaves the table with a smile.
Make Ahead Options
These Cheesy Garlic Breadsticks Easy are perfect for meal prep enthusiasts! You can prepare the dough up to 24 hours in advance by following steps 1 through 4, then refrigerate it tightly wrapped in plastic wrap to maintain its quality. When ready to serve, simply bring the dough to room temperature (about 30 minutes), shape the breadsticks, and follow steps 5 through 11 for baking. The garlic butter topping can also be made ahead (up to 3 days) and stored in the refrigerator; just reheat it gently to keep those flavors vibrant. This way, you can enjoy fresh, homemade breadsticks without the last-minute rush!
Variations & Substitutions for Cheesy Garlic Breadsticks Easy
Feel free to get creative with your breadsticks; the possibilities for customization are endless and delicious!
-
Gluten-Free: Substitute all-purpose flour with a gluten-free blend to accommodate dietary needs. Just ensure the blend contains xanthan gum for the best texture.
-
Herbed Delight: Add fresh herbs like rosemary or thyme into the dough for a fragrant twist. Their earthy notes elevate the flavor, making these breadsticks even more special.
-
Spicy Kick: Mix in a pinch of crushed red pepper flakes to the garlic butter for an added spicy flavor. It’s a simple way to enhance the taste and invigorate every bite.
-
Stuffed Breadsticks: Fill the dough with fresh mozzarella or pepperoni before shaping. This addition creates an ooey-gooey surprise that takes cheesy goodness to a whole new level!
-
Cheddar Variation: Swap half of the mozzarella with sharp cheddar cheese for a tangy flavor boost. The mix of cheeses adds depth and richness that everyone will love.
-
Cheesy Garlic Knots: Instead of breadsticks, tie the dough into knots for a fun, playful presentation. They bake up crispy and soft—perfect for pulling apart!
-
Vegan Option: Use plant-based butter for the garlic topping and dairy-free cheese alternatives for a vegan-friendly version. Your taste buds won’t even miss the dairy!
-
Sweet Twist: Drizzle honey or sprinkle cinnamon sugar on top before serving for a dessert version. This unexpected combination creates a sweet treat that is sure to surprise!
Each variation allows you to tailor these breadsticks to your liking while maintaining that delicious comfort food experience. Enjoy experimenting!
Cheesy Garlic Breadsticks Easy Recipe FAQs
How ripe or fresh should the garlic be for the best flavor?
Use fresh, firm garlic cloves without any soft spots or sprouts for the brightest, most pungent garlicky taste. Avoid garlic with dark spots or shriveled skins as it can turn bitter and compromise the buttery topping’s aroma.
What’s the best way to store leftover Cheesy Garlic Breadsticks Easy?
Store leftover breadsticks in an airtight container at room temperature for up to 2 days to maintain softness and flavor. If you want them to last longer, place them in the fridge sealed tightly for up to 5 days—but be aware they may lose some of that fresh-baked tenderness.
Can I freeze Cheesy Garlic Breadsticks Easy, and how do I reheat them properly?
Absolutely! Freeze individual breadsticks by wrapping each tightly in plastic wrap, then placing them all inside a zip-top freezer bag. Freeze for up to 3 months. To reheat, bake straight from frozen at 350°F for 10–15 minutes until hot and the cheese is melty again. This method keeps them tasting freshly baked and delicious.
What if my breadsticks turn out dense or tough instead of soft?
This can happen if the yeast wasn’t properly activated or the dough was over-kneaded. Make sure your water is a warm 105–115°F and that the yeast foams before mixing. Knead just until the dough is smooth and elastic but still slightly tacky—too much flour or excessive kneading can make dough stiff.
Are Cheesy Garlic Breadsticks Easy safe for pets or those with allergies?
These breadsticks contain garlic and dairy, which are not safe for pets like dogs or cats. Also, the dough uses wheat flour, so it’s unsuitable for gluten-free diets. For guests with allergies, consider substituting ingredients accordingly or offer a simple bread alternative without garlic or cheese.

Cheesy Garlic Breadsticks Easy: Irresistibly Soft & Loaded with Flavor
Ingredients
Equipment
Method
- Activate Yeast: In a small bowl, whisk warm water with sugar and yeast. Let stand 5–10 minutes until foamy.
- Mix Dough: In a large bowl, combine flour and salt. Pour in yeast mixture and olive oil. Stir until a shaggy dough forms.
- Knead Dough: Turn dough onto a lightly floured surface and knead for 5–7 minutes until smooth and elastic.
- First Rise: Place dough in an oiled bowl, cover with plastic wrap, and rest for 15–20 minutes until doubled in size.
- Preheat Oven: Preheat oven to 425°F. Line a baking sheet with parchment paper.
- Shape Sticks: Punch down dough, roll into a 9×12-inch rectangle, then slice into 8–10 equal strips.
- Bake Breadsticks: Bake strips for 10–12 minutes until edges turn golden brown.
- For the Garlic Butter Topping: Melt butter with minced garlic and Italian herbs in a small saucepan.
- Brush Topping: Generously brush garlic butter over hot breadsticks.
- For the Cheese Layer: Sprinkle shredded mozzarella and optional cheddar evenly over breadsticks.
- Melt Cheese: Return to oven for 3–5 minutes until cheese is bubbly and golden brown.