")

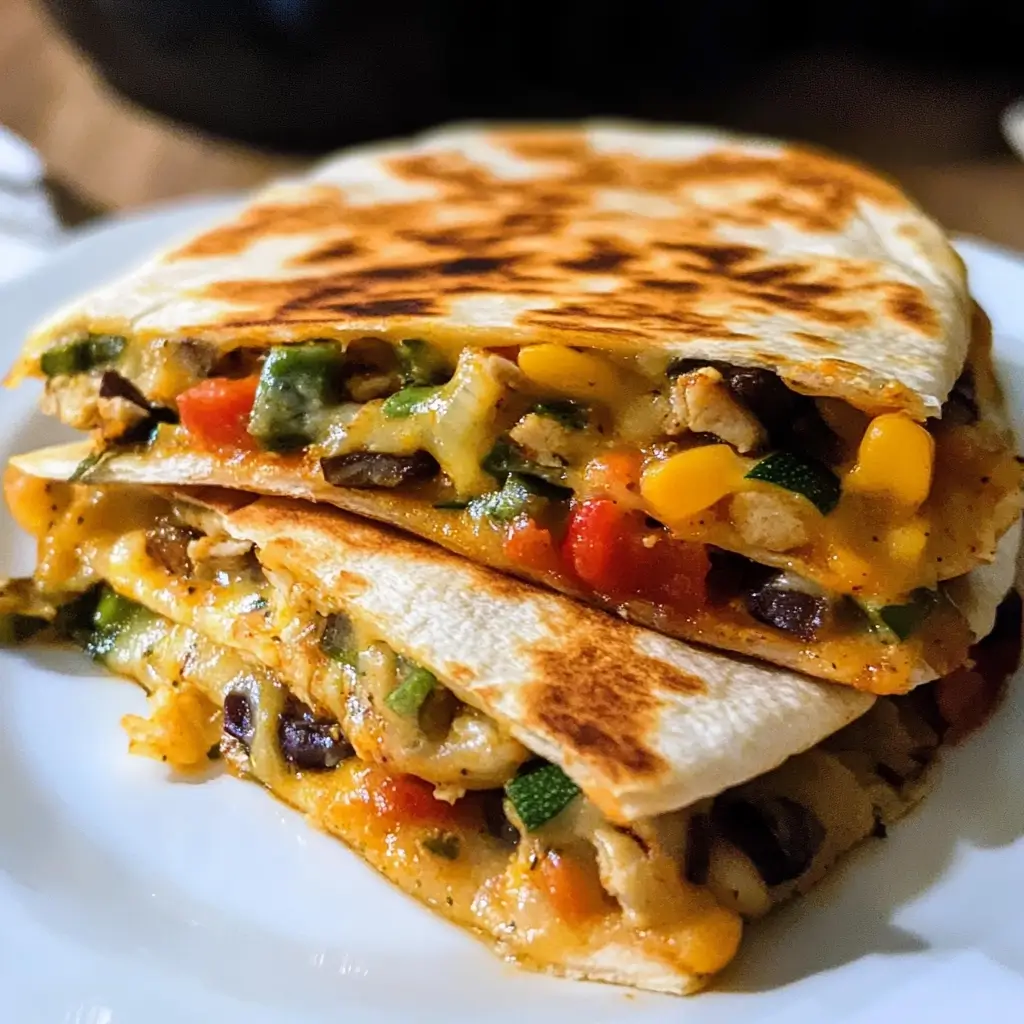

Of all the quick weeknight dinners in my arsenal, there’s one that consistently earns a standing ovation from my entire family: these incredible Chicken and Veggie Quesadillas. It’s more than just a recipe; it’s a solution. It’s the answer to the dreaded “What’s for dinner?” question on a Tuesday night when energy is low, but expectations for a delicious meal are high. I’ll never forget the first time I made them. I was trying to use up some leftover rotisserie chicken and a few stray vegetables from the crisper drawer. I wasn’t expecting magic, just a simple meal. But as the aroma of sizzling onions, sweet bell peppers, and warm spices filled the kitchen, I knew I was onto something. The moment of truth came when I sliced into the first golden, crispy tortilla, revealing a river of gloriously melted cheese binding together the colorful, savory filling. My kids, who normally approach vegetables with deep suspicion, devoured them without a single complaint. My husband declared them “the best quesadillas ever.” Since that day, they’ve become a beloved staple. They are my go-to for a fast and satisfying lunch, a crowd-pleasing appetizer for game day, and the perfect canvas for culinary creativity. This recipe isn’t just about mixing ingredients; it’s about creating a moment of pure comfort and joy, wrapped in a perfectly toasted tortilla.
Ingredients
Here is the full list of ingredients you will need to create these cheesy, flavor-packed quesadillas. Each component is chosen to provide the perfect balance of flavor, texture, and color.
- 1 tablespoon Olive Oil or Butter: This is the foundation for sautéing your vegetables. Olive oil offers a fruity, robust flavor, while butter provides a richer, nuttier taste and helps achieve a beautifully browned tortilla.
- 1 small Yellow Onion, diced: Yellow onions become wonderfully sweet when cooked, providing a deep, aromatic base layer of flavor that complements both the chicken and the other vegetables.
- 1 Red Bell Pepper, thinly sliced: Adds a vibrant splash of color and a lovely, sweet crunch. Its sweetness intensifies as it cooks, balancing the savory elements of the dish.
- 1 Green Bell Pepper, thinly sliced: Offers a slightly more vegetal, earthy flavor than its red counterpart, providing complexity and another layer of color to the filling.
- 1 small Zucchini, finely diced: Zucchini adds a pleasant texture and a healthy dose of nutrients. When diced finely, it integrates seamlessly into the filling, absorbing the surrounding flavors.
- 2 cups Cooked Chicken, shredded or diced: The star protein. Using pre-cooked chicken, such as from a rotisserie chicken or leftover baked chicken, makes this recipe incredibly fast and convenient.
- 1 teaspoon Chili Powder: This is not just for heat; a good chili powder blend adds a smoky, slightly sweet, and complex flavor.
- 1 teaspoon Ground Cumin: Provides a warm, earthy, and slightly nutty flavor that is essential to classic Southwestern and Mexican cuisine.
- ½ teaspoon Garlic Powder: A convenient way to add the savory, aromatic punch of garlic without the risk of burning fresh cloves.
- ½ teaspoon Smoked Paprika: This is a secret weapon. It imparts a deep, smoky flavor that mimics cooking over an open flame, adding incredible depth to the filling.
- Salt and Freshly Ground Black Pepper, to taste: Essential for enhancing all the other flavors in the dish. Adjust according to your preference and the saltiness of your cheese and chicken.
- 3 cups Shredded Cheese Blend (Monterey Jack and Medium Cheddar): This is the glorious glue that holds everything together. Monterey Jack is prized for its superior melting quality, while cheddar adds a sharp, tangy flavor. Grating your own cheese is highly recommended for the best melt.
- 8 large (10-inch) Flour Tortillas: Flour tortillas are ideal for quesadillas as they are pliable, durable, and toast to a perfect golden-brown crispness without becoming brittle.
Instructions
Follow these detailed steps to assemble and cook the most delicious and crispy quesadillas. The process is broken down into preparing the filling and then cooking the quesadillas for easy execution.
Step 1: Prepare and Sauté the Vegetables
Begin by heating the olive oil or butter in a large skillet or sauté pan over medium-high heat. Once the oil is shimmering or the butter is melted and foamy, add the diced yellow onion and the sliced red and green bell peppers. Sauté the vegetables, stirring occasionally, for about 5-7 minutes. You are looking for them to become tender-crisp—softened but still retaining a slight bite. Add the finely diced zucchini and continue to cook for another 2-3 minutes, until the zucchini is tender.
Step 2: Add Chicken and Spices
Once the vegetables are cooked to your liking, add the 2 cups of shredded or diced cooked chicken to the skillet. Stir everything together to combine. Now, sprinkle the chili powder, ground cumin, garlic powder, and smoked paprika over the mixture. Continue to stir and cook for another 1-2 minutes. This step is crucial as it “blooms” the spices, toasting them slightly in the heat of the pan to release their full aromatic potential and deeply infuse the entire filling with flavor. Season generously with salt and black pepper to your taste. Once everything is heated through and well-combined, remove the skillet from the heat and set the filling mixture aside.
Step 3: Assemble the Quesadillas
Wipe the skillet clean with a paper towel and place it back over medium heat. There’s no need to add more oil just yet. Lay one large flour tortilla flat in the warm, dry pan. Working quickly, sprinkle approximately ¼ cup of the shredded cheese blend evenly over the entire surface of the tortilla. Arrange about ½ cup of the chicken and veggie filling over one half of the tortilla. Be careful not to overfill, as this can cause the quesadilla to burst during flipping. Sprinkle another ¼ cup of cheese over the top of the filling. The cheese on both the bottom and top acts as a delicious, edible glue, securing the filling inside.
Step 4: Cook to Golden Perfection
Using a spatula, carefully fold the empty half of the tortilla over the half with the filling, pressing down gently to seal it. Allow the quesadilla to cook for 2-4 minutes on the first side. The heat should be at a steady medium; if it’s too high, the tortilla will burn before the cheese melts. You’re looking for the bottom to be a beautiful golden-brown color and crispy to the touch. You can peek by lifting an edge with your spatula.
Step 5: Flip and Finish Cooking
Carefully slide your spatula under the entire quesadilla and confidently flip it over to the other side. Cook for another 2-4 minutes, until the second side is equally golden and crisp, and you can see that the cheese inside is completely melted and bubbling at the edges.
Step 6: Rest, Cut, and Serve
Slide the finished quesadilla from the skillet onto a cutting board. Let it rest for at least one to two minutes. This important step allows the molten cheese to set up slightly, which will prevent the filling from spilling out when you cut into it. Repeat the assembly and cooking process with the remaining tortillas and filling. Use a sharp knife or a pizza cutter to slice each quesadilla into 3 or 4 wedges. Serve immediately with your favorite toppings.
Nutrition Facts
Please note that these values are an approximation and can vary based on specific ingredients used, such as the type of cheese and tortilla.
- Servings: This recipe makes 4 large quesadillas.
- Calories per serving (1 quesadilla): Approximately 650-750 kcal
- Protein: ~40g This dish is an excellent source of high-quality protein, primarily from the chicken and cheese. Protein is crucial for muscle repair, immune function, and keeping you feeling full and satisfied long after your meal.
- Carbohydrates: ~50g The majority of carbohydrates come from the large flour tortilla. This provides the energy your body needs to power through the day. The vegetables also contribute complex carbohydrates and beneficial fiber.
- Fat: ~32g The fat content comes from the cheese, the oil or butter used for cooking, and the chicken. While it’s important to be mindful of fat intake, it is also a vital nutrient that aids in vitamin absorption and provides flavor.
- Fiber: ~5g The bell peppers, onion, and zucchini are good sources of dietary fiber. Fiber is essential for digestive health, helps regulate blood sugar levels, and contributes to the feeling of fullness.
- Sodium: ~1200mg A significant portion of the sodium comes from the cheese and any salt added during seasoning. To reduce sodium, you can use low-sodium cheese, rinse canned beans if you add them, and control the amount of salt you add.
Preparation Time
This recipe is designed to be a quick and efficient meal, perfect for busy weeknights. The total time can be significantly reduced by using pre-cooked and pre-chopped ingredients.
- Prep Time: 15 minutes. This includes dicing the onion, slicing the bell peppers, dicing the zucchini, and shredding the pre-cooked chicken.
- Cook Time: 25 minutes. This accounts for sautéing the vegetables, warming the filling, and cooking all four quesadillas in batches.
- Total Time: 40 minutes. From start to finish, you can have a hot, delicious, and satisfying meal on the table in under an hour, making it a true weeknight winner.
How to Serve
Quesadillas are a fantastic blank canvas for a variety of delicious toppings and sides. Setting up a “toppings bar” allows everyone to customize their meal to their liking. Here are some classic and creative ways to serve your Chicken and Veggie Quesadillas:
- The Classics (Dips and Dollops):
- Sour Cream or Crema: A cool, tangy dollop of sour cream or Mexican crema perfectly balances the warmth and spice of the quesadilla.
- Guacamole: The creamy texture and rich flavor of fresh guacamole are a match made in heaven.
- Salsa: Whether you prefer a mild pico de gallo, a smoky salsa roja, or a zesty salsa verde, salsa adds moisture and a burst of fresh flavor.
- Plain Greek Yogurt: For a healthier alternative to sour cream, plain Greek yogurt offers a similar tang and creaminess with the added benefit of extra protein.
- Fresh Garnishes:
- Fresh Cilantro: A sprinkle of chopped fresh cilantro adds a bright, herbaceous note that cuts through the richness of the cheese.
- Diced Avocado: If you don’t want to make full guacamole, simple diced avocado provides a creamy, satisfying texture.
- Pickled Red Onions: Their sharp, tangy bite provides a fantastic contrast to the savory filling.
- Sliced Jalapeños: For those who like an extra kick of heat, fresh or pickled jalapeño slices are a must.
- A Squeeze of Lime: A final squeeze of fresh lime juice over the top brightens up all the flavors and adds a zesty finish.
- Hearty Side Dishes:
- Mexican Rice or Cilantro Lime Rice: Serve alongside a scoop of flavorful rice to make it a more substantial and complete meal.
- Black Bean and Corn Salad: A simple salad of black beans, corn, red onion, and cilantro tossed in a lime vinaigrette is a refreshing and complementary side.
- Simple Green Salad: A bed of crisp lettuce with a light citrusy dressing can provide a light, refreshing counterpoint to the cheesy quesadilla.
Additional Tips
Elevate your quesadilla game from good to unforgettable with these eight professional tips and tricks.
- The Ultimate Cheese Secret: Grate Your Own! While convenient, bags of pre-shredded cheese are coated with starches and cellulose to prevent clumping. These additives inhibit a smooth, perfect melt. For the gooiest, most satisfying cheese pull, buy a block of cheese and grate it yourself just before using.
- Don’t Overstuff Your Quesadilla. It’s tempting to load your tortilla with as much filling as possible, but this is a common mistake. Overstuffing leads to a messy cooking process, makes the quesadilla difficult to flip, and can result in a soggy interior because the tortilla steams instead of toasts. A thin, even layer is key.
- Master the Pan Temperature. The perfect quesadilla is cooked over steady, medium heat. If the heat is too high, the tortilla will scorch and burn before the cheese in the center has a chance to melt. If the heat is too low, the tortilla will absorb too much oil and become greasy and soggy. Medium heat is the sweet spot for a crispy exterior and a perfectly melted interior.
- Tortilla Choice Matters. For quesadillas, flour tortillas are generally the superior choice. They are more pliable and forgiving than corn tortillas, and they brown beautifully to achieve that signature crispy-yet-chewy texture. Look for “burrito-size” tortillas for the classic half-moon shape.
- Embrace Meal Prep Magic. You can prepare the entire chicken and vegetable filling up to 3 days in advance and store it in an airtight container in the refrigerator. When you’re ready to eat, all you have to do is assemble and cook the quesadillas, turning this into a 10-minute meal.
- Get Creative with Your Veggies. Don’t feel limited to peppers and zucchini! This recipe is a fantastic way to clean out your vegetable drawer. Sautéed mushrooms, wilted spinach (be sure to squeeze out all excess water), corn kernels, or even finely chopped broccoli can be delicious additions.
- Power Up with Protein and Beans. To boost the fiber and protein content, consider adding a can of rinsed and drained black beans or pinto beans to the filling mixture. You can also easily swap the chicken for other proteins like leftover pulled pork, seasoned ground beef, or sautéed shrimp.
- The Non-Stick Advantage. While a well-seasoned cast-iron skillet works wonderfully, a good quality non-stick skillet makes the process foolproof. It ensures an easy, clean flip every time without the risk of the cheese sticking to the pan, guaranteeing a picture-perfect quesadilla.
FAQ Section
Here are answers to some of the most frequently asked questions about making the perfect Chicken and Veggie Quesadillas.
1. Can I make these quesadillas ahead of time?
While you can fully cook them ahead of time, they are truly best when served fresh and hot from the skillet. The best method for making them ahead is to prepare the filling in advance and store it in the fridge. Assembling and cooking the quesadillas takes only a few minutes per batch, ensuring they are served crispy and hot.
2. How do I store and reheat leftover quesadillas?
Store any leftover quesadilla wedges in an airtight container in the refrigerator for up to 3 days. To reheat, avoid the microwave, which will make them soggy. The best way is to place them in a dry, non-stick skillet over medium-low heat for a few minutes per side, or until the tortilla re-crisps and the filling is warmed through. You can also use an air fryer or a toaster oven.
3. Can I freeze quesadillas?
Yes, you can! Cook the quesadillas fully, let them cool completely, and then stack them with a piece of parchment paper between each one. Place the stack in a freezer-safe zip-top bag and freeze for up to 2 months. Reheat them directly from frozen in a skillet over medium-low heat, flipping occasionally, until hot and crispy.
4. What is the absolute best cheese to use for quesadillas?
The best cheese is a combination of a great melting cheese and a great tasting cheese. Monterey Jack or a low-moisture mozzarella melts beautifully into a smooth, gooey texture. Medium or sharp cheddar adds a tangy, robust flavor. A 50/50 blend of Monterey Jack and cheddar is the gold standard for a reason. Oaxacan cheese is another fantastic, traditional option if you can find it.
5. My quesadillas always turn out soggy. What am I doing wrong?
Sogginess is usually caused by one of three things. First, your filling might be too wet; make sure you cook off any excess liquid from the vegetables. Second, your heat is too low, causing the tortilla to steam instead of toast. Third, you might be covering the pan with a lid, which traps steam. Cook them in an open pan over steady medium heat for the best results.
6. Are these Chicken and Veggie Quesadillas considered healthy?
“Healthy” is subjective, but this recipe can certainly be part of a balanced diet. It’s packed with protein from the chicken and nutrients from the vegetables. To make it healthier, you can use whole wheat tortillas for more fiber, use a moderate amount of cheese, and load up on extra vegetables. Serving it with a side salad instead of rice also makes it a lighter meal.
7. Can I use corn tortillas instead of flour?
You can, but it requires a different technique. Corn tortillas are more brittle and prone to cracking when folded. Instead of the half-moon method, it’s better to use two smaller corn tortillas to create a “sandwich” style quesadilla. Lightly warm them first to make them more pliable, then assemble with one on the bottom, the filling in the middle, and another on top.
8. What if I don’t have any pre-cooked chicken?
No problem! Simply dice one pound of raw, boneless, skinless chicken breast into small, bite-sized pieces. Season it with salt and pepper. Before you sauté the vegetables, cook the chicken pieces in the hot skillet until they are golden brown and cooked through. Remove the chicken from the pan, set it aside, and then proceed with cooking the vegetables in the same pan before adding the cooked chicken back in at the end.

Chicken and Veggie Quesadillas
Ingredients
Here is the full list of ingredients you will need to create these cheesy, flavor-packed quesadillas. Each component is chosen to provide the perfect balance of flavor, texture, and color.
- 1 tablespoon Olive Oil or Butter: This is the foundation for sautéing your vegetables. Olive oil offers a fruity, robust flavor, while butter provides a richer, nuttier taste and helps achieve a beautifully browned tortilla.
- 1 small Yellow Onion, diced: Yellow onions become wonderfully sweet when cooked, providing a deep, aromatic base layer of flavor that complements both the chicken and the other vegetables.
- 1 Red Bell Pepper, thinly sliced: Adds a vibrant splash of color and a lovely, sweet crunch. Its sweetness intensifies as it cooks, balancing the savory elements of the dish.
- 1 Green Bell Pepper, thinly sliced: Offers a slightly more vegetal, earthy flavor than its red counterpart, providing complexity and another layer of color to the filling.
- 1 small Zucchini, finely diced: Zucchini adds a pleasant texture and a healthy dose of nutrients. When diced finely, it integrates seamlessly into the filling, absorbing the surrounding flavors.
- 2 cups Cooked Chicken, shredded or diced: The star protein. Using pre-cooked chicken, such as from a rotisserie chicken or leftover baked chicken, makes this recipe incredibly fast and convenient.
- 1 teaspoon Chili Powder: This is not just for heat; a good chili powder blend adds a smoky, slightly sweet, and complex flavor.
- 1 teaspoon Ground Cumin: Provides a warm, earthy, and slightly nutty flavor that is essential to classic Southwestern and Mexican cuisine.
- ½ teaspoon Garlic Powder: A convenient way to add the savory, aromatic punch of garlic without the risk of burning fresh cloves.
- ½ teaspoon Smoked Paprika: This is a secret weapon. It imparts a deep, smoky flavor that mimics cooking over an open flame, adding incredible depth to the filling.
- Salt and Freshly Ground Black Pepper, to taste: Essential for enhancing all the other flavors in the dish. Adjust according to your preference and the saltiness of your cheese and chicken.
- 3 cups Shredded Cheese Blend (Monterey Jack and Medium Cheddar): This is the glorious glue that holds everything together. Monterey Jack is prized for its superior melting quality, while cheddar adds a sharp, tangy flavor. Grating your own cheese is highly recommended for the best melt.
- 8 large (10-inch) Flour Tortillas: Flour tortillas are ideal for quesadillas as they are pliable, durable, and toast to a perfect golden-brown crispness without becoming brittle.
Instructions
Follow these detailed steps to assemble and cook the most delicious and crispy quesadillas. The process is broken down into preparing the filling and then cooking the quesadillas for easy execution.
Step 1: Prepare and Sauté the Vegetables
Begin by heating the olive oil or butter in a large skillet or sauté pan over medium-high heat. Once the oil is shimmering or the butter is melted and foamy, add the diced yellow onion and the sliced red and green bell peppers. Sauté the vegetables, stirring occasionally, for about 5-7 minutes. You are looking for them to become tender-crisp—softened but still retaining a slight bite. Add the finely diced zucchini and continue to cook for another 2-3 minutes, until the zucchini is tender.
Step 2: Add Chicken and Spices
Once the vegetables are cooked to your liking, add the 2 cups of shredded or diced cooked chicken to the skillet. Stir everything together to combine. Now, sprinkle the chili powder, ground cumin, garlic powder, and smoked paprika over the mixture. Continue to stir and cook for another 1-2 minutes. This step is crucial as it “blooms” the spices, toasting them slightly in the heat of the pan to release their full aromatic potential and deeply infuse the entire filling with flavor. Season generously with salt and black pepper to your taste. Once everything is heated through and well-combined, remove the skillet from the heat and set the filling mixture aside.
Step 3: Assemble the Quesadillas
Wipe the skillet clean with a paper towel and place it back over medium heat. There’s no need to add more oil just yet. Lay one large flour tortilla flat in the warm, dry pan. Working quickly, sprinkle approximately ¼ cup of the shredded cheese blend evenly over the entire surface of the tortilla. Arrange about ½ cup of the chicken and veggie filling over one half of the tortilla. Be careful not to overfill, as this can cause the quesadilla to burst during flipping. Sprinkle another ¼ cup of cheese over the top of the filling. The cheese on both the bottom and top acts as a delicious, edible glue, securing the filling inside.
Step 4: Cook to Golden Perfection
Using a spatula, carefully fold the empty half of the tortilla over the half with the filling, pressing down gently to seal it. Allow the quesadilla to cook for 2-4 minutes on the first side. The heat should be at a steady medium; if it’s too high, the tortilla will burn before the cheese melts. You’re looking for the bottom to be a beautiful golden-brown color and crispy to the touch. You can peek by lifting an edge with your spatula.
Step 5: Flip and Finish Cooking
Carefully slide your spatula under the entire quesadilla and confidently flip it over to the other side. Cook for another 2-4 minutes, until the second side is equally golden and crisp, and you can see that the cheese inside is completely melted and bubbling at the edges.
Step 6: Rest, Cut, and Serve
Slide the finished quesadilla from the skillet onto a cutting board. Let it rest for at least one to two minutes. This important step allows the molten cheese to set up slightly, which will prevent the filling from spilling out when you cut into it. Repeat the assembly and cooking process with the remaining tortillas and filling. Use a sharp knife or a pizza cutter to slice each quesadilla into 3 or 4 wedges. Serve immediately with your favorite toppings.
Nutrition
- Serving Size: one normal portion
- Calories: 750
- Sodium: 1200mg
- Fat: 32g
- Carbohydrates: 50g
- Fiber: 5g
- Protein: 40g


