")

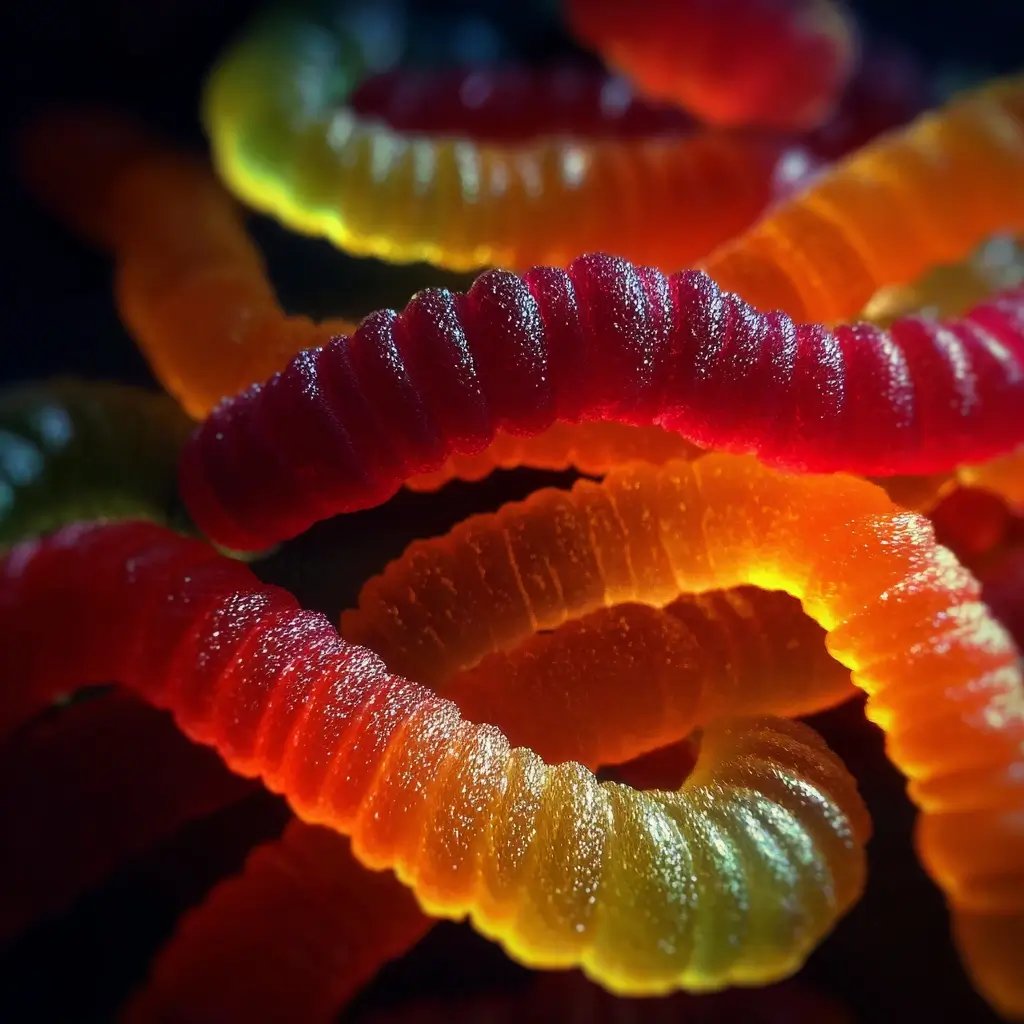

I still remember the first time I decided to tackle this Creepy Crawly Gummy Worms recipe. It was a week before our annual Halloween block party, and I wanted to bring something more exciting than the usual store-bought candy. My kids, always eager for a kitchen “experiment,” were my enthusiastic assistants. The kitchen transformed into a mad scientist’s laboratory, with bubbling pots of vibrant, sugary concoctions and an air of gleeful anticipation. I wasn’t sure if these would turn out to be a sticky mess or a spooky success. But as we carefully squeezed the colorful liquid into the worm-shaped molds, their eyes wide with wonder, I knew we were creating more than just a treat. When we finally popped the finished worms out, perfectly wiggly and glistening, the cheers were deafening. At the party, they were an absolute phenomenon. Kids and adults alike were fascinated, holding them up to the light and giggling at their creepy, crawly appearance before devouring them. They disappeared faster than any other snack on the table, and for the rest of the night, I had parents asking me for the secret. This recipe isn’t just about making candy; it’s about creating a fun, interactive memory that your family will talk about for years to come.
Why You’ll Love This Gummy Worm Recipe
Before we dive into our spooky culinary laboratory, let’s talk about why this homemade gummy worm recipe will become your new go-to for festive fun. It’s more than just a set of instructions; it’s a gateway to delicious creativity.
- Incredibly Fun for All Ages: This is the ultimate kitchen activity to do with kids, tweens, or even fun-loving adults. The process feels like a cool science experiment, from mixing the vibrant colors to the magic of watching the liquid set into perfectly wiggly worms.
- Completely Customizable: You are the candy creator! You control the flavors, the colors, and even the sourness. Want to make lime green and grape-purple worms? Go for it! Dream of an ultra-sour cherry flavor? You can do that too. The possibilities are endless.
- Simple, Accessible Ingredients: There are no strange, hard-to-find chemicals here. The recipe relies on basic pantry and grocery store staples like gelatin and flavored Jell-O, making it an easy project to whip up on a whim.
- Far More Delicious Than Store-Bought: There’s a vibrant, fresh flavor to homemade gummies that you just don’t get from a plastic bag. You can taste the real fruitiness from the Jell-O, and the texture is delightfully chewy and satisfying.
- The Perfect Themed Treat: Whether it’s for a Halloween party, a “dirt and worms” birthday cake, a fishing-themed event, or just a rainy day activity, these creepy crawlers are guaranteed to be a show-stopping centerpiece.
The Science Behind the Wiggle: Understanding the Key Ingredients
Ever wonder what gives a gummy worm its signature chewy, jiggly texture? It’s not magic, but it is some pretty cool food science! Understanding the role of each ingredient will not only make you a better gummy-maker but will also help you troubleshoot and customize your creations like a pro.
The undisputed star of our show is gelatin. Gelatin is a protein derived from collagen. On a microscopic level, these protein strands are long and tangled. When you add them to hot water and introduce a sweetener like the sugar in Jell-O, these strands unwind and float freely in the liquid. This is the “blooming” stage. As the mixture cools, those protein strands begin to link back together, but now they’re not in a tight tangle. Instead, they form a complex, three-dimensional mesh or matrix. This matrix is incredibly effective at trapping the water and sugar molecules within its structure. The result is a semi-solid, wobbly gel. The more concentrated the gelatin, the firmer and chewier the final gummy will be, which is why we add extra unflavored gelatin on top of what’s already in the Jell-O mix.
Next up is the flavored gelatin mix (like Jell-O). This is a multi-tasking powerhouse. It provides the primary flavor, the vibrant color, and a significant amount of the sugar needed for the classic gummy taste. It also contains some gelatin itself, contributing to the overall structure.
Corn syrup is another crucial player, and its role is all about texture and preservation. Sugar, on its own, has a tendency to crystallize when it cools. This would result in a grainy, crunchy gummy instead of a smooth, chewy one. Corn syrup, which is a type of invert sugar, interferes with this crystallization process. It gets in between the sugar molecules and prevents them from forming large, gritty crystals, ensuring a perfectly smooth texture. It also helps to keep the gummies softer and chewier for longer.
Finally, the water acts as the solvent. It’s the vehicle that dissolves the gelatin, sugar, and flavors, allowing the gelatin proteins to unwind and later form their wiggly, jiggly matrix. The temperature of the water is key; it needs to be hot enough to fully dissolve everything but not boiling, which can sometimes weaken the gelatin’s setting power. Together, these simple ingredients create a delicious and fascinating chemical reaction you can eat!
Ingredients
- 2 (3-ounce) boxes of Flavored Gelatin: This will be your primary flavor and color. Think lime for ghoulish green, orange for pumpkin orange, or cherry for blood-red.
- 2 (¼-ounce) envelopes of Unflavored Gelatin: This is the secret to a firm, chewy texture, much like store-bought gummy worms.
- ½ cup of Cold Water: This is used to “bloom” the gelatin, a crucial first step for a smooth final product.
- 2 tablespoons of Light Corn Syrup: This prevents sugar crystallization, ensuring your gummies are chewy and smooth, not grainy.
- Non-stick Cooking Spray or Coconut Oil: For lightly greasing the molds to guarantee your worms slither out perfectly.
Instructions
- Prepare Your Laboratory (The Molds): Begin by preparing your silicone worm molds. Lightly spray the inside of each cavity with non-stick cooking spray. Use a paper towel to wipe out the excess, leaving only a very thin, almost invisible residue. This ensures the worms release easily without being greasy. If you are using the straw method, bunch a group of flexible straws together, place them in a tall, narrow glass, and ensure they are standing upright.
- Bloom the Gelatin: In a small saucepan, pour in the ½ cup of cold water. Gently sprinkle both boxes of flavored gelatin and both envelopes of unflavored gelatin over the surface of the water. Do not stir yet. Let the mixture sit undisturbed for 5-10 minutes. You will see the gelatin absorb the water and become wrinkly and gel-like. This process, known as “blooming,” is essential for a smooth, lump-free gummy.
- Gently Heat the Mixture: Place the saucepan over low to medium-low heat. Stir the mixture continuously with a whisk or silicone spatula. The gelatin will dissolve and the mixture will become a smooth, translucent liquid. It is very important not to let the mixture boil. Boiling can weaken the gelatin’s setting power, resulting in soft or sticky gummies.
- Incorporate the Corn Syrup: Once the gelatin is fully dissolved and the liquid is smooth, remove the saucepan from the heat. Immediately stir in the light corn syrup until it is completely incorporated. This should only take about 30 seconds of stirring.
- Fill the Molds: Now, you need to work relatively quickly before the mixture begins to set. Carefully pour the hot liquid into a measuring cup with a spout or into a kitchen dropper/syringe for precise application. Slowly and carefully fill each worm mold to the top. If using the straw method, pour the liquid slowly into the straws, allowing it to fill them up from the bottom.
- Chill and Set: Place the filled molds onto a small baking sheet (this makes them easier to transport without spilling). Transfer the baking sheet to the refrigerator. Let the gummies chill until they are completely firm. This will take at least 30-60 minutes, but for the best results, allow them to set for 2-3 hours. The longer they chill, the easier they will be to demold.
- Demold the Creepy Crawlers: Once fully set, it’s time for the big reveal! Carefully peel the silicone mold away from the gummy worms. They should pop out easily. If using straws, you can either squeeze them out from the bottom or use rolling pin to press them out. Your creepy crawly gummy worms are now ready to eat!
Nutrition Facts
- Servings: Approximately 40-50 worms (depending on mold size)
- Calories per serving (3 worms): Approximately 25-30 kcal
- Sugar: The primary component, providing the sweet taste and energy. These are a candy treat, so enjoy them in moderation.
- Protein: A small amount is present from the gelatin, which is a protein source.
- Sodium: Very low in sodium, making them a better choice than many other processed snacks.
Preparation Time
This recipe is surprisingly quick to execute, with most of the time being hands-off while you wait for the magic to happen in the fridge.
- Active Preparation Time: 15 minutes
- Chilling & Setting Time: 1-3 hours
How to Serve
Don’t just put these amazing homemade creations in a plain bowl! Their fun, spooky shape is perfect for creative presentations. Here are some fantastic ways to serve your Creepy Crawly Gummy Worms:
- Classic “Dirt and Worms” Pudding:
- Layer chocolate pudding and crushed Oreo cookies (the “dirt”) in clear cups or a large trifle bowl.
- Artfully arrange the gummy worms so they look like they are crawling in and out of the dirt.
- This is a timeless classic that is always a hit at kids’ parties.
- Mad Scientist’s Potion:
- Fill a large punch bowl with a green or purple beverage, like lemon-lime soda, green Hawaiian Punch, or grape juice mixed with ginger ale.
- Add a block of ice or dry ice (with extreme caution and for adult supervision only) for a spooky, smoky effect.
- Drape the gummy worms over the sides of the bowl and drop a few into the “potion” to swim around.
- Spooky Cupcake Toppers:
- Bake your favorite chocolate or vanilla cupcakes and frost them with green, orange, or dark chocolate frosting.
- Place one or two gummy worms on top of each cupcake. You can have them coiling on top or burrowing into the frosting for a creepy effect.
- Witch’s Brew Garnish:
- For an adult Halloween party, use the gummy worms as a fun and edible garnish for cocktails.
- Drape a worm over the rim of a glass containing a colorful martini, a margarita, or any spooky-themed drink.
- Edible Halloween Decor:
- Use the gummy worms to decorate a larger Halloween-themed cake. They can crawl up the sides of a “haunted house” cake or spill out of a “cauldron” cake.
- Scatter them across a platter of brownies or cookies for an instant spooky touch.
- Creepy Crawly Party Favors:
- Fill small cellophane bags with a handful of gummy worms.
- Tie the bags with black and orange ribbons and add a custom tag that says “Thanks for crawling by!” or “A bag of worms for you!”
Additional Tips for Gummy Perfection
- Don’t Rush the Bloom: The initial 5-10 minute blooming step is non-negotiable. Sprinkling the gelatin over cold water allows it to hydrate evenly. If you skip this and add it directly to hot liquid, you’ll end up with stubborn, rubbery clumps that are impossible to whisk out.
- Control Your Heat: The number one enemy of good gelatin is boiling. A hard boil can denature the proteins and weaken their ability to set, leading to gummies that are too soft or even syrupy. Keep the heat on low and stir until just dissolved.
- The Dropper is Your Friend: While you can pour from a spouted cup, using a food-grade dropper or syringe (often included with silicone molds) gives you ultimate control. It prevents messy spills and ensures each mold is filled perfectly without air bubbles.
- Go for a Sour Punch: To make sour gummy worms, create a “sour sugar” coating. Mix 1/4 cup of granulated sugar with 1 to 2 teaspoons of citric acid (found in the canning or spice aisle). Once the gummies are demolded, lightly dampen them with a tiny bit of water and toss them in the sour sugar mixture until evenly coated.
- Double Up on Flavors and Colors: Get creative by layering! Prepare two different colored/flavored batches of the gummy liquid. Fill the molds halfway with the first color, let it set in the fridge for 20-30 minutes until just firm, and then pour the second color on top. You’ll have amazing two-toned worms!
- Troubleshooting Stickiness: If your finished gummies feel a little sticky to the touch, let them air-dry on a wire rack at room temperature for a few hours. This allows some of the surface moisture to evaporate, resulting in a firmer, less sticky “skin.”
- Experiment with Juice: For a slightly different flavor profile, you can substitute a portion of the water with fruit juice. Try replacing half of the cold water with a flavorful juice like white grape or apple. Be aware that highly acidic juices like pineapple or citrus can sometimes interfere with the gelatin’s setting ability.
- Proper Storage is Key: Store your homemade gummy worms in an airtight container. To prevent them from sticking together, you can lightly dust them with a small amount of cornstarch or powdered sugar before storing, shaking off any excess. They will last for 1-2 weeks at room temperature or even longer in the refrigerator.
Frequently Asked Questions (FAQ)
Q1: Can I make these gummy worms vegan or vegetarian?
A: Yes, you can! Gelatin is an animal-derived product, but you can substitute it with agar-agar powder, which is a plant-based gelling agent derived from seaweed. The ratio is typically 1:1 for agar powder to gelatin powder. However, the texture will be slightly different—agar-agar creates a firmer, less chewy gel than gelatin. You will also need to bring the agar-agar mixture to a full boil for a minute to activate it, unlike gelatin.
Q2: Why are my homemade gummy worms too soft and not chewy?
A: This is usually caused by one of two things. First, the gelatin-to-liquid ratio might be off. This recipe uses extra unflavored gelatin to ensure a firm, chewy texture, so don’t skip it! Second, you may have overheated or boiled the gelatin mixture. Boiling can damage the protein structure, preventing it from setting properly. Always use gentle, low heat.
Q3: How do I store my homemade gummy worms and how long will they last?
A: Store them in an airtight container to keep them from drying out or getting sticky. A light dusting of cornstarch can help prevent them from clumping together. Stored at room temperature, they will last for about 1-2 weeks. For longer storage, you can keep them in the refrigerator, where they will stay fresh for up to a month, though they may become slightly firmer.
Q4: Can I use real fruit juice instead of Jell-O and water?
A: Absolutely. For a more natural version, you can use 1 cup of fruit juice (like apple, white grape, or cherry juice) in place of the Jell-O and water. You will need to add a sweetener to taste, such as 2-4 tablespoons of sugar or honey, as the juice isn’t as sweet as the gelatin mix. Remember to still use the 2 envelopes of unflavored gelatin to get the right consistency.
Q5: My gummy worms are stuck in the mold! What did I do wrong?
A: This almost always comes down to mold preparation. It’s crucial to lightly grease your silicone molds with a neutral oil or non-stick spray and wipe out the excess. Also, be patient! Ensure the gummies are fully and firmly set before you try to demold them. If you rush it while they are still soft, they are much more likely to tear or stick.
Q6: Can I make these gummy worms sugar-free?
A: Yes, this is possible with the right substitutions. Use sugar-free Jell-O boxes and replace the corn syrup with a sugar-free liquid sweetener that doesn’t crystallize. Keep in mind that sugar plays a role in the texture, so the final result might be slightly different, but it can certainly be done for a keto-friendly or low-sugar treat.
Q7: I don’t have worm molds. What else can I use?
A: No problem! The classic DIY method is to use a bundle of flexible drinking straws stood upright in a tall glass. Pour the mixture into the straws and let it set. You can also use any other small silicone candy molds you have, like gummy bear, lego, or simple square shapes. They won’t be “worms,” but they will be equally delicious!
Q8: Why did my gummy mixture get clumpy?
A: Clumps are the result of the gelatin not dissolving properly. This happens if you skip the “blooming” step (letting the gelatin sit in cold water first) or if you add the gelatin powder to liquid that is already too hot. Always start with cold water, let it bloom, and then heat it gently and slowly while whisking continuously for a perfectly smooth result.
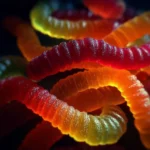
Creepy Crawly Gummy Worms
Ingredients
- 2 (3-ounce) boxes of Flavored Gelatin: This will be your primary flavor and color. Think lime for ghoulish green, orange for pumpkin orange, or cherry for blood-red.
- 2 (¼-ounce) envelopes of Unflavored Gelatin: This is the secret to a firm, chewy texture, much like store-bought gummy worms.
- ½ cup of Cold Water: This is used to “bloom” the gelatin, a crucial first step for a smooth final product.
- 2 tablespoons of Light Corn Syrup: This prevents sugar crystallization, ensuring your gummies are chewy and smooth, not grainy.
- Non-stick Cooking Spray or Coconut Oil: For lightly greasing the molds to guarantee your worms slither out perfectly.
Instructions
- Prepare Your Laboratory (The Molds): Begin by preparing your silicone worm molds. Lightly spray the inside of each cavity with non-stick cooking spray. Use a paper towel to wipe out the excess, leaving only a very thin, almost invisible residue. This ensures the worms release easily without being greasy. If you are using the straw method, bunch a group of flexible straws together, place them in a tall, narrow glass, and ensure they are standing upright.
- Bloom the Gelatin: In a small saucepan, pour in the ½ cup of cold water. Gently sprinkle both boxes of flavored gelatin and both envelopes of unflavored gelatin over the surface of the water. Do not stir yet. Let the mixture sit undisturbed for 5-10 minutes. You will see the gelatin absorb the water and become wrinkly and gel-like. This process, known as “blooming,” is essential for a smooth, lump-free gummy.
- Gently Heat the Mixture: Place the saucepan over low to medium-low heat. Stir the mixture continuously with a whisk or silicone spatula. The gelatin will dissolve and the mixture will become a smooth, translucent liquid. It is very important not to let the mixture boil. Boiling can weaken the gelatin’s setting power, resulting in soft or sticky gummies.
- Incorporate the Corn Syrup: Once the gelatin is fully dissolved and the liquid is smooth, remove the saucepan from the heat. Immediately stir in the light corn syrup until it is completely incorporated. This should only take about 30 seconds of stirring.
- Fill the Molds: Now, you need to work relatively quickly before the mixture begins to set. Carefully pour the hot liquid into a measuring cup with a spout or into a kitchen dropper/syringe for precise application. Slowly and carefully fill each worm mold to the top. If using the straw method, pour the liquid slowly into the straws, allowing it to fill them up from the bottom.
- Chill and Set: Place the filled molds onto a small baking sheet (this makes them easier to transport without spilling). Transfer the baking sheet to the refrigerator. Let the gummies chill until they are completely firm. This will take at least 30-60 minutes, but for the best results, allow them to set for 2-3 hours. The longer they chill, the easier they will be to demold.
- Demold the Creepy Crawlers: Once fully set, it’s time for the big reveal! Carefully peel the silicone mold away from the gummy worms. They should pop out easily. If using straws, you can either squeeze them out from the bottom or use rolling pin to press them out. Your creepy crawly gummy worms are now ready to eat!
Nutrition
- Serving Size: one normal portion
- Calories: 30


