")


Of all the comforting aromas that can fill a home, the scent of freshly baked oatmeal raisin cookies holds a special place in my heart. For years, my cookie journey was dominated by the quest for the perfectly soft and chewy variety. But one afternoon, a friend served me a cookie that changed everything. It wasn’t soft; it was gloriously, audaciously crisp. It had a delicate, lacy edge and a satisfying snap that gave way to a buttery, caramelized oat flavor. I was instantly obsessed. This wasn’t just a cookie; it was an experience. After countless batches, a kitchen dusted in a perpetual layer of flour, and more “taste tests” than my family knew what to do with, I finally perfected the recipe. This is that recipe. It yields a cookie that is unapologetically crispy, deeply flavorful, and utterly addictive. It’s the cookie that converted my “chewy-only” husband and the one my kids now request for their lunchboxes, knowing it will still have that perfect crunch by midday. This is for the lovers of snap, the connoisseurs of crunch, and anyone looking to discover the delightful other side of the oatmeal cookie world.
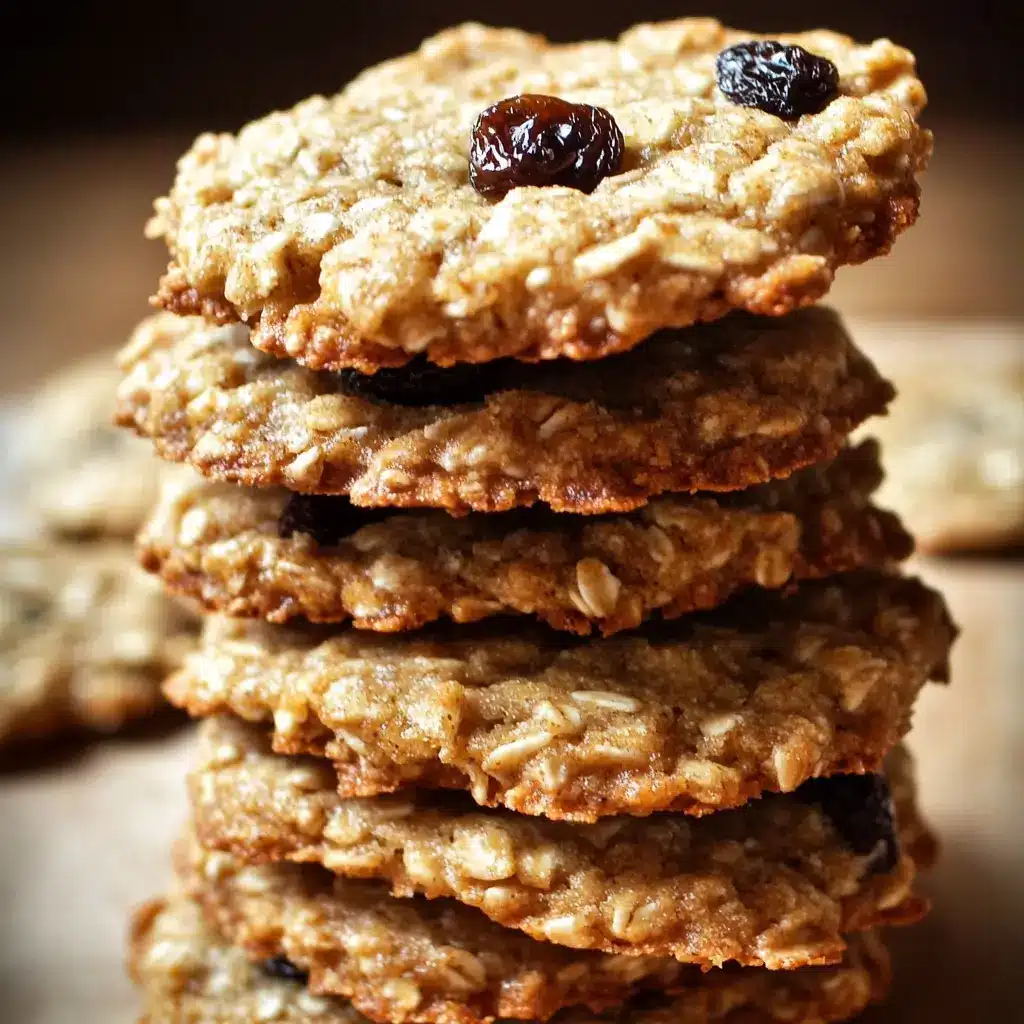
Crispy Oatmeal Raisin Cookies: The Ultimate Recipe
This recipe is meticulously crafted to produce thin, crispy, and buttery oatmeal raisin cookies with golden-brown, lacy edges. The magic lies in the specific combination and ratio of ingredients, particularly the melted butter and the balance of sugars, which encourage spread and caramelization.
Ingredients
- 1 cup (226g or 2 sticks) Unsalted Butter, melted: Using melted butter is crucial for a crispier, thinner cookie as it coats the flour differently than softened butter, leading to more spread.
- 1 cup (200g) Granulated White Sugar: The primary source of sweetness and a key player in creating a crisp texture and promoting spread.
- ½ cup (110g) Packed Light Brown Sugar: Adds moisture and a hint of molasses flavor for depth, creating a lovely chewiness in the very center to contrast the crisp edges.
- 2 large Eggs, at room temperature: Acts as a binder and adds richness. Room temperature eggs incorporate more easily into the batter for a uniform texture.
- 1 teaspoon Pure Vanilla Extract: Enhances all the other flavors in the cookie, adding warmth and aroma.
- 1 ½ cups (180g) All-Purpose Flour: Provides the main structure of the cookie. Be sure to measure it correctly to avoid a cakey cookie.
- 1 teaspoon Baking Soda: The leavening agent that reacts with the brown sugar’s acidity to help the cookies spread out thin.
- 1 teaspoon Ground Cinnamon: The classic spice pairing for oatmeal and raisins, adding a warm, comforting flavor.
- ½ teaspoon Salt: Balances the sweetness and brings out the buttery and nutty flavors of the oats.
- 3 cups (240g) Old-Fashioned Rolled Oats: These provide the signature hearty texture and nutty flavor. Do not use instant or steel-cut oats, as they will drastically alter the final texture.
- 1 cup (150g) Raisins: Adds pockets of sweet, chewy fruitiness. You can use regular or golden raisins.
Instructions
- Preheat and Prepare: Adjust your oven rack to the middle position and preheat to 350°F (175°C). Line two large baking sheets with parchment paper. This prevents sticking and promotes even browning on the bottom.
- Combine Wet Ingredients: In a large mixing bowl, whisk together the melted butter, granulated sugar, and light brown sugar until thoroughly combined. The mixture will look glossy and a bit grainy.
- Add Eggs and Vanilla: Add the room temperature eggs one at a time, beating well after each addition until the mixture is smooth and slightly lightened in color. Stir in the vanilla extract.
- Combine Dry Ingredients: In a separate medium bowl, whisk together the all-purpose flour, baking soda, ground cinnamon, and salt. This step ensures the leavening and spices are evenly distributed throughout the dough, which is vital for a uniform batch of cookies.
- Mix Dough: Gradually add the dry ingredient mixture to the wet ingredient mixture, mixing on low speed with an electric mixer or by hand with a spatula until just combined. Be careful not to overmix at this stage; stop as soon as you no longer see streaks of flour. Overmixing develops gluten, which can make cookies tough instead of crispy.
- Incorporate Oats and Raisins: Gently fold in the old-fashioned rolled oats and raisins with a sturdy spatula until they are evenly distributed throughout the dough. The dough will be relatively loose and sticky compared to other cookie doughs.
- Portion the Dough: Drop rounded tablespoons of dough onto the prepared baking sheets, leaving at least 2-3 inches of space between each cookie. These cookies will spread significantly, so giving them ample room is essential to prevent them from merging into one giant cookie. For a 1-tablespoon scoop, you should fit about 8-9 cookies per sheet.
- Bake to Perfection: Bake for 12-15 minutes, or until the edges are a deep golden brown and the centers look set. For maximum crispiness, err on the longer side of the baking time. The cookies will look quite flat and lacy around the edges.
- Cool for Crispiness: This is a critical step. Let the cookies cool on the baking sheet for 5 minutes. They will be very soft and fragile right out of the oven, and this time allows them to set up. After 5 minutes, use a thin spatula to carefully transfer the cookies to a wire cooling rack to cool completely. Cooling on a wire rack allows air to circulate underneath, preventing moisture from getting trapped and ensuring the entire cookie becomes crisp.
Nutrition Facts
- Servings: Makes approximately 36 cookies
- Calories per serving: Approximately 145 kcal per cookie
- Fat: Contributes to the rich, buttery flavor and the crispy, tender texture of the cookie.
- Carbohydrates: The primary source of energy, coming from the sugars, flour, and oats. The sugars are essential for caramelization and crispness.
- Protein: Provided by the eggs and oats, giving the cookies some structural integrity and nutritional value.
- Fiber: The old-fashioned rolled oats are a good source of dietary fiber, which aids in digestion and contributes to the cookie’s satisfying, hearty texture.
- Sugar: Provides sweetness and is fundamentally responsible for the cookies spreading and developing their characteristic crispy, caramelized texture.
Preparation Time
- Active Preparation Time: 15 minutes
- Baking Time: 12-15 minutes per batch
- Cooling Time: 20 minutes
- Total Time: Approximately 50 minutes (for one batch)
This recipe comes together quickly, with the majority of the time spent on baking and the crucial cooling process, which solidifies that sought-after crispy texture.
How to Serve
These crispy oatmeal raisin cookies are wonderfully versatile. While they are perfect on their own, here are some delightful ways to serve them:
- Classic Pairings:
- With a tall glass of cold milk for the ultimate nostalgic treat.
- Alongside a hot cup of coffee or a latte for a perfect afternoon pick-me-up.
- With a cup of black or spiced tea, allowing the cookie’s cinnamon notes to shine.
- As a Dessert Component:
- Ice Cream Sandwiches: Take two completely cooled cookies and sandwich a scoop of vanilla bean, butter pecan, or cinnamon ice cream between them. Enjoy immediately!
- Dessert Topping: Crumble a cookie over a bowl of yogurt, a scoop of ice cream, or a dish of apple pudding for an added crunchy texture.
- With a Cheese Course: The sweet and savory combination is surprisingly delicious. Pair a cookie with a slice of sharp cheddar or a creamy brie.
- For Gifting and Parties:
- Cookie Platter: Arrange them on a platter with other types of cookies, like chewy chocolate chip or shortbread, to offer a variety of textures.
- Gift Tins: Stack them in a decorative tin or bag, tied with a ribbon, for a beautiful and delicious homemade gift during holidays or for a thank-you present.
Additional Tips for Flawless Crispy Cookies
- Measure Flour Accurately: The most common baking mistake is using too much flour. Instead of scooping directly from the bag (which compacts the flour), use a spoon to fluff up the flour, then spoon it into your measuring cup and level it off with the back of a knife. Too much flour will prevent the cookies from spreading and make them cakey, not crispy.
- Don’t Substitute the Oats: This recipe specifically calls for old-fashioned rolled oats. Quick-cooking oats are thinner and more processed; they will absorb liquid differently and result in a softer, less textured cookie. Steel-cut oats are too hard and will not soften properly during baking.
- Embrace the Spread: Don’t be alarmed by how much these cookies spread—it’s by design! The thinness is a key factor in their crispiness. Ensure you leave at least 2-3 inches between dough balls on the baking sheet to prevent them from running into each other. Using parchment paper is non-negotiable here, as it makes removing the delicate, spread-out cookies much easier.
- Bang the Pan (Optional Trick): For even lacier edges and a flatter cookie, you can try the “pan-banging” method. About 8-9 minutes into baking, open the oven, lift the baking sheet a few inches, and drop it flat onto the oven rack. This action collapses the rising center and pushes the batter outward, creating ripples. Do this once or twice during the last few minutes of baking.
- Bake One Sheet at a Time: For the most consistent and even baking, bake one sheet of cookies at a time in the center of the oven. This ensures even heat circulation all around the cookies, which is crucial for achieving a uniform crisp texture from edge to edge.
- Know Your Oven: Ovens can have hot spots and temperature inaccuracies. An oven thermometer is a baker’s best friend. If you notice cookies browning faster on one side, rotate the pan halfway through the baking time. For crispiness, it’s better to be a minute over-baked than a minute under-baked.
- The Secret to Storing for Crispness: This is counter-intuitive to how you store soft cookies. Do NOT store these in a completely airtight container right away if you want to maintain maximum crispness. Let them cool completely, then store them in a cookie jar or a container with a loose-fitting lid for the first day. This allows a tiny bit of moisture to escape. For longer-term storage, an airtight container is fine, but they may soften slightly over time.
- Soak Your Raisins (Optional Boost): For extra plump and flavorful raisins that don’t steal moisture from the cookie dough, try this trick. Place the raisins in a bowl and cover them with very hot water. Let them sit for 10-15 minutes, then drain them thoroughly and pat them completely dry with paper towels before adding them to the dough. This ensures they are juicy without making the dough wet.
Frequently Asked Questions (FAQ)
1. Why did my cookies turn out soft and cakey instead of crispy?
This is the most common issue and usually comes down to three things. First, you may have added too much flour (see the tip on proper measuring). Second, you might have used softened butter instead of melted butter. Softened, creamed butter incorporates air, which creates a lighter, cakier rise. Melted butter leads to a denser, chewier, and crispier result. Third, you may have under-baked them. For a truly crispy cookie, the edges need to be a deep golden brown, and the center should be fully set.
2. Can I use quick-cooking oats in this recipe?
While you technically can, it will significantly change the final product. Quick-cooking oats are rolled thinner and cut into smaller pieces. They act more like flour, absorbing more moisture and creating a softer, less textured cookie. For the signature hearty chew in the center and crispy texture that comes from a substantial oat, old-fashioned rolled oats are essential.
3. How should I store these cookies to keep them crispy?
The key is to let them cool completely on a wire rack so all the steam escapes. For the first 24 hours, storing them in a container with a loose-fitting lid or a traditional cookie jar helps maintain the best crisp texture. After that, you can move them to an airtight container. If they do soften, you can often re-crisp them in a 300°F (150°C) oven for 3-5 minutes.
4. Can I freeze this cookie dough?
Yes, this dough freezes beautifully! You have two options. You can roll the dough into logs (about 2 inches in diameter), wrap them tightly in plastic wrap and then in foil, and freeze for up to 3 months. To bake, simply slice the frozen log into ¼-inch thick rounds and bake, adding 1-2 minutes to the baking time. Alternatively, you can scoop the dough into individual balls, freeze them on a baking sheet until solid, and then transfer them to a zip-top freezer bag. You can bake these directly from frozen, again adding a couple of minutes to the bake time.
5. My cookies didn’t spread at all. What went wrong?
A lack of spread is typically caused by the dough being too cold or too stiff. If you chilled the dough (which isn’t necessary for this recipe), let it sit at room temperature for 20-30 minutes before baking. The most likely culprit, however, is too much flour, which creates a stiff dough that holds its shape instead of spreading out. Double-check your measuring technique for your next batch. Finally, ensure your baking soda is fresh, as expired leavening won’t provide the “lift and spread” needed.
6. Can I reduce the amount of sugar in this recipe?
You can, but it will affect the final cookie. Sugar does more than just add sweetness; it’s critical for texture. Granulated sugar contributes significantly to the spread and crispness. Reducing it will likely result in a softer, more cake-like cookie that doesn’t spread as much. If you must reduce it, try cutting back by only a few tablespoons to minimize the impact on texture.
7. Can I use other mix-ins besides raisins?
Absolutely! This recipe is a fantastic base for customization. You can swap the raisins for:
- Chocolate Chips: Semi-sweet or dark chocolate chips are wonderful.
- Other Dried Fruits: Chopped dried apricots, cranberries (craisins), or cherries are excellent.
- Nuts: Toasted walnuts or pecans add a lovely crunch and flavor. Use about ¾ to 1 cup of chopped nuts.
- A Combination: A classic “oatmeal supreme” might include raisins, chocolate chips, and walnuts.
8. How do I know exactly when the cookies are done for peak crispiness?
Look for visual cues. The cookies are ready when the outer 1/2-inch of the cookie is a noticeably deep golden brown, and the edges look dry and set. The center of the cookie should also look set and no longer appear wet or doughy, though it might be slightly paler than the edges. When you gently touch the edge of a cookie, it should feel firm. Don’t pull them when the center is still gooey if you’re aiming for all-over crispness. They will continue to firm up and get crispier as they cool on the pan and then the wire rack.

Crispy Oatmeal Raisin Cookies
Ingredients
- 1 cup (226g or 2 sticks) Unsalted Butter, melted: Using melted butter is crucial for a crispier, thinner cookie as it coats the flour differently than softened butter, leading to more spread.
- 1 cup (200g) Granulated White Sugar: The primary source of sweetness and a key player in creating a crisp texture and promoting spread.
- ½ cup (110g) Packed Light Brown Sugar: Adds moisture and a hint of molasses flavor for depth, creating a lovely chewiness in the very center to contrast the crisp edges.
- 2 large Eggs, at room temperature: Acts as a binder and adds richness. Room temperature eggs incorporate more easily into the batter for a uniform texture.
- 1 teaspoon Pure Vanilla Extract: Enhances all the other flavors in the cookie, adding warmth and aroma.
- 1 ½ cups (180g) All-Purpose Flour: Provides the main structure of the cookie. Be sure to measure it correctly to avoid a cakey cookie.
- 1 teaspoon Baking Soda: The leavening agent that reacts with the brown sugar’s acidity to help the cookies spread out thin.
- 1 teaspoon Ground Cinnamon: The classic spice pairing for oatmeal and raisins, adding a warm, comforting flavor.
- ½ teaspoon Salt: Balances the sweetness and brings out the buttery and nutty flavors of the oats.
- 3 cups (240g) Old-Fashioned Rolled Oats: These provide the signature hearty texture and nutty flavor. Do not use instant or steel-cut oats, as they will drastically alter the final texture.
- 1 cup (150g) Raisins: Adds pockets of sweet, chewy fruitiness. You can use regular or golden raisins.
Instructions
- Preheat and Prepare: Adjust your oven rack to the middle position and preheat to 350°F (175°C). Line two large baking sheets with parchment paper. This prevents sticking and promotes even browning on the bottom.
- Combine Wet Ingredients: In a large mixing bowl, whisk together the melted butter, granulated sugar, and light brown sugar until thoroughly combined. The mixture will look glossy and a bit grainy.
- Add Eggs and Vanilla: Add the room temperature eggs one at a time, beating well after each addition until the mixture is smooth and slightly lightened in color. Stir in the vanilla extract.
- Combine Dry Ingredients: In a separate medium bowl, whisk together the all-purpose flour, baking soda, ground cinnamon, and salt. This step ensures the leavening and spices are evenly distributed throughout the dough, which is vital for a uniform batch of cookies.
- Mix Dough: Gradually add the dry ingredient mixture to the wet ingredient mixture, mixing on low speed with an electric mixer or by hand with a spatula until just combined. Be careful not to overmix at this stage; stop as soon as you no longer see streaks of flour. Overmixing develops gluten, which can make cookies tough instead of crispy.
- Incorporate Oats and Raisins: Gently fold in the old-fashioned rolled oats and raisins with a sturdy spatula until they are evenly distributed throughout the dough. The dough will be relatively loose and sticky compared to other cookie doughs.
- Portion the Dough: Drop rounded tablespoons of dough onto the prepared baking sheets, leaving at least 2-3 inches of space between each cookie. These cookies will spread significantly, so giving them ample room is essential to prevent them from merging into one giant cookie. For a 1-tablespoon scoop, you should fit about 8-9 cookies per sheet.
- Bake to Perfection: Bake for 12-15 minutes, or until the edges are a deep golden brown and the centers look set. For maximum crispiness, err on the longer side of the baking time. The cookies will look quite flat and lacy around the edges.
- Cool for Crispiness: This is a critical step. Let the cookies cool on the baking sheet for 5 minutes. They will be very soft and fragile right out of the oven, and this time allows them to set up. After 5 minutes, use a thin spatula to carefully transfer the cookies to a wire cooling rack to cool completely. Cooling on a wire rack allows air to circulate underneath, preventing moisture from getting trapped and ensuring the entire cookie becomes crisp.
Nutrition
- Serving Size: one normal portion
- Calories: 145


