")

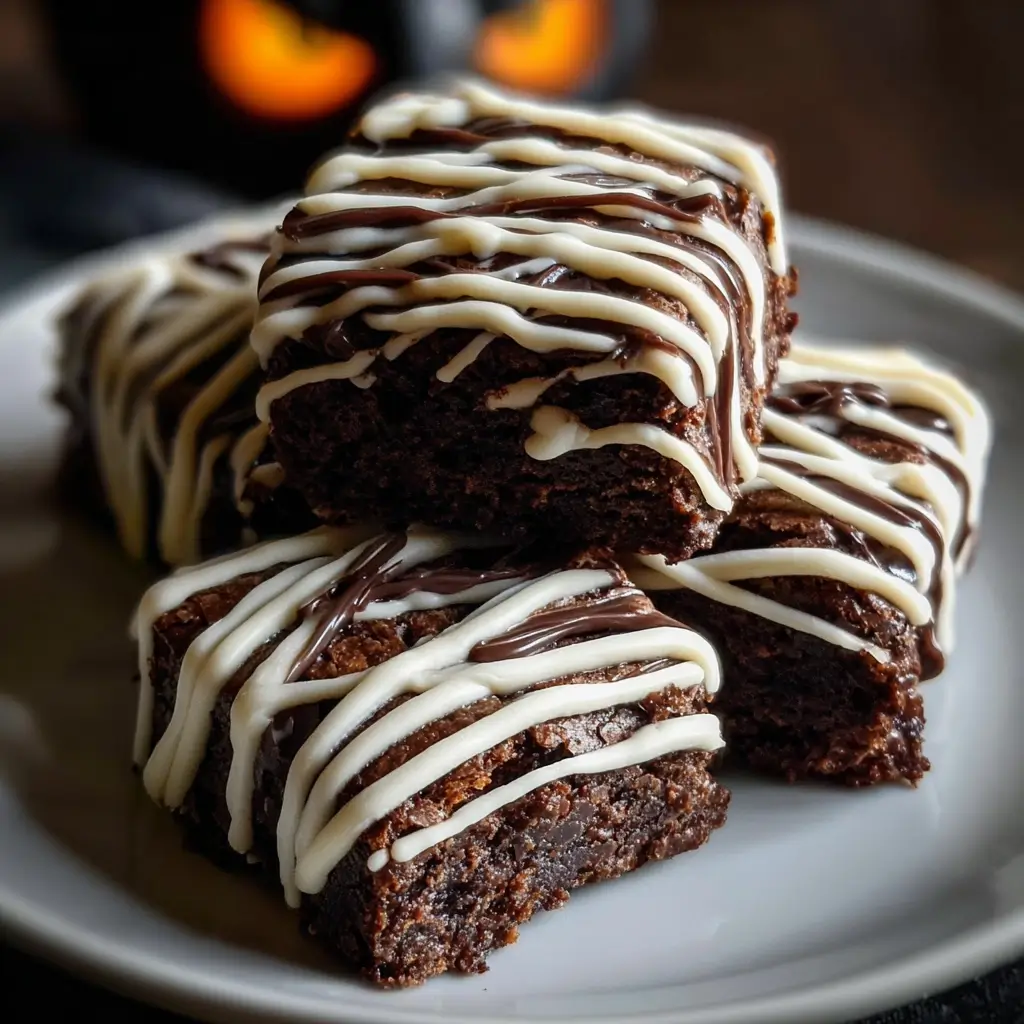

Of all the traditions our family cherishes, the annual Halloween baking extravaganza ranks supreme. Every year, as the leaves turn to fiery shades of orange and red, my kitchen transforms into a mad scientist’s laboratory of spooky sweets and ghoulish goodies. For years, we tried everything from ghost-shaped cookies that spread into amorphous blobs to pumpkin-spiced cakes that were more trick than treat. But a few years ago, we stumbled upon a recipe that changed our Halloween game forever: these Decadent Mummy Wrapped Brownie Bites. The first time I pulled a tray of these from the oven, the rich, intoxicating aroma of deep chocolate filled the house, instantly gathering a small, eager crowd. The real magic, however, happened during the decoration. My kids, usually a whirlwind of chaotic energy, were completely captivated, carefully drizzling the white chocolate “bandages” and giving each little mummy a unique personality with candy eyeballs. When we finally took our first bite, there was a moment of reverent silence, followed by a chorus of “Mmm’s” and “These are the best ever!” The brownie itself is intensely fudgy and moist, a perfect, rich foundation for the sweet crackle of the white chocolate and the playful crunch of the candy eyes. They aren’t just a dessert; they’re an experience. They are now the undisputed star of our Halloween spread, the first thing to disappear at parties and the treat my kids proudly hand out to their friends. Making these Mummy Wrapped Brownie Bites has become a treasured part of our spooky season, a deliciously fun way to create memories that are as sweet as the treats themselves.
Ingredients for Decadent Mummy Wrapped Brownie Bites
To create these spooktacularly delicious treats, you’ll need a combination of high-quality ingredients for the brownies themselves and a few simple items for the fun mummy decoration.
For the Fudgy Brownie Bites:
- 1 cup (225g) Unsalted Butter: Using unsalted butter allows you to control the final saltiness of the brownies, ensuring a perfectly balanced, rich flavor.
- 4 ounces (115g) Unsweetened Chocolate, chopped: This is the foundation of the deep, dark chocolate flavor. Using unsweetened chocolate provides an intense cocoa base that isn’t overly sweet.
- 2 cups (400g) Granulated Sugar: Provides the classic sweetness and contributes to the iconic crackly top of a perfect brownie.
- 4 large Eggs, at room temperature: Room temperature eggs incorporate more easily into the batter, creating a smoother, more uniform texture.
- 1 teaspoon Vanilla Extract: A crucial flavor enhancer that complements and elevates the rich notes of the chocolate.
- 1 cup (120g) All-Purpose Flour: This provides the structure for the brownies. Be careful not to overmeasure, as too much flour can lead to a cakey, dry result.
- ½ cup (45g) Unsweetened Cocoa Powder: This ingredient doubles down on the chocolate flavor, adding depth and a darker color.
- ½ teaspoon Salt: Salt is a flavor miracle worker; it doesn’t make the brownies salty but instead intensifies the sweetness and the chocolate notes.
- 1 teaspoon Instant Espresso Powder (optional): This is the secret weapon. You won’t taste coffee, but a small amount of espresso powder will make the chocolate flavor richer and more complex.
For the Mummy Decoration:
- 8 ounces (225g) High-Quality White Chocolate, chopped (or white candy melts): This will form the mummy’s “bandages.” Using good quality white chocolate or candy melts ensures it will melt smoothly and set up nicely.
- 1 teaspoon Coconut Oil or Vegetable Shortening (optional): Adding a small amount of fat helps to thin the melted chocolate, making it much easier to drizzle into fine lines.
- 48-60 small Candy Eyeballs: These are essential for bringing your little mummies to life! You can find these in the baking aisle of most grocery stores, especially around Halloween.
Step-by-Step Instructions
Follow these detailed instructions carefully to ensure your brownie bites are perfectly fudgy and your mummies are frighteningly cute.
Part 1: Baking the Fudgy Brownie Base
- Preheat and Prepare: Begin by preheating your oven to 350°F (175°C). Generously grease and flour a 9×13 inch baking pan. For easier removal and cutting, you can line the pan with parchment paper, leaving an overhang on two sides to act as “handles.”
- Melt Chocolate and Butter: In a medium-sized, heatproof bowl set over a saucepan of simmering water (a double boiler), combine the chopped unsweetened chocolate and the unsalted butter. Stir frequently until both are completely melted and the mixture is smooth and glossy. Remove the bowl from the heat and set it aside to cool slightly for about 5 minutes.
- Combine Wet Ingredients: In a separate large mixing bowl, whisk together the granulated sugar and the room temperature eggs. Continue to whisk vigorously for 2-3 minutes, until the mixture becomes pale, thick, and airy. This step is crucial for developing the desirable shiny, crackly top on your brownies. Once aerated, whisk in the vanilla extract.
- Incorporate the Chocolate: Slowly pour the slightly cooled, melted chocolate and butter mixture into the egg and sugar mixture. Whisk gently until just combined. Be careful not to overmix here; you want to maintain the air you incorporated into the eggs.
- Combine and Add Dry Ingredients: In a separate, smaller bowl, sift or whisk together the all-purpose flour, unsweetened cocoa powder, salt, and the optional instant espresso powder. Sifting prevents lumps and ensures everything is evenly distributed.
- Fold, Don’t Stir: Gently add the dry ingredients to the wet ingredients. Using a rubber spatula, fold the mixture together until you see just a few streaks of flour remaining. Folding, rather than stirring, is key to preventing the development of too much gluten, which would result in tough, cakey brownies instead of dense, fudgy ones.
- Bake to Perfection: Pour the brownie batter into your prepared 9×13 inch pan and use the spatula to spread it into an even layer. Bake in the preheated oven for 25-30 minutes. The key to a fudgy brownie is to slightly underbake it. To check for doneness, insert a toothpick into the center. It should come out with a few moist, fudgy crumbs attached, not wet batter or completely clean.
- Cool Completely: This is arguably the most important and most difficult step due to the amazing smell! Remove the brownies from the oven and place the pan on a wire rack to cool completely. Do not attempt to cut them while they are warm. They need at least 2-3 hours to cool and set up properly. For the best results, you can even chill them in the refrigerator for an hour before cutting.
Part 2: Assembling Your Mummy Wrapped Brownie Bites
- Cut the Brownies: Once the brownies are completely cooled, use the parchment paper “handles” to lift the entire slab out of the pan and onto a cutting board. Using a large, sharp knife, trim the dry edges (baker’s treat!) and then cut the slab into small, bite-sized rectangles or squares. A 9×13 pan should yield approximately 24-30 brownie bites, depending on your preferred size.
- Melt the White Chocolate: Place the chopped white chocolate or candy melts into a microwave-safe bowl. Microwave in 30-second intervals, stirring thoroughly after each interval, until the chocolate is almost completely melted. Stir until the residual heat melts the remaining pieces. If the chocolate seems too thick for drizzling, stir in the teaspoon of coconut oil or shortening until smooth.
- Prepare for Drizzling: Transfer the melted white chocolate into a small ziplock bag or a piping bag. If using a ziplock bag, push the chocolate down to one corner and snip a very tiny piece off the corner. The smaller the hole, the finer your “bandage” lines will be.
- Attach the Eyes: Working with one brownie bite at a time, place a small dab of the melted white chocolate where you want the eyes to go. Immediately press two candy eyeballs into the chocolate to secure them. This gives them a “peeking out” from under the bandages effect.
- Wrap the Mummies: Now for the fun part! Take your piping or ziplock bag of white chocolate and quickly drizzle lines back and forth over the top of the brownie bite, crisscrossing the lines to create the look of mummy wrappings. Be sure to leave the eyes visible. There’s no right or wrong way to do this; some can be neat, others messy—it all adds to the character!
- Let Them Set: Place the decorated mummy brownies on a parchment-lined baking sheet or plate. Allow them to sit at room temperature for about an hour, or until the white chocolate has fully hardened. To speed up the process, you can place them in the refrigerator for 15-20 minutes.
Nutrition Facts
Disclaimer: The following nutritional information is an estimate and can vary based on the specific ingredients and brands used.
- Servings: 24 Brownie Bites
- Calories per serving: Approximately 210 kcal
- Carbohydrates: As the primary source of energy in this treat, carbohydrates come mainly from the sugar and flour, providing that perfect sugar rush for a night of trick-or-treating.
- Sugar: A significant component that gives these brownies their classic sweet taste and contributes to their moist, fudgy texture.
- Fat: Sourced from the butter and chocolate, fat is essential for creating the rich mouthfeel and decadent flavor that makes these brownies irresistible.
- Protein: Primarily from the eggs and a small amount from the flour, protein provides the structural backbone of the brownie, holding everything together.
- Sodium: A small but mighty amount of salt is used to enhance all the other flavors, making the chocolate taste more chocolaty and the sweetness more pronounced.
Preparation Time
Crafting these delightful ghouls is a multi-step process, but much of it is hands-off time.
- Active Time: Approximately 35 minutes. This includes mixing the batter, preparing the chocolate, and the fun part of decorating each mummy.
- Total Time: Approximately 3 hours. This includes the 25-30 minute baking time and, most importantly, the 2-3 hours of essential cooling time required for the brownies to set properly before cutting and decorating.
How to Serve Your Spooky Brownie Bites
These mummy brownies are the star of any Halloween gathering. Here are some creative ways to present them:
- The Haunted Graveyard Platter:
- Arrange the Mummy Wrapped Brownie Bites on a large black or dark gray platter.
- Crumble chocolate cookies (like Oreos with the cream removed) to create “dirt” and scatter it around the brownies.
- Stick upright cookies (like Milano cookies) into the “dirt” to look like tombstones.
- Add gummy worms peeking out from the dirt for an extra spooky touch.
- The Ultimate Halloween Dessert Board:
- Create a dessert “charcuterie” board by placing a large pile of mummy brownies in the center.
- Surround them with bowls of candy corn, mellowcreme pumpkins, and chocolate skulls.
- Add segments of mandarin oranges (which look like tiny pumpkins) and apple slices with caramel dip for a touch of freshness.
- Fill in the gaps with pretzels, nuts, and other spooky-shaped candies.
- Individual Treat Packages:
- Perfect for classroom parties or as take-home favors for guests.
- Place one or two mummy brownie bites into small, clear cellophane bags.
- Tie the bags shut with festive orange and black ribbon. This keeps them fresh and makes for a cute, portable treat.
- A Spooky Movie Night Delight:
- Serve the brownies on a tray alongside a big bowl of popcorn.
- Pair them with a “Witches’ Brew” green punch or a “Vampire’s Kiss” red soda for a fully themed snack experience while you watch your favorite scary movies.
Additional Tips for Perfect Mummy Brownies
Unlock the full potential of your spooky treats with these eight professional tips.
- Don’t You Dare Overbake: The single most important rule of brownie making. The residual heat from the pan will continue to cook the brownies after you remove them from the oven. Pulling them out when a toothpick shows moist crumbs is the secret to an eternally fudgy texture.
- Patience in Cooling is a Virtue: It is incredibly tempting to cut into warm brownies, but this will result in a crumbly, gooey mess. Letting them cool completely allows the chocolate and butter to solidify, resulting in clean, perfect squares and a much denser, chewier bite.
- Quality Chocolate is Non-Negotiable: Your brownies will only taste as good as the chocolate you put in them. For the brownie base, opt for a good quality unsweetened or bittersweet chocolate bar rather than chocolate chips, which contain stabilizers that affect melting. For the drizzle, quality white chocolate or candy melts will give you the smoothest consistency.
- Master the Drizzle Technique: For fine, delicate “bandages,” ensure the hole you snip in your bag is tiny. Move your hand quickly and confidently back and forth over the brownie. Don’t aim for perfection; the randomness and occasional messiness are what make them look authentically wrapped!
- Make-Ahead Magic: You can bake the brownies a day or two in advance. Keep the uncut, cooled slab tightly wrapped in plastic wrap at room temperature. Decorate them on the day you plan to serve them for the freshest look and taste.
- Customize Your Core Flavor: Feel free to get creative with the brownie base. Add a pinch of cinnamon or cayenne pepper for a little warmth, or a teaspoon of orange zest to complement the chocolate. You could even fold in a half cup of black or orange sprinkles for a festive surprise inside.
- The Secret to Clean Cuts: For ultra-clean, professional-looking brownie bites, use a long, sharp chef’s knife. After each and every cut, wipe the blade clean with a damp, hot paper towel. A clean, hot blade will slice through the brownies like butter, preventing any dragging or crumbling.
- Get the Kids Involved: This recipe is perfect for a family activity. Let younger kids help with whisking the dry ingredients or placing the candy eyeballs. Older kids can take charge of the white chocolate drizzling. It’s a wonderful way to build excitement for the holiday and create lasting memories in the kitchen.
Frequently Asked Questions (FAQ)
Here are answers to some common questions about making these Mummy Wrapped Brownie Bites.
1. Can I use a boxed brownie mix instead of making them from scratch?
Absolutely! If you’re short on time or prefer the convenience, a boxed brownie mix is a great shortcut. Simply prepare a 9×13 inch pan of your favorite fudgy brownie mix according to the package directions. The most important part is to let it cool completely before cutting and decorating.
2. How should I store the finished brownie bites?
Store the finished and fully set Mummy Wrapped Brownie Bites in a single layer in an airtight container at room temperature. They will stay fresh and delicious for up to 3-4 days. Avoid stacking them, as this can smudge the decorations. If your house is very warm, you may want to store them in the refrigerator, but let them come to room temperature before serving for the best flavor and texture.
3. Can I freeze these brownies for later?
Yes, these brownies freeze beautifully! For best results, freeze the undecorated brownie slab. Wrap the completely cooled slab tightly in two layers of plastic wrap, followed by a layer of aluminum foil. It can be frozen for up to 3 months. Thaw it at room temperature before cutting and decorating. You can also freeze the decorated brownies, but the candy eyes might get a little condensation on them when thawing.
4. My white chocolate got thick and clumpy (seized)! What went wrong?
White chocolate is notoriously finicky. It seizes when it comes into contact with even a tiny droplet of water or when it’s overheated. Always use a completely dry bowl and utensils. Microwave it in short bursts at a lower power setting and stir frequently. If it does seize, you unfortunately can’t save it for drizzling, but you can still use it as a base for a white chocolate ganache by stirring in hot heavy cream.
5. I don’t have a 9×13 inch pan. Can I use a different size?
You can, but you’ll need to adjust the baking time. An 8×8 inch pan will result in much thicker brownies and will likely need 40-45 minutes to bake. A 9×9 inch pan will also be thicker and need around 35-40 minutes. Keep a close eye on them and use the toothpick test to check for doneness.
6. Are these Mummy Wrapped Brownie Bites nut-free?
As written, this recipe is nut-free. However, cross-contamination can be a serious issue for those with allergies. Always check the labels on all your ingredients—especially the chocolate, cocoa powder, and candy eyeballs—to ensure they were produced in a nut-free facility if you are serving them to someone with a severe nut allergy.
7. Why didn’t my brownies get that shiny, crackly top?
The secret to the shiny, paper-thin top layer on brownies lies in dissolving the sugar properly and whipping the eggs. Make sure you whisk your eggs and sugar together vigorously for a full 2-3 minutes until the mixture is pale and thick. This creates a thin meringue-like layer on top of the batter that bakes into that perfect crackly crust.
8. What are some other fun decoration ideas besides mummies?
The brownie bite base is a perfect canvas for all sorts of spooky creativity! You could skip the white chocolate drizzle and top them with orange-colored frosting and a small green candy for a “pumpkin patch” look. Or, use chocolate frosting and draw a spiderweb with white icing. You could also crumble cookies on top for “dirt” and add a gummy worm for a creepy-crawly treat.
Decadent Mummy Wrapped Brownie Bites
Ingredients
To create these spooktacularly delicious treats, you’ll need a combination of high-quality ingredients for the brownies themselves and a few simple items for the fun mummy decoration.
For the Fudgy Brownie Bites:
- 1 cup (225g) Unsalted Butter: Using unsalted butter allows you to control the final saltiness of the brownies, ensuring a perfectly balanced, rich flavor.
- 4 ounces (115g) Unsweetened Chocolate, chopped: This is the foundation of the deep, dark chocolate flavor. Using unsweetened chocolate provides an intense cocoa base that isn’t overly sweet.
- 2 cups (400g) Granulated Sugar: Provides the classic sweetness and contributes to the iconic crackly top of a perfect brownie.
- 4 large Eggs, at room temperature: Room temperature eggs incorporate more easily into the batter, creating a smoother, more uniform texture.
- 1 teaspoon Vanilla Extract: A crucial flavor enhancer that complements and elevates the rich notes of the chocolate.
- 1 cup (120g) All-Purpose Flour: This provides the structure for the brownies. Be careful not to overmeasure, as too much flour can lead to a cakey, dry result.
- ½ cup (45g) Unsweetened Cocoa Powder: This ingredient doubles down on the chocolate flavor, adding depth and a darker color.
- ½ teaspoon Salt: Salt is a flavor miracle worker; it doesn’t make the brownies salty but instead intensifies the sweetness and the chocolate notes.
- 1 teaspoon Instant Espresso Powder (optional): This is the secret weapon. You won’t taste coffee, but a small amount of espresso powder will make the chocolate flavor richer and more complex.
For the Mummy Decoration:
- 8 ounces (225g) High-Quality White Chocolate, chopped (or white candy melts): This will form the mummy’s “bandages.” Using good quality white chocolate or candy melts ensures it will melt smoothly and set up nicely.
- 1 teaspoon Coconut Oil or Vegetable Shortening (optional): Adding a small amount of fat helps to thin the melted chocolate, making it much easier to drizzle into fine lines.
- 48–60 small Candy Eyeballs: These are essential for bringing your little mummies to life! You can find these in the baking aisle of most grocery stores, especially around Halloween.
Instructions
Follow these detailed instructions carefully to ensure your brownie bites are perfectly fudgy and your mummies are frighteningly cute.
Part 1: Baking the Fudgy Brownie Base
- Preheat and Prepare: Begin by preheating your oven to 350°F (175°C). Generously grease and flour a 9×13 inch baking pan. For easier removal and cutting, you can line the pan with parchment paper, leaving an overhang on two sides to act as “handles.”
- Melt Chocolate and Butter: In a medium-sized, heatproof bowl set over a saucepan of simmering water (a double boiler), combine the chopped unsweetened chocolate and the unsalted butter. Stir frequently until both are completely melted and the mixture is smooth and glossy. Remove the bowl from the heat and set it aside to cool slightly for about 5 minutes.
- Combine Wet Ingredients: In a separate large mixing bowl, whisk together the granulated sugar and the room temperature eggs. Continue to whisk vigorously for 2-3 minutes, until the mixture becomes pale, thick, and airy. This step is crucial for developing the desirable shiny, crackly top on your brownies. Once aerated, whisk in the vanilla extract.
- Incorporate the Chocolate: Slowly pour the slightly cooled, melted chocolate and butter mixture into the egg and sugar mixture. Whisk gently until just combined. Be careful not to overmix here; you want to maintain the air you incorporated into the eggs.
- Combine and Add Dry Ingredients: In a separate, smaller bowl, sift or whisk together the all-purpose flour, unsweetened cocoa powder, salt, and the optional instant espresso powder. Sifting prevents lumps and ensures everything is evenly distributed.
- Fold, Don’t Stir: Gently add the dry ingredients to the wet ingredients. Using a rubber spatula, fold the mixture together until you see just a few streaks of flour remaining. Folding, rather than stirring, is key to preventing the development of too much gluten, which would result in tough, cakey brownies instead of dense, fudgy ones.
- Bake to Perfection: Pour the brownie batter into your prepared 9×13 inch pan and use the spatula to spread it into an even layer. Bake in the preheated oven for 25-30 minutes. The key to a fudgy brownie is to slightly underbake it. To check for doneness, insert a toothpick into the center. It should come out with a few moist, fudgy crumbs attached, not wet batter or completely clean.
- Cool Completely: This is arguably the most important and most difficult step due to the amazing smell! Remove the brownies from the oven and place the pan on a wire rack to cool completely. Do not attempt to cut them while they are warm. They need at least 2-3 hours to cool and set up properly. For the best results, you can even chill them in the refrigerator for an hour before cutting.
Part 2: Assembling Your Mummy Wrapped Brownie Bites
- Cut the Brownies: Once the brownies are completely cooled, use the parchment paper “handles” to lift the entire slab out of the pan and onto a cutting board. Using a large, sharp knife, trim the dry edges (baker’s treat!) and then cut the slab into small, bite-sized rectangles or squares. A 9×13 pan should yield approximately 24-30 brownie bites, depending on your preferred size.
- Melt the White Chocolate: Place the chopped white chocolate or candy melts into a microwave-safe bowl. Microwave in 30-second intervals, stirring thoroughly after each interval, until the chocolate is almost completely melted. Stir until the residual heat melts the remaining pieces. If the chocolate seems too thick for drizzling, stir in the teaspoon of coconut oil or shortening until smooth.
- Prepare for Drizzling: Transfer the melted white chocolate into a small ziplock bag or a piping bag. If using a ziplock bag, push the chocolate down to one corner and snip a very tiny piece off the corner. The smaller the hole, the finer your “bandage” lines will be.
- Attach the Eyes: Working with one brownie bite at a time, place a small dab of the melted white chocolate where you want the eyes to go. Immediately press two candy eyeballs into the chocolate to secure them. This gives them a “peeking out” from under the bandages effect.
- Wrap the Mummies: Now for the fun part! Take your piping or ziplock bag of white chocolate and quickly drizzle lines back and forth over the top of the brownie bite, crisscrossing the lines to create the look of mummy wrappings. Be sure to leave the eyes visible. There’s no right or wrong way to do this; some can be neat, others messy—it all adds to the character!
- Let Them Set: Place the decorated mummy brownies on a parchment-lined baking sheet or plate. Allow them to sit at room temperature for about an hour, or until the white chocolate has fully hardened. To speed up the process, you can place them in the refrigerator for 15-20 minutes.
Nutrition
- Serving Size: one normal portion
- Calories: 210


