")

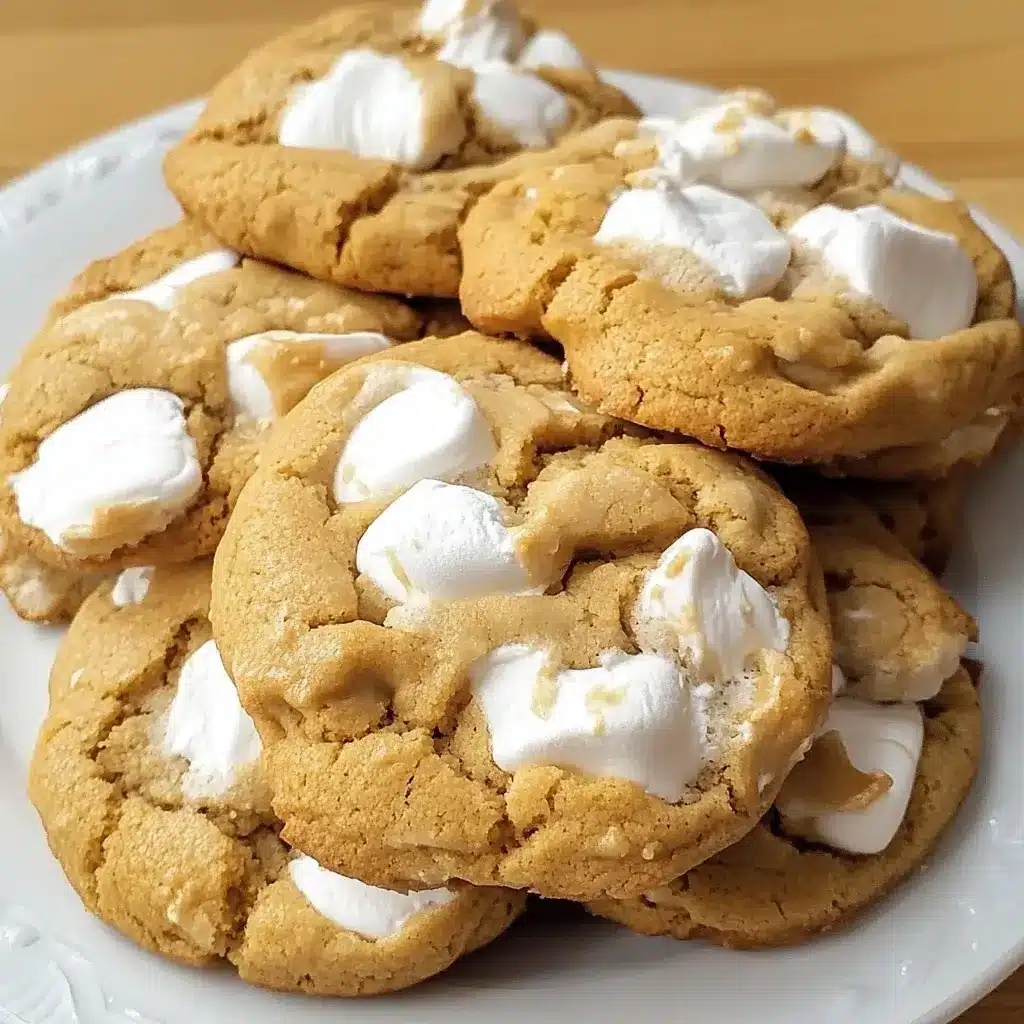

There are some recipes that just instantly transport you back to childhood, or maybe create those core memories for your own kids. For our family, this Easy Marshmallow Cookies recipe is exactly that. I remember the first time I baked these on a whim one chilly Saturday afternoon. The kids were restless, I was craving something sweet and comforting, and I stumbled upon the idea of combining classic chewy cookies with gooey, toasted marshmallows. The aroma that filled the house as they baked – that buttery, sugary smell mingling with the slightly caramelized scent of marshmallow – was pure magic. When they came out of the oven, slightly puffed, golden brown, with pockets of melted marshmallow peeking through, they looked irresistible. The real test, of course, was the taste. That first bite was heavenly! A perfectly soft and chewy cookie base giving way to stretchy, sweet marshmallow goo. My husband, usually reserved in his praise for sweets, declared them “dangerously delicious,” and the kids? Let’s just say the batch disappeared much faster than I anticipated. Since then, these cookies have become a staple for movie nights, potlucks, and whenever we need a little dose of uncomplicated happiness. They are genuinely easy to make, require simple ingredients, and the result is always spectacular. If you’re looking for a crowd-pleasing treat that’s both nostalgic and excitingly yummy, you absolutely have to try these easy marshmallow cookies.
Ingredients
Here’s what you’ll need to gather to create these delightful marshmallow treats:
- 1 cup (2 sticks or 226g) Unsalted Butter, Softened: Using softened, room temperature butter is key for achieving the perfect creamy base and texture.
- ¾ cup (150g) Granulated Sugar: Provides sweetness and helps the cookies spread slightly.
- ¾ cup (165g) Packed Light Brown Sugar: Adds moisture, chewiness, and a hint of molasses flavor.
- 2 Large Eggs: Act as binders and add richness; ensure they are at room temperature for better incorporation.
- 1 tablespoon Pure Vanilla Extract: Enhances all the other flavors in the cookie; use pure extract for the best taste.
- 2 ¾ cups (330g) All-Purpose Flour: The main structure of the cookie; spoon and level it into the measuring cup for accuracy.
- 1 teaspoon Baking Soda: The leavening agent that helps the cookies rise and become tender.
- ½ teaspoon Salt: Balances the sweetness and brings out the flavors.
- 1 ½ cups (about 150g) Mini Marshmallows: The star ingredient! Mini marshmallows distribute easily throughout the dough. (Alternatively, use large marshmallows cut into smaller pieces).
Instructions
Follow these simple steps to bake your perfect batch of Easy Marshmallow Cookies:
- Preheat & Prep: Preheat your oven to 375°F (190°C). Line two large baking sheets with parchment paper or silicone baking mats to prevent sticking, especially important with melting marshmallows.
- Cream Butter & Sugars: In a large mixing bowl, using an electric mixer (handheld or stand mixer with paddle attachment), cream together the softened unsalted butter, granulated sugar, and packed light brown sugar on medium speed until the mixture is light, fluffy, and pale in color. This usually takes about 2-3 minutes. Scrape down the sides of the bowl occasionally.
- Add Eggs & Vanilla: Add the large eggs one at a time, beating well after each addition until fully incorporated. Beat in the pure vanilla extract until combined.
- Combine Dry Ingredients: In a separate medium bowl, whisk together the all-purpose flour, baking soda, and salt. This ensures the leavening agent and salt are evenly distributed.
- Mix Wet & Dry: Gradually add the dry ingredient mixture to the wet ingredients in the large bowl. Mix on low speed until just combined. Be careful not to overmix at this stage; stop as soon as you no longer see streaks of flour. Overmixing can lead to tough cookies.
- Fold in Marshmallows: Gently fold in the mini marshmallows using a spatula or wooden spoon. Try to distribute them evenly throughout the dough, but don’t worry if it’s not perfect.
- Scoop Dough: Drop rounded tablespoons of cookie dough onto the prepared baking sheets, leaving about 2 inches between each cookie to allow for spreading. A medium cookie scoop (about 1.5 tablespoons) works perfectly for uniform cookies. Optional but Recommended: If time permits, chill the scooped dough balls on the baking sheet in the refrigerator for 15-30 minutes. This helps prevent excessive spreading and intensifies the flavor.
- Bake: Bake in the preheated oven for 9-12 minutes. The edges should be lightly golden brown, and the centers should still look slightly soft and puffy. The marshmallows will puff up and might lightly toast. Keep a close eye on them, as oven temperatures can vary. For chewier cookies, err on the side of slightly underbaking.
- Cool: Let the cookies cool on the baking sheets for 5-10 minutes before transferring them to a wire rack to cool completely. The marshmallows will be very hot and molten right out of the oven, and this cooling time on the sheet allows the cookies to set properly.
- Enjoy: Serve warm for the ultimate gooey marshmallow experience, or store and enjoy once completely cooled.
Nutrition Facts
- Servings: This recipe yields approximately 24-30 cookies, depending on the size scooped.
- Calories per Serving (1 cookie): Approximately 150-180 kcal (estimated).
- Fat: Contains fats primarily from the butter and eggs, contributing to the rich texture.
- Carbohydrates: The main source of energy, primarily from the sugars and flour.
- Protein: A smaller component, derived mainly from the eggs and flour.
- Sugar: Includes both granulated and brown sugar, plus the sugar in the marshmallows, contributing significantly to the sweetness.
- Sodium: Present due to the added salt, which helps balance the overall flavor profile.
(Disclaimer: Nutritional information is an estimate only, calculated using standard ingredient databases. Actual values may vary based on specific ingredients used and final cookie size.)
Preparation Time
This recipe is designed for ease and relative speed. Here’s a breakdown:
- Prep Time: 15-20 minutes (Mixing the dough and scooping)
- Optional Chill Time: 15-30 minutes
- Bake Time: 9-12 minutes per batch
- Total Time: Approximately 40-65 minutes (depending on chilling and number of batches)
This makes it a fantastic option for a relatively quick baking project yielding delicious results without requiring hours in the kitchen.
How to Serve
These Easy Marshmallow Cookies are delightful on their own, but here are some fun and tasty ways to serve them:
- Warm from the Oven: This is arguably the best way! Serve them slightly warm when the marshmallows are still incredibly gooey and melted. Pure comfort!
- With a Glass of Milk: The classic pairing. Cold milk perfectly complements the sweetness and chewiness of the cookies.
- Alongside Coffee or Tea: A warm marshmallow cookie makes a wonderful companion to your morning coffee or afternoon tea break.
- As an Ice Cream Sandwich: Place a scoop of your favorite vanilla or chocolate ice cream between two completely cooled cookies. Freeze briefly before serving for an epic dessert.
- On a Dessert Platter: Include these cookies on a platter with other treats like brownies, fruit, or different types of cookies for parties or gatherings. Their unique texture and look make them stand out.
- Crumbled Over Ice Cream: Crumble a cooled cookie over a bowl of ice cream for a delicious textural topping.
- For School Lunches or Snacks: Once cooled, they pack well (though they might lose some gooiness) and make for a much-loved lunchbox treat or after-school snack.
- Holiday Cookie Exchanges: Their crowd-pleasing nature and slightly festive look (especially if marshmallows toast nicely) make them great for holiday exchanges.
- Campfire Style (Indoor S’mores Vibe): Gently warm a cookie in the microwave for a few seconds (5-10) to re-melt the marshmallow slightly for an indoor s’mores-like experience without the mess.
Additional Tips
To ensure your Easy Marshmallow Cookies turn out perfectly every time, consider these extra tips:
- Room Temperature is Key: Make sure your butter and eggs are truly at room temperature. This allows the butter and sugars to cream properly, incorporating air for a lighter texture, and helps the eggs mix in smoothly without curdling. Take them out of the fridge about 30-60 minutes before you start.
- Don’t Overmix the Flour: Once you add the dry ingredients, mix only until the flour streaks disappear. Overmixing develops the gluten in the flour, which can result in tough, dense cookies instead of soft and chewy ones. Gentle mixing is crucial here.
- Chill the Dough (Highly Recommended): While optional in the main instructions, chilling the scooped dough for at least 15-30 minutes (or even longer) makes a big difference. It solidifies the butter, preventing the cookies from spreading too much during baking, leading to thicker, chewier cookies. It also allows the flavors to meld and deepen.
- Strategic Marshmallow Placement: While folding them in usually works, some marshmallows inevitably end up near the edges and can ooze out and burn. For picture-perfect cookies, you can gently press a few extra mini marshmallows onto the top of the dough balls just before baking. This ensures visible, gooey pockets without as much risk of edge burning. Alternatively, fold most marshmallows into the dough, but reserve some to press into the tops halfway through baking.
- Slightly Underbake for Chewiness: For that perfect soft and chewy texture, pull the cookies from the oven when the edges are just set and lightly golden, but the centers still look a little soft and underdone. They will continue to cook and set on the hot baking sheet as they cool. Overbaking leads to dry, crispy cookies.
- Cooling Time on the Baking Sheet is Crucial: Don’t skip the 5-10 minute cooling period on the baking sheet! The cookies are very delicate right out of the oven, especially with the molten marshmallows. This time allows them to firm up enough to be transferred to a wire rack without falling apart.
- Experiment with Marshmallow Types: While mini marshmallows are easiest, you can use regular-sized marshmallows cut into quarters or sixths. You could even try flavored marshmallows (like strawberry or chocolate) for a fun twist, keeping in mind they might add extra sweetness or flavor. Be aware that different brands or types might melt differently.
- Consider Mix-Ins: Feel free to customize! Adding ½ to 1 cup of chocolate chips (semi-sweet, milk, or white), chopped nuts (like pecans or walnuts), or even some festive sprinkles along with the marshmallows can add another layer of flavor and texture. Just fold them in gently with the marshmallows.
FAQ Section
Here are answers to some frequently asked questions about making Easy Marshmallow Cookies:
- Q: Can I use large marshmallows instead of mini ones?
- A: Yes, you definitely can! Simply cut the large marshmallows into smaller, bite-sized pieces using kitchen shears or a lightly greased knife. Aim for pieces roughly the size of mini marshmallows (about 4-6 pieces per large marshmallow). This ensures they distribute more evenly and melt nicely within the cookie.
- Q: Why did my marshmallows completely disappear or melt into puddles?
- A: This can happen for a few reasons. Your oven temperature might be too high, causing the marshmallows to liquefy and spread excessively before the cookie structure sets. Ensure your oven is accurately calibrated. Also, marshmallows placed too close to the edge of the cookie dough ball are more likely to ooze out and burn on the baking sheet. Try folding them thoroughly into the dough or pressing them lightly into the center top just before baking or partway through. Using fresh marshmallows also helps; older, dried-out marshmallows might not melt as nicely.
- Q: Can I freeze the cookie dough?
- A: Absolutely! This dough freezes beautifully. Scoop the dough balls onto a parchment-lined baking sheet and freeze until solid (about 1-2 hours). Then, transfer the frozen dough balls to an airtight container or freezer bag. They can be stored in the freezer for up to 3 months. When ready to bake, you can bake them directly from frozen, adding 1-3 minutes to the baking time. No need to thaw!
- Q: How should I store leftover cookies, and how long will they last?
- A: Store completely cooled cookies in an airtight container at room temperature. They are best enjoyed within 3-4 days for optimal softness and chewiness. Placing a slice of bread in the container can help maintain moisture. The marshmallows might become less gooey over time but will still be delicious. Avoid refrigerating them, as it can dry them out.
- Q: Can I make these cookies gluten-free?
- A: Yes, you can adapt this recipe for gluten-free diets. Substitute the all-purpose flour with a good quality gluten-free all-purpose baking blend that contains xanthan gum. Ensure your blend is designed for 1:1 substitution. Also, double-check that your vanilla extract and marshmallows are certified gluten-free, as some brands may have cross-contamination risks. The texture might be slightly different, but they should still be tasty.
- Q: My cookies spread too much and became flat. What went wrong?
- A: Flat cookies are often due to overly soft or melted butter, not chilling the dough, using too little flour (incorrect measuring), or an oven that’s not hot enough. Ensure your butter is softened but not greasy/melted. Measuring flour correctly by spooning and leveling is important. Chilling the dough before baking is the best defense against spreading. Also, verify your oven temperature with an oven thermometer. Lastly, make sure your baking soda isn’t expired.
- Q: Can I use margarine instead of butter?
- A: You can substitute margarine, but it will likely affect the final flavor and texture. Butter provides a richer flavor. Margarine, especially tub-style, often contains more water and less fat than butter, which can lead to cookies that spread more and have a slightly different, potentially less chewy texture. If using margarine, opt for stick margarine with a high fat percentage for better results.
- Q: What if I don’t have light brown sugar? Can I use all granulated sugar or dark brown sugar?
- A: Yes, you can make substitutions, but expect changes. Using all granulated sugar will result in flatter, crispier cookies lacking the chewiness and slight molasses depth brown sugar provides. Using all dark brown sugar will make the cookies darker, softer, chewier, and impart a stronger molasses flavor. The best substitution is often to use granulated sugar and add 1-2 tablespoons of molasses to mimic light brown sugar, but sticking to the recipe offers the intended balance of texture and flavor.

Easy Marshmallow Cookies Recipe
Ingredients
Here’s what you’ll need to gather to create these delightful marshmallow treats:
- 1 cup (2 sticks or 226g) Unsalted Butter, Softened: Using softened, room temperature butter is key for achieving the perfect creamy base and texture.
- ¾ cup (150g) Granulated Sugar: Provides sweetness and helps the cookies spread slightly.
- ¾ cup (165g) Packed Light Brown Sugar: Adds moisture, chewiness, and a hint of molasses flavor.
- 2 Large Eggs: Act as binders and add richness; ensure they are at room temperature for better incorporation.
- 1 tablespoon Pure Vanilla Extract: Enhances all the other flavors in the cookie; use pure extract for the best taste.
- 2 ¾ cups (330g) All-Purpose Flour: The main structure of the cookie; spoon and level it into the measuring cup for accuracy.
- 1 teaspoon Baking Soda: The leavening agent that helps the cookies rise and become tender.
- ½ teaspoon Salt: Balances the sweetness and brings out the flavors.
- 1 ½ cups (about 150g) Mini Marshmallows: The star ingredient! Mini marshmallows distribute easily throughout the dough. (Alternatively, use large marshmallows cut into smaller pieces).
Instructions
Follow these simple steps to bake your perfect batch of Easy Marshmallow Cookies:
- Preheat & Prep: Preheat your oven to 375°F (190°C). Line two large baking sheets with parchment paper or silicone baking mats to prevent sticking, especially important with melting marshmallows.
- Cream Butter & Sugars: In a large mixing bowl, using an electric mixer (handheld or stand mixer with paddle attachment), cream together the softened unsalted butter, granulated sugar, and packed light brown sugar on medium speed until the mixture is light, fluffy, and pale in color. This usually takes about 2-3 minutes. Scrape down the sides of the bowl occasionally.
- Add Eggs & Vanilla: Add the large eggs one at a time, beating well after each addition until fully incorporated. Beat in the pure vanilla extract until combined.
- Combine Dry Ingredients: In a separate medium bowl, whisk together the all-purpose flour, baking soda, and salt. This ensures the leavening agent and salt are evenly distributed.
- Mix Wet & Dry: Gradually add the dry ingredient mixture to the wet ingredients in the large bowl. Mix on low speed until just combined. Be careful not to overmix at this stage; stop as soon as you no longer see streaks of flour. Overmixing can lead to tough cookies.
- Fold in Marshmallows: Gently fold in the mini marshmallows using a spatula or wooden spoon. Try to distribute them evenly throughout the dough, but don’t worry if it’s not perfect.
- Scoop Dough: Drop rounded tablespoons of cookie dough onto the prepared baking sheets, leaving about 2 inches between each cookie to allow for spreading. A medium cookie scoop (about 1.5 tablespoons) works perfectly for uniform cookies. Optional but Recommended: If time permits, chill the scooped dough balls on the baking sheet in the refrigerator for 15-30 minutes. This helps prevent excessive spreading and intensifies the flavor.
- Bake: Bake in the preheated oven for 9-12 minutes. The edges should be lightly golden brown, and the centers should still look slightly soft and puffy. The marshmallows will puff up and might lightly toast. Keep a close eye on them, as oven temperatures can vary. For chewier cookies, err on the side of slightly underbaking.
- Cool: Let the cookies cool on the baking sheets for 5-10 minutes before transferring them to a wire rack to cool completely. The marshmallows will be very hot and molten right out of the oven, and this cooling time on the sheet allows the cookies to set properly.
- Enjoy: Serve warm for the ultimate gooey marshmallow experience, or store and enjoy once completely cooled.
Nutrition
- Serving Size: one normal portion
- Calories: 180