")


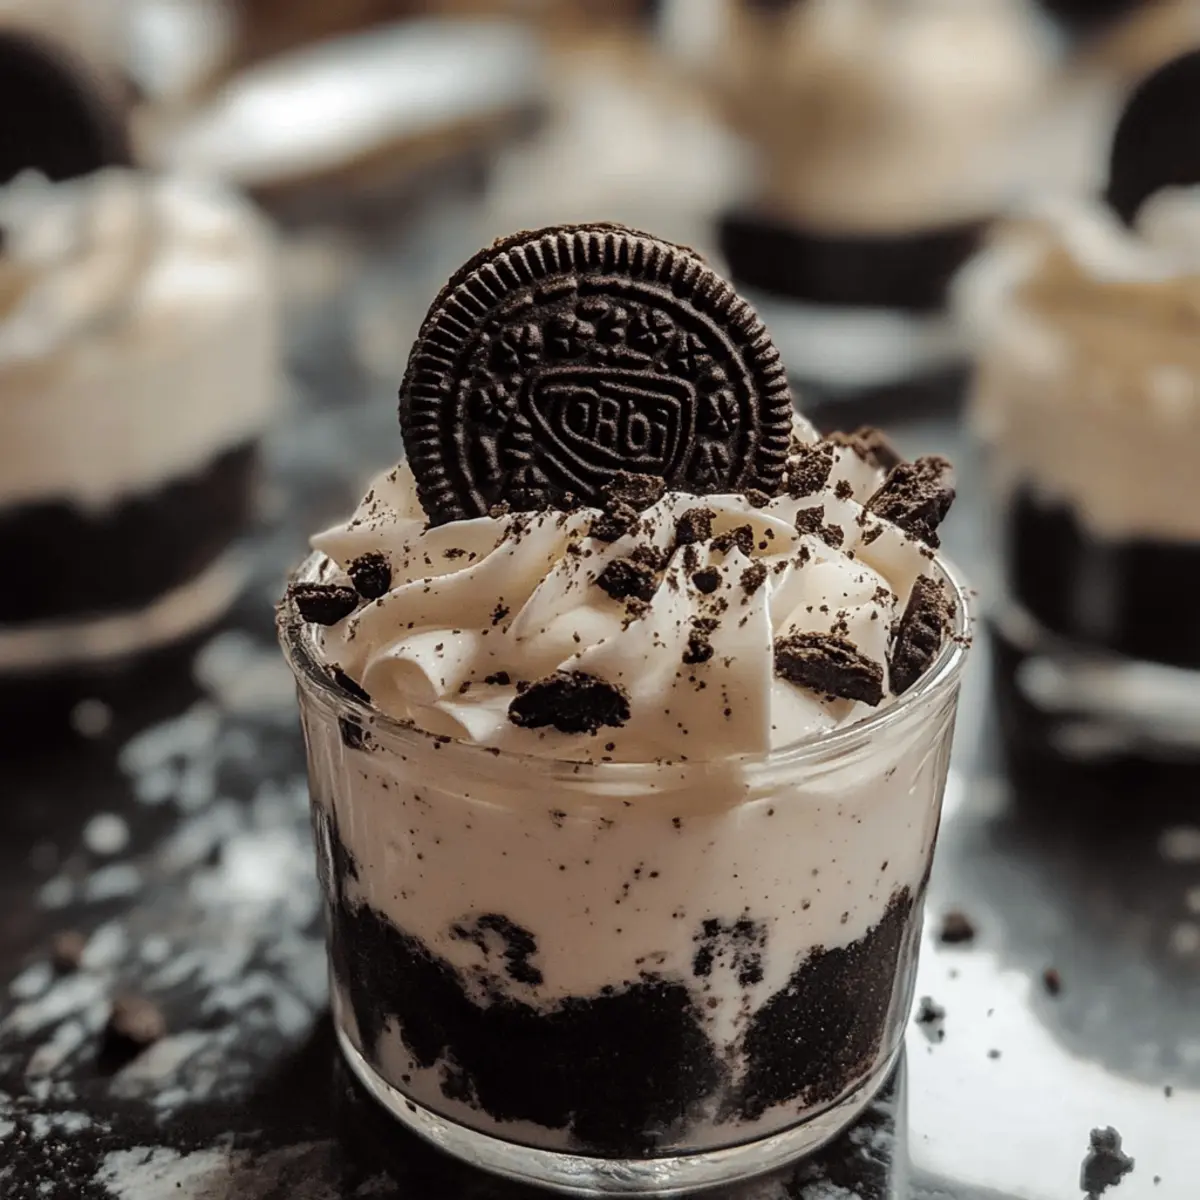
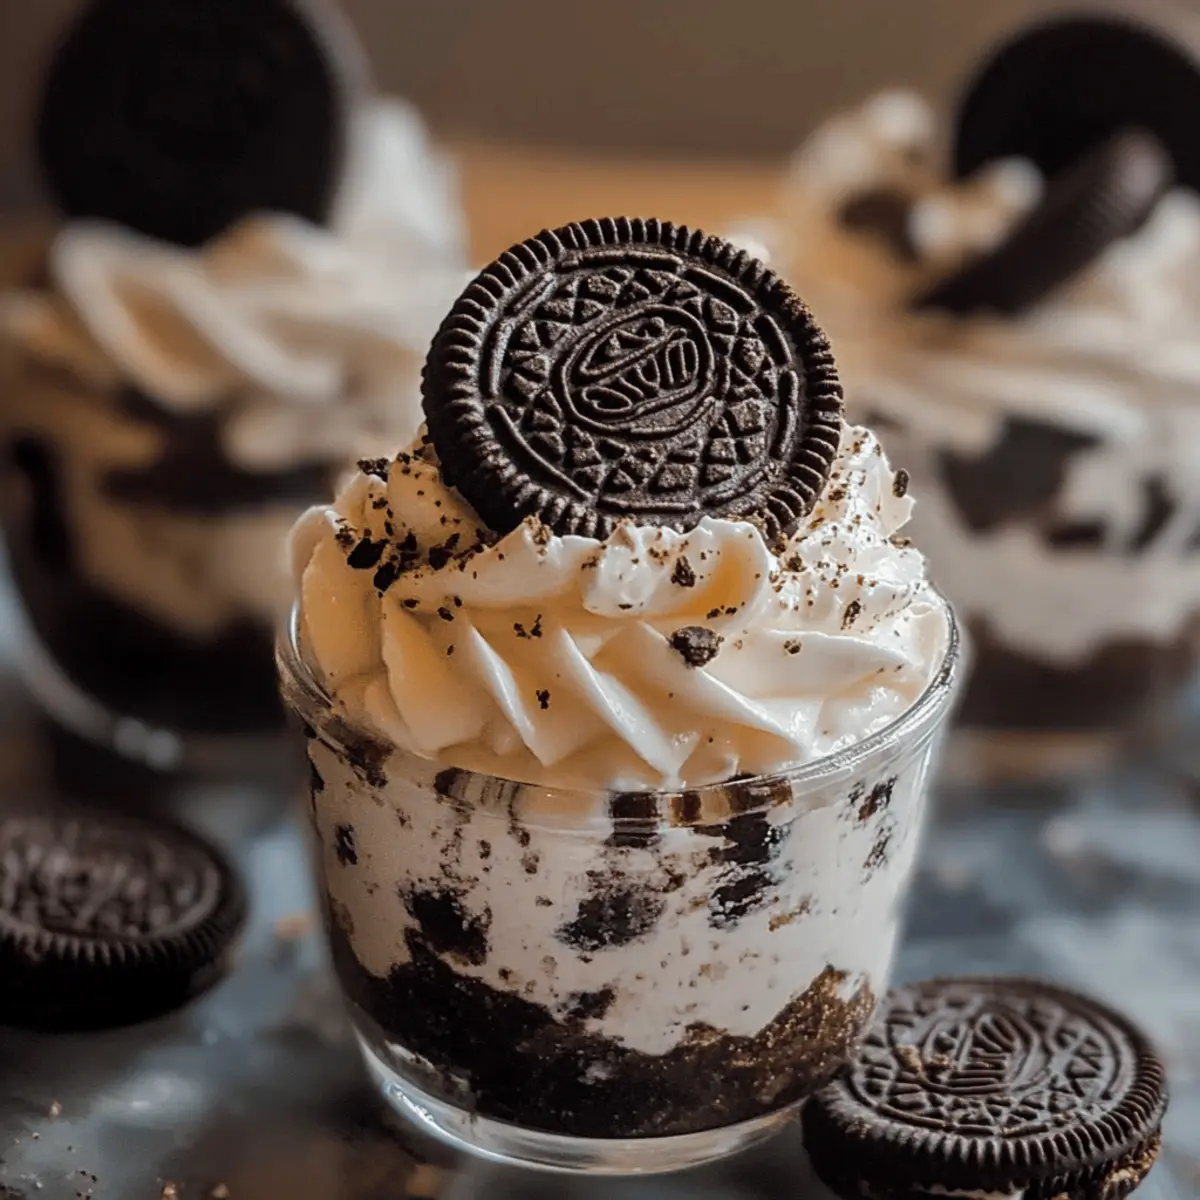
There’s something truly irresistible about the creamy texture of cheesecake paired with the classic crunch of Oreos—and what if I told you you could whip this up in individual cups without turning on the oven? These No-Bake Oreo Cheesecake Cups combine rich cream cheese, sweet whipped topping, and crushed Oreos into a simple dessert that feels both indulgent and effortlessly elegant. Perfect for last-minute guests or a sweet treat to satisfy your chocolate cravings, they’re a game-changer for anyone tired of complicated recipes but still craving homemade goodness. Let me take you through how easy it is to assemble these crowd-pleasers that deliver big on flavor and require almost no hands-on time—because who says decadent desserts have to be complicated?
What makes No-Bake Oreo Cheesecake Cups special?
Effortless Elegance: No oven means no stress—just simple assembly. Creamy Indulgence: The luscious cream cheese and whipped topping blend into a dreamy texture. Oreo Crunch: Crushed Oreos add that iconic crunch, complementing every bite. Versatile Treat: Perfect for parties, dessert tables, or a solo sweet escape. Time-Saving: Ready in minutes yet impressively rich—ideal for busy food lovers craving homemade delights.
No-Bake Oreo Cheesecake Cups Ingredients
For the Oreo Crust
- Crushed Oreos – Use about 20 cookies for that iconic, crunchy base that anchors the cups.
- Melted Butter – Just a couple of tablespoons to bind the crust and add richness.
For the Cheesecake Filling
- Cream Cheese – Soften it to room temperature for a silky, smooth cheesecake texture.
- Powdered Sugar – Adds sweetness without any grittiness that granulated sugar can cause.
- Whipped Topping – Fold gently to keep the filling light and fluffy, giving that dreamy mouthfeel.
- Vanilla Extract – Just a splash to enhance and balance the creamy flavors.
For Garnish
- Mini Oreo Pieces – Sprinkle on top for an extra touch of crunch and unmistakable Oreo goodness.
- Chocolate Shavings (optional) – A little extra flair for presentation and deeper chocolate notes.
How to Make No-Bake Oreo Cheesecake Cups
- Prep Oreos: Crush about 20 cookies in a food processor until fine crumbs form, then stir in melted butter until mixture holds together when pressed.
- Form Crust: Divide the Oreo crumb and butter mixture among 6 to 8 serving cups or jars, pressing firmly into the bottom to create a compact, golden-brown base layer.
For the Cheesecake Filling:
- Beat Cream Cheese: In a large mixing bowl, whip softened cream cheese with powdered sugar on medium speed for 2–3 minutes, until pale, creamy, and completely smooth with no lumps.
- Fold in Topping: Place whipped topping and vanilla extract into a separate bowl, then gently fold into the cream cheese mixture until airy, light, and perfectly uniform in color.
- Assemble Cups: Use a spoon or a piping bag to fill each crust layer with cheesecake filling, filling cups almost to the top for a neat, elegant presentation that holds its shape.
- Chill: Cover cups loosely with plastic wrap and refrigerate for at least 2 hours or overnight, until filling is set and firm, letting flavors meld and texture turn irresistibly silky.
- Garnish & Serve: Just before serving, sprinkle mini Oreo pieces and chocolate shavings over each cup for extra crunch, texture, and a show-stopping finish.
Optional: Dust with cocoa powder for extra chocolate richness.
Exact quantities are listed in the recipe card below.

Variations & Substitutions for No-Bake Oreo Cheesecake Cups
Feel free to get creative and make this dessert your own with these delightful twists!
-
Gluten-Free: Substitute regular Oreos with gluten-free chocolate cookies to keep the crunch while accommodating dietary needs.
-
Nutty Crunch: Add crushed nuts, like pecans or walnuts, to the crust for an extra layer of flavor and texture. This will bring a lovely contrast to the creamy filling.
-
Fruit-Infused: Fold in crushed strawberries or raspberries into the cheesecake filling for a fruity burst that brightens the dessert. It’s a refreshing twist that adds beautiful color!
-
Mint Chocolate: Mix in peppermint extract for a minty flavor that pairs perfectly with the chocolate. This variation is great for those who love a cool sensation with their sweets.
-
Dairy-Free: Use vegan cream cheese and coconut whipped topping to create a dairy-free version that’s just as delicious. The coconut adds a subtle tropical flavor!
-
Chocolate Lovers: For a richer chocolate taste, use chocolate-flavored Oreos and add melted chocolate into the filling. This will create a decadent experience that’s pure bliss!
-
Lemon Zest: A sprinkle of fresh lemon zest in the filling can elevate the flavor with a sweet and tangy twist. It brightens the dessert, making it feel light and refreshing.
-
Spicy Kick: Add a pinch of cayenne pepper or chili powder to the filling for a surprising heat that offsets the sweetness. It’s an unexpected surprise that livens up this classic dessert!
What to Serve with No-Bake Oreo Cheesecake Cups?
Indulging in these delightful desserts creates the perfect opportunity to explore complementary flavors and textures that will elevate your gathering.
- Fresh Berries: The tartness of berries like strawberries or raspberries balances the rich sweetness of the cheesecake, adding a refreshing bite.
- Chocolate Drizzle: A silky chocolate sauce drizzled on top enhances the dessert’s indulgence and adds a new depth of flavor.
- Coffee: A smooth, rich cup of coffee pairs beautifully with the creamy cheesecake, cutting through the sweetness and providing a delightful contrast.
- Mint Garnish: Sprinkling fresh mint leaves adds a pop of color and a burst of freshness that complements the chocolate and cream.
- Whipped Cream: A light dollop of freshly whipped cream on the side softens each bite, enhancing the creamy texture of the cheesecake cups.
- Ice Cream: Vanilla or coffee-flavored ice cream adds a luscious element that takes this dessert experience to the next level of indulgence.
These pairings enhance the celebratory nature of your No-Bake Oreo Cheesecake Cups, inviting warmth and joy to every gathering they grace.
Expert Tips for No-Bake Oreo Cheesecake Cups
- Soften Cream Cheese Properly: Ensure the cream cheese is at room temperature to avoid lumps and achieve a silky-smooth filling.
- Crush Oreos Evenly: Use a food processor for fine, uniform crumbs—this helps the crust bind well and creates that perfect crunch.
- Fold Gently: When mixing whipped topping into the cream cheese, fold gently to keep the filling light and airy without deflating it.
- Chill Long Enough: Refrigerate at least 2 hours or overnight for the cheesecake cups to set firmly and develop rich flavor.
- Prevent Soggy Crust: Press the crust firmly into cups and avoid adding filling until the crust is compact to keep the base crisp.
- Use Fresh Whipped Topping: Opt for fresh or high-quality whipped topping to maintain the ideal creamy texture in your No-Bake Oreo Cheesecake Cups.
Make Ahead Options
These No-Bake Oreo Cheesecake Cups are perfect for busy home cooks looking to save time without sacrificing flavor! You can prepare the Oreo crust up to 3 days in advance. Simply crush the Oreos and mix with melted butter, then store the crust mixture in an airtight container in the refrigerator. You can also whip up the cheesecake filling ahead of time, keeping it refrigerated for up to 24 hours before assembly, to ensure it stays fresh and creamy. When you’re ready to serve, fill the prepared crusts with the cheesecake mixture, chill for a couple of hours (or overnight), then garnish with mini Oreo pieces just before serving for that fresh touch. These steps ensure your dessert remains just as delicious while saving you precious time!
How to Store and Freeze No-Bake Oreo Cheesecake Cups
Fridge: Keep your No-Bake Oreo Cheesecake Cups covered in the fridge for up to 5 days. Use plastic wrap or an airtight container to maintain their freshness.
Freezer: For longer storage, freeze the cups for up to 2 months. Wrap each cup tightly in plastic wrap and then in aluminum foil to prevent freezer burn.
Thawing: When ready to enjoy, transfer the cups from the freezer to the fridge and let them thaw overnight. This ensures a smooth texture retains the original flavor.
Reheating: There’s no need to heat these cups, just enjoy them chilled straight from the fridge after thawing!

No-Bake Oreo Cheesecake Cups Recipe FAQs
How do I know if my cream cheese is ready to use?
Cream cheese should be softened to room temperature, around 68–72°F (20–22°C). It should feel soft to the touch and easily spreadable without being runny. This helps avoid lumps and gives you that luscious, smooth filling texture.
Can I store No-Bake Oreo Cheesecake Cups at room temperature?
It’s best to keep these cheesecake cups refrigerated. Since they contain cream cheese and whipped topping, leaving them out for more than 2 hours can risk spoilage. Store them covered in the fridge for up to 5 days to maintain freshness and flavor.
What’s the best way to freeze these cheesecake cups?
Absolutely! Freeze individual cups wrapped tightly in plastic wrap, then again in aluminum foil to prevent freezer burn. Place them in an airtight container or freezer bag for up to 2 months. When ready, thaw overnight in the fridge and enjoy chilled—no reheating needed!
My crust turned soggy after chilling—what went wrong?
This happens if the crust wasn’t pressed firmly enough or if the filling was added before the crust had time to set. For a crispier base, press the Oreo and butter mixture tightly into the cups, chill for 10–15 minutes before adding filling, and avoid stirring the crust once layered.
Are these cheesecake cups safe for pets or people with allergies?
Unfortunately, Oreos contain wheat and soy, which aren’t suitable for many pets or those with gluten allergies. If you’re serving someone with allergies, try substituting the crust with gluten-free cookies and using dairy-free cream cheese alternatives. Always check ingredient labels carefully.
Easy No-Bake Oreo Cheesecake Cups That’ll Wow Your Tastebuds
Ingredients
Equipment
Method
- Crush about 20 cookies in a food processor until fine crumbs form, then stir in melted butter until mixture holds together when pressed.
- Divide the Oreo crumb and butter mixture among 6 to 8 serving cups or jars, pressing firmly into the bottom to create a compact, golden-brown base layer.
- In a large mixing bowl, whip softened cream cheese with powdered sugar on medium speed for 2–3 minutes, until pale, creamy, and completely smooth with no lumps.
- Place whipped topping and vanilla extract into a separate bowl, then gently fold into the cream cheese mixture until airy, light, and perfectly uniform in color.
- Use a spoon or a piping bag to fill each crust layer with cheesecake filling, filling cups almost to the top for a neat, elegant presentation that holds its shape.
- Cover cups loosely with plastic wrap and refrigerate for at least 2 hours or overnight, until filling is set and firm.
- Just before serving, sprinkle mini Oreo pieces and chocolate shavings over each cup for extra crunch, texture, and a show-stopping finish.