")

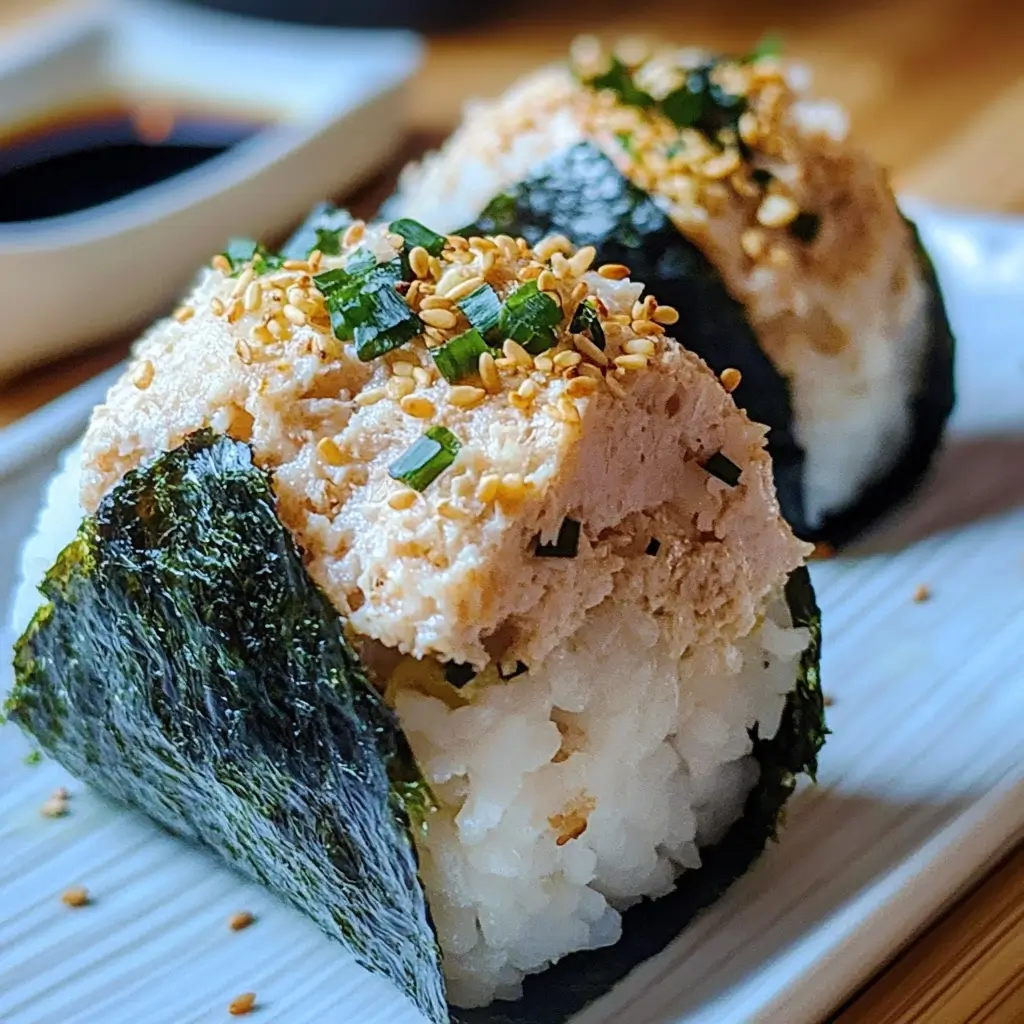

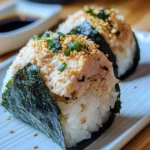
I still remember the first time I attempted to make onigiri. It was after a trip to Japan where I’d fallen head-over-heels for these delightful rice balls, particularly the creamy, savory tuna mayo ones. My initial tries were… let’s just say, comically misshapen and prone to falling apart. But I was determined! After much trial, error, and a lot of sticky rice later, I landed on this Easy Tuna Mayo Onigiri recipe. It’s become an absolute staple in our household. My kids, who can be notoriously picky, devour these. They’re perfect for their lunchboxes, a quick and satisfying snack after school, or even a light meal on busy weeknights. The combination of perfectly seasoned sushi rice, the rich and tangy tuna mayo filling, and the crisp nori wrapper is just an explosion of umami goodness. It’s not just a recipe; it’s a little piece of joy we can whip up anytime, and I’m so excited to share it with you. It’s simpler than you think, and the results are incredibly rewarding!
Understanding Onigiri: More Than Just a Rice Ball
Before we dive into the deliciousness that is Tuna Mayo Onigiri, let’s take a moment to appreciate what onigiri truly represents. Often translated as “Japanese rice balls,” onigiri (お握り) are a cornerstone of Japanese cuisine and culture, far more nuanced than their simple description suggests. They are a testament to the Japanese philosophy of using simple, high-quality ingredients to create something profoundly satisfying.
The history of onigiri stretches back centuries, possibly even to the Nara period (710-794 AD) when rice was often formed into easily transportable balls for travelers, samurai, and farmers. These early versions were likely simple salted rice, designed for preservation and convenience. Over time, as culinary techniques evolved, so did onigiri. Fillings were introduced, and methods for shaping and wrapping them became more refined.
Today, onigiri are ubiquitous in Japan. You’ll find them in bento boxes, sold in convenience stores (konbini) with an astonishing array of fillings, served in restaurants, and lovingly prepared in homes. They are the ultimate comfort food – portable, versatile, and deeply ingrained in the fabric of daily life. From a child’s school lunch to a quick snack for a busy professional, onigiri serves a multitude of purposes.
The beauty of onigiri lies in its simplicity and adaptability. The foundation is always seasoned Japanese short-grain rice, prized for its sticky texture that allows it to be molded. The fillings can range from traditional options like pickled plums (umeboshi), salted salmon (shiozake), or seasoned kombu seaweed, to more modern and inventive creations like our star today: tuna mayo. The optional nori seaweed wrapper not only adds a distinct umami flavor and pleasant crispness (if added just before eating) but also makes the onigiri easier to hold without getting sticky fingers.
Making onigiri at home is a delightful culinary adventure. It connects you to a rich tradition and allows for endless creativity. This Easy Tuna Mayo Onigiri recipe is a fantastic starting point, offering a universally loved flavor combination that’s both comforting and exciting.
Why You’ll Fall in Love with This Easy Tuna Mayo Onigiri Recipe
There are countless reasons why this particular recipe for Tuna Mayo Onigiri will quickly become a favorite in your kitchen:
- Incredibly Delicious: The combination of fluffy, slightly vinegared sushi rice, creamy and savory tuna mayonnaise, and a hint of salty nori is simply irresistible. It’s a flavor profile that appeals to both kids and adults.
- Surprisingly Easy to Make: Don’t let the idea of shaping rice balls intimidate you. With a few simple tips (and maybe an onigiri mold if you prefer), you’ll be an onigiri pro in no time. The steps are straightforward and don’t require any fancy culinary skills.
- Perfectly Portable: Onigiri are the original grab-and-go meal. They are ideal for lunchboxes, picnics, road trips, or as a quick snack when you’re on the move. They hold their shape well and don’t require utensils.
- Customizable: While tuna mayo is a classic, this recipe provides a fantastic base for experimentation. You can adjust the seasoning, add extra ingredients to the filling, or even try different fillings altogether once you’ve mastered the technique.
- Budget-Friendly: Rice and canned tuna are generally inexpensive ingredients, making this a cost-effective meal option that doesn’t skimp on flavor or satisfaction.
- Kid-Approved: The mild, creamy flavor of tuna mayo is a big hit with children. Getting them involved in the shaping process can also be a fun family activity.
- A Healthier Snack/Meal Option: Compared to many processed snacks, homemade onigiri can be a relatively healthy choice, providing carbohydrates for energy, protein from the tuna, and essential nutrients. You control the ingredients, so you know exactly what’s going into them.
- A Taste of Japan at Home: This recipe offers an accessible way to enjoy a beloved Japanese comfort food without needing to visit a specialty restaurant. It’s a delightful introduction to Japanese home-style cooking.
Get ready to embrace the simple joy of making and eating these delightful rice balls. They’re more than just food; they’re a little handful of happiness!
Key Ingredients Explained
Understanding the role of each ingredient will help you achieve the best possible Tuna Mayo Onigiri:
- Japanese Short-Grain Rice (Sushi Rice): This is non-negotiable for authentic onigiri. Brands like Nishiki, Koshihikari, or Tamanishiki are excellent choices. Its high starch content, particularly amylopectin, makes it sticky when cooked, which is essential for a rice ball that holds its shape. Medium-grain rice can sometimes work in a pinch, but long-grain rice (like Basmati or Jasmine) will not stick together properly.
- Canned Tuna: Opt for tuna packed in oil or water, according to your preference. Tuna in oil tends to be more flavorful and moist, but tuna in water is a lighter option. Ensure it’s well-drained to prevent the filling from becoming too wet and making the onigiri soggy. Flaked light tuna or chunk light tuna works best for texture.
- Japanese Mayonnaise (Kewpie): This is the secret weapon! Kewpie mayonnaise is made with only egg yolks (not whole eggs), rice vinegar (or apple cider vinegar), and a touch of MSG (in many versions, though MSG-free versions exist), giving it a richer, tangier, and more umami flavor than its Western counterparts. If you can’t find Kewpie, use your favorite good-quality mayonnaise, but the taste will be slightly different.
- Rice Vinegar: Used to season the cooked rice, giving it that characteristic sushi rice tang. Unseasoned rice vinegar is preferred, as you’ll be adding your own sugar and salt.
- Sugar & Salt: These are used to season the rice along with the rice vinegar, balancing the flavors and enhancing the overall taste of the onigiri.
- Nori Seaweed Sheets: These are dried, roasted seaweed sheets, the same kind used for sushi rolls. For onigiri, they are typically cut into strips to wrap around the base or cover a portion of the rice ball, providing flavor, texture, and a convenient way to hold it.
- Optional Seasonings for Tuna Filling:
- Soy Sauce: A dash can add extra umami and saltiness to the tuna mixture.
- Sesame Oil: A tiny drop can impart a lovely nutty aroma and flavor.
- Sriracha or Chili Flakes: For those who like a bit of a kick.
- Finely Chopped Green Onion or Chives: Adds freshness and a mild oniony bite.
- Furikake: A Japanese rice seasoning blend that can be mixed into the rice or sprinkled on the outside for extra flavor and visual appeal. There are many varieties, often containing sesame seeds, seaweed, dried fish, and other seasonings.
Choosing high-quality ingredients, especially the rice and mayonnaise, will significantly impact the final taste and texture of your Easy Tuna Mayo Onigiri.
Equipment You’ll Need
Making onigiri doesn’t require a lot of specialized equipment, but having these items will make the process smoother:
- Rice Cooker (Recommended) or Pot with Lid: A rice cooker ensures perfectly cooked Japanese rice with minimal effort. If you don’t have one, a heavy-bottomed pot with a tight-fitting lid will work.
- Large Mixing Bowl: For seasoning the cooked rice. A wooden or plastic bowl is traditionally preferred as it doesn’t react with the vinegar, but any non-metallic bowl will do.
- Rice Paddle (Shamoji): A flat, wide paddle (preferably wooden or plastic) is ideal for “cutting” and mixing the seasoning into the rice without mashing the grains.
- Small Bowl: For mixing the tuna mayo filling.
- Measuring Cups and Spoons: For accurate measurement of ingredients.
- Cutting Board and Knife: For chopping any additional ingredients for the filling and for cutting nori sheets if needed.
- Small Bowl of Water (Tezu): For wetting your hands to prevent the rice from sticking while shaping the onigiri. Sometimes a little salt is dissolved in this water (shio-mizu).
- Onigiri Molds (Optional but helpful for beginners): These plastic molds come in various shapes (triangle,俵_tawara_ (oval), round) and make it very easy to create uniformly shaped onigiri. Highly recommended if you’re new to making them or want perfectly consistent results.
- Kitchen Shears (Optional): Useful for neatly cutting nori sheets into strips.
With these basic tools, you’re all set to start your onigiri-making journey!
Ingredients
- For the Rice:
- 2 cups (approx. 400g) Japanese short-grain rice (sushi rice), uncooked
- 2 ¼ cups (540ml) water, for cooking the rice (or follow your rice cooker’s instructions)
- ¼ cup (60ml) rice vinegar
- 2 tablespoons granulated sugar
- 1 teaspoon salt
- For the Tuna Mayo Filling:
- 1 can (5 oz / 142g) tuna, drained very well (packed in oil or water)
- 3-4 tablespoons Japanese mayonnaise (Kewpie recommended)
- ½ – 1 teaspoon soy sauce (optional, to taste)
- Pinch of black pepper (optional, to taste)
- Optional: 1 teaspoon finely chopped green onion or a dash of sriracha for a kick
- For Assembling:
- Nori seaweed sheets, cut into strips (approx. 1-1.5 inches wide and 3-4 inches long)
- A small bowl of water (for wetting hands)
- A pinch of salt (to add to the water for hands, optional)
- Sesame seeds or Furikake (optional, for garnish)
Instructions
Step 1: Cook the Japanese Short-Grain Rice
- Rinse the Rice: Place the Japanese short-grain rice in a large bowl. Add cold water, swirl the rice gently with your hand, then pour out the milky water. Repeat this process 3-4 times, or until the water runs mostly clear. This removes excess surface starch, preventing gummy rice.
- Drain and Soak (Optional but Recommended): Drain the rice well in a fine-mesh sieve for at least 15-30 minutes. For even better texture, after rinsing, add the measured cooking water to the rice and let it soak for 30 minutes before cooking. This allows the grains to hydrate evenly.
- Cook the Rice: Transfer the rinsed (and soaked, if you did that step) rice and the measured 2 ¼ cups of water to your rice cooker. Cook according to the manufacturer’s instructions for white rice or sushi rice. If cooking on the stovetop, combine rice and water in a heavy-bottomed pot with a tight-fitting lid. Bring to a boil, then reduce heat to the lowest setting, cover, and simmer for 15-18 minutes, or until all water is absorbed. Do not lift the lid during this time.
- Steam the Rice: Once cooked (either in the rice cooker or on the stovetop), turn off the heat and let the rice steam, covered and undisturbed, for another 10-15 minutes. This step is crucial for fluffy, perfectly cooked grains.
Step 2: Prepare the Sushi Vinegar Seasoning
- While the rice is cooking or steaming, prepare the sushi vinegar (sushi-zu). In a small saucepan, combine the ¼ cup rice vinegar, 2 tablespoons sugar, and 1 teaspoon salt.
- Gently heat over low heat, stirring continuously, just until the sugar and salt are completely dissolved. Do not let it boil.
- Remove from heat and set aside to cool slightly.
Step 3: Season the Cooked Rice
- Once the rice has finished steaming, transfer it immediately to a large, non-metallic mixing bowl (a wooden hangiri or a large plastic/glass bowl works well).
- Gradually pour the prepared sushi vinegar seasoning evenly over the hot rice.
- Using a rice paddle (shamoji), gently “cut” and fold the seasoning into the rice using slicing motions. Avoid stirring or mashing the rice, as this will make it gummy. The goal is to coat each grain without breaking it.
- As you mix, you can fan the rice (traditionally done with an uchiwa fan, but a piece of cardboard works) to help it cool down quickly and give it a nice sheen. This also helps evaporate excess moisture.
- Cover the seasoned rice with a damp cloth or plastic wrap while you prepare the filling to prevent it from drying out. It should be used when it’s warm (body temperature), not hot or cold.
Step 4: Prepare the Tuna Mayo Filling
- Ensure your canned tuna is very well drained. Squeeze out any excess liquid to prevent a soggy filling.
- In a small bowl, flake the drained tuna with a fork.
- Add 3-4 tablespoons of Japanese mayonnaise (Kewpie is highly recommended for its rich flavor). Start with 3 tablespoons and add more if needed to reach your desired creaminess.
- Add the optional ½ – 1 teaspoon of soy sauce and a pinch of black pepper, if using. If you like a bit of freshness or spice, stir in finely chopped green onion or a dash of sriracha.
- Mix everything together until well combined and creamy. Taste and adjust seasonings if necessary.
Step 5: Shape the Onigiri
- Prepare Your Workspace: Have the bowl of warm seasoned rice, the tuna mayo filling, a small bowl of water (tezu – you can add a tiny pinch of salt to this if desired), and your nori strips ready. If using onigiri molds, lightly wet them.
- Wet Your Hands: Dip your hands in the bowl of water and rub them together to moisten. This prevents the rice from sticking to your palms. If you added salt to the water, this will also lightly season the outside of the onigiri. Re-wet your hands as needed between shaping each onigiri.
- Take Rice: Scoop a portion of warm rice (about ½ to ¾ cup, depending on desired onigiri size) into one palm.
- Make an Indentation: Gently press down in the center of the rice with your thumb or fingers to create a well or indent for the filling.
- Add Filling: Place about 1-2 teaspoons of the tuna mayo filling into the indentation. Be careful not to overfill, as it will be difficult to seal.
- Cover and Shape: Take a little more rice (if needed) and place it on top of the filling to cover it completely. Then, begin to gently cup and press the rice around the filling to form your desired onigiri shape. The most common shape is a triangle (sankaku), but you can also make rounds (maru) or ovals (tawara).
- For Triangles: Cup your hands to form a triangle, using your palms and fingers to gently press and rotate the rice ball, firming it up. It should be firm enough to hold its shape but not so compressed that the rice grains are crushed.
- Using a Mold: If using an onigiri mold, lightly wet the inside. Fill the mold about halfway with rice, make an indent, add the filling, then top with more rice until the mold is full but not overflowing. Press the lid of the mold down firmly, then gently unmold the onigiri.
- Repeat: Continue shaping until all the rice and filling are used. You should get about 6-8 onigiri, depending on their size.
Step 6: Add Nori and Serve
- Once your onigiri are shaped, you can wrap them with a strip of nori seaweed. This is traditionally done just before eating to keep the nori crisp, but you can do it in advance if preferred (the nori will soften over time).
- Wrap a strip of nori around the base or side of the onigiri. The moisture from the rice will help it stick.
- (Optional) If desired, you can dip a corner of the onigiri into sesame seeds or sprinkle some furikake seasoning over the top for extra flavor and visual appeal.
- Serve immediately or pack for later.
Nutrition Facts
- Servings: Approximately 6-8 onigiri
- Calories per serving (1 onigiri, approx.): 200-280 calories (This can vary significantly based on the size of the onigiri and the exact amount of mayonnaise used.)
- Protein: A good source of protein, primarily from the tuna, crucial for muscle repair and growth.
- Carbohydrates: Primarily from the rice, providing sustained energy throughout the day.
- Fat: Mainly from the mayonnaise and tuna (if oil-packed). Choosing light mayo or water-packed tuna can reduce fat content.
- Sodium: Contains sodium from salt used in rice seasoning, soy sauce, and nori. Be mindful if on a low-sodium diet.
- Omega-3 Fatty Acids: Tuna is a source of beneficial omega-3 fatty acids, important for heart and brain health.
Disclaimer: Nutritional information is an estimate and can vary based on specific ingredients and portion sizes used.
Preparation Time
- Rice Preparation (Rinsing, Soaking): 20-40 minutes (active rinsing, passive soaking)
- Rice Cooking & Steaming: 30-45 minutes (mostly passive)
- Sushi Vinegar & Filling Preparation: 10-15 minutes (active, can be done while rice cooks)
- Seasoning Rice & Cooling: 10-15 minutes (active)
- Shaping Onigiri: 15-25 minutes (active, depends on skill and number of onigiri)
- Total Estimated Time: Approximately 1 hour 30 minutes to 2 hours 15 minutes (with a good portion of this being passive cooking/soaking time for the rice).
- Active Preparation Time: Roughly 45-60 minutes.
This recipe is great for meal prepping, as you can make a batch and enjoy them over the next day or two.
How to Serve Your Easy Tuna Mayo Onigiri
Tuna Mayo Onigiri are wonderfully versatile. Here are some delightful ways to serve and enjoy them:
- As a Standalone Snack:
- Perfect for a mid-morning or afternoon pick-me-up.
- Great for satisfying hunger pangs between meals.
- In a Bento Box:
- Onigiri are a classic bento box component.
- Pair them with other Japanese side dishes like:
- Tamagoyaki (Japanese rolled omelet)
- Pickled vegetables (tsukemono) like pickled ginger (gari) or cucumber
- Small sausages or chicken karaage
- Edamame
- A fresh fruit salad
- For Picnics and Outings:
- Their portability makes them ideal for outdoor adventures.
- Pack them individually in plastic wrap or small containers.
- As a Light Lunch or Dinner:
- Serve 2-3 onigiri with a side of miso soup.
- A simple green salad with a Japanese-style dressing (like ginger or sesame) complements them well.
- Party Appetizers:
- Make smaller, bite-sized onigiri for a unique and tasty party food.
- Arrange them attractively on a platter.
- With Japanese Condiments:
- Provide small dishes of soy sauce for dipping (though they are usually seasoned enough).
- Offer extra furikake for sprinkling.
- A dollop of wasabi on the side for those who like a spicy kick.
- Presentation Matters:
- If serving at home, arrange them on a nice Japanese-style plate.
- Garnish with a sprinkle of black sesame seeds or finely chopped chives on top of the exposed rice or filling.
- Use decorative nori punches to create fun shapes if serving to kids.
The key is to enjoy them fresh. If you’re wrapping with nori, it’s best to do so just before serving to maintain its crispness. However, many people (myself included!) enjoy the softened nori too.
Additional Tips for Perfect Tuna Mayo Onigiri
- Rice is King: Use high-quality Japanese short-grain rice. The success of your onigiri heavily depends on it. Don’t skip the rinsing step, and if you have time, soak the rice. Cook it perfectly according to package or rice cooker instructions.
- Season Rice While Warm: The seasoned vinegar (sushi-zu) absorbs best when the rice is warm. Mix it gently using a cutting motion to avoid mashing the grains. Let it cool to body temperature before shaping.
- Don’t Squeeze Too Hard: When shaping, apply just enough pressure to make the rice hold together. If you squeeze too hard, the onigiri will be dense and tough instead of pleasantly firm and fluffy.
- Well-Drained Tuna is Crucial: Excess moisture from the tuna will make your filling watery and can cause the onigiri to become soggy and fall apart. Squeeze out as much liquid as possible.
- Kewpie Mayo for Authenticity: While any mayo works, Japanese mayonnaise like Kewpie provides a distinct rich and tangy flavor that truly elevates the tuna filling. It’s worth seeking out.
- Wet Hands, Happy Shaping (Tezu): Keep a small bowl of water (tezu) nearby and wet your hands before handling the rice for each onigiri. This prevents sticking. Adding a pinch of salt to the water also lightly seasons the exterior.
- Nori Strategy: For the crispiest nori, wrap the onigiri just before eating. If packing for later, you can pack nori strips separately and wrap them at mealtime. Many convenience store onigiri in Japan have clever packaging that keeps nori separate until opened.
- Storage Savvy: Onigiri are best eaten the day they are made. Store them at room temperature for a few hours, or in the refrigerator wrapped tightly in plastic wrap for up to 1-2 days. Rice can harden in the fridge, so let them come to room temperature or microwave briefly (15-20 seconds, covered with a damp paper towel) before eating. Avoid freezing tuna mayo onigiri as the mayonnaise can separate and the texture will suffer.
Frequently Asked Questions (FAQ)
Q1: Can I use regular long-grain rice instead of Japanese short-grain rice?
A: It’s highly discouraged. Long-grain rice (like Basmati or Jasmine) lacks the necessary starch content (amylopectin) that makes Japanese short-grain rice sticky. Your onigiri will likely fall apart and won’t have the characteristic texture. Always use Japanese short-grain “sushi” rice.
Q2: My onigiri are falling apart. What am I doing wrong?
A: This could be due to a few reasons:
* Wrong Rice: You might be using non-sticky rice.
* Rice Not Cooked Properly: Undercooked or overly dry rice won’t stick.
* Not Enough Pressure: You need to apply firm, gentle pressure when shaping.
* Filling Too Wet: If your tuna mayo filling is too moist, it can make the rice soggy.
* Rice Too Cold: Shaping is easiest when the rice is still warm (body temperature).
Q3: Can I make tuna mayo onigiri ahead of time?
A: Yes, you can. They are best enjoyed on the day they are made, at room temperature. If you need to store them longer, wrap them individually and tightly in plastic wrap and refrigerate for up to 1-2 days. The rice will harden in the fridge, so let them sit at room temperature for about 30 minutes before eating or microwave them very briefly (15-20 seconds, covered with a damp paper towel) to soften.
Q4: Can I freeze tuna mayo onigiri?
A: It’s generally not recommended to freeze onigiri with tuna mayonnaise filling. Mayonnaise can separate upon thawing, leading to an undesirable texture and oily consistency. Plain onigiri or those with cooked fillings (like seasoned salmon) freeze better.
Q5: What are some other popular onigiri fillings?
A: The possibilities are endless! Some classics include:
* Umeboshi: Pickled Japanese plum (salty and sour).
* Shiozake: Salted grilled salmon, flaked.
* Okaka: Bonito flakes (katsuobushi) moistened with soy sauce.
* Kombu Tsukudani: Seaweed simmered in soy sauce and mirin.
* Chicken Soboro: Seasoned ground chicken.
* Mentaiko: Spicy cod roe (often mixed with mayonnaise).
Q6: Do I have to use nori seaweed?
A: No, nori is optional. While it adds flavor, texture, and makes the onigiri easier to hold, you can enjoy onigiri without it. Sometimes, onigiri are rolled in sesame seeds, furikake, or shiso leaves instead.
Q7: My tuna filling is too bland. How can I jazz it up?
A: Besides ensuring you’re using good quality Japanese mayo, try adding:
* A dash more soy sauce.
* A tiny bit of sesame oil.
* Finely chopped green onions, chives, or shiso leaves.
* A pinch of shichimi togarashi (Japanese seven-spice blend) or a few drops of sriracha for heat.
* A squeeze of lemon juice for brightness.
Q8: Is it safe to leave onigiri at room temperature?
A: Onigiri, especially with fillings like tuna mayo, should ideally be consumed within a few hours if left at room temperature (e.g., in a lunchbox). For longer storage, refrigeration is necessary. If it’s a very hot day, reduce the time they are left out or use an insulated lunch bag with an ice pack.
Easy Tuna Mayo Onigiri
Ingredients
- For the Rice:
- 2 cups (approx. 400g) Japanese short-grain rice (sushi rice), uncooked
- 2 ¼ cups (540ml) water, for cooking the rice (or follow your rice cooker’s instructions)
- ¼ cup (60ml) rice vinegar
- 2 tablespoons granulated sugar
- 1 teaspoon salt
- For the Tuna Mayo Filling:
- 1 can (5 oz / 142g) tuna, drained very well (packed in oil or water)
- 3–4 tablespoons Japanese mayonnaise (Kewpie recommended)
- ½ – 1 teaspoon soy sauce (optional, to taste)
- Pinch of black pepper (optional, to taste)
- Optional: 1 teaspoon finely chopped green onion or a dash of sriracha for a kick
- For Assembling:
- Nori seaweed sheets, cut into strips (approx. 1-1.5 inches wide and 3-4 inches long)
- A small bowl of water (for wetting hands)
- A pinch of salt (to add to the water for hands, optional)
- Sesame seeds or Furikake (optional, for garnish)
Instructions
Step 1: Cook the Japanese Short-Grain Rice
- Rinse the Rice: Place the Japanese short-grain rice in a large bowl. Add cold water, swirl the rice gently with your hand, then pour out the milky water. Repeat this process 3-4 times, or until the water runs mostly clear. This removes excess surface starch, preventing gummy rice.
- Drain and Soak (Optional but Recommended): Drain the rice well in a fine-mesh sieve for at least 15-30 minutes. For even better texture, after rinsing, add the measured cooking water to the rice and let it soak for 30 minutes before cooking. This allows the grains to hydrate evenly.
- Cook the Rice: Transfer the rinsed (and soaked, if you did that step) rice and the measured 2 ¼ cups of water to your rice cooker. Cook according to the manufacturer’s instructions for white rice or sushi rice. If cooking on the stovetop, combine rice and water in a heavy-bottomed pot with a tight-fitting lid. Bring to a boil, then reduce heat to the lowest setting, cover, and simmer for 15-18 minutes, or until all water is absorbed. Do not lift the lid during this time.
- Steam the Rice: Once cooked (either in the rice cooker or on the stovetop), turn off the heat and let the rice steam, covered and undisturbed, for another 10-15 minutes. This step is crucial for fluffy, perfectly cooked grains.
Step 2: Prepare the Sushi Vinegar Seasoning
- While the rice is cooking or steaming, prepare the sushi vinegar (sushi-zu). In a small saucepan, combine the ¼ cup rice vinegar, 2 tablespoons sugar, and 1 teaspoon salt.
- Gently heat over low heat, stirring continuously, just until the sugar and salt are completely dissolved. Do not let it boil.
- Remove from heat and set aside to cool slightly.
Step 3: Season the Cooked Rice
- Once the rice has finished steaming, transfer it immediately to a large, non-metallic mixing bowl (a wooden hangiri or a large plastic/glass bowl works well).
- Gradually pour the prepared sushi vinegar seasoning evenly over the hot rice.
- Using a rice paddle (shamoji), gently “cut” and fold the seasoning into the rice using slicing motions. Avoid stirring or mashing the rice, as this will make it gummy. The goal is to coat each grain without breaking it.
- As you mix, you can fan the rice (traditionally done with an uchiwa fan, but a piece of cardboard works) to help it cool down quickly and give it a nice sheen. This also helps evaporate excess moisture.
- Cover the seasoned rice with a damp cloth or plastic wrap while you prepare the filling to prevent it from drying out. It should be used when it’s warm (body temperature), not hot or cold.
Step 4: Prepare the Tuna Mayo Filling
- Ensure your canned tuna is very well drained. Squeeze out any excess liquid to prevent a soggy filling.
- In a small bowl, flake the drained tuna with a fork.
- Add 3-4 tablespoons of Japanese mayonnaise (Kewpie is highly recommended for its rich flavor). Start with 3 tablespoons and add more if needed to reach your desired creaminess.
- Add the optional ½ – 1 teaspoon of soy sauce and a pinch of black pepper, if using. If you like a bit of freshness or spice, stir in finely chopped green onion or a dash of sriracha.
- Mix everything together until well combined and creamy. Taste and adjust seasonings if necessary.
Step 5: Shape the Onigiri
- Prepare Your Workspace: Have the bowl of warm seasoned rice, the tuna mayo filling, a small bowl of water (tezu – you can add a tiny pinch of salt to this if desired), and your nori strips ready. If using onigiri molds, lightly wet them.
- Wet Your Hands: Dip your hands in the bowl of water and rub them together to moisten. This prevents the rice from sticking to your palms. If you added salt to the water, this will also lightly season the outside of the onigiri. Re-wet your hands as needed between shaping each onigiri.
- Take Rice: Scoop a portion of warm rice (about ½ to ¾ cup, depending on desired onigiri size) into one palm.
- Make an Indentation: Gently press down in the center of the rice with your thumb or fingers to create a well or indent for the filling.
- Add Filling: Place about 1-2 teaspoons of the tuna mayo filling into the indentation. Be careful not to overfill, as it will be difficult to seal.
- Cover and Shape: Take a little more rice (if needed) and place it on top of the filling to cover it completely. Then, begin to gently cup and press the rice around the filling to form your desired onigiri shape. The most common shape is a triangle (sankaku), but you can also make rounds (maru) or ovals (tawara).
- For Triangles: Cup your hands to form a triangle, using your palms and fingers to gently press and rotate the rice ball, firming it up. It should be firm enough to hold its shape but not so compressed that the rice grains are crushed.
- Using a Mold: If using an onigiri mold, lightly wet the inside. Fill the mold about halfway with rice, make an indent, add the filling, then top with more rice until the mold is full but not overflowing. Press the lid of the mold down firmly, then gently unmold the onigiri.
- Repeat: Continue shaping until all the rice and filling are used. You should get about 6-8 onigiri, depending on their size.
Step 6: Add Nori and Serve
- Once your onigiri are shaped, you can wrap them with a strip of nori seaweed. This is traditionally done just before eating to keep the nori crisp, but you can do it in advance if preferred (the nori will soften over time).
- Wrap a strip of nori around the base or side of the onigiri. The moisture from the rice will help it stick.
- (Optional) If desired, you can dip a corner of the onigiri into sesame seeds or sprinkle some furikake seasoning over the top for extra flavor and visual appeal.
- Serve immediately or pack for later.
Nutrition
- Serving Size: one normal portion
- Calories: 280