Ingredients
Scale
Here’s what you’ll need to create this delightful Honey Ricotta Cream Tart, a symphony of textures and flavors that’s bound to become a new favorite. Each component plays a crucial role, from the sturdy yet tender base to the ethereally light and creamy filling.
For the Shortcrust Pastry:
- 1 ¾ cups (220g) All-Purpose Flour: The structural backbone of our tart shell, providing a tender yet sturdy base. Ensure it’s unbleached for the best flavor.
- ¼ cup (50g) Granulated Sugar: Adds a touch of sweetness to the crust, complementing the honeyed filling.
- ½ teaspoon Salt: Balances the sweetness and enhances the overall flavor profile of the pastry.
- ½ cup (113g) Unsalted Butter, chilled and cubed: Crucial for a flaky, tender crust. Keep it very cold until the moment it’s incorporated.
- 1 Large Egg Yolk: Adds richness, tenderness, and color to the pastry.
- 2–3 tablespoons Ice Water: Helps bind the dough together. Use just enough for the dough to come together; too much can make it tough.
For the Honey Ricotta Cream Filling:
- 2 cups (約 480g) Whole Milk Ricotta Cheese, drained: The star of the filling! Use good quality, fresh whole milk ricotta. Draining it well is key to prevent a soggy tart. You can do this by placing it in a cheesecloth-lined sieve over a bowl in the refrigerator for a few hours or overnight.
- ½ cup (120ml) Heavy Cream: Lends an incredible richness and smooth, velvety texture to the ricotta filling.
- ½ cup (170g) High-Quality Honey: Provides the primary sweetness and a distinct floral or amber flavor. Choose a honey you love the taste of – clover, orange blossom, or wildflower honey all work beautifully.
- 2 Large Egg Yolks: These contribute to the richness and custard-like consistency of the filling, helping it set beautifully.
- 1 teaspoon Lemon Zest (from about 1 medium lemon): Adds a bright, fresh counterpoint to the richness of the ricotta and the sweetness of the honey. It truly elevates the filling.
- 1 teaspoon Vanilla Extract: Enhances all the other flavors and adds a warm, comforting aroma.
- Pinch of Salt: A tiny amount to balance the sweetness and bring out the nuances of the other ingredients in the filling.
Optional for Garnish:
- Extra Honey, for drizzling: A final flourish of liquid gold before serving.
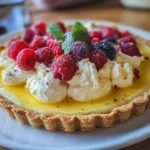
- Fresh Berries (raspberries, blueberries, strawberries): Their slight tartness and vibrant color provide a beautiful contrast.
- Toasted Sliced Almonds or Pistachios: For a delightful crunch and nutty flavor.
- A dusting of Powdered Sugar: For an elegant, classic finish.
Instructions
Follow these steps carefully to create your perfect Honey Ricotta Cream Tart. Baking is a science, but it’s also an art, so enjoy the process!
Part 1: Prepare the Shortcrust Pastry
- Combine Dry Ingredients: In a large mixing bowl, whisk together the all-purpose flour, granulated sugar, and salt. This ensures even distribution.
- Cut in the Butter: Add the chilled, cubed butter to the flour mixture. Using a pastry blender, your fingertips, or a food processor, cut the butter into the flour until the mixture resembles coarse crumbs with some pea-sized pieces of butter remaining. Working quickly helps keep the butter cold, which is essential for a flaky crust.
- Add Wet Ingredients: In a small bowl, lightly whisk the egg yolk with 2 tablespoons of ice water. Make a well in the center of the flour-butter mixture and pour in the egg yolk mixture.
- Form the Dough: Gently mix with a fork or your hands until the dough just starts to come together. If it seems too dry, add the remaining tablespoon of ice water, one teaspoon at a time, until it holds together without being sticky. Be careful not to overwork the dough, as this can make the crust tough.
- Chill the Dough: Turn the dough out onto a lightly floured surface and gently pat it into a 1-inch thick disc. Wrap it tightly in plastic wrap and refrigerate for at least 1 hour, or up to 2 days. This chilling period allows the gluten to relax, making the dough easier to roll out and preventing shrinkage during baking. It also ensures the butter is very cold.
Part 2: Blind Bake the Tart Shell
- Preheat Oven and Prepare Pan: Preheat your oven to 375°F (190°C). Have a 9-inch or 9.5-inch tart pan with a removable bottom ready. You don’t typically need to grease these pans if your pastry has enough butter.
- Roll Out the Dough: On a lightly floured surface, roll out the chilled dough disc into a circle about 12-13 inches in diameter and roughly ⅛-inch thick. Work from the center outwards, rotating the dough frequently to ensure an even circle and prevent sticking.
- Line the Tart Pan: Carefully transfer the rolled-out dough to your tart pan. An easy way to do this is to gently roll the dough around your rolling pin, then unroll it over the pan. Press the dough gently into the bottom and up the sides of the pan. Trim any excess dough from the edges using your rolling pin pressed across the rim or a sharp knife.
- Dock and Chill Again: Prick the bottom of the pastry all over with a fork. This allows steam to escape during baking, preventing the crust from puffing up. Place the pastry-lined tart pan in the freezer for 15-20 minutes, or in the refrigerator for at least 30 minutes, to firm up again. This further helps prevent shrinkage.
- Blind Bake: Line the chilled tart shell with parchment paper, ensuring it covers the bottom and sides. Fill it with pie weights, dried beans, or uncooked rice. This is called “blind baking” and ensures the crust bakes evenly and holds its shape.
- First Bake: Bake for 15-20 minutes. Then, carefully remove the parchment paper and weights. The crust should look set but still pale.
- Second Bake (Naked): Return the crust to the oven and bake for another 10-15 minutes, or until it’s lightly golden brown and looks dry. This step ensures the bottom of the crust is fully cooked and crisp.
- Cool Slightly: Remove the tart shell from the oven and let it cool on a wire rack for at least 15-20 minutes while you prepare the filling. Reduce the oven temperature to 350°F (175°C).
Part 3: Prepare the Honey Ricotta Cream Filling
- Drain Ricotta (if not done already): Ensure your ricotta is well-drained. Excess moisture can lead to a watery filling and a soggy crust. If you haven’t drained it yet, place it in a fine-mesh sieve lined with cheesecloth over a bowl and press gently to remove as much liquid as possible.
- Combine Filling Ingredients: In a large bowl, combine the drained ricotta cheese, heavy cream, honey, egg yolks, lemon zest, vanilla extract, and the pinch of salt.
- Mix Until Smooth: Using an electric mixer on low speed or a whisk, beat the ingredients together until they are just combined and the mixture is smooth and creamy. Be careful not to overmix, as this can incorporate too much air, which might cause the filling to crack during baking. A few small lumps of ricotta are perfectly fine and add to the texture.
Part 4: Assemble and Bake the Tart
- Pour Filling into Crust: Carefully pour the honey ricotta cream filling into the pre-baked and slightly cooled tart shell. Spread it evenly with a spatula.
- Bake the Tart: Place the tart on a baking sheet (to catch any potential drips and for easier handling) and bake in the preheated 350°F (175°C) oven for 30-40 minutes. The tart is done when the filling is mostly set but still has a slight wobble in the center. The edges should be lightly golden, and the filling might be slightly puffed.
- Cool Completely: Once baked, remove the tart from the oven and place it on a wire rack. Let it cool completely to room temperature, which can take 2-3 hours. As it cools, the filling will firm up further.
- Chill (Recommended): For the best texture and flavor, and for easier slicing, cover the cooled tart loosely with plastic wrap and refrigerate for at least 2-3 hours, or preferably overnight.
Part 5: Garnish and Serve
- Garnish: Just before serving, you can drizzle the top of the tart with a little extra honey. Add fresh berries, a sprinkle of toasted nuts, or a light dusting of powdered sugar if desired.
- Serve: Carefully remove the outer ring of the tart pan. Slice the Honey Ricotta Cream Tart into wedges using a sharp knife, wiping the blade clean between cuts for neat slices. Enjoy this exquisite dessert!
Nutrition
- Serving Size: one normal portion
- Calories: 450
- Sugar: 20g
- Sodium: 200mg
- Fat: 30g
- Carbohydrates: 35g
- Protein: 10g