")

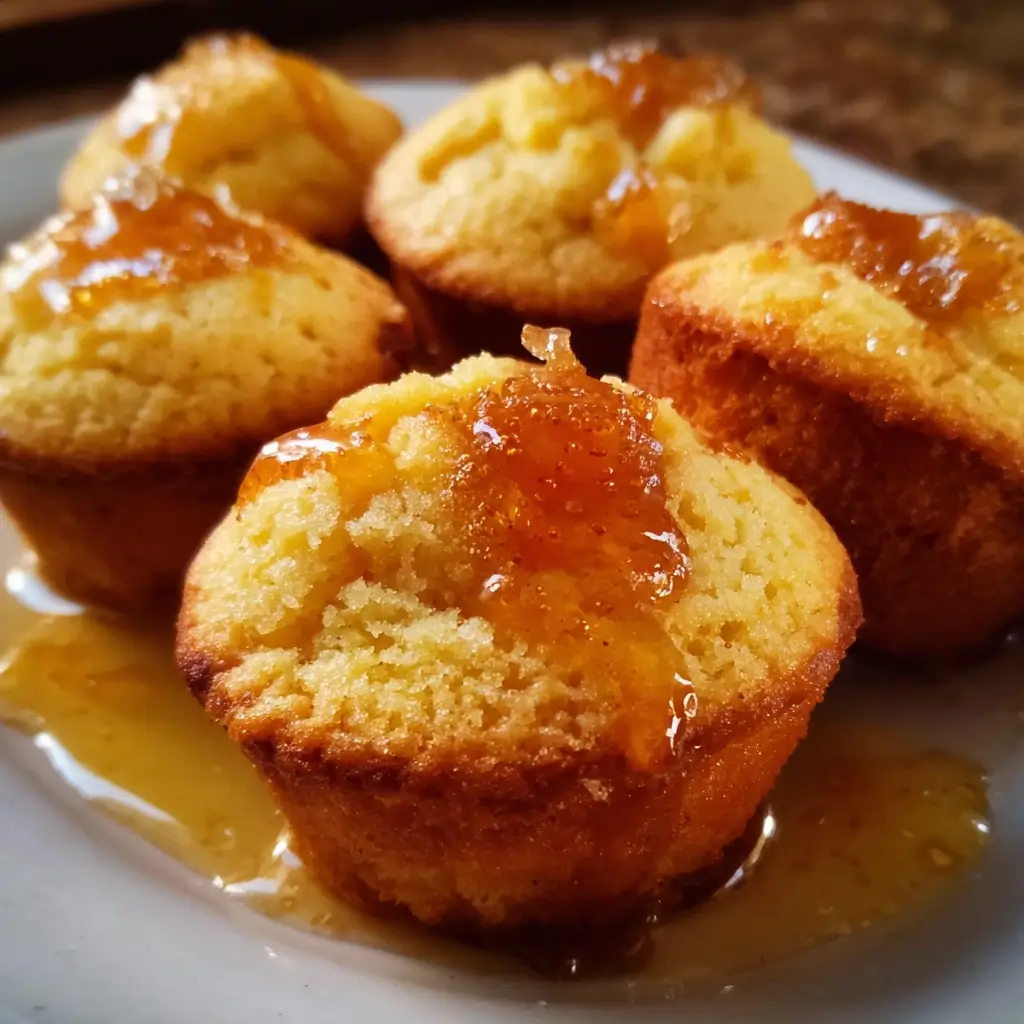

Of all the recipes that grace my kitchen table, there are a select few that feel like a warm hug in food form. These Mini Cornbread Muffins with their cloud-like topping of whipped honey butter are definitively on that list. I first baked a batch of these for a family chili night, thinking they would be a simple side dish. I was completely unprepared for the reaction. The moment they came out of the oven, a sweet, buttery, corn-filled aroma filled the entire house, drawing everyone to the kitchen. My kids, usually picky about anything that isn’t a cookie, devoured them before the chili was even served. My husband, a man who appreciates the classics, declared them “the best cornbread he’s ever had.” It was the perfect combination of textures and flavors: the slightly crisp muffin top giving way to a tender, moist, and fluffy crumb, with the sweet, creamy honey butter melting into every nook and cranny. They are more than just a side dish; they’re a conversation starter, a comfort food champion, and an absolute staple for everything from holiday dinners to simple weeknight suppers. This recipe isn’t just about food; it’s about creating those small, delicious moments of joy that make a meal memorable.
Ingredients
This recipe uses simple, accessible pantry staples to create a truly exceptional result. Each component plays a critical role in achieving the perfect balance of flavor and texture, from the rustic cornmeal to the tangy buttermilk.
For the Mini Cornbread Muffins:
- 1 cup yellow cornmeal: This is the heart and soul of the muffins, providing that signature golden color, sweet corn flavor, and delightful, slightly gritty texture. A medium-grind cornmeal offers the best balance for a tender crumb that still feels authentic.
- 1 cup all-purpose flour: Acting as the structural backbone, the flour works in tandem with the cornmeal to create a soft, cake-like texture and prevents the muffins from being overly crumbly.
- ⅓ cup granulated sugar: This provides just enough sweetness to complement the natural flavor of the corn without turning the muffins into a dessert. It also helps to create a tender crumb and a beautifully golden-brown crust.
- 2 teaspoons baking powder: This is the essential leavening agent, responsible for the light, airy lift that makes these muffins so fluffy and delightful. Make sure your baking powder is fresh for the best results.
- ½ teaspoon salt: A crucial flavor enhancer, salt sharpens and brightens all the other ingredients, balancing the sweetness and bringing out the rich flavors of the butter and corn.
- 1 cup buttermilk: This is the secret weapon for incredibly moist and tender cornbread. The acidity in buttermilk reacts with the baking powder for a better rise and tenderizes the gluten in the flour, ensuring a melt-in-your-mouth texture.
- 2 large eggs: Acting as a binder, the eggs hold the muffins together, add richness and flavor, and contribute to the beautiful golden color of the final product.
- ½ cup unsalted butter, melted: Melted butter infuses every bite with rich flavor and contributes significantly to the overall moisture of the muffins, keeping them from drying out.
For the Whipped Honey Butter:
- ½ cup salted butter, softened to room temperature: Using salted butter provides a perfect counterpoint to the sweetness of the honey. It must be very soft to whip into a light, airy, and spreadable consistency.
- ¼ cup honey: This provides the signature sweet, floral flavor. The amount can be adjusted to your personal preference for a sweeter or more subtle honey flavor.
- ½ teaspoon ground cinnamon (optional): A pinch of cinnamon adds a wonderful warmth and complexity that pairs beautifully with both the honey and the cornbread.
Instructions
Follow these step-by-step instructions carefully to ensure your mini muffins are perfectly fluffy, moist, and delicious every single time. The key is to work efficiently and avoid overmixing the batter.
Step 1: Preparation and Preheating
Begin by establishing the foundation for a successful bake. Preheat your oven to 400°F (200°C). Proper preheating is crucial as it ensures the muffins start baking immediately upon entering the oven, which helps them rise quickly and evenly. Generously grease a 24-cup mini muffin tin with butter or non-stick cooking spray, making sure to coat the bottom and sides of each cup thoroughly to prevent any sticking. Alternatively, you can use mini paper liners for easier cleanup.
Step 2: Combine the Dry Ingredients
In a large mixing bowl, add the yellow cornmeal, all-purpose flour, granulated sugar, baking powder, and salt. Using a whisk, stir these ingredients together for about 30 seconds. This step is more important than it seems; thoroughly whisking the dry ingredients ensures that the baking powder and salt are evenly distributed throughout the mixture. This even distribution is the key to a consistent rise and flavor in every single muffin.
Step 3: Combine the Wet Ingredients
In a separate medium-sized bowl, add the buttermilk and the two large eggs. Whisk them together until the eggs are fully broken up and the mixture is smooth and uniform in color. Now, slowly drizzle in the ½ cup of melted unsalted butter while continuing to whisk. This process of slowly incorporating the butter helps to emulsify the wet ingredients, creating a smooth, rich liquid base for your batter.
Step 4: Create the Batter (Do Not Overmix!)
Pour the wet ingredient mixture into the large bowl containing the dry ingredients. Using a rubber spatula or a wooden spoon, gently fold the ingredients together until they are just combined. It is critically important not to overmix the batter. You should still see a few small lumps; this is perfectly fine and actually desirable. Overmixing develops the gluten in the flour, which will result in tough, dense, and chewy muffins instead of the light and tender crumb we are aiming for. The entire mixing process should take no more than 15-20 seconds.
Step 5: Fill the Muffin Tin and Bake
Carefully portion the batter into the prepared mini muffin tin, filling each cup about three-quarters of the way full. A small cookie scoop or a tablespoon works perfectly for this, ensuring that all your muffins are a uniform size and will bake evenly. Place the muffin tin on the center rack of your preheated oven. Bake for 12 to 15 minutes, or until the tops are beautifully golden brown and a wooden toothpick inserted into the center of a muffin comes out clean with no wet batter attached.
Step 6: Prepare the Whipped Honey Butter
While the muffins are baking, you can prepare the irresistible honey butter topping. In a medium bowl, place the softened salted butter, honey, and the optional ground cinnamon. Using an electric hand mixer, start on low speed and gradually increase to high. Whip the mixture for 2 to 3 minutes, or until the butter becomes pale, light, and fluffy, almost like a frosting. This process incorporates air into the butter, giving it a wonderfully creamy and easily spreadable texture.
Step 7: Cool and Serve
Once the muffins are done baking, remove them from the oven and let them cool in the pan for about 5 minutes. This brief cooling period allows them to set up slightly, making them easier to remove. After 5 minutes, carefully transfer the mini muffins to a wire rack to continue cooling. Serve them warm with a generous dollop of the freshly whipped honey butter.
Nutrition Facts
Please note that these values are an estimate and can vary based on the specific ingredients used.
- Servings: 24 mini muffins
- Calories per serving (1 mini muffin): Approximately 110 kcal
- Carbohydrates: This is the primary source of energy in the muffins, coming from the cornmeal, flour, and sugar, providing the fuel your body needs.
- Fat: Primarily derived from the butter in both the muffins and the honey butter, fat contributes to the rich flavor, moist texture, and feeling of satiety.
- Protein: Sourced from the eggs and buttermilk, protein is essential for building and repairing tissues and adds to the satisfying structure of the muffins.
Preparation time
This recipe is designed to be quick and straightforward, making it perfect for a weeknight side or a last-minute addition to any meal.
- Total Time: Approximately 30 minutes
- Prep Time: 10 minutes
- Cook Time: 12-15 minutes
How to Serve
These mini cornbread muffins are incredibly versatile and can be served in a multitude of ways, complementing a wide range of dishes from breakfast to dinner. Here are some of our favorite ways to enjoy them:
- The Classic Companion to Soups and Stews:
- Hearty Chili: There is no better partner for a bowl of rich beef or vegetable chili. Use the muffins to sop up every last delicious drop.
- Comforting Stews: Serve alongside a slow-cooked beef stew, chicken and dumplings, or a savory lentil soup for a complete and comforting meal.
- Creamy Soups: The slight sweetness of the muffins provides a wonderful contrast to creamy tomato soup, butternut squash soup, or a loaded baked potato soup.
- Perfect for BBQ and Grilled Feasts:
- Pulled Meats: Pile them high next to a serving of pulled beef or chicken. The honey butter melting over the warm muffin is a heavenly combination with smoky barbecue sauce.
- Ribs and Chicken: They are the ultimate side dish for a rack of ribs or perfectly grilled chicken, balancing the savory, charred flavors.
- A Star on the Holiday Table:
- Thanksgiving Dinner: Place a basket of these warm muffins on the table to accompany the turkey, gravy, and cranberry sauce. They are a welcome alternative or addition to traditional dinner rolls.
- Christmas and Easter: Their golden color and comforting flavor make them a festive and beloved side dish for any holiday ham or roast beef dinner.
- For Breakfast and Brunch:
- A Sweet Start: Serve them warm with an extra drizzle of honey or a smear of fruit jam for a delightful breakfast treat.
- Savory Pairings: They are fantastic alongside scrambled eggs, omelets, and breakfast sausage or ham. You can even split one open and create a mini breakfast sandwich.
- As a Simple Snack or Appetizer:
- Afternoon Pick-Me-Up: A warm mini muffin with a dollop of honey butter is the perfect comforting snack to enjoy with a cup of tea or coffee.
- Party Appetizer: Arrange them on a platter for guests to enjoy. They are the perfect bite-sized appetizer that everyone loves.
Additional tips
Elevate your mini cornbread muffins from great to unforgettable with these eight expert tips and tricks.
- Do Not Overmix the Batter: This is the most critical rule of muffin making. When you combine the wet and dry ingredients, mix only until the flour streaks disappear. A lumpy batter is a good batter! Overmixing develops gluten, leading to a tough, dense, and rubbery texture instead of a light and tender one.
- Use Room Temperature Ingredients: For the fluffiest muffins and the creamiest honey butter, ensure your eggs, buttermilk, and butter are all at room temperature. Room temperature ingredients emulsify and combine more easily and evenly, creating a smoother batter that traps air more effectively, resulting in a lighter final product.
- The Buttermilk Substitute: If you don’t have buttermilk on hand, don’t rush to the store! You can easily make a substitute at home. Simply measure out 1 cup of regular milk and stir in 1 tablespoon of either lemon juice or white vinegar. Let it sit for 5-10 minutes until it looks slightly curdled, then use it as a direct replacement for the buttermilk in the recipe.
- Customize Your Muffins: This recipe is a fantastic base for customization. Feel free to fold in about ½ cup of add-ins to the batter for a flavor twist. Some great options include shredded sharp cheddar cheese, finely diced jalapeños for a spicy kick, cooked and crumbled ham, or whole corn kernels (canned and drained, or frozen and thawed) for extra texture and corn flavor.
- Achieve Perfectly Even Muffins: For bakery-quality, uniform muffins, use a small spring-loaded cookie or ice cream scoop to portion the batter into the muffin tin. This ensures each muffin is the same size, so they all bake at the same rate and look beautifully consistent.
- Proper Storage for Lasting Freshness: To store leftover muffins, allow them to cool completely to room temperature first. Then, place them in an airtight container or a zip-top bag lined with a paper towel to absorb any excess moisture. They can be stored at room temperature for up to 3 days.
- Freezing for Future Cravings: These muffins freeze exceptionally well. Once completely cooled, place them in a single layer on a baking sheet and flash-freeze for about an hour. Transfer the frozen muffins to a freezer-safe bag or container. They can be frozen for up to 3 months. To reheat, simply microwave for 20-30 seconds or warm in a 300°F (150°C) oven for 5-10 minutes.
- Mastering the Honey Butter: The key to perfect whipped honey butter is truly soft, room-temperature butter. If your butter is too cold, it won’t whip properly and will be lumpy. If it’s too soft or melted, it will be greasy. Feel free to adjust the honey-to-butter ratio to your liking. For a saltier kick, you can also add a small pinch of flaky sea salt on top after whipping.
FAQ section
Here are answers to some of the most frequently asked questions about making these mini cornbread muffins.
1. Can I make these in a regular-sized muffin tin instead of a mini one?
Absolutely! This recipe can easily be adapted for a standard 12-cup muffin tin. Simply fill the cups about three-quarters full and increase the baking time. Start checking for doneness around 18-20 minutes. They are ready when a toothpick inserted into the center comes out clean.
2. Why did my cornbread muffins turn out dry and crumbly?
The two most common culprits for dry, crumbly cornbread are overbaking and overmixing. Be sure to pull the muffins from the oven as soon as a toothpick comes out clean. Even an extra minute or two can dry them out. Secondly, as emphasized in the tips, mix the batter only until the ingredients are just combined. Overmixing develops too much gluten, which ruins the tender texture. Using buttermilk is also key to ensuring moisture.
3. Can I use a different type of sweetener in the cornbread batter?
Yes, you can experiment with other sweeteners. You could substitute the granulated sugar with an equal amount of brown sugar for a deeper, molasses-like flavor. You could also use ¼ cup of honey or maple syrup in the batter, but you may need to slightly reduce the buttermilk (by about 1-2 tablespoons) to compensate for the added liquid.
4. Is it possible to make this recipe gluten-free?
Yes, you can make a gluten-free version of these muffins. Simply substitute the all-purpose flour with a high-quality “cup-for-cup” or “1-to-1” gluten-free baking flour blend that contains xanthan gum. The rest of the recipe can remain the same. The texture may be slightly different but will still be delicious.
5. What is the difference between Southern-style and Northern-style cornbread?
This recipe leans more towards the Northern style. Generally, Southern-style cornbread contains little to no sugar, is made primarily with cornmeal (and little to no flour), and is often baked in a sizzling hot, bacon-greased cast-iron skillet, giving it a savory flavor and a crunchy crust. Northern-style cornbread, like this recipe, is sweeter, more cake-like, and typically includes a significant amount of flour and a leavening agent like baking powder for a lighter, fluffier texture.
6. Can I make the whipped honey butter ahead of time?
Yes, the honey butter can be made up to a week in advance. Store it in an airtight container in the refrigerator. Before serving, you’ll need to let it sit out at room temperature for at least 30-60 minutes to soften. You may want to give it a quick whip with a fork or a mixer to restore its light and fluffy texture.
7. Can I add whole corn kernels to the batter?
Definitely! Adding whole corn kernels is a fantastic way to boost the corn flavor and add a pleasant textural pop to the muffins. You can gently fold in about ½ to ¾ cup of corn kernels into the batter at the very end. You can use fresh, frozen (thawed first), or canned (drained well) corn.
8. My muffins stuck to the pan. How can I prevent this?
Sticking is usually caused by not greasing the pan adequately. Be sure to generously coat every nook and cranny of each muffin cup with butter, shortening, or a quality non-stick baking spray. Allowing the muffins to cool in the pan for about 5 minutes after baking also helps them release more easily. If they are still stuck, you can carefully run a thin knife or an offset spatula around the edge of each muffin to loosen it. Using paper liners is the most foolproof way to prevent sticking.
Mini Cornbread Muffins with Honey Butter
Ingredients
This recipe uses simple, accessible pantry staples to create a truly exceptional result. Each component plays a critical role in achieving the perfect balance of flavor and texture, from the rustic cornmeal to the tangy buttermilk.
For the Mini Cornbread Muffins:
- 1 cup yellow cornmeal: This is the heart and soul of the muffins, providing that signature golden color, sweet corn flavor, and delightful, slightly gritty texture. A medium-grind cornmeal offers the best balance for a tender crumb that still feels authentic.
- 1 cup all-purpose flour: Acting as the structural backbone, the flour works in tandem with the cornmeal to create a soft, cake-like texture and prevents the muffins from being overly crumbly.
- ⅓ cup granulated sugar: This provides just enough sweetness to complement the natural flavor of the corn without turning the muffins into a dessert. It also helps to create a tender crumb and a beautifully golden-brown crust.
- 2 teaspoons baking powder: This is the essential leavening agent, responsible for the light, airy lift that makes these muffins so fluffy and delightful. Make sure your baking powder is fresh for the best results.
- ½ teaspoon salt: A crucial flavor enhancer, salt sharpens and brightens all the other ingredients, balancing the sweetness and bringing out the rich flavors of the butter and corn.
- 1 cup buttermilk: This is the secret weapon for incredibly moist and tender cornbread. The acidity in buttermilk reacts with the baking powder for a better rise and tenderizes the gluten in the flour, ensuring a melt-in-your-mouth texture.
- 2 large eggs: Acting as a binder, the eggs hold the muffins together, add richness and flavor, and contribute to the beautiful golden color of the final product.
- ½ cup unsalted butter, melted: Melted butter infuses every bite with rich flavor and contributes significantly to the overall moisture of the muffins, keeping them from drying out.
For the Whipped Honey Butter:
- ½ cup salted butter, softened to room temperature: Using salted butter provides a perfect counterpoint to the sweetness of the honey. It must be very soft to whip into a light, airy, and spreadable consistency.
- ¼ cup honey: This provides the signature sweet, floral flavor. The amount can be adjusted to your personal preference for a sweeter or more subtle honey flavor.
- ½ teaspoon ground cinnamon (optional): A pinch of cinnamon adds a wonderful warmth and complexity that pairs beautifully with both the honey and the cornbread.
Instructions
Follow these step-by-step instructions carefully to ensure your mini muffins are perfectly fluffy, moist, and delicious every single time. The key is to work efficiently and avoid overmixing the batter.
Step 1: Preparation and Preheating
Begin by establishing the foundation for a successful bake. Preheat your oven to 400°F (200°C). Proper preheating is crucial as it ensures the muffins start baking immediately upon entering the oven, which helps them rise quickly and evenly. Generously grease a 24-cup mini muffin tin with butter or non-stick cooking spray, making sure to coat the bottom and sides of each cup thoroughly to prevent any sticking. Alternatively, you can use mini paper liners for easier cleanup.
Step 2: Combine the Dry Ingredients
In a large mixing bowl, add the yellow cornmeal, all-purpose flour, granulated sugar, baking powder, and salt. Using a whisk, stir these ingredients together for about 30 seconds. This step is more important than it seems; thoroughly whisking the dry ingredients ensures that the baking powder and salt are evenly distributed throughout the mixture. This even distribution is the key to a consistent rise and flavor in every single muffin.
Step 3: Combine the Wet Ingredients
In a separate medium-sized bowl, add the buttermilk and the two large eggs. Whisk them together until the eggs are fully broken up and the mixture is smooth and uniform in color. Now, slowly drizzle in the ½ cup of melted unsalted butter while continuing to whisk. This process of slowly incorporating the butter helps to emulsify the wet ingredients, creating a smooth, rich liquid base for your batter.
Step 4: Create the Batter (Do Not Overmix!)
Pour the wet ingredient mixture into the large bowl containing the dry ingredients. Using a rubber spatula or a wooden spoon, gently fold the ingredients together until they are just combined. It is critically important not to overmix the batter. You should still see a few small lumps; this is perfectly fine and actually desirable. Overmixing develops the gluten in the flour, which will result in tough, dense, and chewy muffins instead of the light and tender crumb we are aiming for. The entire mixing process should take no more than 15-20 seconds.
Step 5: Fill the Muffin Tin and Bake
Carefully portion the batter into the prepared mini muffin tin, filling each cup about three-quarters of the way full. A small cookie scoop or a tablespoon works perfectly for this, ensuring that all your muffins are a uniform size and will bake evenly. Place the muffin tin on the center rack of your preheated oven. Bake for 12 to 15 minutes, or until the tops are beautifully golden brown and a wooden toothpick inserted into the center of a muffin comes out clean with no wet batter attached.
Step 6: Prepare the Whipped Honey Butter
While the muffins are baking, you can prepare the irresistible honey butter topping. In a medium bowl, place the softened salted butter, honey, and the optional ground cinnamon. Using an electric hand mixer, start on low speed and gradually increase to high. Whip the mixture for 2 to 3 minutes, or until the butter becomes pale, light, and fluffy, almost like a frosting. This process incorporates air into the butter, giving it a wonderfully creamy and easily spreadable texture.
Step 7: Cool and Serve
Once the muffins are done baking, remove them from the oven and let them cool in the pan for about 5 minutes. This brief cooling period allows them to set up slightly, making them easier to remove. After 5 minutes, carefully transfer the mini muffins to a wire rack to continue cooling. Serve them warm with a generous dollop of the freshly whipped honey butter.
Nutrition
- Serving Size: one normal portion
- Calories: 110


