")

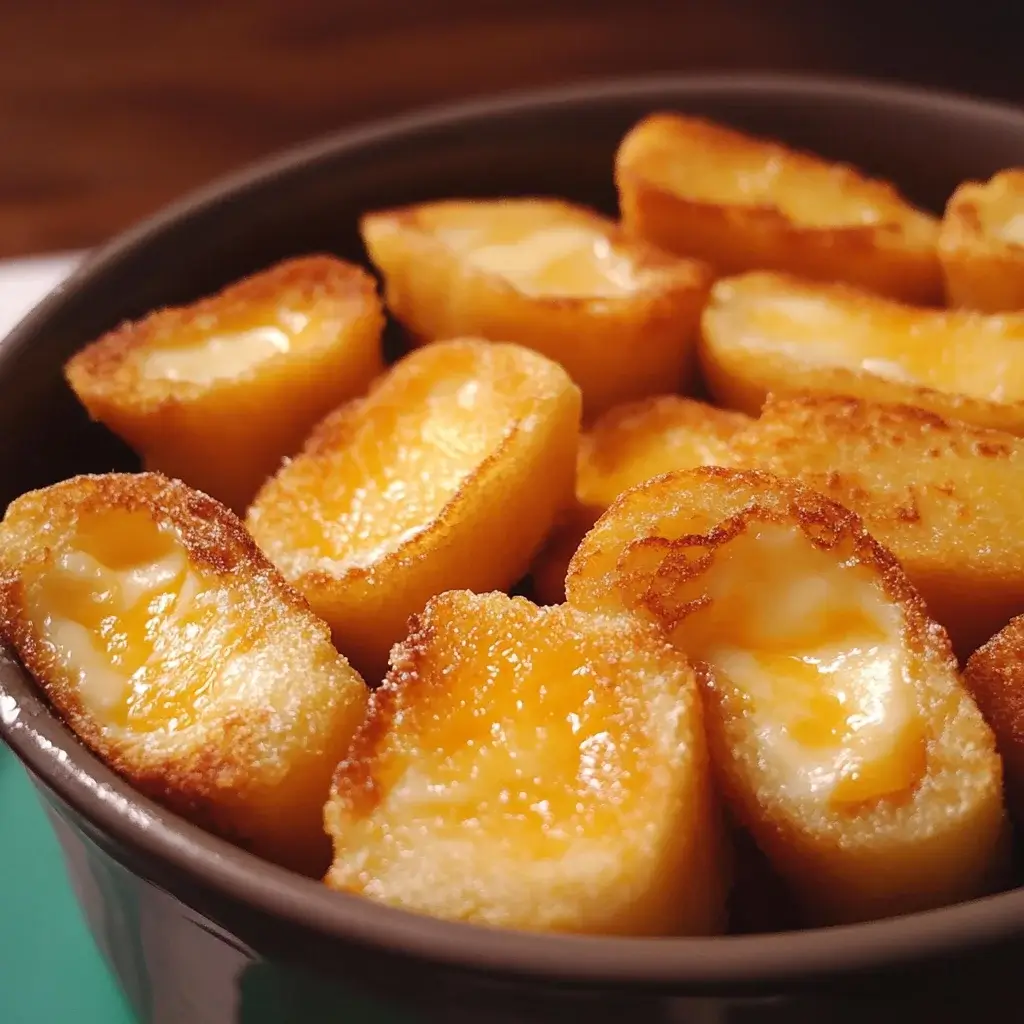

There are some recipes that just instantly transport you to a place of comfort, a culinary hug that makes everything seem right with the world. For our family, these Mini Grilled Cheese Dippers are exactly that. I first whipped them up on a whim for a movie night, thinking they’d be a fun, less messy alternative to full-sized sandwiches for the kids. Little did I know they’d become an absolute sensation! The kids devoured them, their little hands perfectly suited for the dippable strips, faces beaming with cheesy delight. My husband, initially skeptical about “miniaturizing” a classic, was quickly won over by their perfect crisp-to-cheese ratio and the sheer fun of dunking them into a bowl of warm tomato soup. Now, they’re a staple for everything from quick weeknight dinners when I’m short on time, to a star appetizer at casual get-togethers with friends, and of course, every single game day. They are incredibly easy to make, wonderfully versatile, and embody that nostalgic, simple joy that only a perfectly made grilled cheese can offer, just in a more shareable, dippable, and arguably more delightful form.
Ingredients
- 1 Loaf Sliced Bread: Your favorite sandwich bread works perfectly. White bread offers a classic, soft interior, while sourdough can add a pleasant tang, and whole wheat brings a nuttier flavor. Aim for standard thickness slices. (Approx. 16-20 slices)
- 16 Slices Medium Cheddar Cheese (or your favorite melting cheese): Good quality cheese is key for that perfect melt and flavor. Other great options include Monterey Jack, Colby, Gruyère (for a gourmet touch), or a blend. Ensure slices are relatively thin.
- 1/2 cup (1 stick) Unsalted Butter, softened: Softened butter spreads easily, ensuring an even, golden-brown crust. You can also use mayonnaise for an equally crispy and slightly tangy exterior.
- Optional for serving: Tomato Soup, Marinara Sauce, or other favorite dips: Classic tomato soup is the quintessential pairing, but these dippers are versatile enough for a variety of dipping companions.
Instructions
- Prepare the Bread Slices: Lay out half of your bread slices on a clean work surface or large cutting board. These will be the bottom layers of your mini grilled cheese sandwiches.
- Add the Cheese: Place one slice of cheese (or a generous layer of shredded cheese) onto each of the bread slices. If your cheese slices are large, you might need to trim them slightly to fit the bread without too much overhang, though a little melt-over is always welcome!
- Top the Sandwiches: Place the remaining bread slices on top of the cheese to form full sandwiches.
- Butter the Outsides: Gently spread a thin layer of softened butter on the outside of each sandwich – that is, the top slice of bread. You’ll butter the other side once it’s in the pan. If using mayonnaise, apply it in the same way.
- Preheat the Pan/Griddle: Place a large skillet, non-stick pan, or griddle over medium-low to medium heat. You don’t want the heat too high, or the bread will brown too quickly before the cheese has a chance to melt.
- Grill the Sandwiches (First Side): Carefully place the sandwiches, buttered-side down, onto the preheated skillet. You may need to do this in batches depending on the size of your pan. Now, butter the current top side of the sandwiches in the pan.
- Cook Until Golden: Grill for about 2-4 minutes per side, or until the bread is golden brown and crispy, and the cheese is beautifully melted and gooey. Use a spatula to peek underneath; adjust heat if browning too quickly.
- Press Gently (Optional): You can gently press down on the sandwiches with a spatula as they cook. This helps the cheese melt evenly and encourages a crispier crust.
- Remove and Cool Slightly: Once both sides are golden brown and the cheese is fully melted, transfer the grilled cheese sandwiches to a clean cutting board. Let them cool for a minute or two. This helps the cheese set slightly, making them easier to cut.
- Cut into Dippers: Using a sharp knife or a pizza cutter, slice each sandwich into 3 or 4 strips, depending on your preferred “dipper” size.
- Serve Immediately: Arrange the mini grilled cheese dippers on a platter alongside small bowls of your chosen dipping sauce, like classic tomato soup, marinara, or even a creamy ranch.
Nutrition Facts
- Servings: Approximately 6-8 servings (assuming 3-4 dippers per person, depending on how many sandwiches are made from the loaf)
- Calories per serving (approx. 3 dippers): 280-350 kcal (This can vary significantly based on bread type, cheese type and thickness, and amount of butter used.)
- Fat: High in fat, primarily from cheese and butter, contributing to satiety and flavor.
- Protein: Moderate protein content, mainly from the cheese.
- Carbohydrates: Primarily from the bread, providing energy.
- Sodium: Content can vary based on bread and cheese selection; processed cheese tends to be higher in sodium.
Disclaimer: Nutritional information is an estimate and can vary based on specific ingredients and quantities used.
Preparation Time
- Prep Time: Approximately 10-15 minutes. This includes laying out the bread, adding cheese, and buttering the sandwiches. If you’re quick, you might even do it in under 10!
- Cook Time: Approximately 5-8 minutes per batch of sandwiches (2-4 minutes per side). Total cook time will depend on how many batches you need to make to grill all the sandwiches.
- Total Time: Approximately 20-30 minutes from start to serving, making this a wonderfully quick and satisfying option for snacks, appetizers, or a light meal.
How to Serve
Mini Grilled Cheese Dippers are incredibly versatile and lend themselves to a multitude of serving styles and occasions. Their fun, dippable nature makes them a hit with all ages. Here are some creative and delicious ways to serve them:
- The Classic Comfort Combo:
- Tomato Soup Shooters: Serve the dippers alongside small cups, mugs, or even shot glasses filled with warm, creamy tomato soup. This is the quintessential pairing and offers a nostalgic, comforting experience. Garnish the soup with a swirl of cream, fresh basil, or croutons for an elevated touch.
- Family-Style Soup Bowl: For a more casual setting, a large bowl of tomato soup in the center of the table with a platter of dippers allows everyone to serve themselves.
- Appetizer Extravaganza:
- Dipping Sauce Bar: Offer a variety of dipping sauces to cater to different tastes. Consider:
- Marinara Sauce: A classic Italian-inspired dip that complements the cheese wonderfully.
- Ranch Dressing: A cool, creamy, and herby option, especially popular with kids.
- Pesto: For a vibrant, nutty, and herbaceous dip. A basil pesto or even a sun-dried tomato pesto works well.
- Garlic Aioli: A rich and flavorful mayonnaise-based dip with a punch of garlic.
- Spicy Ketchup or Sriracha Mayo: For those who like a bit of a kick.
- Honey Mustard: A sweet and tangy option that pairs surprisingly well with the savory cheese.
- Appetizer Platter Star: Arrange the mini grilled cheese dippers attractively on a large platter. You can fan them out, stack them log-cabin style, or create patterns. Surround them with other finger foods like vegetable sticks (carrots, celery, bell peppers), olives, pickles, or even small meatballs for a comprehensive appetizer spread.
- Skewered Dippers: For an elegant presentation or easier handling at parties, thread one or two dippers onto small skewers. You can even add a cherry tomato or a small gherkin to the skewer for color and flavor contrast.
- Dipping Sauce Bar: Offer a variety of dipping sauces to cater to different tastes. Consider:
- Kid-Friendly Fun:
- Lunchbox Heroes: Once cooled, these dippers can be a fantastic addition to a child’s lunchbox (though they are best enjoyed warm). Pair with a small container of their favorite dip.
- Interactive Snack Time: Let kids help choose the dipping sauces or even assemble their own “dipper plates” with a few dippers and a selection of healthy sides like fruit slices or yogurt.
- Game Day or Movie Night Fuel:
- Easy Grab-and-Go: Pile them high on a platter where guests can easily grab them while watching the game or a movie. Their mess-free nature (compared to larger sandwiches) is a big plus.
- Themed Presentation: If it’s for a specific sports team, use napkins or small plates in team colors.
- Brunch or Light Meal Addition:
- Alongside a Salad: Serve a few dippers next to a fresh green salad or a hearty Caesar salad for a balanced and satisfying light lunch or brunch.
- With Scrambled Eggs: Surprisingly delightful, a couple of cheesy dippers can be a fun alternative to toast with breakfast or brunch.
- Presentation Tips:
- Garnish: A sprinkle of finely chopped fresh parsley or chives over the platter of dippers can add a touch of color and freshness.
- Warmth: Serve them as soon as possible after making them for the best experience – warm bread, crispy edges, and gooey cheese. If making a large batch, you can keep them warm in a low oven (around 200°F or 90°C) on a baking sheet.
- Individual Servings: For a more formal appetizer setting, arrange 2-3 dippers artfully on small individual plates with a dollop or small ramekin of dip.
No matter how you choose to serve them, these Mini Grilled Cheese Dippers are sure to be a crowd-pleaser, bringing smiles and satisfying cravings with their simple yet irresistible charm.
Additional Tips
Elevate your Mini Grilled Cheese Dippers from simply delicious to absolutely unforgettable with these eight expert tips:
- Bread Selection is Paramount: While standard white sandwich bread is a classic choice for its soft texture and mild flavor, don’t be afraid to experiment.
- Sourdough: Offers a delightful tang and a chewier crust, providing a lovely contrast to the rich cheese. Its robust structure holds up well.
- Brioche: A richer, slightly sweet bread with a tender crumb. It creates exceptionally decadent dippers with a beautifully golden crust.
- Whole Wheat or Multigrain: Adds a nuttier flavor and a bit more texture. Ensure it’s a softer variety for the best dipper experience.
- Rye Bread: Provides an earthy, slightly tangy flavor that pairs wonderfully with sharp cheddar or Swiss cheese.
- Thickness: Opt for medium-sliced bread. Too thin, and it might not hold the cheese well or could get soggy; too thick, and the cheese might not melt before the bread burns, or the bread-to-cheese ratio will be off.
- Master the Cheese Blend: A single type of cheese is fine, but a blend can create a more complex flavor profile and superior melt.
- The Melters: Good old American cheese (yes, really!), Monterey Jack, Colby, Fontina, and young Cheddar are fantastic for their smooth, creamy melt.
- The Flavor Powerhouses: Sharp Cheddar, Gruyère, Gouda (smoked or plain), Provolone, and even a touch of Parmesan (mixed with a good melter) can add depth and character.
- The Stretch Factor: Mozzarella is king for that epic cheese pull, but its flavor is mild, so pair it with something more assertive.
- Application: Use thinly sliced cheese for even melting. If using shredded cheese, bring it to room temperature first for a quicker, more even melt. Don’t overstuff, or you’ll have a cheese explosion (though some find this desirable!).
- The Great Butter vs. Mayo Debate: Both create a crispy, golden exterior, but they offer slightly different results.
- Butter: Provides a classic, rich, nutty flavor and a beautiful golden-brown color. Use unsalted butter so you can control the saltiness, and ensure it’s softened for easy spreading. Clarified butter (ghee) has a higher smoke point and can prevent burning.
- Mayonnaise: Many chefs swear by mayo for grilled cheese. It has a higher smoke point than butter, leading to less risk of burning and an incredibly even, crisp, golden crust. The flavor is slightly tangy, which many enjoy. Use full-fat mayo for best results.
- Try Both! Experiment to see which you prefer, or even use a thin layer of mayo followed by a very light dusting of Parmesan cheese before grilling for an extra savory crust.
- Perfect Your Grilling Technique: The key to a perfect grilled cheese dipper is achieving melted cheese and a golden, crispy crust simultaneously.
- Low and Slow is the Way to Go: Medium-low to medium heat is crucial. If the heat is too high, the bread will toast (or burn) before the cheese has a chance to fully melt.
- Cover the Pan: For the first minute or two on each side, you can cover the pan with a lid. This traps steam and helps the cheese melt more quickly and evenly.
- Panini Press Power: If you have a panini press, it’s an excellent tool for making grilled cheese dippers. It cooks both sides at once and provides even pressure.
- Weight it Down (Gently): A bacon press or another smaller, heavy pan placed on top of the sandwiches can help ensure even contact with the cooking surface for a uniform crust and promote cheese melting. Don’t press too hard, or you’ll squish the bread.
- Subtle Add-Ins for Extra Wow: While classic is great, tiny additions inside the dippers can elevate them. The key is “thin” and “sparing.”
- Ultra-Thin Deli Ham or Prosciutto: A very thin slice adds a savory, salty note.
- Pre-Cooked Bacon Crumbles: Ensure they are finely crumbled and not too chunky.
- A Whisper of Pesto or Tapenade: A very thin smear on the inside of one slice of bread before adding the cheese can introduce a burst of flavor.
- Caramelized Onions (Finely Chopped): For a sweet and savory depth, but ensure they are almost a paste to avoid making the dippers bulky.
- Herbs: A tiny sprinkle of finely chopped chives or a very thin layer of herbed cheese spread can be nice. Avoid anything too bulky that will prevent a good seal.
- Partial Make-Ahead Strategy for Parties: While best served fresh, you can do some prep work.
- Assemble Sandwiches: You can assemble the sandwiches (bread, cheese, top bread) a few hours ahead. Stack them, wrap them tightly in plastic wrap, and refrigerate.
- Butter Just Before Grilling: Wait to butter the outsides until you’re ready to cook, as pre-buttered bread can become soggy in the fridge.
- Prepare Dips: All your dipping sauces can be made a day or two in advance and stored in the refrigerator.
- Reheating for Optimal Crispness: Leftover dippers (if any!) can be revived.
- Avoid the Microwave: Microwaving will make them soft and chewy, losing all that delightful crispness.
- Skillet or Griddle: Reheat in a dry skillet over medium-low heat for a few minutes per side until warmed through and re-crisped.
- Toaster Oven or Air Fryer: These are excellent options. Reheat at around 300-325°F (150-160°C) for 3-5 minutes, or until hot and crispy. Keep a close eye on them to prevent burning.
- Oven: You can reheat on a baking sheet in a preheated oven at 350°F (175°C) for about 5-7 minutes.
- Precision Cutting for Perfect Dippers: Uniformity makes them look more appealing and easier to dip.
- Cool Slightly First: Let the whole grilled sandwiches rest for a minute or two after grilling. This allows the cheese to set up just a bit, preventing it from oozing out excessively when you cut.
- Sharp Knife or Pizza Cutter: A long, sharp chef’s knife or a pizza cutter will give you the cleanest cuts.
- Confident Strokes: Use decisive, even strokes. For a knife, press straight down rather than sawing too much, which can tear the bread.
- Trim Crusts (Optional): For super-tender dippers, especially for picky eaters or a more refined presentation, you can trim the crusts from the bread before assembling and grilling the sandwiches. This results in incredibly soft, uniform dippers.
FAQ Section
1. Can I make these Mini Grilled Cheese Dippers gluten-free?
Absolutely! Making gluten-free mini grilled cheese dippers is quite straightforward. The key is to substitute the regular bread with your favorite gluten-free bread. Look for gluten-free sandwich bread brands that have a good texture and hold up well when grilled. Some gluten-free breads can be more delicate, so handle them gently. You might find that gluten-free bread toasts a bit faster, so keep a closer eye on it during grilling and perhaps use a slightly lower heat. Ensure your cheese and butter are also certified gluten-free if Celiac disease or severe gluten sensitivity is a concern. The rest of the process remains the same, delivering a delicious and inclusive treat!
2. How can I make these Mini Grilled Cheese Dippers dairy-free or vegan?
Yes, you can easily adapt this recipe to be dairy-free or fully vegan.
- For Dairy-Free: Substitute the regular cheese with your favorite dairy-free cheese slices or shreds. There are many excellent almond, cashew, soy, or oat-based cheese alternatives available that melt reasonably well. For the butter, use a dairy-free butter substitute (margarine) or opt for the mayonnaise trick for grilling (ensure the mayo is egg-free if catering to an egg allergy as well).
- For Vegan: Use vegan bread (most standard bread is vegan, but always check labels for honey, eggs, or dairy). Select a good quality vegan cheese alternative – brands specializing in meltable vegan cheese are your best bet. For grilling, use a vegan butter substitute or vegan mayonnaise. With these swaps, you can create delicious vegan mini grilled cheese dippers that everyone can enjoy.
3. What’s the best way to store leftover Mini Grilled Cheese Dippers?
If you happen to have leftovers (which is rare!), the best way to store them is to first let them cool completely to room temperature. This prevents condensation from making them soggy. Once cooled, place them in an airtight container or wrap them tightly in plastic wrap or aluminum foil. Store them in the refrigerator for up to 2-3 days. Avoid storing them with high-moisture items. For reheating instructions to restore crispness, refer to Tip #7 in the “Additional Tips” section (skillet, toaster oven, or air fryer are recommended).
4. How many dippers does this recipe typically make, and can it be easily scaled?
A standard loaf of sandwich bread usually contains 16-20 usable slices (excluding the ends, unless you like to use them!). If you make 8 full sandwiches (using 16 slices of bread), and cut each sandwich into 3 dippers, you’ll get 24 dippers. If you cut them into 4 thinner dippers, you’ll get 32 dippers. The recipe is incredibly easy to scale up or down. Simply adjust the number of bread slices and cheese slices according to how many dippers you need. For a large crowd, you might use multiple loaves of bread and cook in batches or on a large electric griddle.
5. Can I use different types of cheese, and do you have any favorite combinations?
Absolutely! Experimenting with cheese is one of the best parts of making grilled cheese. While medium cheddar is a great all-rounder, consider these:
- Classic Melt: Colby, Monterey Jack, Provolone, American cheese.
- Flavorful & Gooey: A blend of sharp Cheddar (for flavor) and Monterey Jack (for meltability) is a fantastic combination. Gruyère offers a nutty, complex flavor and melts beautifully – try it with a touch of Emmental. Smoked Gouda adds a wonderful smoky depth.
- For an Epic Cheese Pull: Mix in some low-moisture mozzarella with a more flavorful cheese.
- Avoid: Very hard cheeses like Parmesan on their own won’t melt well (though they can be added to a blend or sprinkled on the buttered exterior for a crispy crust). Also, be cautious with very soft, fresh cheeses like fresh mozzarella or goat cheese, as they can make the bread soggy if not used carefully or paired with a sturdier bread.
6. My cheese isn’t melting properly before the bread burns. What am I doing wrong?
This is a common grilled cheese challenge! The most likely culprit is that your heat is too high. If the pan or griddle is too hot, the bread will toast and burn on the outside long before the heat has a chance to penetrate through to the center and melt the cheese.
- Solution: Lower the heat to medium-low or low. Patience is key. You can also try covering the pan with a lid for the first minute or two of cooking each side. This traps steam and helps create a warm, melty environment for the cheese. Using thinner slices of cheese or shredded cheese (which melts faster than thick slices) can also help.
7. Can I bake these Mini Grilled Cheese Dippers in the oven instead of pan-frying them?
Yes, baking is a viable alternative, especially if you’re making a large batch.
- Method: Assemble the sandwiches as usual. You can either butter both outside slices of bread or brush a baking sheet with melted butter and place the sandwiches on it, then brush the tops with more melted butter. Bake in a preheated oven at around 375-400°F (190-200°C) for about 5-7 minutes per side, or until golden brown and the cheese is melted. Flip them halfway through.
- Pros: Easier to make many at once, less hands-on time.
- Cons: You might not achieve the same level of individualized, super-crispy crust that direct contact with a hot skillet provides. The texture might be slightly softer overall, but still delicious. Keep a close eye on them as oven temperatures can vary.
8. Are these Mini Grilled Cheese Dippers suitable for freezing?
While technically possible, freezing already cooked grilled cheese dippers isn’t ideal as the texture can suffer upon thawing and reheating – they tend to lose their crispness and can become a bit tough or rubbery.
- Better Option (Freezing Uncooked): You could potentially assemble the sandwiches (bread and cheese, unbuttered), wrap them individually and tightly in plastic wrap and then in foil or a freezer bag, and freeze for up to a month. Thaw them in the refrigerator overnight before buttering and grilling as per the recipe. This will yield a much fresher result.
- If Freezing Cooked: If you must freeze cooked dippers, cool them completely, wrap them very well, and freeze. Reheat from frozen in an oven or air fryer (not a microwave) until hot and re-crisped, but manage expectations regarding texture. They are truly best enjoyed fresh or reheated from refrigerated leftovers.
Mini Grilled Cheese Dippers
Ingredients
- 1 Loaf Sliced Bread: Your favorite sandwich bread works perfectly. White bread offers a classic, soft interior, while sourdough can add a pleasant tang, and whole wheat brings a nuttier flavor. Aim for standard thickness slices. (Approx. 16–20 slices)
- 16 Slices Medium Cheddar Cheese (or your favorite melting cheese): Good quality cheese is key for that perfect melt and flavor. Other great options include Monterey Jack, Colby, Gruyère (for a gourmet touch), or a blend. Ensure slices are relatively thin.
- 1/2 cup (1 stick) Unsalted Butter, softened: Softened butter spreads easily, ensuring an even, golden-brown crust. You can also use mayonnaise for an equally crispy and slightly tangy exterior.
- Optional for serving: Tomato Soup, Marinara Sauce, or other favorite dips: Classic tomato soup is the quintessential pairing, but these dippers are versatile enough for a variety of dipping companions.
Instructions
- Prepare the Bread Slices: Lay out half of your bread slices on a clean work surface or large cutting board. These will be the bottom layers of your mini grilled cheese sandwiches.
- Add the Cheese: Place one slice of cheese (or a generous layer of shredded cheese) onto each of the bread slices. If your cheese slices are large, you might need to trim them slightly to fit the bread without too much overhang, though a little melt-over is always welcome!
- Top the Sandwiches: Place the remaining bread slices on top of the cheese to form full sandwiches.
- Butter the Outsides: Gently spread a thin layer of softened butter on the outside of each sandwich – that is, the top slice of bread. You’ll butter the other side once it’s in the pan. If using mayonnaise, apply it in the same way.
- Preheat the Pan/Griddle: Place a large skillet, non-stick pan, or griddle over medium-low to medium heat. You don’t want the heat too high, or the bread will brown too quickly before the cheese has a chance to melt.
- Grill the Sandwiches (First Side): Carefully place the sandwiches, buttered-side down, onto the preheated skillet. You may need to do this in batches depending on the size of your pan. Now, butter the current top side of the sandwiches in the pan.
- Cook Until Golden: Grill for about 2-4 minutes per side, or until the bread is golden brown and crispy, and the cheese is beautifully melted and gooey. Use a spatula to peek underneath; adjust heat if browning too quickly.
- Press Gently (Optional): You can gently press down on the sandwiches with a spatula as they cook. This helps the cheese melt evenly and encourages a crispier crust.
- Remove and Cool Slightly: Once both sides are golden brown and the cheese is fully melted, transfer the grilled cheese sandwiches to a clean cutting board. Let them cool for a minute or two. This helps the cheese set slightly, making them easier to cut.
- Cut into Dippers: Using a sharp knife or a pizza cutter, slice each sandwich into 3 or 4 strips, depending on your preferred “dipper” size.
- Serve Immediately: Arrange the mini grilled cheese dippers on a platter alongside small bowls of your chosen dipping sauce, like classic tomato soup, marinara, or even a creamy ranch.
Nutrition
- Serving Size: one normal portion
- Calories: 350


