")

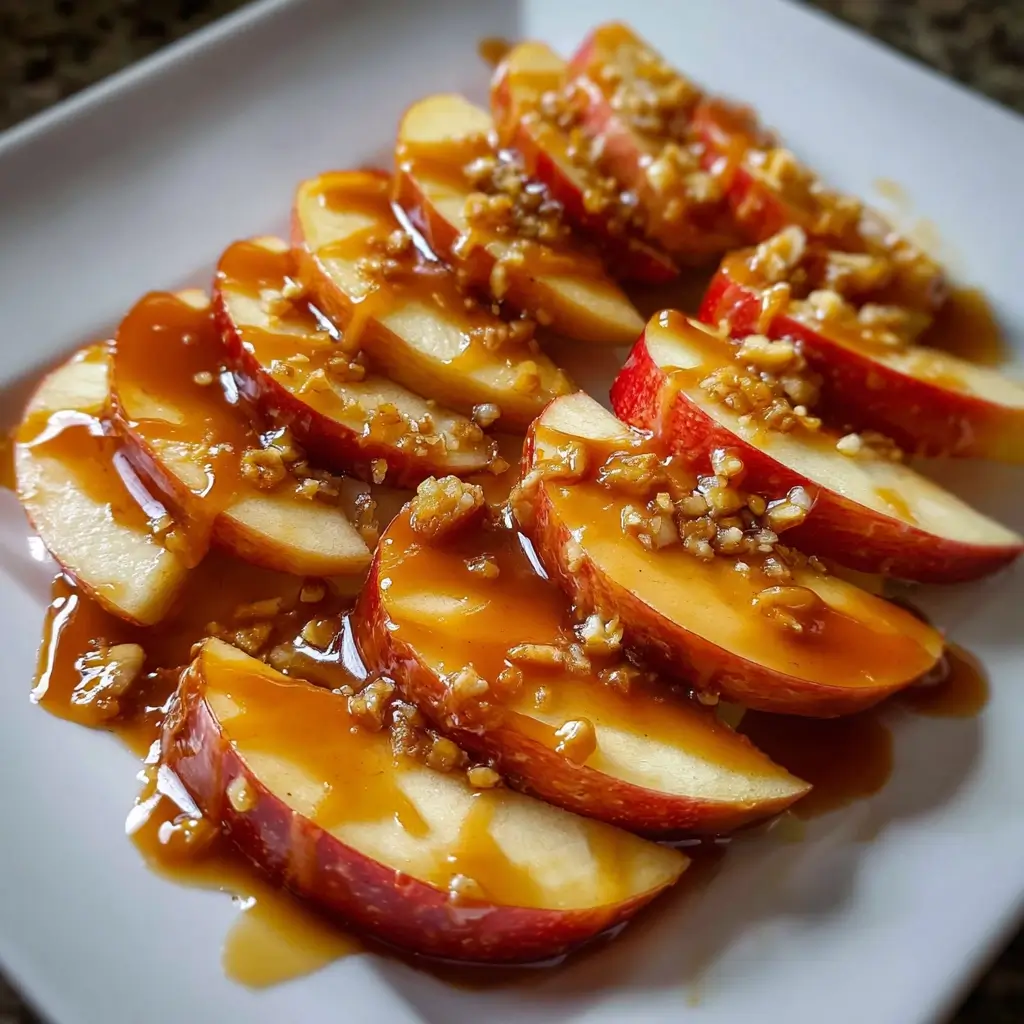

Of all the quintessential fall flavors, the combination of crisp, tart apple and rich, buttery caramel holds a special place in my heart. For years, our family tradition involved the laborious, and often messy, process of making whole caramel apples. It was fun, but I’d always end up with more caramel on the counter than on the apples, and the kids would struggle to take a single bite without getting it all over their faces. One brisk autumn afternoon, with a bag of beautiful apples from a local orchard and a craving for that classic treat, I decided to try something different. I sliced the apples first. This simple change was a complete game-changer. Suddenly, we had a delightful, shareable, and infinitely easier-to-eat dessert. The kids could dip their own slices, decorate them with a wild assortment of toppings, and enjoy them without a fuss. These Quick Caramel Apple Slices have since become our go-to fall recipe, perfect for everything from a cozy movie night to a festive Halloween party. They deliver all the nostalgic flavor of a traditional caramel apple but in a fun, modern, and wonderfully convenient package that our whole family adores.
Ingredients
- Apples (4 large): Choose a firm, crisp, and slightly tart variety for the best flavor and texture contrast. Granny Smith is a classic choice for its pronounced tartness, while Honeycrisp, Gala, or Fuji apples offer a slightly sweeter but still wonderfully crisp bite.
- Bag of Soft Caramels (11 ounces): One standard bag of individually wrapped square caramels is the perfect amount. These melt down into a smooth, thick sauce that clings perfectly to the apple slices.
- Heavy Cream or Milk (2 tablespoons): This is the secret to achieving the perfect caramel consistency. It thins the melted caramels just enough to make them smooth and dippable without becoming too runny.
- Lemon Juice (1 tablespoon): Freshly squeezed or bottled lemon juice is essential. A quick toss with the apple slices prevents them from browning and keeps them looking fresh and appetizing.
- Optional Toppings: This is where you can get creative!
- Salty & Savory: Flaky sea salt, crushed pretzels, chopped peanuts, or toasted pecans.
- Sweet & Decadent: Mini chocolate chips (milk, dark, or white), toffee bits, shredded coconut, or colorful sprinkles.
- Spiced & Warm: A dash of cinnamon or pumpkin pie spice mixed into the toppings.
Instructions
- Prepare Your Workstation: Before you begin, set up an efficient workspace. Line a large baking sheet with parchment paper. This is crucial for preventing the caramel apples from sticking as they set. In small, separate bowls, arrange all your desired toppings. This “topping bar” makes the decorating process smooth, fast, and fun.
- Wash and Slice the Apples: Wash the apples thoroughly under cool running water. The most critical step for ensuring the caramel adheres properly is to dry the apples completely with a clean kitchen towel or paper towels. Any moisture on the apple’s skin will cause the caramel to slide right off. Once bone dry, slice the apples into wedges, about 8-10 slices per apple, depending on their size. Use an apple corer/slicer for perfectly uniform slices, or carefully cut around the core with a sharp knife.
- Prevent Browning: Place the apple slices in a medium-sized bowl. Drizzle the tablespoon of lemon juice over them and toss gently to coat each slice. This acidic barrier will slow down the oxidation process, keeping your apple slices looking bright and fresh.
- Melt the Caramel: Unwrap all the caramels from the 11-ounce bag and place them in a medium-sized, microwave-safe bowl. Add the two tablespoons of heavy cream or milk. Microwave on high in 30-second intervals, stirring well after each interval. It is vital to stir thoroughly to prevent the caramel from scorching at the bottom of the bowl. Continue this process until the caramel is completely melted, smooth, and has a luscious, pourable consistency. This typically takes about 2-3 minutes in total.
- Stovetop Alternative: If you prefer, you can melt the caramels in a small saucepan over low heat. Add the caramels and cream to the pan and stir constantly until fully melted and smooth. Be careful not to let the heat get too high, as caramel can burn easily.
- Dip the Slices: Now for the fun part! Hold an apple slice by the top (the skin side). Dip about two-thirds of the slice into the warm, melted caramel, tilting the bowl as needed to get a good coating. Lift the slice out of the caramel and allow any excess to drip back into the bowl for a few seconds. This prevents a thick, goopy layer and ensures a more elegant finish.
- Add the Toppings: Immediately after dipping, while the caramel is still hot and sticky, press the caramel-coated side of the apple into your bowl of chosen toppings. Alternatively, you can sprinkle the toppings over the slice. Work quickly, as the caramel will begin to set as it cools.
- Chill and Set: Place the finished caramel apple slice onto the parchment-lined baking sheet. Repeat the dipping and topping process with the remaining apple slices, arranging them in a single layer on the sheet. Once all slices are complete, transfer the baking sheet to the refrigerator for at least 15-20 minutes. This chilling step is essential for firming up the caramel, ensuring it sets properly and doesn’t slide off the apple.
Nutrition Facts
- Servings: 8 servings
- Calories per Serving: Approximately 250-350 kcal (This is an estimate and can vary significantly based on the size of the apples and the type and amount of toppings used.)
- Carbohydrates: The primary source of energy, coming from the natural sugars in the apples and the refined sugars in the caramel and toppings.
- Fat: Primarily derived from the butter and milk solids in the caramels, as well as any high-fat toppings like nuts or chocolate.
- Sugar: A significant component of this treat, contributed by both the fruit and the caramel sauce. Enjoy in moderation as part of a balanced diet.
Preparation Time
This recipe is designed to be quick and efficient, making it a perfect last-minute treat. The total time can be broken down as follows:
- Active Preparation Time (15-20 minutes): This includes washing, drying, and slicing the apples, preparing the topping station, and melting the caramel.
- Assembly Time (10-15 minutes): This is the hands-on time spent dipping the apples and adding the toppings.
- Chill Time (20 minutes): This is the crucial, hands-off time where the caramel apple slices set in the refrigerator.
In total, you can have these delicious treats ready to serve in under an hour, with most of that time being simple assembly or passive chilling.
How to Serve
These caramel apple slices are incredibly versatile. You can dress them up for a fancy occasion or keep them casual for a simple snack. Here are some creative ways to serve them:
- The Ultimate Fall Dessert Board: Create a stunning and interactive dessert platter. Arrange the finished caramel apple slices on a large wooden board or platter. Fill in the gaps with bowls of extra toppings, small bunches of grapes, assorted cheeses (like a sharp cheddar or creamy brie which pair wonderfully with apple), and a small bowl of leftover caramel sauce for extra drizzling.
- Individual Party Favors: For a Halloween party, fall festival, or Thanksgiving gathering, these make perfect take-home gifts. Place two or three slices in a clear cellophane bag and tie it shut with a festive ribbon in autumn colors like orange, brown, or gold. It’s a thoughtful and delicious way for guests to remember the event.
- An Elevated After-School Snack: Surprise the kids with a fun and slightly decadent after-school treat. Arrange a few slices on a plate with a glass of milk or a mug of warm apple cider. It’s a simple way to make an ordinary afternoon feel special.
- As a Deconstructed Dessert Topper: Take your desserts to the next level. Roughly chop a few finished caramel apple slices and use them as a topping for a bowl of vanilla bean ice cream, a slice of plain cheesecake, or a simple pound cake. The combination of textures and flavors is absolutely divine.
- The Centerpiece of a DIY Dipping Bar: For a truly engaging party activity, set up a “Do-It-Yourself Caramel Apple Slice Bar.” Provide bowls of plain apple slices (tossed in lemon juice), a pot of warm caramel sauce (kept warm in a small slow cooker on the “warm” setting), and a wide array of toppings. Let guests create their own custom caramel apple masterpieces.
Additional Tips
To ensure your caramel apple slices are perfect every single time, keep these eight expert tips in mind:
- Choose the Right Apple: The foundation of this recipe is the apple, so choose wisely. You need a variety that is firm enough to hold its shape and won’t turn mushy. The tartness of a Granny Smith beautifully cuts through the sweetness of the caramel, creating a balanced flavor profile. For those who prefer less tartness, Honeycrisp, Braeburn, and Gala are excellent alternatives that provide both sweetness and a satisfying crunch.
- Dry Apples are Non-Negotiable: This tip cannot be stressed enough. Any trace of water, or even the waxy coating found on some store-bought apples, will act as a barrier between the apple flesh and the caramel. For best results, after washing, consider giving the apples a quick buff with a towel to remove any commercial wax before drying them completely.
- Master Your Caramel Consistency: The ideal caramel is thick enough to coat the apple without being clumpy, yet thin enough to drip off the excess smoothly. If your caramel seems too thick after melting, add another teaspoon of heavy cream or milk and stir until smooth. If it seems too thin, let it cool for a minute or two to thicken up slightly before you start dipping.
- The Lemon Juice Trick Revisited: While lemon juice is great for preventing browning, you don’t want the flavor to be overwhelming. A quick toss is all you need. If you’re particularly sensitive to the taste of lemon, you can also use a solution of salt water (1/2 teaspoon of salt dissolved in 1 cup of cold water). Soak the slices for 5-10 minutes, then rinse and dry them thoroughly before dipping.
- Work in Batches and Keep it Warm: Caramel begins to set the moment it starts to cool. If you are making a large quantity of slices, your caramel may start to thicken and harden in the bowl. Simply pop it back in the microwave for 15-20 seconds to bring it back to the perfect dipping consistency.
- Parchment Paper is Essential: Do not substitute with wax paper or aluminum foil. Hot caramel can melt wax paper, and it will stick horribly to aluminum foil, even if it’s greased. Parchment paper has a silicone coating that is designed to be non-stick and heat-resistant, making it the perfect surface for your slices to set on.
- Explore Creative Topping Combinations: Think beyond the basics and create gourmet flavor pairings. Try drizzling melted dark chocolate over the caramel and then sprinkling with flaky sea salt for a sophisticated treat. Combine crushed pistachios with a drizzle of white chocolate for an elegant look. Mix mini chocolate chips with toffee bits for an ultimate candy-bar-inspired slice.
- The Pre-Chill Advantage: For an extra layer of insurance against sliding caramel, try this pro trick: after slicing the apples and tossing them in lemon juice, place the plain slices on a baking sheet in the refrigerator for 15-20 minutes. A cold apple slice will help the warm caramel to set almost instantly upon contact, creating a much stronger bond.
FAQ Section
1. How do I keep the caramel from sliding off the apple slices?
This is the most common issue, and it’s usually caused by one of three things. First, the apple slices were not completely dry. Any moisture creates a slippery surface. Second, the caramel was too hot or too thin, causing it to run. Let it cool slightly to thicken before dipping. Third, the apples were at room temperature. Chilling the slices for 15 minutes before dipping makes a huge difference, as the cold surface helps the warm caramel set much faster.
2. What are the best apples to use for Quick Caramel Apple Slices?
The best apples are firm, crisp, and have a tart or tangy flavor to balance the sweet caramel. Granny Smith is the gold standard for its sharp tartness and firm texture. Other fantastic options include Honeycrisp (very crisp and sweet-tart), Gala (mildly sweet and crisp), Braeburn (crisp with a complex sweet-tart flavor), and Fuji (very crisp and sweet). Avoid softer apples like Red Delicious, as they can become mealy and don’t provide a good crunch.
3. Can I make these caramel apple slices ahead of time?
Yes, you can make them ahead of time, but for the best quality, it’s best to do so no more than 24 hours in advance. The main challenge is that the apples will slowly release moisture over time, which can make the caramel a bit watery at the base. Store them in a single layer in an airtight container in the refrigerator to keep them as fresh as possible.
4. How should I store leftover caramel apple slices?
Store any leftovers in an airtight container in the refrigerator. To prevent them from sticking together, place a small piece of parchment paper between any layers. They will keep for up to 2-3 days, though they are at their best quality within the first 24 hours. The apple will remain crisp, and the caramel will stay firm when chilled.
5. Can I use a homemade caramel sauce instead of melted caramels?
Absolutely! However, you need to ensure your homemade caramel sauce is thick enough. A standard thin caramel sauce used for drizzling over ice cream will be too runny and won’t set properly on the apples. You will need a recipe for a thick, candy-like caramel. If your sauce is too thin, you can often thicken it by cooking it a bit longer to evaporate more moisture.
6. My apples still turned brown, even after using lemon juice. What went wrong?
This can happen if the slices weren’t evenly and thoroughly coated in the lemon juice, or if they sat out for too long before being dipped in the caramel. Ensure you toss them well so all cut surfaces are touched by the juice. Also, try to work efficiently, moving from slicing to dipping within a reasonable timeframe (under 30 minutes is ideal).
7. Are these caramel apple slices gluten-free?
They can be! Apples themselves are naturally gluten-free. Most brands of plain soft caramels are also gluten-free, but you must check the packaging to be sure, as formulations can vary. The final determination depends entirely on your toppings. Stick to toppings like nuts, seeds, coconut, and certified gluten-free chocolate or sprinkles to ensure the final product is completely gluten-free.
8. What’s a good way to get my kids involved in making this recipe?
This recipe is perfect for little helpers! Depending on their age, kids can help with several steps. Younger children can help by unwrapping the individual caramels, arranging the toppings in bowls, and sprinkling the toppings onto the caramel-dipped slices. Older children, with supervision, can help wash and dry the apples, toss them in lemon juice, and even do some of the dipping. It’s a wonderfully interactive and rewarding kitchen activity for the whole family.

Quick Caramel Apple Slices
Ingredients
- Apples (4 large): Choose a firm, crisp, and slightly tart variety for the best flavor and texture contrast. Granny Smith is a classic choice for its pronounced tartness, while Honeycrisp, Gala, or Fuji apples offer a slightly sweeter but still wonderfully crisp bite.
- Bag of Soft Caramels (11 ounces): One standard bag of individually wrapped square caramels is the perfect amount. These melt down into a smooth, thick sauce that clings perfectly to the apple slices.
- Heavy Cream or Milk (2 tablespoons): This is the secret to achieving the perfect caramel consistency. It thins the melted caramels just enough to make them smooth and dippable without becoming too runny.
- Lemon Juice (1 tablespoon): Freshly squeezed or bottled lemon juice is essential. A quick toss with the apple slices prevents them from browning and keeps them looking fresh and appetizing.
- Optional Toppings: This is where you can get creative!
- Salty & Savory: Flaky sea salt, crushed pretzels, chopped peanuts, or toasted pecans.
- Sweet & Decadent: Mini chocolate chips (milk, dark, or white), toffee bits, shredded coconut, or colorful sprinkles.
- Spiced & Warm: A dash of cinnamon or pumpkin pie spice mixed into the toppings.
Instructions
- Prepare Your Workstation: Before you begin, set up an efficient workspace. Line a large baking sheet with parchment paper. This is crucial for preventing the caramel apples from sticking as they set. In small, separate bowls, arrange all your desired toppings. This “topping bar” makes the decorating process smooth, fast, and fun.
- Wash and Slice the Apples: Wash the apples thoroughly under cool running water. The most critical step for ensuring the caramel adheres properly is to dry the apples completely with a clean kitchen towel or paper towels. Any moisture on the apple’s skin will cause the caramel to slide right off. Once bone dry, slice the apples into wedges, about 8-10 slices per apple, depending on their size. Use an apple corer/slicer for perfectly uniform slices, or carefully cut around the core with a sharp knife.
- Prevent Browning: Place the apple slices in a medium-sized bowl. Drizzle the tablespoon of lemon juice over them and toss gently to coat each slice. This acidic barrier will slow down the oxidation process, keeping your apple slices looking bright and fresh.
- Melt the Caramel: Unwrap all the caramels from the 11-ounce bag and place them in a medium-sized, microwave-safe bowl. Add the two tablespoons of heavy cream or milk. Microwave on high in 30-second intervals, stirring well after each interval. It is vital to stir thoroughly to prevent the caramel from scorching at the bottom of the bowl. Continue this process until the caramel is completely melted, smooth, and has a luscious, pourable consistency. This typically takes about 2-3 minutes in total.
-
- Stovetop Alternative: If you prefer, you can melt the caramels in a small saucepan over low heat. Add the caramels and cream to the pan and stir constantly until fully melted and smooth. Be careful not to let the heat get too high, as caramel can burn easily.
Kitchen remodeling -
- Dip the Slices: Now for the fun part! Hold an apple slice by the top (the skin side). Dip about two-thirds of the slice into the warm, melted caramel, tilting the bowl as needed to get a good coating. Lift the slice out of the caramel and allow any excess to drip back into the bowl for a few seconds. This prevents a thick, goopy layer and ensures a more elegant finish.
- Add the Toppings: Immediately after dipping, while the caramel is still hot and sticky, press the caramel-coated side of the apple into your bowl of chosen toppings. Alternatively, you can sprinkle the toppings over the slice. Work quickly, as the caramel will begin to set as it cools.
- Chill and Set: Place the finished caramel apple slice onto the parchment-lined baking sheet. Repeat the dipping and topping process with the remaining apple slices, arranging them in a single layer on the sheet. Once all slices are complete, transfer the baking sheet to the refrigerator for at least 15-20 minutes. This chilling step is essential for firming up the caramel, ensuring it sets properly and doesn’t slide off the apple.
Nutrition
- Serving Size: one normal portion
- Calories: 350


