")

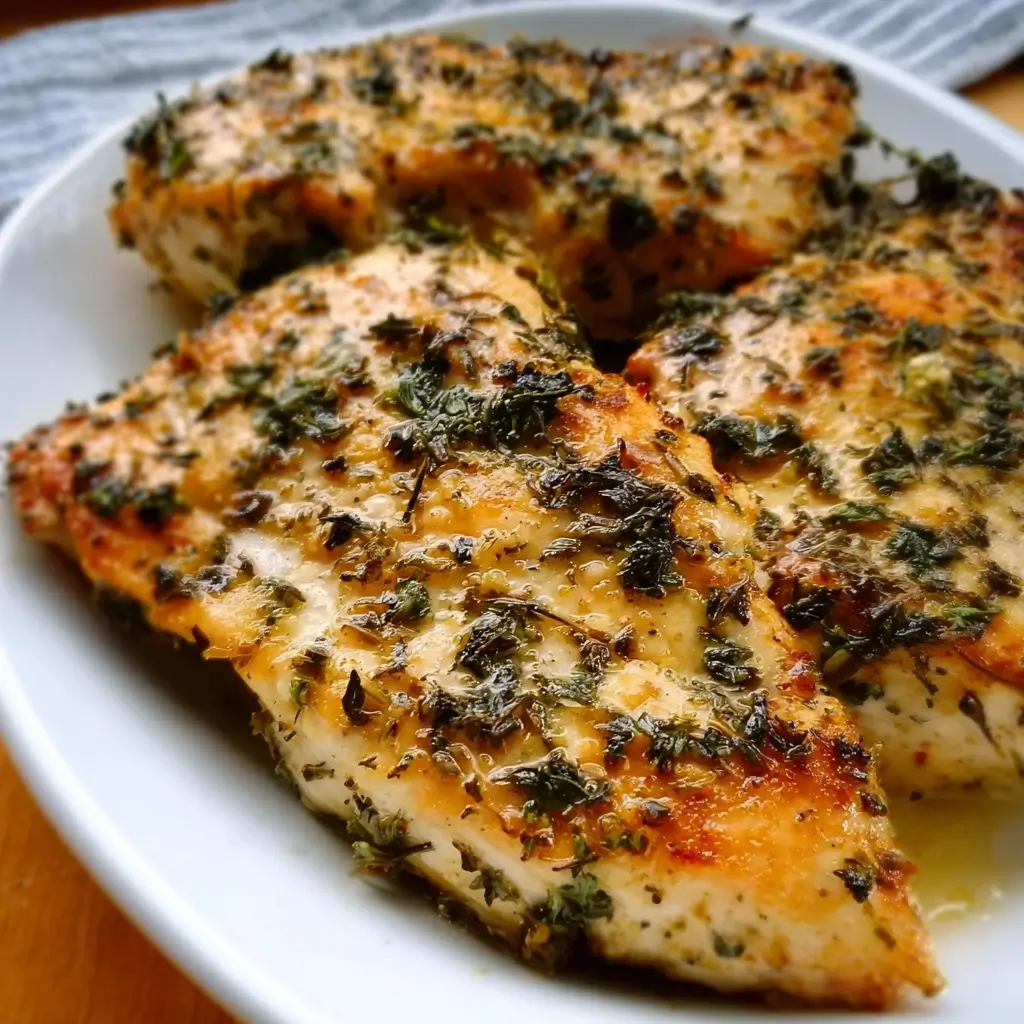

Of all the battles waged on a busy weeknight, the one against the ticking clock for a healthy, delicious dinner is often the most challenging. I remember one particularly chaotic Tuesday, where the day had been a whirlwind of meetings, errands, and forgotten to-do lists. The thought of preparing a complicated meal felt like climbing a mountain. That’s when I turned to this recipe for Quick Italian Herb Chicken Breasts, a trusted ally in my culinary arsenal. As the chicken sizzled in the pan, a fragrant cloud of oregano, basil, and garlic began to fill the kitchen, instantly transforming the atmosphere from stressed to serene. My family, drawn by the incredible aroma, gathered in the kitchen, their faces filled with anticipation. When we finally sat down to eat, the first bite was a revelation. The chicken was unbelievably juicy, bursting with a savory, herbaceous flavor that tasted like it had been marinating for hours, not minutes. It was a resounding success, a five-star meal created in under 30 minutes that brought a moment of pure joy and satisfaction to an otherwise hectic day. This recipe isn’t just about food; it’s about reclaiming your evenings with a meal that is effortlessly elegant, incredibly flavorful, and guaranteed to make you feel like a kitchen hero.
Ingredients
Here is the simple yet powerful list of ingredients you’ll need to create this masterpiece. Each component plays a crucial role in building layers of classic Italian flavor.
- 4 (6-ounce) boneless, skinless chicken breasts: The star of the show. Using medium-sized breasts ensures they cook quickly and evenly.
- 2 tablespoons extra virgin olive oil: This is used for cooking and adds a rich, fruity undertone that is quintessentially Italian.
- 1 ½ teaspoons dried oregano: Provides a pungent, earthy, and slightly bitter note that is a cornerstone of Italian seasoning.
- 1 ½ teaspoons dried basil: Adds a sweet, peppery, and slightly minty flavor that complements the other herbs perfectly.
- 1 teaspoon garlic powder: Offers a deep, savory garlic flavor without the risk of burning fresh garlic in a hot pan.
- 1 teaspoon onion powder: Lends a subtle, sweet, and savory depth that rounds out the entire seasoning blend.
- ½ teaspoon salt: Essential for enhancing all the other flavors and helping to keep the chicken moist.
- ½ teaspoon black pepper: Provides a gentle heat and pungent spice to balance the herbs.
- ¼ teaspoon red pepper flakes (optional): For those who enjoy a little kick of warmth and spice. Adjust to your personal preference.
- 1 tablespoon fresh parsley, chopped (for garnish): Adds a final touch of fresh, bright, and clean flavor, along with a beautiful pop of color.
Instructions
Follow these detailed steps to achieve perfectly cooked, juicy, and flavorful Italian herb chicken every single time. The key is in the preparation and the cooking technique.
- Prepare the Chicken: Place the chicken breasts on a cutting board and cover them with a piece of parchment paper or plastic wrap. This prevents any mess and protects the meat. Using a meat mallet, the flat side of a heavy pan, or even a rolling pin, gently pound the chicken breasts until they are an even thickness of about ½ to ¾ inch. This is the single most important step for ensuring the chicken cooks evenly and stays moist, preventing the thinner parts from drying out while the thicker parts cook through.
- Create the Seasoning Blend: In a small bowl, combine the dried oregano, dried basil, garlic powder, onion powder, salt, black pepper, and optional red pepper flakes. Use a fork or a small whisk to mix them together thoroughly. This ensures that every bite of chicken gets an equal distribution of the delicious herb coating.
- Season the Chicken Generously: Pat the chicken breasts completely dry with a paper towel. A dry surface is crucial for getting a beautiful golden-brown sear. Drizzle a small amount of the olive oil over the chicken, just enough to act as a binder for the seasonings. Sprinkle the herb mixture generously and evenly over all sides of each chicken breast. Use your hands to press the seasoning into the meat, making sure it’s fully coated.
- Heat the Pan: Place a large skillet (cast iron or stainless steel works best) over medium-high heat. Add the remaining olive oil to the pan. Allow the pan and oil to get hot. You’ll know it’s ready when the oil shimmers slightly or when a drop of water sizzles and evaporates instantly upon contact. A hot pan is essential for creating that perfect crust.
- Sear the Chicken: Carefully place the seasoned chicken breasts in the hot skillet, making sure not to overcrowd the pan. If necessary, cook them in two batches. Leave at least an inch of space between each breast. This allows them to sear properly rather than steam. Cook for 5-7 minutes on the first side without moving them. Resisting the urge to peek or flip them too early is key to developing a deep, golden-brown crust.
- Flip and Finish Cooking: Using tongs, flip the chicken breasts over. Cook for another 5-7 minutes on the second side, or until the chicken is cooked through and the internal temperature reaches 165°F (74°C) on an instant-read thermometer. Using a thermometer is the most reliable way to guarantee perfectly cooked, juicy chicken without any guesswork.
- Rest the Chicken: Once cooked, transfer the chicken breasts from the skillet to a clean cutting board or plate. Let them rest for at least 5-10 minutes before slicing or serving. This crucial resting period allows the juices to redistribute throughout the meat, ensuring that every slice is moist and tender. If you cut into it immediately, the juices will run out onto the board, leaving you with dry chicken.
- Garnish and Serve: After resting, slice the chicken against the grain. Garnish with the freshly chopped parsley for a burst of freshness and color. Serve immediately and enjoy the incredible flavors.
Nutrition Facts
This recipe is not only delicious but also a healthy choice for a balanced meal. The nutritional information is an estimate and can vary based on the exact size of the chicken breasts and ingredients used.
- Servings: 4
- Calories Per Serving: Approximately 285 kcal
- Protein (Approx. 45g): This dish is an excellent source of high-quality, lean protein, which is essential for muscle growth and repair, immune function, and keeping you feeling full and satisfied.
- Fat (Approx. 9g): The majority of the fat comes from the heart-healthy monounsaturated fats in the extra virgin olive oil, which can help support good cholesterol levels.
- Carbohydrates (Approx. 2g): With virtually no carbs, this recipe is naturally low-carb, keto-friendly, and perfect for anyone monitoring their carbohydrate intake.
- Sodium (Approx. 350mg): The sodium content is relatively low and can be easily adjusted by reducing the amount of salt used in the seasoning blend to meet your dietary needs.
- Iron (Approx. 8% of DV): Chicken is a good source of heme iron, a type of iron that is easily absorbed by the body and is vital for carrying oxygen in the blood and preventing fatigue.
Preparation Time
This recipe is designed for speed and efficiency, making it the perfect solution for a last-minute dinner.
The total time from start to finish is approximately 25 minutes. This includes about 10 minutes of preparation time for pounding and seasoning the chicken, and about 15 minutes of active cooking time in the skillet. It’s a true 30-minute meal that delivers maximum flavor with minimum effort.
How to Serve
The versatility of this Italian Herb Chicken is one of its greatest strengths. It can be the centerpiece of countless meal combinations, from comforting classics to light and healthy fare. Here are some fantastic ways to serve it:
- Classic Italian Feast:
- Slice the chicken and serve it over a bed of your favorite pasta. It pairs beautifully with a simple marinara sauce, a creamy Alfredo, or a light and zesty pesto.
- Serve alongside a creamy Parmesan risotto or a simple aglio e olio (garlic and oil) spaghetti for an authentic Italian experience.
- Healthy and Wholesome Sides:
- Roasted Vegetables: Toss broccoli, bell peppers, zucchini, and cherry tomatoes with a little olive oil and salt, then roast until tender-crisp.
- Steamed Greens: Serve with a side of steamed asparagus drizzled with lemon juice or sautéed spinach with garlic.
- Grain Bowls: Pair with fluffy quinoa, hearty farro, or brown rice for a nutritious and filling meal.
- Fresh and Crisp Salads:
- Create a gourmet chicken salad by placing sliced chicken over a bed of arugula or mixed greens. Add cherry tomatoes, cucumbers, red onion, and a sprinkle of feta or Parmesan cheese. Drizzle with a balsamic vinaigrette.
- Serve with a classic Caprese salad (fresh mozzarella, tomatoes, and basil) for a light and refreshing combination.
- Low-Carb and Keto-Friendly Options:
- Serve the chicken with zucchini noodles (“zoodles”) sautéed with garlic and olive oil.
- Pair it with a side of creamy mashed cauliflower or roasted cauliflower rice for a satisfying low-carb alternative to potatoes or rice.
- Creative Leftovers:
- Slice the cold, leftover chicken and use it to make delicious sandwiches or wraps with pesto mayo and provolone cheese.
- Dice the chicken and add it to a quesadilla with mozzarella cheese and sautéed peppers.
- Chop it up and use it as a protein-packed topping for a homemade pizza.
Additional Tips
Elevate your chicken-cooking game with these eight professional tips that will ensure foolproof results every time.
- Don’t Skip the Pounding: It might seem like an extra step, but pounding the chicken to an even thickness is non-negotiable for juicy results. It ensures that the entire breast cooks at the same rate, eliminating the common problem of dry, overcooked edges and an undercooked center.
- Try a Quick Brine: If you have an extra 15-30 minutes, consider a quick brine. Submerge the chicken breasts in a solution of 4 cups of lukewarm water and ¼ cup of salt. This process, called osmosis, helps the chicken retain more moisture during cooking, acting as an insurance policy against dryness. Just be sure to rinse and pat the chicken completely dry before seasoning, and you may want to reduce the salt in the herb blend.
- Master the Sear with a Dry Surface: For that coveted golden-brown, flavorful crust, the surface of the chicken must be as dry as possible. Use paper towels to pat down every nook and cranny. Moisture is the enemy of a good sear; a wet surface will steam in the pan, resulting in a pale, rubbery exterior.
- Embrace the Meat Thermometer: The single best tool for any home cook is an instant-read meat thermometer. It completely removes the guesswork from cooking meat. Chicken is perfectly cooked and safe to eat when it reaches an internal temperature of 165°F (74°C). Insert the thermometer into the thickest part of the breast for an accurate reading. No more cutting into the chicken to check for doneness, which lets precious juices escape.
- Don’t Overcrowd the Pan: Give your chicken breasts some personal space in the skillet. Overcrowding lowers the temperature of the pan, causing the chicken to steam in its own juices instead of searing. If your pan isn’t large enough to hold all the chicken without overlapping, it’s always better to cook in two separate batches.
- Let It Rest, No Exceptions: The resting period after cooking is just as important as the cooking itself. As the chicken cooks, the muscle fibers tighten and push moisture to the center. Letting it rest for 5-10 minutes allows those fibers to relax and the juices to redistribute evenly throughout the entire breast, guaranteeing a moist and tender result in every bite.
- Experiment with Herbs: While this blend is a classic, feel free to customize it. You can add ½ teaspoon of dried rosemary for a more piney, robust flavor or a pinch of fennel seed for a hint of sweet anise. If you have fresh herbs on hand, you can use them, but remember the general rule: use three times the amount of fresh herbs as you would dried (e.g., 1 tablespoon of fresh basil for every 1 teaspoon of dried).
- Create a Simple Pan Sauce: Don’t let those flavorful brown bits (the “fond”) at the bottom of the pan go to waste! After removing the chicken, reduce the heat to medium, add a splash of chicken broth, white wine, or even just water to the pan. Use a wooden spoon to scrape up all the browned bits from the bottom. Let it simmer and reduce for a minute or two, then swirl in a small pat of butter. Drizzle this quick, flavorful sauce over the chicken just before serving.
FAQ Section
Here are answers to some of the most common questions about this recipe, helping you troubleshoot and customize it with confidence.
1. Can I use chicken thighs instead of breasts?
Absolutely! Boneless, skinless chicken thighs would be delicious in this recipe. They are naturally more tender and forgiving than breasts due to their higher fat content. The cooking time may be slightly longer, around 6-8 minutes per side, depending on their thickness. As always, use a meat thermometer and cook them to an internal temperature of 165°F (74°C) for the best results.
2. Can I bake this chicken instead of pan-searing it?
Yes, you can. For a more hands-off approach, you can bake the chicken. Preheat your oven to 400°F (200°C). Prepare and season the chicken as directed. Place it in a single layer on a baking sheet lined with parchment paper. Bake for 18-22 minutes, or until the internal temperature reaches 165°F (74°C). Note that you won’t get the same deep, golden-brown crust as you would with pan-searing, but it will still be juicy and flavorful.
3. How should I store and reheat leftovers?
Store any leftover chicken in an airtight container in the refrigerator for up to 3-4 days. To reheat, you can gently warm it in a skillet over low heat with a splash of water or chicken broth to keep it from drying out. You can also microwave it in short 30-second intervals until warm. For best results, avoid overheating, as this can make the chicken tough.
4. Can I freeze this chicken?
Yes, this recipe is very freezer-friendly. You can freeze it either cooked or uncooked.
- To freeze uncooked: Season the raw chicken breasts, place them in a freezer-safe bag or container (you can place parchment paper between them to prevent sticking), and freeze for up to 3 months. Thaw overnight in the refrigerator before cooking as directed.
- To freeze cooked: Allow the cooked chicken to cool completely, then store it in a freezer-safe container for up to 3 months. Thaw in the refrigerator before reheating.
5. My chicken always turns out dry. What am I doing wrong?
The most common culprits for dry chicken are overcooking and not pounding it to an even thickness. First, ensure you’re pounding the chicken to about ½ inch thick so it cooks quickly and evenly. Second, and most importantly, invest in a meat thermometer. Cook the chicken just until it reaches 165°F (74°C) and not a degree more. Finally, always let the chicken rest for 5-10 minutes before slicing to lock in the juices.
6. Can I prepare the chicken ahead of time?
Yes, this is a great recipe for meal prep. You can pound and season the chicken breasts up to 24 hours in advance. Store them in an airtight container in the refrigerator. This essentially acts as a dry marinade, allowing the flavors to penetrate the meat even more deeply. When you’re ready to eat, you can take it straight from the fridge and cook as directed.
7. Is this recipe gluten-free and/or keto-friendly?
Yes, this recipe is naturally both gluten-free and keto-friendly. All the ingredients used are free of gluten and have negligible carbohydrates, making it a perfect fit for these dietary lifestyles. Just be mindful of the side dishes you choose to serve with it to keep your meal compliant.
8. I don’t have all the specific dried herbs. What can I use instead?
No problem! The beauty of this recipe is its flexibility. If you’re missing one or two herbs, you can simply omit them or increase the others slightly. Alternatively, you can substitute the entire homemade blend with 2-3 tablespoons of a pre-made Italian seasoning blend, which typically contains a similar mix of herbs. Just be sure to check if your blend contains salt and adjust accordingly.

Quick Italian Herb Chicken Breasts
Ingredients
Here is the simple yet powerful list of ingredients you’ll need to create this masterpiece. Each component plays a crucial role in building layers of classic Italian flavor.
- 4 (6-ounce) boneless, skinless chicken breasts: The star of the show. Using medium-sized breasts ensures they cook quickly and evenly.
- 2 tablespoons extra virgin olive oil: This is used for cooking and adds a rich, fruity undertone that is quintessentially Italian.
- 1 ½ teaspoons dried oregano: Provides a pungent, earthy, and slightly bitter note that is a cornerstone of Italian seasoning.
- 1 ½ teaspoons dried basil: Adds a sweet, peppery, and slightly minty flavor that complements the other herbs perfectly.
- 1 teaspoon garlic powder: Offers a deep, savory garlic flavor without the risk of burning fresh garlic in a hot pan.
- 1 teaspoon onion powder: Lends a subtle, sweet, and savory depth that rounds out the entire seasoning blend.
- ½ teaspoon salt: Essential for enhancing all the other flavors and helping to keep the chicken moist.
- ½ teaspoon black pepper: Provides a gentle heat and pungent spice to balance the herbs.
- ¼ teaspoon red pepper flakes (optional): For those who enjoy a little kick of warmth and spice. Adjust to your personal preference.
- 1 tablespoon fresh parsley, chopped (for garnish): Adds a final touch of fresh, bright, and clean flavor, along with a beautiful pop of color.
Instructions
Follow these detailed steps to achieve perfectly cooked, juicy, and flavorful Italian herb chicken every single time. The key is in the preparation and the cooking technique.
- Prepare the Chicken: Place the chicken breasts on a cutting board and cover them with a piece of parchment paper or plastic wrap. This prevents any mess and protects the meat. Using a meat mallet, the flat side of a heavy pan, or even a rolling pin, gently pound the chicken breasts until they are an even thickness of about ½ to ¾ inch. This is the single most important step for ensuring the chicken cooks evenly and stays moist, preventing the thinner parts from drying out while the thicker parts cook through.
- Create the Seasoning Blend: In a small bowl, combine the dried oregano, dried basil, garlic powder, onion powder, salt, black pepper, and optional red pepper flakes. Use a fork or a small whisk to mix them together thoroughly. This ensures that every bite of chicken gets an equal distribution of the delicious herb coating.
- Season the Chicken Generously: Pat the chicken breasts completely dry with a paper towel. A dry surface is crucial for getting a beautiful golden-brown sear. Drizzle a small amount of the olive oil over the chicken, just enough to act as a binder for the seasonings. Sprinkle the herb mixture generously and evenly over all sides of each chicken breast. Use your hands to press the seasoning into the meat, making sure it’s fully coated.
- Heat the Pan: Place a large skillet (cast iron or stainless steel works best) over medium-high heat. Add the remaining olive oil to the pan. Allow the pan and oil to get hot. You’ll know it’s ready when the oil shimmers slightly or when a drop of water sizzles and evaporates instantly upon contact. A hot pan is essential for creating that perfect crust.
- Sear the Chicken: Carefully place the seasoned chicken breasts in the hot skillet, making sure not to overcrowd the pan. If necessary, cook them in two batches. Leave at least an inch of space between each breast. This allows them to sear properly rather than steam. Cook for 5-7 minutes on the first side without moving them. Resisting the urge to peek or flip them too early is key to developing a deep, golden-brown crust.
- Flip and Finish Cooking: Using tongs, flip the chicken breasts over. Cook for another 5-7 minutes on the second side, or until the chicken is cooked through and the internal temperature reaches 165°F (74°C) on an instant-read thermometer. Using a thermometer is the most reliable way to guarantee perfectly cooked, juicy chicken without any guesswork.
- Rest the Chicken: Once cooked, transfer the chicken breasts from the skillet to a clean cutting board or plate. Let them rest for at least 5-10 minutes before slicing or serving. This crucial resting period allows the juices to redistribute throughout the meat, ensuring that every slice is moist and tender. If you cut into it immediately, the juices will run out onto the board, leaving you with dry chicken.
- Garnish and Serve: After resting, slice the chicken against the grain. Garnish with the freshly chopped parsley for a burst of freshness and color. Serve immediately and enjoy the incredible flavors.
Nutrition
- Serving Size: one normal portion
- Calories: 285
- Sodium: 350mg
- Fat: 9g
- Carbohydrates: 2g
- Protein: 45g