")

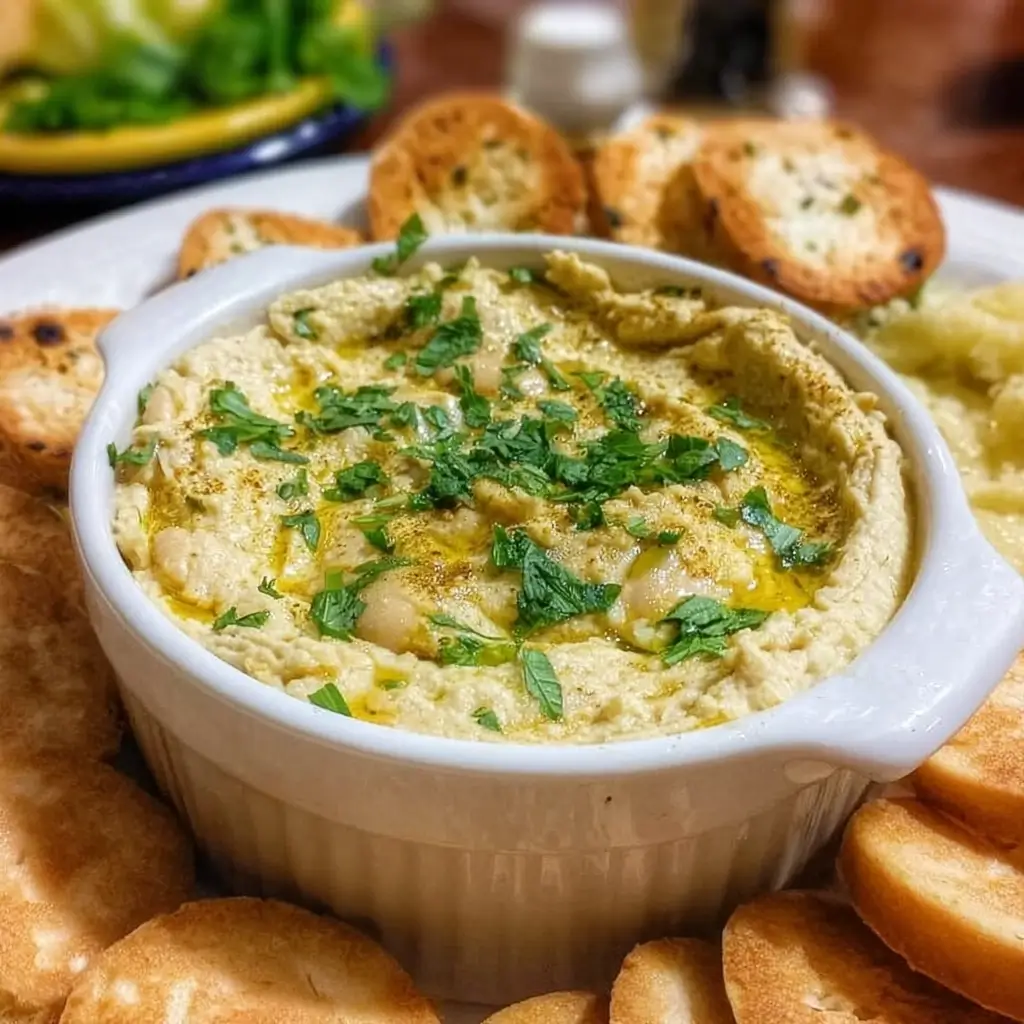

Of all the recipes that have become staples in my kitchen, this Roasted Garlic and White Bean Dip holds a special place. I first made it on a whim for a last-minute family get-together. I needed a simple, crowd-pleasing appetizer that wouldn’t require a frantic trip to the grocery store. With a head of garlic, a can of cannellini beans, and a few pantry staples, I whipped up a batch, not expecting much more than a passable dip. But the reaction was anything but passable. My nephew, a notoriously picky eater, declared it “the best dip ever.” My sister, a dedicated foodie, immediately asked for the recipe. The bowl was scraped clean within minutes. What makes it so magical is the transformation of the garlic. Roasting turns its sharp, pungent bite into a sweet, nutty, and unbelievably creamy element that perfectly complements the mild, buttery texture of the white beans. It’s elegant enough for a dinner party, yet simple enough for a casual movie night. This dip has become my secret weapon—a reliably delicious, surprisingly healthy, and effortlessly sophisticated appetizer that never fails to impress.
Ingredients
- 1 whole head of garlic: This is the star of the show. Roasting mellows its flavor, making it sweet, caramelized, and fragrant.
- 2 tablespoons extra-virgin olive oil, divided: A good quality olive oil is essential. One tablespoon is used for roasting the garlic, and the other is for creating a silky-smooth consistency in the dip.
- 2 (15-ounce) cans cannellini beans, rinsed and drained: Also known as white kidney beans, these are prized for their creamy texture and mild, nutty flavor, which creates the perfect base for the dip.
- ¼ cup tahini: A paste made from ground sesame seeds, tahini adds a rich, nutty depth and contributes to the dip’s luxurious texture.
- ¼ cup fresh lemon juice: Crucial for brightness and acidity, fresh juice cuts through the richness of the beans and oil, balancing the flavors.
- ½ teaspoon salt, or to taste: Enhances all the other flavors in the dip. You can adjust this based on your preference.
- ¼ teaspoon black pepper, or to taste: Adds a subtle warmth and spice.
- 3 to 5 tablespoons of water or reserved liquid from the canned beans: This is used to thin the dip to your desired consistency, making it perfectly scoopable.
- Optional for garnish: a drizzle of extra-virgin olive oil, a sprinkle of smoked paprika, and fresh chopped parsley: These finishing touches add visual appeal and an extra layer of flavor.
Instructions
- Preheat and Prepare the Garlic: Begin by preheating your oven to 400°F (200°C). Take the whole head of garlic and, using a sharp knife, slice off the top ¼ to ½ inch, just enough to expose the tops of the individual cloves. Place the garlic head on a small piece of aluminum foil. Drizzle 1 tablespoon of the extra-virgin olive oil over the exposed cloves, making sure the oil seeps down between them.
- Roast the Garlic: Wrap the aluminum foil tightly around the garlic head to create a sealed packet. Place the packet directly on the oven rack and roast for 40-50 minutes. The garlic is done when the cloves are completely soft, fragrant, and lightly golden-brown. You should be able to easily pierce a clove with a fork. Once roasted, carefully remove it from the oven and let it cool for about 10 minutes, or until it’s safe to handle.
- Prepare the Beans: While the garlic is roasting, open the cans of cannellini beans. Pour them into a fine-mesh sieve or colander. Rinse the beans thoroughly under cold running water. This step is important as it removes the starchy, sometimes metallic-tasting liquid from the can and reduces the overall sodium content. Give them a good shake to drain off any excess water.
- Extract the Garlic: Once the roasted garlic has cooled slightly, simply squeeze the base of the head. The soft, caramelized cloves should pop right out of their skins. Discard the papery skins.
- Combine the Ingredients: In the bowl of a food processor, combine the rinsed and drained cannellini beans, the soft roasted garlic cloves, the tahini, fresh lemon juice, salt, and black pepper.
- Blend to Perfection: Secure the lid on the food processor and blend the ingredients on high for 1-2 minutes. The mixture will start to come together. Stop the processor and use a spatula to scrape down the sides of the bowl to ensure everything is incorporated evenly.
- Adjust the Consistency: With the food processor running, slowly stream in 3 tablespoons of water or the reserved bean liquid. Continue to blend for another 2-3 minutes. This final, extended blending time is the key to achieving an ultra-creamy, whipped texture. Check the consistency. If it’s still too thick for your liking, add more water, one tablespoon at a time, until you reach your desired smoothness.
- Taste and Season: Give the dip a final taste. Adjust the seasoning if necessary. You might want to add another pinch of salt to make the flavors pop or an extra squeeze of lemon juice for more brightness.
- Garnish and Serve: Transfer the finished dip to a serving bowl. Use the back of a spoon to create an attractive swirl on the surface. Drizzle with a little extra-virgin olive oil, a light sprinkle of smoked paprika for color and smoky flavor, and a scattering of fresh chopped parsley for a touch of freshness. Serve immediately or cover and refrigerate until ready to use.
Nutrition Facts
- Servings: 12
- Calories per serving: Approximately 110 kcal
- Fiber (4g): This dip is an excellent source of dietary fiber, which is crucial for digestive health, helps you feel full longer, and supports stable blood sugar levels.
- Protein (5g): With a good amount of plant-based protein from the beans and tahini, this dip is a satisfying and nourishing choice that helps with muscle repair and overall body function.
- Healthy Fats (6g): The majority of the fat comes from olive oil and tahini, which are sources of monounsaturated and polyunsaturated fats, known for supporting heart health.
- Iron (1.5mg): Beans are a good source of iron, an essential mineral that helps transport oxygen throughout the body and prevent fatigue.
- Low in Saturated Fat (1g): This dip is naturally low in saturated fats, making it a heart-conscious alternative to many cream-cheese or sour-cream-based dips.
Preparation Time
The total time for this recipe is approximately 1 hour, but most of it is hands-off.
- Active Preparation Time: 15 minutes (chopping garlic, rinsing beans, blending).
- Roasting Time: 40-50 minutes (during which you can prepare other elements of your meal).
How to Serve
This versatile dip can be served in a multitude of ways, making it suitable for any occasion. Here are some of the best ways to enjoy your Roasted Garlic and White Bean Dip:
- As a Classic Dip Platter:
- Warm Pita Bread: Serve with soft, warm pita bread cut into wedges for a comforting and classic pairing.
- Toasted Pita Chips: For a crunchier option, toss pita wedges with a little olive oil and salt, then bake until golden and crisp.
- Artisanal Crackers: A selection of crackers, such as whole-grain, seeded, or simple water crackers, provides a perfect vehicle for the creamy dip.
- Tortilla Chips: Sturdy corn tortilla chips are excellent for scooping up a generous amount of dip.
- With a Fresh Vegetable Crudité Board:
- Create a vibrant and healthy platter by surrounding the bowl of dip with an assortment of fresh, crisp vegetables. This is a fantastic gluten-free option.
- Carrot Sticks
- Cucumber Slices
- Bell Pepper Strips (red, yellow, and orange for color)
- Celery Sticks
- Cherry Tomatoes
- Radishes
- Broccoli and Cauliflower Florets
- Snap Peas
- As a Versatile Spread or Condiment:
- Sandwich and Wrap Spread: Use it in place of mayonnaise or hummus for a flavorful and healthy spread on sandwiches and wraps. It pairs beautifully with grilled vegetables, roasted beef, or fresh greens.
- Flatbread or Pizza Base: Spread a thin layer on a flatbread or pizza crust before adding your favorite toppings. It creates a creamy, garlicky base that is a delicious alternative to traditional tomato sauce.
- Gourmet Toast: Slather it on a thick slice of toasted sourdough or whole-grain bread and top with sliced avocado, a sprinkle of red pepper flakes, or a sun-dried tomato.
- As a Component in a Larger Meal:
- Grain Bowl Dollop: Add a generous dollop to a quinoa, farro, or rice bowl to add creaminess, flavor, and a boost of protein.
- Side for Grilled Meats: Serve it alongside grilled chicken, steak, or fish as a flavorful, cooling counterpoint.
- Stuffed Potatoes: Mix it into the flesh of a baked potato or sweet potato for a creamy and nutritious stuffing.
Additional Tips
- For Ultra-Creamy Texture: For a dip that is exceptionally smooth and light, almost like a mousse, add one or two ice cubes to the food processor along with the other ingredients. The cold temperature helps emulsify the fats and create a whipped, airy texture. Alternatively, using ice-cold water instead of room-temperature water will achieve a similar effect.
- Roast Garlic in Advance: The roasting of the garlic is the most time-consuming step. You can easily roast several heads of garlic at once and store the soft, roasted cloves in an airtight container in the refrigerator, covered in olive oil, for up to two weeks. This makes whipping up a batch of dip incredibly fast.
- Taste and Adjust Fearlessly: A recipe is a guide, not a strict rule. Your palate is the final judge. After blending, always taste the dip. Does it need more brightness? Add another squeeze of lemon. Is it a bit bland? A pinch more salt will make the flavors sing. Not enough nutty depth? A little more tahini can help.
- No Tahini on Hand? If you don’t have tahini or have a sesame allergy, don’t worry. You can substitute it with a smooth, unsweetened nut butter like cashew or almond butter for a similar richness. For a nut-free version, simply omit the tahini and add an extra tablespoon of high-quality extra-virgin olive oil. The flavor will be slightly different but still delicious.
- Experiment with Different Beans: While cannellini beans are ideal for their creaminess, this recipe is also fantastic with other white beans. Great Northern beans are an excellent substitute, and navy beans will also work well, though they may yield a slightly less creamy result.
- Spice It Up: Feel free to customize the flavor profile with spices. A teaspoon of ground cumin will add a warm, earthy flavor. A half-teaspoon of smoked paprika blended into the dip (not just as a garnish) will give it a deep, smoky dimension. For a bit of heat, add a pinch of cayenne pepper or a dash of your favorite hot sauce.
- Perfecting the Consistency: The final texture of your dip is a matter of personal preference. For a thicker, more paste-like spread, use less water. For a thinner, more sauce-like consistency that’s perfect for drizzling over a salad or grain bowl, slowly add more water while the food processor is running until it’s just right.
- The Power of Good Olive Oil: Since olive oil is used both in the dip and as a finishing garnish, using a high-quality extra-virgin olive oil will make a noticeable difference. A flavorful, fruity, or peppery olive oil will add a layer of complexity that a blander oil simply can’t provide. Save your best oil for the final drizzle.
FAQ Section
1. Can I make this dip without a food processor?
Yes, you absolutely can. A high-powered blender is an excellent alternative and will produce an equally creamy, if not creamier, result. If you only have an immersion blender (stick blender), you can make it in a deep bowl or the beaker that came with it. For a more rustic, textured dip, you can even mash everything by hand using a potato masher or the back of a fork in a large bowl. It will require more effort, but the result will still be delicious.
2. How long does this roasted garlic and white bean dip last in the refrigerator?
The dip can be stored in an airtight container in the refrigerator for up to 5-7 days. The flavors will actually meld and deepen overnight, so it’s a great make-ahead recipe. Before serving leftover dip, give it a good stir. You may want to add a fresh squeeze of lemon juice or a drizzle of olive oil to liven it back up.
3. Can I freeze this dip?
Yes, this dip freezes surprisingly well. Place it in a freezer-safe, airtight container, leaving a little space at the top for expansion. To prevent the surface from drying out, you can press a piece of plastic wrap directly onto the dip before sealing the container. It can be frozen for up to 3 months. To thaw, transfer it to the refrigerator overnight. Once thawed, stir it vigorously to recombine everything and restore its creamy texture.
4. Is this roasted garlic and white bean dip healthy?
Absolutely. It’s packed with nutritional benefits. The cannellini beans provide an excellent source of plant-based protein and dietary fiber. The garlic has well-known health-promoting properties, and the use of olive oil and tahini contributes healthy monounsaturated fats. It’s a nutrient-dense choice that is far healthier than most store-bought, preservative-laden dips.
5. Is this recipe vegan and gluten-free?
Yes, the dip itself is naturally vegan (containing no animal products) and gluten-free. To keep the entire snack gluten-free, be sure to serve it with gluten-free options like fresh vegetables, rice crackers, or corn tortilla chips instead of traditional pita bread or wheat-based crackers.
6. My dip tastes a little bitter. What went wrong?
Bitterness in a dip like this usually comes from one of two sources. The most common culprit is the tahini. If tahini is old or has been stored improperly, it can become bitter. Always use fresh, good-quality tahini. The second potential cause is the lemon. If any of the white pith from the lemon peel gets into the juice, it can impart a bitter flavor. Be careful to only use the juice from the lemon.
7. How can I roast garlic if I don’t want to turn on my big oven?
You have a couple of great options. You can use an air fryer: wrap the oiled garlic head in foil and air fry at 370°F (185°C) for 20-25 minutes, or until soft. You can also roast it on the stovetop. Place the foil-wrapped garlic in a small, dry skillet or saucepan over low heat. Cover the pan and let it cook for 25-35 minutes, turning it occasionally, until the cloves are soft and fragrant.
8. What is the difference between this white bean dip and hummus?
The primary difference lies in the main ingredient. Traditional hummus is made with chickpeas (garbanzo beans), while this dip is made with cannellini beans (or another type of white bean). While they share some ingredients like tahini, lemon juice, and garlic, the resulting flavor and texture are distinct. White bean dip is often milder and creamier, with a buttery texture, whereas hummus has a slightly grainier texture and a more distinct, earthy flavor from the chickpeas.

Roasted Garlic and White Bean Dip
Ingredients
- 1 whole head of garlic: This is the star of the show. Roasting mellows its flavor, making it sweet, caramelized, and fragrant.
- 2 tablespoons extra-virgin olive oil, divided: A good quality olive oil is essential. One tablespoon is used for roasting the garlic, and the other is for creating a silky-smooth consistency in the dip.
- 2 (15-ounce) cans cannellini beans, rinsed and drained: Also known as white kidney beans, these are prized for their creamy texture and mild, nutty flavor, which creates the perfect base for the dip.
- ¼ cup tahini: A paste made from ground sesame seeds, tahini adds a rich, nutty depth and contributes to the dip’s luxurious texture.
- ¼ cup fresh lemon juice: Crucial for brightness and acidity, fresh juice cuts through the richness of the beans and oil, balancing the flavors.
- ½ teaspoon salt, or to taste: Enhances all the other flavors in the dip. You can adjust this based on your preference.
- ¼ teaspoon black pepper, or to taste: Adds a subtle warmth and spice.
- 3 to 5 tablespoons of water or reserved liquid from the canned beans: This is used to thin the dip to your desired consistency, making it perfectly scoopable.
- Optional for garnish: a drizzle of extra-virgin olive oil, a sprinkle of smoked paprika, and fresh chopped parsley: These finishing touches add visual appeal and an extra layer of flavor.
Instructions
- Preheat and Prepare the Garlic: Begin by preheating your oven to 400°F (200°C). Take the whole head of garlic and, using a sharp knife, slice off the top ¼ to ½ inch, just enough to expose the tops of the individual cloves. Place the garlic head on a small piece of aluminum foil. Drizzle 1 tablespoon of the extra-virgin olive oil over the exposed cloves, making sure the oil seeps down between them.
- Roast the Garlic: Wrap the aluminum foil tightly around the garlic head to create a sealed packet. Place the packet directly on the oven rack and roast for 40-50 minutes. The garlic is done when the cloves are completely soft, fragrant, and lightly golden-brown. You should be able to easily pierce a clove with a fork. Once roasted, carefully remove it from the oven and let it cool for about 10 minutes, or until it’s safe to handle.
- Prepare the Beans: While the garlic is roasting, open the cans of cannellini beans. Pour them into a fine-mesh sieve or colander. Rinse the beans thoroughly under cold running water. This step is important as it removes the starchy, sometimes metallic-tasting liquid from the can and reduces the overall sodium content. Give them a good shake to drain off any excess water.
- Extract the Garlic: Once the roasted garlic has cooled slightly, simply squeeze the base of the head. The soft, caramelized cloves should pop right out of their skins. Discard the papery skins.
- Combine the Ingredients: In the bowl of a food processor, combine the rinsed and drained cannellini beans, the soft roasted garlic cloves, the tahini, fresh lemon juice, salt, and black pepper.
- Blend to Perfection: Secure the lid on the food processor and blend the ingredients on high for 1-2 minutes. The mixture will start to come together. Stop the processor and use a spatula to scrape down the sides of the bowl to ensure everything is incorporated evenly.
- Adjust the Consistency: With the food processor running, slowly stream in 3 tablespoons of water or the reserved bean liquid. Continue to blend for another 2-3 minutes. This final, extended blending time is the key to achieving an ultra-creamy, whipped texture. Check the consistency. If it’s still too thick for your liking, add more water, one tablespoon at a time, until you reach your desired smoothness.
- Taste and Season: Give the dip a final taste. Adjust the seasoning if necessary. You might want to add another pinch of salt to make the flavors pop or an extra squeeze of lemon juice for more brightness.
- Garnish and Serve: Transfer the finished dip to a serving bowl. Use the back of a spoon to create an attractive swirl on the surface. Drizzle with a little extra-virgin olive oil, a light sprinkle of smoked paprika for color and smoky flavor, and a scattering of fresh chopped parsley for a touch of freshness. Serve immediately or cover and refrigerate until ready to use.
Nutrition
- Serving Size: one normal portion
- Calories: 110
- Fat: 6g
- Saturated Fat: 1g
- Fiber: 4g
- Protein: 5g