")

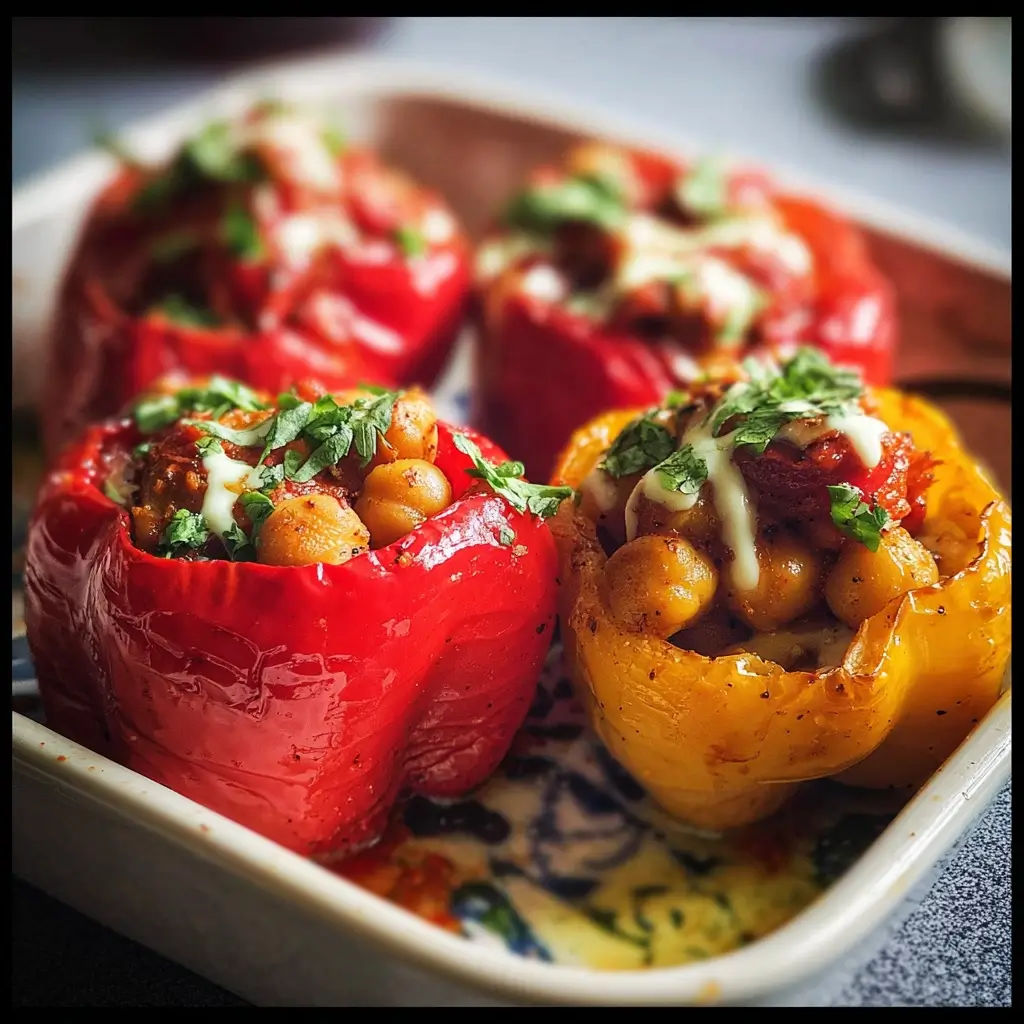

Of all the recipes that have graced my family’s table, few disappear as quickly or with as much fanfare as these Stuffed Cherry Peppers with Chickpeas. The first time I made them, I was simply looking for a quick, no-fuss appetizer for a weekend get-together. I arranged the vibrant, jewel-toned red peppers on a simple white platter, and they looked almost too pretty to eat. But once the first guest took a bite, it was a chain reaction. The initial pop of the sweet and tangy pepper, followed by the creamy, savory, and surprisingly hearty chickpea filling, created a moment of pure culinary delight. My brother, who is usually a meat-and-potatoes kind of guy, was hooked. My kids, who are often skeptical of new things, were grabbing them by the handful. It’s that perfect balance of textures and flavors—creamy, crunchy, tangy, savory, and fresh—that makes this recipe an absolute showstopper. It has since become my signature dish for potlucks, holiday parties, and even just a healthy, satisfying afternoon snack. They are effortlessly elegant, incredibly simple to prepare, and universally loved.
Ingredients
- 1 (16-ounce) jar of whole sweet cherry peppers: These are typically found in the pickle or Italian foods aisle, packed in a light brine. The brine gives them a wonderful tang.
- 1 (15-ounce) can of chickpeas (garbanzo beans): Drained and rinsed thoroughly to remove excess sodium and improve the filling’s texture.
- 1/4 cup extra-virgin olive oil: Use a good quality oil, as its fruity flavor is prominent in the filling.
- 3 tablespoons freshly squeezed lemon juice: This provides a bright, acidic counterpoint to the rich olive oil and earthy chickpeas.
- 2 cloves garlic: Finely minced or pressed to ensure the flavor distributes evenly without any harsh, raw bites.
- 1/4 cup finely chopped fresh parsley: Adds a clean, herbaceous freshness that lifts the entire filling.
- 2 tablespoons finely chopped fresh basil: Lends a sweet, peppery, and aromatic note that pairs beautifully with the peppers.
- 1/2 teaspoon sea salt: Or to taste; you may need less depending on the saltiness of your cherry pepper brine.
- 1/4 teaspoon black pepper: Freshly ground for the best flavor and aroma.
- Optional garnish: Extra chopped parsley, a drizzle of olive oil, or a sprinkle of paprika.
Instructions
- Prepare the Cherry Peppers: Carefully drain the cherry peppers from their jar, reserving a tablespoon of the brine for the filling if you like an extra tangy flavor. Using a small, sharp knife or a melon baller, gently cut around the stem of each pepper and pull it out. Use the tip of the tool to scoop out any remaining seeds and membranes from the inside, creating a hollow vessel for your filling. Be gentle to avoid tearing the pepper walls. Place the hollowed-out peppers opening-side-down on a paper towel-lined plate to drain any excess liquid while you prepare the filling.
- Create the Chickpea Filling: In the bowl of a food processor, combine the drained and rinsed chickpeas, extra-virgin olive oil, fresh lemon juice, minced garlic, sea salt, and black pepper.
- Pulse to Perfection: Pulse the mixture in short bursts, about 8-10 times. Scrape down the sides of the bowl with a spatula, then pulse a few more times. The goal is a texture that is mostly smooth and creamy but still has some small, discernible pieces of chickpea for a rustic, interesting mouthfeel. Avoid blending it into a completely smooth hummus, as a bit of texture makes the filling more satisfying.
- Incorporate the Fresh Herbs: Transfer the chickpea mixture to a medium bowl. Add the finely chopped fresh parsley and basil. Gently fold the herbs into the chickpea mixture with a spatula until they are evenly distributed. Give the filling a taste and adjust the seasoning if necessary—it may need another pinch of salt, a squeeze of lemon, or more herbs to suit your preference.
- Stuff the Peppers: Now it’s time to fill the peppers. You can do this using a small spoon, carefully scooping the filling into each hollowed-out pepper until it is full and slightly mounded at the top. For a faster and cleaner method, transfer the chickpea filling to a piping bag (or a sturdy zip-top bag with the corner snipped off). Gently squeeze the filling into each pepper. This method ensures each pepper is filled completely and gives a neater appearance.
- Chill and Serve: Arrange the stuffed cherry peppers on a serving platter or in an airtight container. For the best flavor, cover and refrigerate them for at least 30 minutes. This chilling time allows the flavors in the filling to meld together and firm up slightly. When ready to serve, you can garnish with a final drizzle of good olive oil, a sprinkle of smoked paprika for color, or some extra fresh parsley.
Nutrition Facts
- Servings: This recipe yields approximately 24-30 stuffed peppers. A serving is considered 4 peppers.
- Calories per serving: Approximately 120-140 calories.
- Protein (3g): The chickpeas provide a healthy dose of plant-based protein, making these snacks surprisingly satisfying and great for muscle maintenance and satiety.
- Fiber (4g): A fantastic source of dietary fiber from both the chickpeas and the peppers, which aids in digestion, helps regulate blood sugar, and promotes a feeling of fullness.
- Vitamin C (Over 50% of RDI): Cherry peppers are packed with Vitamin C, a powerful antioxidant that supports immune function, skin health, and iron absorption.
- Healthy Fats (8g): The majority of the fat comes from heart-healthy monounsaturated fats in the extra-virgin olive oil, which is beneficial for cardiovascular health.
Preparation Time
This is a wonderfully quick recipe to assemble. The total preparation time is approximately 20-25 minutes. This includes 15 minutes of active time for draining and coring the peppers and blending the filling, plus an additional 5-10 minutes for carefully stuffing each pepper. For the best result, an optional 30-minute chilling time is recommended to allow the flavors to meld beautifully before serving.
How to Serve
These Stuffed Cherry Peppers with Chickpeas are incredibly versatile. Their bite-sized nature and vibrant flavor make them suitable for a wide range of occasions. Here are some of the best ways to serve them:
- As a Classic Appetizer:
- Arrange them on a large, clean white or wooden platter to make their red color pop.
- Garnish with fresh parsley or basil leaves for a touch of green.
- Serve them chilled, straight from the refrigerator, as a perfect pre-dinner bite.
- Part of an Antipasto or Mezze Platter:
- Create a stunning board by pairing them with other Mediterranean and Italian favorites.
- Components to include: Assorted cheeses (like mozzarella balls, aged provolone), cured meats (prosciutto, salami), marinated artichoke hearts, various olives, and toasted baguette slices or crackers.
- A Unique Salad Topping:
- Give your salads a major upgrade. Coarsely chop a few stuffed peppers and toss them into a simple green salad with a light vinaigrette.
- They add a burst of flavor, creaminess, and texture, effectively replacing both croutons and a heavy dressing. They work especially well in arugula or spinach salads.
- A Healthy and Satisfying Snack:
- Keep a container of these in the fridge for a quick and healthy grab-and-go snack.
- They are a perfect solution for that mid-afternoon slump, providing protein and fiber to keep you energized and full until your next meal.
- As a Vibrant Side Dish:
- Serve them alongside grilled chicken, steak, or fish. Their tangy and savory profile cuts through the richness of grilled meats perfectly.
- They also make a fantastic, no-cook side dish for summer barbecues and picnics, adding a splash of color and fresh flavor to the table.
Additional Tips
- Choose Your Peppers Wisely: Look for jarred cherry peppers that are relatively uniform in size. This ensures they not only look more professional on the platter but also makes the stuffing process much more consistent. Check the label for “sweet” or “hot”—this recipe works beautifully with either, so choose based on your spice preference.
- The Piping Bag Trick: Don’t underestimate the power of a piping bag (or a zip-top bag with the corner cut off). It’s not just for frosting! It makes filling the small peppers incredibly fast, clean, and efficient, preventing the creamy filling from smearing all over the outside of the peppers.
- Don’t Throw Out the Brine: The brine from the pepper jar is liquid gold. If your chickpea filling seems a bit too thick in the food processor, add a tablespoon of the brine instead of water or more oil. It thins the mixture while adding an extra layer of tangy, peppery flavor that complements the final dish perfectly.
- Texture is Key: For the best filling, resist the urge to blend it into a completely smooth, hummus-like paste. Pulsing the mixture leaves some small, tender chunks of chickpeas, which provides a more rustic and satisfying texture that contrasts beautifully with the soft pepper shell.
- Make Them Ahead: This is the ultimate make-ahead appetizer. You can prepare and stuff the peppers up to 2-3 days in advance. Store them in a single layer in an airtight container in the refrigerator. Their flavor actually deepens and improves as they sit.
- Chill for Flavor Fusion: While you can serve them immediately, letting the stuffed peppers chill in the refrigerator for at least 30 minutes is highly recommended. This brief resting period allows the garlic, lemon, and herb flavors to meld together, creating a more cohesive and delicious filling.
- Balance the Seasoning: Always taste your filling before you start stuffing. The saltiness of jarred peppers can vary significantly between brands. You might need less salt than the recipe calls for, or you might need a bit more. A final taste test ensures a perfectly balanced bite every time.
- Get Creative with Herbs: While parsley and basil are a classic and delicious combination, feel free to experiment. Fresh dill would add a lovely, tangy note. A bit of fresh mint could provide a cooling contrast, especially if you use hot cherry peppers. Finely chopped chives or oregano would also be wonderful additions.
Frequently Asked Questions (FAQ)
1. Can I make these stuffed peppers ahead of time?
Absolutely! This is one of the best features of this recipe. You can assemble them completely, place them in an airtight container, and store them in the refrigerator for up to 3 days. The flavors will actually meld and become even more delicious over time. This makes them perfect for stress-free party planning.
2. Are these stuffed cherry peppers spicy?
The spice level depends entirely on the type of cherry peppers you buy. Most grocery stores sell both “sweet” and “hot” varieties. If you prefer a mild appetizer, be sure to purchase the sweet ones. If you enjoy a kick of heat, the hot cherry peppers provide a wonderful contrast to the creamy, cooling chickpea filling.
3. Is this recipe vegan and gluten-free?
Yes, this recipe is naturally vegan and gluten-free. The filling is made from chickpeas, olive oil, and fresh herbs, with no dairy or animal products. The peppers themselves are vegetables, and there is no gluten involved, making it a fantastic option for guests with various dietary restrictions.
4. How should I store leftovers?
Store any leftover stuffed peppers in an airtight container in the refrigerator. They will stay fresh and delicious for up to 3-4 days. It’s best to arrange them in a single layer to prevent them from getting squished. They are excellent cold, straight from the fridge.
5. Can I use dried chickpeas instead of canned?
Yes, you can definitely use dried chickpeas. You will need to cook them first. Soak about 3/4 cup of dried chickpeas overnight, then simmer them in water until they are very tender (about 1.5 to 2 hours). One can of chickpeas is equivalent to about 1.5 cups of cooked chickpeas. Using home-cooked chickpeas can result in an even creamier filling.
6. My chickpea filling seems too dry or too runny. How can I fix it?
This is an easy fix! If the filling is too dry or thick, add more liquid one tablespoon at a time. You can use more olive oil for richness, more lemon juice for brightness, or a splash of the reserved pepper brine for tanginess. If the filling is too runny, you can add more chickpeas to thicken it up, or even a tablespoon of tahini (sesame paste) which will add thickness and a nutty flavor.
7. Can I freeze stuffed cherry peppers?
Freezing is not recommended for this recipe. The cherry peppers, having been packed in brine, have a high water content. Upon thawing, they would likely become very soft, mushy, and watery, which would ruin the delightful texture of the dish. The creamy chickpea filling may also separate. It’s best to enjoy them fresh or refrigerated.
8. What if I can’t find cherry peppers?
If you can’t find jarred cherry peppers, you have a few good alternatives. You could use small, sweet bell peppers (roast them first and peel the skins), or purchase jarred Peppadew peppers, which have a similar sweet and tangy profile. In a pinch, you could even use this filling to stuff large olives or celery sticks.
Stuffed Cherry Peppers with Chickpeas
Ingredients
- 1 (16-ounce) jar of whole sweet cherry peppers: These are typically found in the pickle or Italian foods aisle, packed in a light brine. The brine gives them a wonderful tang.
- 1 (15-ounce) can of chickpeas (garbanzo beans): Drained and rinsed thoroughly to remove excess sodium and improve the filling’s texture.
- 1/4 cup extra-virgin olive oil: Use a good quality oil, as its fruity flavor is prominent in the filling.
- 3 tablespoons freshly squeezed lemon juice: This provides a bright, acidic counterpoint to the rich olive oil and earthy chickpeas.
- 2 cloves garlic: Finely minced or pressed to ensure the flavor distributes evenly without any harsh, raw bites.
- 1/4 cup finely chopped fresh parsley: Adds a clean, herbaceous freshness that lifts the entire filling.
- 2 tablespoons finely chopped fresh basil: Lends a sweet, peppery, and aromatic note that pairs beautifully with the peppers.
- 1/2 teaspoon sea salt: Or to taste; you may need less depending on the saltiness of your cherry pepper brine.
- 1/4 teaspoon black pepper: Freshly ground for the best flavor and aroma.
- Optional garnish: Extra chopped parsley, a drizzle of olive oil, or a sprinkle of paprika.
Instructions
- Prepare the Cherry Peppers: Carefully drain the cherry peppers from their jar, reserving a tablespoon of the brine for the filling if you like an extra tangy flavor. Using a small, sharp knife or a melon baller, gently cut around the stem of each pepper and pull it out. Use the tip of the tool to scoop out any remaining seeds and membranes from the inside, creating a hollow vessel for your filling. Be gentle to avoid tearing the pepper walls. Place the hollowed-out peppers opening-side-down on a paper towel-lined plate to drain any excess liquid while you prepare the filling.
- Create the Chickpea Filling: In the bowl of a food processor, combine the drained and rinsed chickpeas, extra-virgin olive oil, fresh lemon juice, minced garlic, sea salt, and black pepper.
- Pulse to Perfection: Pulse the mixture in short bursts, about 8-10 times. Scrape down the sides of the bowl with a spatula, then pulse a few more times. The goal is a texture that is mostly smooth and creamy but still has some small, discernible pieces of chickpea for a rustic, interesting mouthfeel. Avoid blending it into a completely smooth hummus, as a bit of texture makes the filling more satisfying.
- Incorporate the Fresh Herbs: Transfer the chickpea mixture to a medium bowl. Add the finely chopped fresh parsley and basil. Gently fold the herbs into the chickpea mixture with a spatula until they are evenly distributed. Give the filling a taste and adjust the seasoning if necessary—it may need another pinch of salt, a squeeze of lemon, or more herbs to suit your preference.
- Stuff the Peppers: Now it’s time to fill the peppers. You can do this using a small spoon, carefully scooping the filling into each hollowed-out pepper until it is full and slightly mounded at the top. For a faster and cleaner method, transfer the chickpea filling to a piping bag (or a sturdy zip-top bag with the corner snipped off). Gently squeeze the filling into each pepper. This method ensures each pepper is filled completely and gives a neater appearance.
- Chill and Serve: Arrange the stuffed cherry peppers on a serving platter or in an airtight container. For the best flavor, cover and refrigerate them for at least 30 minutes. This chilling time allows the flavors in the filling to meld together and firm up slightly. When ready to serve, you can garnish with a final drizzle of good olive oil, a sprinkle of smoked paprika for color, or some extra fresh parsley.
Nutrition
- Serving Size: one normal portion
- Calories: 140
- Fat: 8g
- Fiber: 4g
- Protein: 3g


