")


Varenyky, also known as pierogi in Polish cuisine, are Eastern European dumplings that have captured hearts worldwide. While these soft, savory parcels can be filled with a variety of ingredients, tender varenyky with potato and cheese filling remain a timeless favorite. In this article, we delve into the world of this beloved dish, providing you with a comprehensive guide on how to make and enjoy them.
Introduction
Varenyky are more than just a dish; they are a symbol of comfort and tradition, often served during family gatherings, festive seasons, and celebratory occasions. Originating from Ukraine, these dumplings have transcended borders to become a staple in various cuisines. The combination of creamy mashed potatoes and cheese wrapped in a tender dough is nothing short of delightful. Whether you’re a seasoned chef or a home cook looking to try something new, making varenyky is a rewarding experience that promises delicious results.
Ingredients
Before you embark on your culinary adventure, gather the following ingredients to ensure a seamless cooking process:
For the Dough:
- 3 cups all-purpose flour
- 1 cup warm water
- 1 large egg
- 2 tablespoons vegetable oil
- 1/2 teaspoon salt
For the Filling:
- 3 large potatoes, peeled and cubed
- 1 cup cottage cheese (or farmer’s cheese)
- 1/2 cup shredded cheddar cheese
- 1 small onion, finely chopped
- 2 tablespoons butter
- Salt and pepper to taste
Optional Garnishes:
- Sour cream
- Chopped fresh dill or parsley
- Crispy bacon bits
- Caramelized onions
Instructions
Preparing the Dough
- Mix the Dry Ingredients: In a large mixing bowl, combine the flour and salt.
- Add Wet Ingredients: Create a well in the center of the flour mixture. Pour in the warm water, beaten egg, and vegetable oil.
- Knead the Dough: Stir the ingredients together until a dough forms. Transfer it to a floured surface and knead for about 10 minutes until the dough is smooth and elastic.
- Rest the Dough: Cover the dough with a damp cloth or plastic wrap and let it rest for at least 30 minutes. This allows the gluten to relax, making it easier to roll out.
Preparing the Filling
- Cook the Potatoes: Boil the cubed potatoes in salted water until tender, about 15-20 minutes. Drain and set aside.
- Sauté the Onion: In a skillet, melt the butter over medium heat. Add the chopped onion and sauté until golden brown.
- Mash the Potatoes: In a large bowl, mash the cooked potatoes. Stir in the sautéed onion, cottage cheese, shredded cheddar cheese, salt, and pepper. Mix until well combined.
Assembling the Varenyky
- Roll Out the Dough: On a floured surface, roll out the dough to about 1/8 inch thickness. Use a round cutter or a glass to cut out circles, approximately 3 inches in diameter.
- Fill the Dough Circles: Place a spoonful of the potato and cheese filling in the center of each dough circle.
- Seal the Dumplings: Fold the dough over to create a half-moon shape. Press the edges firmly to seal, using a fork to crimp the edges for extra security.
Cooking the Varenyky
- Boil the Dumplings: Bring a large pot of salted water to a gentle boil. Carefully drop the varenyky into the water in batches, stirring occasionally to prevent sticking.
- Cook Until Done: Once the varenyky float to the surface, continue cooking for an additional 2-3 minutes.
- Drain and Serve: Use a slotted spoon to remove the varenyky. Drain well and transfer to a serving dish.
Nutrition Facts
Understanding the nutritional profile of your meals is essential. Here’s a rough breakdown of the nutritional content per serving (4-5 varenyky):
- Calories: 320
- Protein: 10g
- Fat: 10g
Note: Nutritional values may vary based on specific ingredients used and portion sizes.
How to Serve
Varenyky, the beloved Ukrainian dumplings, are versatile and can be served in several delightful ways that enhance their flavor and appeal. Here are some comprehensive serving suggestions that will elevate your dining experience:
Traditional Style
One of the most authentic ways to serve varenyky is to keep it simple yet flavorful. Serve the dumplings warm on a plate, accompanied by a generous dollop of tangy sour cream. The cool cream beautifully contrasts with the warmth of the dumplings, creating a delightful balance. To elevate this classic presentation, you can sprinkle fresh herbs, such as dill or parsley, on top. Fresh dill, in particular, adds a hint of earthiness and brightness that complements the flavors of the filling, whether they are potato, cheese, or cherry. For an even more traditional touch, consider adding a splash of vinegar or a sprinkle of black pepper to the sour cream, enhancing its taste profile.
With Toppings
For those looking to add a richer, more savory dimension to their varenyky, consider garnishing them with toppings that provide texture and depth. Crispy bacon bits add a delightful crunch and a smoky flavor, making the dish heartier. To prepare this topping, cook the bacon until it’s crispy, then crumble it over the warm varenyky just before serving.
Caramelized onions are another fantastic topping that brings sweetness and complexity to each bite. To caramelize onions, slice them thinly and cook them slowly in a pan with a bit of butter or oil over low heat until they turn golden brown and become tender. The natural sugars in the onions will enhance the overall flavor of the dish. Mixing the bacon bits and caramelized onions together creates a savory topping that will impress any guest.
Pan-Fried
For a unique twist on serving varenyky, consider pan-frying them after boiling. This technique gives the dumplings a crispy exterior while preserving their tender, flavorful filling. Start by boiling the varenyky in salted water until they float to the surface, indicating they’re fully cooked. Once drained, heat a generous amount of butter in a non-stick skillet over medium heat. Arrange the varenyky in a single layer in the pan, ensuring they have enough space to fry without overcrowding. Fry them for about 3-5 minutes on each side, or until they achieve a beautiful golden-brown color.
The result is a delightful contrast between the crispy outer layer and the soft, warm filling inside. Serve the pan-fried varenyky with a side of sour cream or a simple garlic sauce for dipping. You can also enhance the dish by sprinkling them with fresh chives or adding a touch of hot sauce for those who enjoy a bit of heat.
Additional Serving Suggestions
- Sweet Variations: Varenyky are not limited to savory fillings; sweet varieties, such as those filled with cherries or blueberries, are equally popular. Serve these sweet dumplings dusted with powdered sugar, accompanied by a side of vanilla ice cream or whipped cream for a delightful dessert experience.
- Broth Accompaniment: For a hearty meal, consider serving varenyky in a light broth. This can be a simple chicken or vegetable stock that enhances the flavors of the dumplings. Ladle the warm broth into bowls, add a few varenyky, and garnish with fresh herbs for a comforting, soup-like dish.
- Creative Plating: Presentation can elevate your dish significantly. Arrange the varenyky artfully on a platter, perhaps in a circular pattern, and drizzle with melted butter. You can also add a few sprigs of herbs or edible flowers for a pop of color and freshness.
- Pairing with Sides: To create a complete meal, serve varenyky alongside traditional Ukrainian sides, such as borscht or a fresh beet salad. The vibrant, earthy flavors of these sides complement the dumplings beautifully and create a more rounded culinary experience.
By exploring these various serving methods, you can create a memorable dining experience with varenyky that caters to different tastes and occasions. Whether you’re hosting a festive gathering or enjoying a cozy dinner at home, these serving suggestions will enhance the flavor and appeal of this beloved dish.
Additional Tips
Creating varenyky, the beloved Ukrainian dumplings, can be both a delightful and rewarding culinary experience. To ensure that your varenyky-making adventure goes smoothly and yields delicious results, here are some additional tips to enhance your process:
Make Ahead
One of the best ways to streamline your varenyky preparation is to make the dough and filling ahead of time. This allows you to enjoy the process without feeling rushed. Here’s how to do it effectively:
- Prepare the Dough: Mix your flour, eggs, water, and salt to create a smooth, elastic dough. Once prepared, wrap it tightly in plastic wrap or place it in an airtight container. You can store the dough in the refrigerator for up to 24 hours. This resting period allows the gluten to relax, making it easier to roll out later.
- Prepare the Filling: Whether you’re going for a savory potato filling, a sweet cherry filling, or something entirely unique, prepare your filling in advance. Cook and mash your potatoes, sauté your mushrooms, or pit and sweeten your fruits. After cooling, store the filling in a separate airtight container in the refrigerator. This not only saves time but also allows the flavors to meld together beautifully.
Freezing
If you’re looking to meal prep or simply want to enjoy varenyky at a later date, freezing them is an excellent option. Here’s how to do it without compromising taste or texture:
- Prepare for Freezing: Once you’ve formed your varenyky, lay them out on a baking sheet lined with parchment paper in a single layer, ensuring they don’t touch. This prevents them from sticking together during the freezing process.
- Freeze Until Solid: Place the baking sheet in the freezer for about 1-2 hours, or until the varenyky are completely frozen. This method, known as flash freezing, keeps them intact and allows you to store them easily without clumping.
- Storage: Once frozen solid, transfer the varenyky to a freezer-safe zip-top bag or airtight container. Be sure to label the bag with the date and contents for easy identification later.
- Cooking from Frozen: When you’re ready to eat your frozen varenyky, there’s no need to thaw them. Simply drop them directly into boiling water. Keep in mind that you will need to add a few extra minutes to the cooking time—typically around 5-7 minutes, depending on the size. They are ready when they float to the surface and are tender to the bite.
Experiment with Fillings
Once you’ve mastered the classic potato filling, the world of varenyky opens up to countless delicious possibilities. Here are some ideas to inspire your creativity:
- Savory Fillings: Don’t hesitate to try fillings that add a twist to traditional flavors. Popular choices include:
- Mushrooms and Onions: Sauté finely chopped mushrooms and onions in butter until golden brown. Season with salt and pepper for a hearty filling.
- Sauerkraut: For a tangy option, mix sautéed sauerkraut with a touch of caraway seeds. This filling pairs wonderfully with a dollop of sour cream.
- Cheese: Blend farmer’s cheese with herbs for a creamy, savory filling. This can be enhanced with garlic, dill, or chives for added flavor.
- Sweet Fillings: For a dessert or a sweet treat, consider these delightful options:
- Cherry or Blueberry Filling: Use fresh or frozen fruits mixed with a bit of sugar and cornstarch to thicken the filling. These sweet varenyky are perfect served with a sprinkle of powdered sugar or a drizzle of cream.
- Cottage Cheese and Raisins: Combine sweetened cottage cheese with raisins for a rich filling. This sweet variant can be served with yogurt or a fruit sauce.
- Herbs and Spices: Don’t shy away from adding fresh herbs or spices to your fillings. Dill, parsley, or even a pinch of nutmeg can elevate the flavor profile significantly.
Final Thoughts
Making varenyky can be a fun and fulfilling activity, especially when shared with family and friends. By planning ahead, freezing for future meals, and experimenting with a variety of fillings, you can create a memorable and delicious experience that celebrates the rich culinary tradition of Ukrainian cuisine. Enjoy the process, and don’t forget to share these delightful dumplings with loved ones—they are best enjoyed together!
FAQs
Q1: Can I use a different type of cheese for the filling?
A1: Absolutely! Feel free to substitute cheddar with other cheeses like mozzarella, gouda, or feta to suit your taste preference.
Q2: Is it possible to make this recipe vegan?
A2: Yes, you can. Replace the egg with a flax egg (1 tablespoon flaxseed meal mixed with 2.5 tablespoons water) and use vegan cheese alternatives.
Q3: How can I prevent the varenyky from sticking together?
A3: Stir them gently in the pot while boiling and add a touch of oil to the water. Also, ensure they are not overcrowded in the pot.
Q4: Can I bake varenyky instead of boiling them?
A4: Baking is not traditional for varenyky, but you can bake them after boiling to achieve a crispy texture.
Conclusion
Tender varenyky with potato and cheese filling are a testament to the beauty of simple, comforting food. Whether you’re making them for a special occasion or a cozy family meal, these dumplings are sure to impress. With a little practice and creativity, you can master this delightful dish and perhaps even create your own signature version. So, gather your ingredients, roll up your sleeves, and dive into the rich culinary tradition of varenyky-making. Enjoy every bite!
Print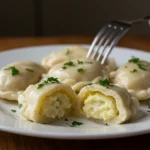
Tender Varenyky with Potato and Cheese Filling
Ingredients
Before you embark on your culinary adventure, gather the following ingredients to ensure a seamless cooking process:
For the Dough:
- 3 cups all-purpose flour
- 1 cup warm water
- 1 large egg
- 2 tablespoons vegetable oil
- 1/2 teaspoon salt
For the Filling:
- 3 large potatoes, peeled and cubed
- 1 cup cottage cheese (or farmer’s cheese)
- 1/2 cup shredded cheddar cheese
- 1 small onion, finely chopped
- 2 tablespoons butter
- Salt and pepper to taste
Optional Garnishes:
- Sour cream
- Chopped fresh dill or parsley
- Crispy bacon bits
- Caramelized onions
Instructions
Preparing the Dough
- Mix the Dry Ingredients: In a large mixing bowl, combine the flour and salt.
- Add Wet Ingredients: Create a well in the center of the flour mixture. Pour in the warm water, beaten egg, and vegetable oil.
- Knead the Dough: Stir the ingredients together until a dough forms. Transfer it to a floured surface and knead for about 10 minutes until the dough is smooth and elastic.
- Rest the Dough: Cover the dough with a damp cloth or plastic wrap and let it rest for at least 30 minutes. This allows the gluten to relax, making it easier to roll out.
Preparing the Filling
- Cook the Potatoes: Boil the cubed potatoes in salted water until tender, about 15-20 minutes. Drain and set aside.
- Sauté the Onion: In a skillet, melt the butter over medium heat. Add the chopped onion and sauté until golden brown.
- Mash the Potatoes: In a large bowl, mash the cooked potatoes. Stir in the sautéed onion, cottage cheese, shredded cheddar cheese, salt, and pepper. Mix until well combined.
Assembling the Varenyky
- Roll Out the Dough: On a floured surface, roll out the dough to about 1/8 inch thickness. Use a round cutter or a glass to cut out circles, approximately 3 inches in diameter.
- Fill the Dough Circles: Place a spoonful of the potato and cheese filling in the center of each dough circle.
- Seal the Dumplings: Fold the dough over to create a half-moon shape. Press the edges firmly to seal, using a fork to crimp the edges for extra security.
Cooking the Varenyky
- Boil the Dumplings: Bring a large pot of salted water to a gentle boil. Carefully drop the varenyky into the water in batches, stirring occasionally to prevent sticking.
- Cook Until Done: Once the varenyky float to the surface, continue cooking for an additional 2-3 minutes.
- Drain and Serve: Use a slotted spoon to remove the varenyky. Drain well and transfer to a serving dish.
Nutrition
- Serving Size: one normal portion
- Calories: 320
- Fat: 10g
- Protein: 10g


